Crispy Chickpea Salad Flavorful and Healthy Meal
![To make a tasty and healthy crispy chickpea salad, you need these main ingredients: - 1 can (15 oz) chickpeas, drained and rinsed - 2 tablespoons olive oil - 1 teaspoon smoked paprika - 1/2 teaspoon garlic powder - 1/2 teaspoon ground cumin - Salt and freshly ground pepper to taste - 4 cups mixed greens (spinach, arugula, and lettuce blend) - 1 cup cherry tomatoes, halved - 1/2 cucumber, diced - 1/4 red onion, thinly sliced Add some optional ingredients to enhance the flavor and texture of your salad: - 1/4 cup feta cheese, crumbled (optional) - A handful of fresh parsley, chopped (for garnish) You will also need a few kitchen tools to make this salad: - A medium-sized mixing bowl for the chickpeas - A large bowl for the salad - A baking sheet lined with parchment paper - A whisk for the dressing - A separate small bowl for mixing the tahini dressing Using these ingredients and tools, you can create a delicious crispy chickpea salad. Try the full recipe for a step-by-step guide! First, preheat your oven to 400°F (200°C). This makes sure the chickpeas get crispy. Line a baking sheet with parchment paper. This helps with easy cleanup later. In a bowl, mix the drained chickpeas with olive oil. Add smoked paprika, garlic powder, ground cumin, salt, and pepper. Make sure each chickpea is well coated. This blend gives them a tasty kick. Spread the seasoned chickpeas evenly on the baking sheet. Don’t crowd them; they need space to get crispy. Bake for 25-30 minutes. Shake the pan halfway through to help them cook evenly. They should turn golden and crunchy. While the chickpeas bake, prepare the salad base. In a large bowl, toss together mixed greens, halved cherry tomatoes, diced cucumber, and thinly sliced red onion. Mixing them now lets the flavors combine as you assemble. In a small bowl, whisk tahini, fresh lemon juice, and a pinch of salt and pepper. If you want a thinner dressing, add a splash of water. This dressing ties the salad together, adding a rich flavor. Once the chickpeas are crispy, take them out and let them cool for a minute. Top your salad with these warm chickpeas. Drizzle the tahini dressing over everything. Add crumbled feta cheese for creaminess, if you like. Finish with fresh parsley for color. Enjoy your Crispy Chickpea Delight Salad! For the complete recipe, check the [Full Recipe]. To make your chickpeas extra crispy, dry them well before cooking. Drain and rinse the canned chickpeas, then lay them on a paper towel. Pat them gently to remove excess moisture. The drier the chickpeas, the crunchier they will be. Toss them with olive oil and spices right before baking. Spread them out on your baking sheet. Avoid crowding them; it helps with airflow and crispiness. Bake at 400°F for 25 to 30 minutes, shaking the pan halfway through. This step ensures even cooking and crispiness. If you have leftovers, store the salad and chickpeas separately. Place the salad in an airtight container in the fridge. Keep the chickpeas in another container. This will help prevent sogginess. When you want to eat the leftovers, reheat the chickpeas in the oven for a few minutes. This will revive their crisp texture. The salad will stay fresh for about two days in the fridge. For the best taste, serve the salad immediately after assembling. The warm chickpeas add a nice contrast to the cool greens. Drizzle the tahini dressing right before serving. This way, it coats the ingredients nicely. You can also sprinkle some feta cheese on top for extra creaminess. Fresh herbs like parsley can brighten the dish. Try adding avocado for creaminess or nuts for crunch. Each addition enhances the flavor and texture of your salad. Enjoy experimenting! {{image_4}} You can swap out greens to change the salad's taste. Try using kale for a hearty crunch. Baby spinach offers a soft, mild flavor. You can even mix in some crunchy cabbage for more texture. Each option adds its unique twist while still pairing well with crispy chickpeas. If you want to make the salad more filling, add protein. Grilled chicken works great with the chickpeas. You can also try adding sliced hard-boiled eggs for richness. For a vegetarian option, toss in some quinoa or black beans. These choices will help boost the meal's nutrients. While tahini dressing is fantastic, don’t be afraid to experiment. A lemon vinaigrette adds a bright zing. You could also try a yogurt-based dressing for creaminess. If you like a kick, a spicy harissa dressing works wonders too. Each dressing brings a new flavor that can change your salad experience. For the full recipe, check out the Crispy Chickpea Delight Salad 🥗. To store leftover salad, first, let it cool down. Place it in an airtight container. This keeps the salad fresh. Add the crispy chickpeas on top only when serving. This way, they stay crunchy. If you mix them in, they can get soggy. If you have leftover crispy chickpeas, you can reheat them. Preheat your oven to 350°F (175°C). Spread the chickpeas on a baking sheet. Bake them for about 10 minutes. This brings back their crunch. You can also use an air fryer for a quicker option. The salad can last up to three days in the fridge. Chickpeas stay good for about a week if stored well. Fresh veggies have a shorter shelf life. Use them within three to five days. Always check for freshness before eating. For a detailed recipe, refer to the Full Recipe. Yes, you can use dried chickpeas. They need soaking and cooking first. To prepare, soak them overnight in water. Cook them until they are tender. This can take about 1 to 2 hours. Then, follow the same steps as with canned chickpeas in the recipe. This salad is packed with nutrients. Chickpeas provide protein and fiber. Mixed greens bring vitamins A and C. Tomatoes offer antioxidants, while cucumbers add hydration. Olive oil is a healthy fat. Feta cheese, if used, adds calcium. Overall, it is a well-balanced meal. To make this salad vegan, skip the feta cheese. The rest of the ingredients are already plant-based. You can also add more veggies or nuts for extra flavor and nutrition. Try adding avocado for creaminess or nuts for crunch. Yes, you can prep it ahead of time. Store the crispy chickpeas in an airtight container. Keep the salad ingredients separate until you are ready to eat. This keeps everything fresh and crispy. Just assemble when you want to enjoy your meal. This salad pairs well with many dishes. Serve it alongside grilled chicken or fish for protein. It also goes great with a warm pita or flatbread. If you want a lighter meal, enjoy it as a stand-alone dish. You can find the Full Recipe for more details. In summary, this blog post covered how to make a crispy chickpea salad. We explored the main ingredients and added options to boost flavor. I shared step-by-step cooking instructions and tips for the perfect crunch. You learned about storage methods and how to customize the dish. Enjoy this salad any time for a tasty and healthy meal. With its simple steps, you can make it again and again!](https://dishtreats.com/wp-content/uploads/2025/06/a0161600-1d29-449f-a743-39fb8b2e717a.webp)
Looking for a tasty and healthy meal? You’ll love this Crispy Chickpea Salad! It’s packed with flavor, crunch, and nutrition. I’ll walk you through each step, from choosing the best ingredients to making a quick dressing. Whether you’re cooking for yourself or sharing with friends, this salad is sure to please. Dive in and discover how easy it is to whip up a dish that’s both satisfying and delicious!
Ingredients
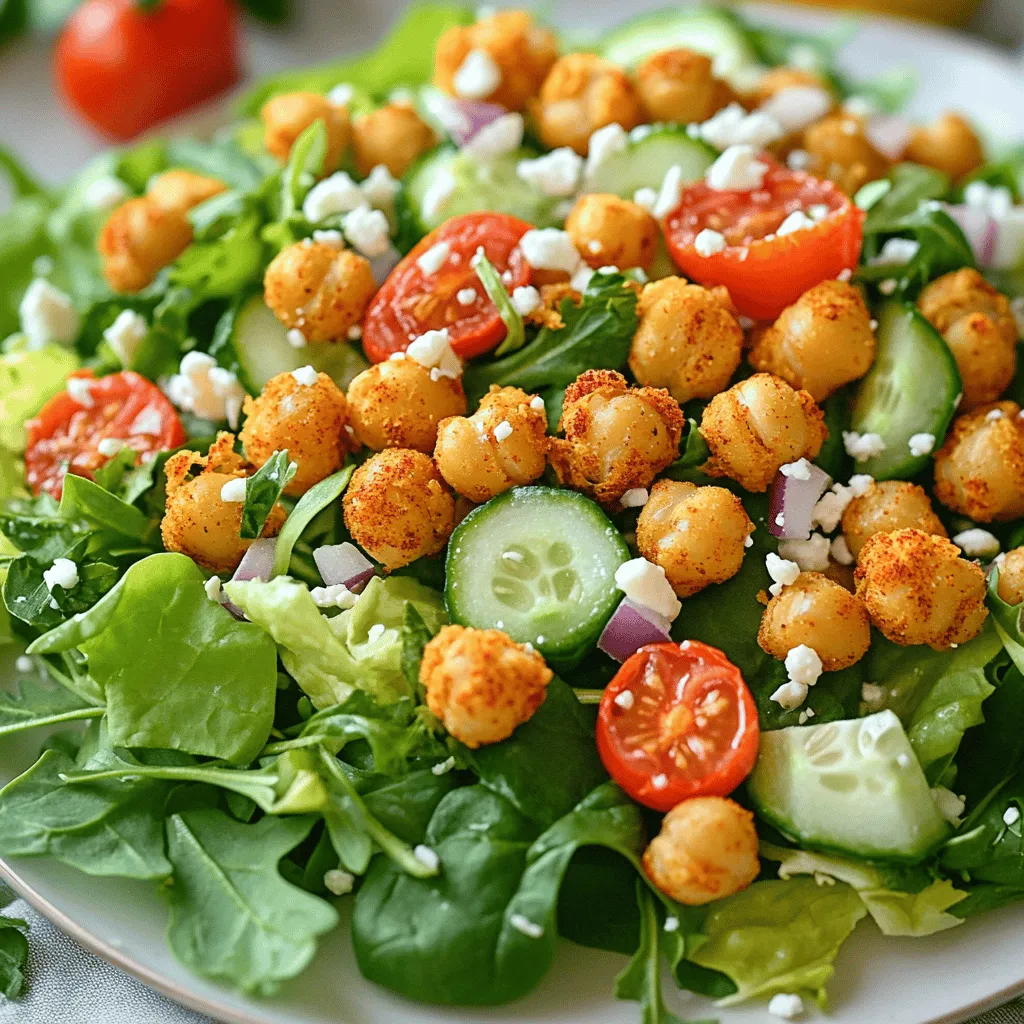
Main Ingredients for Crispy Chickpea Salad
To make a tasty and healthy crispy chickpea salad, you need these main ingredients:
- 1 can (15 oz) chickpeas, drained and rinsed
- 2 tablespoons olive oil
- 1 teaspoon smoked paprika
- 1/2 teaspoon garlic powder
- 1/2 teaspoon ground cumin
- Salt and freshly ground pepper to taste
- 4 cups mixed greens (spinach, arugula, and lettuce blend)
- 1 cup cherry tomatoes, halved
- 1/2 cucumber, diced
- 1/4 red onion, thinly sliced
Optional Additions
Add some optional ingredients to enhance the flavor and texture of your salad:
- 1/4 cup feta cheese, crumbled (optional)
- A handful of fresh parsley, chopped (for garnish)
Cooking Essentials
You will also need a few kitchen tools to make this salad:
- A medium-sized mixing bowl for the chickpeas
- A large bowl for the salad
- A baking sheet lined with parchment paper
- A whisk for the dressing
- A separate small bowl for mixing the tahini dressing
Using these ingredients and tools, you can create a delicious crispy chickpea salad.
Step-by-Step Instructions
Preheat and Prepare
First, preheat your oven to 400°F (200°C). This makes sure the chickpeas get crispy. Line a baking sheet with parchment paper. This helps with easy cleanup later.
Seasoning the Chickpeas
In a bowl, mix the drained chickpeas with olive oil. Add smoked paprika, garlic powder, ground cumin, salt, and pepper. Make sure each chickpea is well coated. This blend gives them a tasty kick.
Baking the Chickpeas
Spread the seasoned chickpeas evenly on the baking sheet. Don’t crowd them; they need space to get crispy. Bake for 25-30 minutes. Shake the pan halfway through to help them cook evenly. They should turn golden and crunchy.
Assembling the Salad
While the chickpeas bake, prepare the salad base. In a large bowl, toss together mixed greens, halved cherry tomatoes, diced cucumber, and thinly sliced red onion. Mixing them now lets the flavors combine as you assemble.
Whisking the Dressing
In a small bowl, whisk tahini, fresh lemon juice, and a pinch of salt and pepper. If you want a thinner dressing, add a splash of water. This dressing ties the salad together, adding a rich flavor.
Final Assembly
Once the chickpeas are crispy, take them out and let them cool for a minute. Top your salad with these warm chickpeas. Drizzle the tahini dressing over everything. Add crumbled feta cheese for creaminess, if you like. Finish with fresh parsley for color. Enjoy your Crispy Chickpea Delight Salad!
Tips & Tricks
How to Achieve Extra Crispiness
To make your chickpeas extra crispy, dry them well before cooking. Drain and rinse the canned chickpeas, then lay them on a paper towel. Pat them gently to remove excess moisture. The drier the chickpeas, the crunchier they will be. Toss them with olive oil and spices right before baking. Spread them out on your baking sheet. Avoid crowding them; it helps with airflow and crispiness. Bake at 400°F for 25 to 30 minutes, shaking the pan halfway through. This step ensures even cooking and crispiness.
Best Storage Practices for Leftovers
If you have leftovers, store the salad and chickpeas separately. Place the salad in an airtight container in the fridge. Keep the chickpeas in another container. This will help prevent sogginess. When you want to eat the leftovers, reheat the chickpeas in the oven for a few minutes. This will revive their crisp texture. The salad will stay fresh for about two days in the fridge.
Serving Suggestions for Optimal Flavor
For the best taste, serve the salad immediately after assembling. The warm chickpeas add a nice contrast to the cool greens. Drizzle the tahini dressing right before serving. This way, it coats the ingredients nicely. You can also sprinkle some feta cheese on top for extra creaminess. Fresh herbs like parsley can brighten the dish. Try adding avocado for creaminess or nuts for crunch. Each addition enhances the flavor and texture of your salad. Enjoy experimenting!

Variations
Different Greens to Use
You can swap out greens to change the salad’s taste. Try using kale for a hearty crunch. Baby spinach offers a soft, mild flavor. You can even mix in some crunchy cabbage for more texture. Each option adds its unique twist while still pairing well with crispy chickpeas.
Protein Additions for a Hearty Meal
If you want to make the salad more filling, add protein. Grilled chicken works great with the chickpeas. You can also try adding sliced hard-boiled eggs for richness. For a vegetarian option, toss in some quinoa or black beans. These choices will help boost the meal’s nutrients.
Dressing Alternatives
While tahini dressing is fantastic, don’t be afraid to experiment. A lemon vinaigrette adds a bright zing. You could also try a yogurt-based dressing for creaminess. If you like a kick, a spicy harissa dressing works wonders too. Each dressing brings a new flavor that can change your salad experience.
Storage Info
How to Store Leftover Salad
To store leftover salad, first, let it cool down. Place it in an airtight container. This keeps the salad fresh. Add the crispy chickpeas on top only when serving. This way, they stay crunchy. If you mix them in, they can get soggy.
Reheating Tips for Crispy Chickpeas
If you have leftover crispy chickpeas, you can reheat them. Preheat your oven to 350°F (175°C). Spread the chickpeas on a baking sheet. Bake them for about 10 minutes. This brings back their crunch. You can also use an air fryer for a quicker option.
Shelf Life of Ingredients
The salad can last up to three days in the fridge. Chickpeas stay good for about a week if stored well. Fresh veggies have a shorter shelf life. Use them within three to five days. Always check for freshness before eating.
FAQs
Can I use dried chickpeas?
Yes, you can use dried chickpeas. They need soaking and cooking first. To prepare, soak them overnight in water. Cook them until they are tender. This can take about 1 to 2 hours. Then, follow the same steps as with canned chickpeas in the recipe.
What are the nutritional benefits of this salad?
This salad is packed with nutrients. Chickpeas provide protein and fiber. Mixed greens bring vitamins A and C. Tomatoes offer antioxidants, while cucumbers add hydration. Olive oil is a healthy fat. Feta cheese, if used, adds calcium. Overall, it is a well-balanced meal.
How can I make this salad vegan?
To make this salad vegan, skip the feta cheese. The rest of the ingredients are already plant-based. You can also add more veggies or nuts for extra flavor and nutrition. Try adding avocado for creaminess or nuts for crunch.
Can I prepare this salad in advance?
Yes, you can prep it ahead of time. Store the crispy chickpeas in an airtight container. Keep the salad ingredients separate until you are ready to eat. This keeps everything fresh and crispy. Just assemble when you want to enjoy your meal.
What can I serve with crispy chickpea salad?
This salad pairs well with many dishes. Serve it alongside grilled chicken or fish for protein. It also goes great with a warm pita or flatbread. If you want a lighter meal, enjoy it as a stand-alone dish.
In summary, this blog post covered how to make a crispy chickpea salad. We explored the main ingredients and added options to boost flavor. I shared step-by-step cooking instructions and tips for the perfect crunch. You learned about storage methods and how to customize the dish.
Enjoy this salad any time for a tasty and healthy meal. With its simple steps, you can make it again and again!
![To make a tasty and healthy crispy chickpea salad, you need these main ingredients: - 1 can (15 oz) chickpeas, drained and rinsed - 2 tablespoons olive oil - 1 teaspoon smoked paprika - 1/2 teaspoon garlic powder - 1/2 teaspoon ground cumin - Salt and freshly ground pepper to taste - 4 cups mixed greens (spinach, arugula, and lettuce blend) - 1 cup cherry tomatoes, halved - 1/2 cucumber, diced - 1/4 red onion, thinly sliced Add some optional ingredients to enhance the flavor and texture of your salad: - 1/4 cup feta cheese, crumbled (optional) - A handful of fresh parsley, chopped (for garnish) You will also need a few kitchen tools to make this salad: - A medium-sized mixing bowl for the chickpeas - A large bowl for the salad - A baking sheet lined with parchment paper - A whisk for the dressing - A separate small bowl for mixing the tahini dressing Using these ingredients and tools, you can create a delicious crispy chickpea salad. Try the full recipe for a step-by-step guide! First, preheat your oven to 400°F (200°C). This makes sure the chickpeas get crispy. Line a baking sheet with parchment paper. This helps with easy cleanup later. In a bowl, mix the drained chickpeas with olive oil. Add smoked paprika, garlic powder, ground cumin, salt, and pepper. Make sure each chickpea is well coated. This blend gives them a tasty kick. Spread the seasoned chickpeas evenly on the baking sheet. Don’t crowd them; they need space to get crispy. Bake for 25-30 minutes. Shake the pan halfway through to help them cook evenly. They should turn golden and crunchy. While the chickpeas bake, prepare the salad base. In a large bowl, toss together mixed greens, halved cherry tomatoes, diced cucumber, and thinly sliced red onion. Mixing them now lets the flavors combine as you assemble. In a small bowl, whisk tahini, fresh lemon juice, and a pinch of salt and pepper. If you want a thinner dressing, add a splash of water. This dressing ties the salad together, adding a rich flavor. Once the chickpeas are crispy, take them out and let them cool for a minute. Top your salad with these warm chickpeas. Drizzle the tahini dressing over everything. Add crumbled feta cheese for creaminess, if you like. Finish with fresh parsley for color. Enjoy your Crispy Chickpea Delight Salad! For the complete recipe, check the [Full Recipe]. To make your chickpeas extra crispy, dry them well before cooking. Drain and rinse the canned chickpeas, then lay them on a paper towel. Pat them gently to remove excess moisture. The drier the chickpeas, the crunchier they will be. Toss them with olive oil and spices right before baking. Spread them out on your baking sheet. Avoid crowding them; it helps with airflow and crispiness. Bake at 400°F for 25 to 30 minutes, shaking the pan halfway through. This step ensures even cooking and crispiness. If you have leftovers, store the salad and chickpeas separately. Place the salad in an airtight container in the fridge. Keep the chickpeas in another container. This will help prevent sogginess. When you want to eat the leftovers, reheat the chickpeas in the oven for a few minutes. This will revive their crisp texture. The salad will stay fresh for about two days in the fridge. For the best taste, serve the salad immediately after assembling. The warm chickpeas add a nice contrast to the cool greens. Drizzle the tahini dressing right before serving. This way, it coats the ingredients nicely. You can also sprinkle some feta cheese on top for extra creaminess. Fresh herbs like parsley can brighten the dish. Try adding avocado for creaminess or nuts for crunch. Each addition enhances the flavor and texture of your salad. Enjoy experimenting! {{image_4}} You can swap out greens to change the salad's taste. Try using kale for a hearty crunch. Baby spinach offers a soft, mild flavor. You can even mix in some crunchy cabbage for more texture. Each option adds its unique twist while still pairing well with crispy chickpeas. If you want to make the salad more filling, add protein. Grilled chicken works great with the chickpeas. You can also try adding sliced hard-boiled eggs for richness. For a vegetarian option, toss in some quinoa or black beans. These choices will help boost the meal's nutrients. While tahini dressing is fantastic, don’t be afraid to experiment. A lemon vinaigrette adds a bright zing. You could also try a yogurt-based dressing for creaminess. If you like a kick, a spicy harissa dressing works wonders too. Each dressing brings a new flavor that can change your salad experience. For the full recipe, check out the Crispy Chickpea Delight Salad 🥗. To store leftover salad, first, let it cool down. Place it in an airtight container. This keeps the salad fresh. Add the crispy chickpeas on top only when serving. This way, they stay crunchy. If you mix them in, they can get soggy. If you have leftover crispy chickpeas, you can reheat them. Preheat your oven to 350°F (175°C). Spread the chickpeas on a baking sheet. Bake them for about 10 minutes. This brings back their crunch. You can also use an air fryer for a quicker option. The salad can last up to three days in the fridge. Chickpeas stay good for about a week if stored well. Fresh veggies have a shorter shelf life. Use them within three to five days. Always check for freshness before eating. For a detailed recipe, refer to the Full Recipe. Yes, you can use dried chickpeas. They need soaking and cooking first. To prepare, soak them overnight in water. Cook them until they are tender. This can take about 1 to 2 hours. Then, follow the same steps as with canned chickpeas in the recipe. This salad is packed with nutrients. Chickpeas provide protein and fiber. Mixed greens bring vitamins A and C. Tomatoes offer antioxidants, while cucumbers add hydration. Olive oil is a healthy fat. Feta cheese, if used, adds calcium. Overall, it is a well-balanced meal. To make this salad vegan, skip the feta cheese. The rest of the ingredients are already plant-based. You can also add more veggies or nuts for extra flavor and nutrition. Try adding avocado for creaminess or nuts for crunch. Yes, you can prep it ahead of time. Store the crispy chickpeas in an airtight container. Keep the salad ingredients separate until you are ready to eat. This keeps everything fresh and crispy. Just assemble when you want to enjoy your meal. This salad pairs well with many dishes. Serve it alongside grilled chicken or fish for protein. It also goes great with a warm pita or flatbread. If you want a lighter meal, enjoy it as a stand-alone dish. You can find the Full Recipe for more details. In summary, this blog post covered how to make a crispy chickpea salad. We explored the main ingredients and added options to boost flavor. I shared step-by-step cooking instructions and tips for the perfect crunch. You learned about storage methods and how to customize the dish. Enjoy this salad any time for a tasty and healthy meal. With its simple steps, you can make it again and again!](https://dishtreats.com/wp-content/uploads/2025/06/a0161600-1d29-449f-a743-39fb8b2e717a-300x300.webp)


![To make this tasty dip, you need a few key items: - 1 medium head of cauliflower, broken into bite-sized florets - 1 cup plain Greek yogurt (preferably full-fat for creaminess) - 1/2 cup shredded sharp cheddar cheese - 1/4 cup cream cheese, softened at room temperature - 1/4 cup buffalo sauce (adjust based on your heat preference) - 2 cloves garlic, finely minced - 1/2 teaspoon onion powder - 1/2 teaspoon smoked paprika for extra depth - Salt and freshly ground black pepper to taste These ingredients blend together to create a creamy, spicy dip that you will love. While the dip is great on its own, you can add some fun toppings. Here are some ideas: - Chopped green onions (scallions) for a fresh pop of color - Celery sticks for a crunchy contrast - Crispy tortilla chips for dipping These add-ons enhance both the look and taste of your dish. This dip is not just delicious; it's also packed with nutrients. Here’s a quick look at what you get: - Cauliflower: Low in calories, high in fiber - Greek yogurt: Good source of protein and probiotics - Cheese: Adds calcium and flavor Each serving is a great choice for a snack or appetizer. You can enjoy this dish without guilt! First, preheat your oven to 375°F (190°C). This step helps the dip cook well. Take a medium head of cauliflower and break it into bite-sized florets. Next, fill a large pot halfway with water and bring it to a boil. Once boiling, place a steamer basket inside the pot and add the cauliflower florets. Steam them for 8 to 10 minutes. You want them tender enough to pierce easily with a fork. After steaming, remove the florets from heat and let them cool for a few minutes. In a food processor, add the steamed cauliflower, 1 cup of plain Greek yogurt, 1/4 cup of softened cream cheese, and 1/4 cup of buffalo sauce. You can adjust the buffalo sauce to control the heat. Also, include 2 cloves of minced garlic, 1/2 teaspoon of onion powder, 1/2 teaspoon of smoked paprika, salt, and black pepper to taste. Blend until smooth and creamy. Scrape down the sides as needed. Then, gently fold in 1/2 cup of shredded sharp cheddar cheese. This adds great flavor and texture to the dip. Now, transfer the cauliflower mixture to your greased baking dish. Spread it out evenly using a spatula. Place it in the oven and bake for 20 to 25 minutes. You want the dip to be hot and the top to turn a light golden-brown color. When done, carefully take the dish out of the oven and let it cool for about 5 minutes. This rest time allows the flavors to blend. Don’t forget to garnish with chopped green onions before serving! Enjoy your warm dip with crunchy celery sticks and crispy tortilla chips. For the Full Recipe, you can refer back to the ingredients and instructions. To get the best flavor and texture from your dip, use fresh cauliflower. Steam it until it's tender but not mushy. This keeps the dip thick and creamy. Use full-fat Greek yogurt and cream cheese for added richness. They blend well and give a nice mouthfeel. Don't skip the garlic; it adds a punch of flavor. For spice lovers, adjust the buffalo sauce to your taste. You can easily modify this dip for different diets. For a vegan option, swap Greek yogurt and cream cheese for cashew cream or coconut yogurt. Use nutritional yeast for that cheesy flavor without dairy. If you want a low-carb option, serve it with sliced veggies instead of chips. This way, everyone can enjoy it without feeling left out. This dip works for many occasions. For game days, serve it warm with crispy tortilla chips. At parties, set it out with celery sticks and carrot sticks for a colorful platter. If you're hosting a casual dinner, pair it with toasted bread or pita chips. This dip can fit into any setting, making it a versatile choice. You can find the full recipe to make it just right! {{image_4}} To make a vegan version, swap Greek yogurt for cashew cream or vegan yogurt. Use vegan cream cheese instead of regular cream cheese. You can also choose nutritional yeast for a cheesy taste without dairy. Adjust the buffalo sauce based on your heat level. This version keeps the flavor while being plant-based. If you love heat, add extra buffalo sauce or some diced jalapeños. For a cheesier dip, mix in more shredded vegan cheese or cheddar. You can even top it with cheese before baking for a bubbly, golden finish. This variation will delight cheese lovers and spice fans alike. While celery sticks and tortilla chips are classic, try using sliced bell peppers or cucumber sticks. Pita chips or even crispy veggies add a nice crunch. For a fun twist, serve with mini pretzels for a salty kick. These options keep it fresh and exciting! For the full recipe, visit the [Full Recipe] page. To store leftover dip, let it cool first. Place it in an airtight container. This keeps the dip fresh for up to three days. You can also cover it tightly with plastic wrap. Make sure no air gets in, as this can spoil the dip. When you're ready to enjoy it again, scoop out what you need. Reheat in the oven for best results. Preheat your oven to 350°F (175°C). Place the dip in an oven-safe dish and cover it with foil. Heat for about 15-20 minutes, or until it's warm. You can also use the microwave. Heat in short bursts, about 30 seconds, stirring in between until hot. You can freeze Cauliflower Buffalo Dip for up to three months. Use a freezer-safe container. Leave some space at the top, as the dip may expand. To thaw, move it to the fridge overnight. Reheat it as mentioned above. The texture may change slightly, but the taste remains delicious. Enjoy this tasty dip anytime! Yes, you can use various cheeses. Creamy cheeses like goat cheese or ricotta work well. You could also try mozzarella for a milder taste. Each cheese changes the dip's flavor and texture. Mixing cheeses can create a unique taste. Just keep the total amount the same as the recipe calls for. You have many fun options for serving this dip. Here are a few ideas: - Crispy tortilla chips - Fresh celery sticks - Carrot sticks - Pita bread or chips - Crackers These choices add crunch and flavor. You can even make a veggie platter for a colorful spread. The dip's spice level depends on the buffalo sauce you use. Some sauces are very hot, while others are mild. If you like less heat, use less buffalo sauce. You can taste and adjust as you mix. This way, you control the spice to suit your taste. In this blog post, I covered how to make tasty Cauliflower Buffalo Dip. You learned about the key ingredients, how to prepare, and bake the dip. I shared tips for the best flavor and texture, plus easy variations to try. Storage tips ensure your leftovers stay fresh. Cauliflower Buffalo Dip is great for any party. Enjoy experimenting with flavors and tweaks. I hope you make this dish and share it with others. It’s sure to be a hit!](https://dishtreats.com/wp-content/uploads/2025/07/091f7212-5f30-4b51-84f4-e8795fa9d64a-768x768.webp)


