Crispy Baked Chicken Wings Flavorful and Simple Recipe

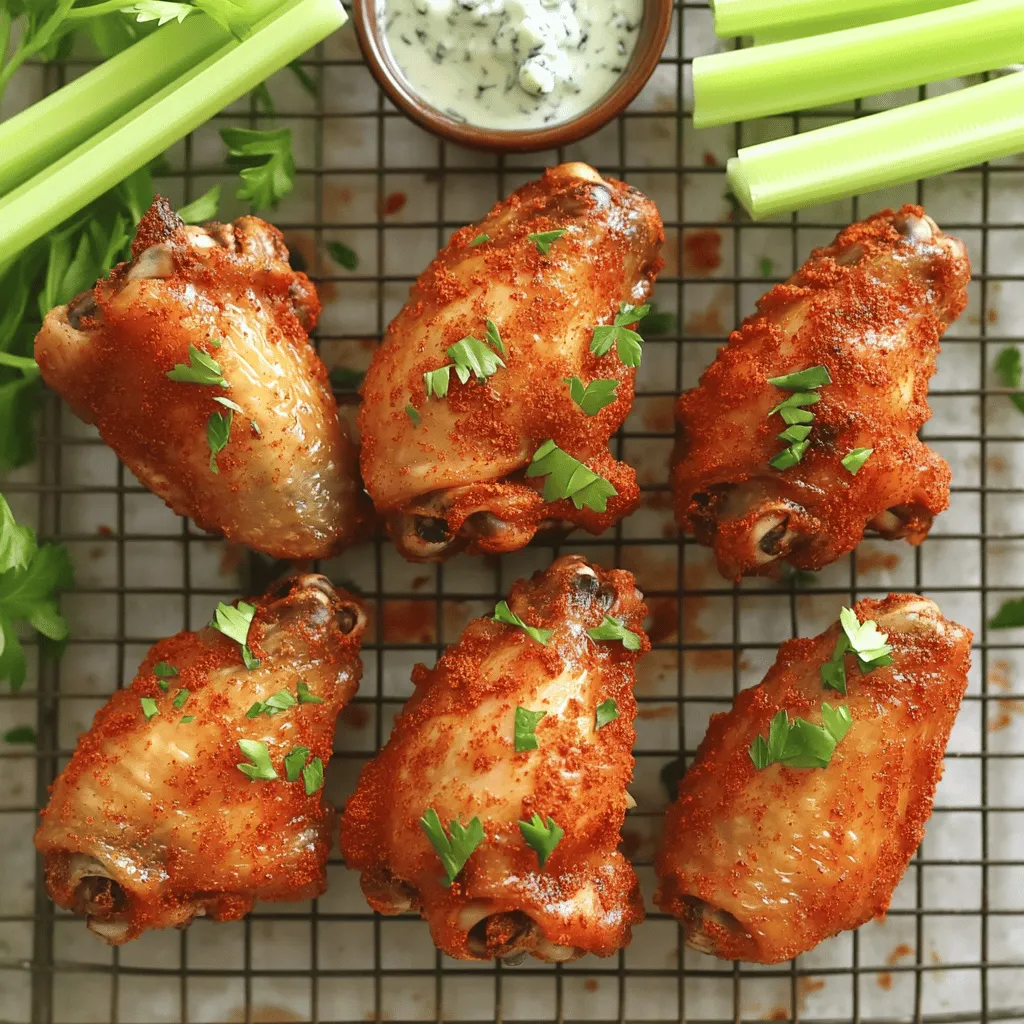
Are you ready to make chicken wings that are crispy and full of flavor? In this simple recipe, I’ll guide you step-by-step to achieve perfect baked wings every time. With just a few ingredients and some easy techniques, you can impress your family or guests. Whether it’s game day or a cozy dinner, these wings will be a hit. Let’s dive right in to whip up this tasty treat!
Ingredients
Essential Ingredients for Crispy Baked Chicken Wings
To make crispy baked chicken wings, you need the following ingredients:
- 2 pounds of chicken wings, cleaned and thoroughly patted dry
- 1 tablespoon of baking powder
- 1 teaspoon of garlic powder
- 1 teaspoon of onion powder
- 1 teaspoon of smoked paprika
- 1 teaspoon of cayenne pepper (adjust to taste for desired heat)
- Salt and black pepper, to taste
- 2 tablespoons of olive oil
- Fresh parsley, finely chopped (for garnishing)
These ingredients work together to create amazing flavor and crispiness. The baking powder is key. It helps dry out the skin, making it extra crispy when baked.
Recommended Kitchen Tools
For this recipe, here are the tools you need:
- Baking sheet
- Aluminum foil
- Wire rack
- Large mixing bowl
- Measuring spoons
- Tongs
Using a wire rack is important. It allows hot air to circulate around the wings, increasing crispiness.
Optional Ingredients for Extra Flavor
If you want to add more flavor, consider these optional items:
- Garlic cloves, minced
- Fresh herbs like thyme or rosemary
- Hot sauce for serving
These extras can make your wings even more delicious and fun to eat. You can easily adjust the recipe to match your taste.
Step-by-Step Instructions
Preheating the Oven and Preparing the Baking Sheet
Start by preheating your oven to 425°F (220°C). This heat helps create crispy wings. While it warms up, line a baking sheet with aluminum foil. This makes cleanup easy. Place a wire rack on top of the baking sheet. The rack allows hot air to circulate, making the wings extra crispy.
Mixing the Dry Seasoning
In a large bowl, mix the dry ingredients together. Combine 1 tablespoon of baking powder, 1 teaspoon of garlic powder, 1 teaspoon of onion powder, 1 teaspoon of smoked paprika, and 1 teaspoon of cayenne pepper. Add salt and black pepper to taste. Stir well to blend all the flavors. This spice mix gives the wings their tasty kick.
Preparing and Coating the Chicken Wings
Take your 2 pounds of cleaned chicken wings and put them in the bowl with the spice mix. Drizzle 2 tablespoons of olive oil over the wings. The oil helps the seasoning stick. Toss the wings in the mix. Make sure each wing is fully covered with the spices. This ensures every bite is packed with flavor.
Arranging Wings for Optimal Baking
Now, spread the coated wings on the wire rack. Lay them in a single layer, ensuring they do not touch. This space allows each wing to crisp up nicely. If they are too close, they will steam instead of bake.
Baking and Turning the Wings
Place the wire rack with wings in the oven. Bake for 40 to 45 minutes. Halfway through, turn the wings over. This step helps them brown evenly. Your wings are ready when they are golden brown and reach an internal temperature of 165°F (75°C).
Finishing Touches: Resting and Garnishing
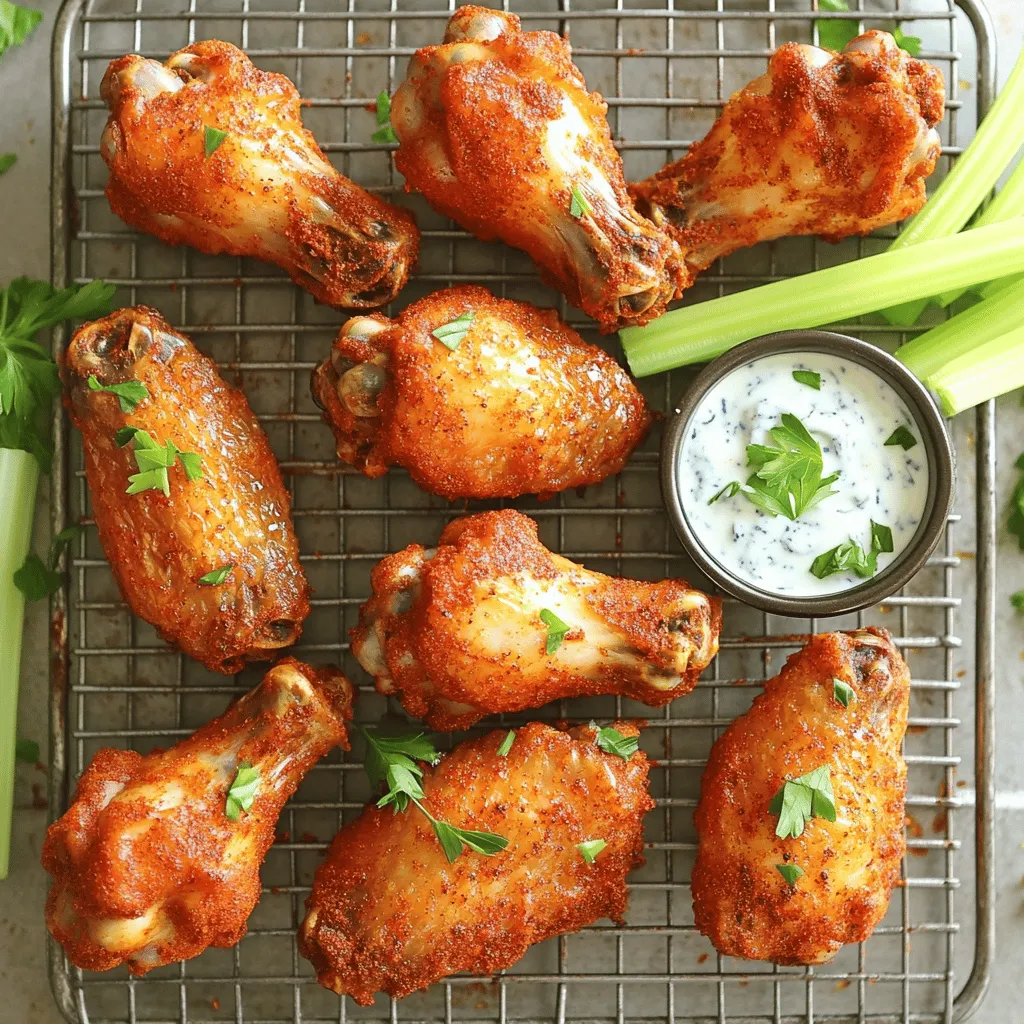
Once baked, take the wings out and let them rest for a few minutes. This helps keep them juicy. After resting, sprinkle fresh parsley on top for color and taste. Serve your wings hot with celery sticks and blue cheese dressing if you like. Enjoy your crispy baked chicken wings!
Tips & Tricks
Achieving Perfectly Crispy Skin
To get that perfect crispy skin on your baked chicken wings, you need to dry them well. Pat the wings dry with paper towels. This step is key. The moisture will stop them from crisping up. Next, use baking powder in your spice mix. It helps the skin puff up and get crispy. Spread the wings out on a wire rack. This allows hot air to flow around them, ensuring even cooking. Bake them at 425°F (220°C) for the best results.
Common Mistakes to Avoid
One common mistake is overcrowding the wings on the baking sheet. This traps steam and makes them soggy. Always leave space between the wings. Another mistake is skipping the drying step. Wings need to be dry for that crunchy texture. Avoid using too much oil. A light drizzle is enough. Lastly, don’t forget to flip the wings halfway through baking. This helps them brown evenly.
Serving Suggestions for Baked Chicken Wings
Baked chicken wings are great on their own, but you can enhance them. Serve the wings with celery sticks and blue cheese dressing. This adds a nice crunch and creaminess. You can also pair them with different sauces. BBQ, honey garlic, or spicy buffalo sauce work well. If you want, sprinkle fresh herbs like parsley on top for a pop of color. This not only looks nice but adds fresh flavor too.

Variations
Flavor Variations: Spicy, Honey Garlic, and BBQ
You can spice up crispy baked chicken wings in many ways. For heat lovers, add more cayenne pepper or hot sauce. This will make your wings really spicy. If you like sweet flavors, try honey garlic. Mix honey, garlic, and soy sauce for a tasty glaze. Pour it over the wings before baking. For BBQ fans, use your favorite BBQ sauce. Brush it on after baking for a sticky, flavorful finish. Each variation makes the wings unique, so feel free to get creative!
Cooking Method Alternatives: Air Fryer vs. Oven
You can cook your wings in an oven or air fryer. Both methods can give you crispy wings. If you use the air fryer, set it to 400°F (200°C). Cook the wings for about 25-30 minutes. Shake the basket halfway through for even cooking. This method is quick and uses less oil, making it a healthy choice.Choose the one that fits your time and taste!
Adjusting Heat Levels for Different Palates
Not everyone likes spicy food. To make milder wings, skip the cayenne pepper. You can also reduce the amount of garlic powder for a softer flavor. For kids, consider using just salt and pepper for seasoning. If you want to add flavor without the heat, try adding lemon juice or herbs like rosemary. These options keep the wings tasty but less intense. Adjusting the heat makes your wings perfect for everyone at the table!
Storage Info
Storing Leftover Chicken Wings
After enjoying your crispy baked chicken wings, you may have some left. To store them, place the wings in an airtight container. Keep them in the fridge for up to three days. This way, they stay fresh and tasty. You can also cover them with foil or plastic wrap. Just make sure they are completely cool before sealing them up.
Reheating Tips for Maintaining Crispiness
When you are ready to enjoy the leftovers, reheating them can be tricky. To keep them crispy, use your oven. Preheat it to 350°F (175°C). Spread the wings on a baking sheet. Heat them for about 10-15 minutes. This method helps them regain their crunch. You can also use an air fryer. It works well to keep the wings crispy without drying them out.
Freezing Chicken Wings for Later Use
If you want to keep your wings for a longer time, freezing is a great option. First, let the wings cool completely. Then, place them in a freezer-safe bag. Remove as much air as possible before sealing. You can freeze them for up to three months. When you are ready to eat them, thaw them in the fridge overnight. Reheat them in the oven or air fryer for the best texture. This makes it easy to enjoy crispy baked chicken wings anytime!
FAQs
How long do I need to bake chicken wings for optimal crispiness?
Bake your chicken wings for 40-45 minutes. This time helps them become golden and crispy. Turning them halfway through ensures they cook evenly. Always check that they reach an internal temperature of 165°F (75°C).
Can I use frozen chicken wings for this recipe?
Yes, you can use frozen chicken wings. However, you should thaw them first. Pat them dry to remove excess moisture. This helps achieve that crispy texture you want.
What is the best temperature for baking chicken wings?
The best temperature is 425°F (220°C). This high heat cooks the wings quickly. It also helps the skin become crispy while keeping the meat juicy.
How can I make my wings spicier?
To add spice, increase the cayenne pepper in the recipe. You can also add hot sauce to the wings before baking. Another option is to toss baked wings in a spicy sauce after cooking.
Is it necessary to use baking powder for crispy wings?
Yes, baking powder is important. It helps the skin become crispier. The baking powder raises the pH level of the chicken skin, allowing it to brown better. This simple step makes a big difference in texture.
Crispy baked chicken wings are easy to make. You need the right ingredients, tools, and steps. By following the guide, you learn how to achieve perfect wings. Tips help you avoid mistakes and enhance flavor. Variations let you enjoy different tastes, while storage tips keep leftovers fresh.
Now, you are ready to bake your delicious wings. Enjoy your tasty creation with friends or family!


![- 1 can (15 oz) black beans, thoroughly rinsed and drained - 1 cup sweet corn (use fresh, frozen, or canned) - 1 large red bell pepper, diced into bite-sized pieces - 1 ripe avocado, diced - 1/2 medium red onion, finely chopped for a milder flavor - 1 cup cherry tomatoes, halved for bursts of sweetness - 1/4 cup fresh cilantro, finely chopped for an aromatic touch The foundation of my zesty black bean salad lies in the fresh ingredients. Black beans serve as the protein-packed base. They add a creamy texture and earthy flavor. Sweet corn brings a pop of sweetness, balancing the dish. A red bell pepper adds crunch and color. Diced avocado gives a rich, buttery taste. Finely chopped red onion adds a mild bite, while halved cherry tomatoes provide juicy bursts. Finally, fresh cilantro adds a bright finish, tying all the flavors together. - 2 tablespoons freshly squeezed lime juice - 1 tablespoon high-quality olive oil - 1 teaspoon ground cumin for warmth - 1 teaspoon garlic powder for depth - Salt and freshly cracked black pepper to taste The dressing is key to making the salad come alive. Fresh lime juice adds a zesty kick. Olive oil brings richness and ties the salad together. Ground cumin adds a warm, earthy note. Garlic powder deepens the flavor profile. Finally, salt and black pepper enhance all the tastes, making each bite delightful. - Portion size and garnishes - Optional accompaniments For serving, I like to present the salad in a large, colorful bowl. This makes it inviting and fun. You can also portion it into individual cups for a neat look. Garnish with extra cilantro leaves and lime wedges for a fresh touch. This salad pairs well with grilled chicken or fish. It also makes a great filling for wraps or tacos. Enjoy the zesty flavors and vibrant colors! For the full recipe, check out the details above. To start, grab a big mixing bowl. Add the rinsed black beans, sweet corn, diced red bell pepper, diced avocado, finely chopped red onion, halved cherry tomatoes, and chopped cilantro. Mix them all together well. Make sure each ingredient spreads out. This ensures every bite is full of flavor. Next, take a small bowl. In it, whisk together the freshly squeezed lime juice, olive oil, ground cumin, garlic powder, and a good pinch of salt and black pepper. Keep whisking until the dressing is smooth and well mixed. This mixture will bring out the best in the salad. Now, drizzle the dressing over your salad mixture. Using a large spoon or spatula, gently toss everything together. You want each piece coated with that zesty dressing. After tossing, taste the salad. You can add more lime juice or salt if needed. Let the salad sit for 10-15 minutes at room temperature. This resting time helps all the flavors blend nicely before you serve it. Check out the Full Recipe to see all the details! To make your Zesty Black Bean Salad shine, adjust the seasoning to suit your taste. Start with a little salt and pepper, then taste. If it needs more, add gradually until it’s perfect. You can also squeeze in a splash of extra lime juice. This adds brightness and makes the flavors pop. Using canned ingredients can save you time. Canned black beans and corn are quick and easy. Just rinse and drain them well. If you prefer fresh, that’s great too! Prepping ingredients in advance can also help. Chop your veggies the day before. Store them in the fridge until you’re ready to mix. Serving style can make your salad more appealing. Use a large, colorful bowl to showcase the bright ingredients. You can also serve it in cups for individual portions. Garnish with extra cilantro leaves and lime wedges. This adds a fresh look and invites guests to enjoy your creation. For the full recipe, check the details above! {{image_4}} You can easily swap beans in this salad. Try pinto beans or kidney beans for a different taste. Each bean brings its own flavor and texture. Adding or substituting vegetables can change the salad’s vibe. Consider diced cucumber for crunch or chopped jalapeño for heat. Roasted red peppers can add a smoky note. Use what you like! This salad is vegan and gluten-free. It fits well into many diets. If you want more protein, add grilled chicken or shrimp. Both options pair great with the zesty flavors. You can also use tofu or tempeh for a plant-based protein boost. Both options add texture while keeping it healthy. Want to mix up the dressing? Try a simple vinaigrette with balsamic vinegar instead of lime juice. It adds a sweet tang. You could also use a creamy dressing, like ranch or avocado dressing. This change can make the salad richer and more filling. For a spicy kick, add some hot sauce to your dressing. Experiment to find your favorite combination! For the full recipe and more ideas, check the [Full Recipe]. Store Zesty Black Bean Salad in an airtight container. Glass containers work best, but plastic ones are fine too. Make sure everything is sealed tight. This keeps the flavors fresh. Keep the salad in the fridge for the best taste. To batch prepare, mix all ingredients except avocado. Add avocado just before serving. This keeps it from browning. You can store the salad for up to three days. After that, it may lose its crunch and flavor. You can freeze black bean salad, but I don’t recommend it. Freezing changes the texture of the ingredients. If you decide to freeze it, do so without avocado. To thaw, place the salad in the fridge overnight. This helps it retain some freshness. Yes, you can make this salad ahead of time. It tastes even better after resting. To prep, mix all the salad ingredients in a bowl. Keep the dressing separate until you're ready to serve. This keeps the salad fresh and crunchy. Store the salad in a sealed container in the fridge. It can last up to two days. Just remember to add the dressing just before serving. This salad pairs well with many dishes. Try serving it with grilled chicken or fish for a complete meal. You can also enjoy it with tacos or burritos for a fun twist. It works great as a side dish for barbecues. If you want a lighter meal, serve it with whole-grain pita bread. The flavors blend well with many cuisines. Yes, this salad is very healthy! Black beans are rich in protein and fiber, which help you feel full. They also support heart health and digestion. The fresh veggies add vitamins and minerals. Avocado provides healthy fats that are good for your skin. The lime juice boosts your vitamin C intake. Overall, this salad is a great choice for a nutritious meal. For the full recipe, check out the vibrant Zesty Black Bean Salad! This blog post covered the essentials for making a delicious black bean salad. We explored fresh ingredients, dressings, serving ideas, and tips for great flavor. You can customize it to fit your taste and dietary needs, too. Remember to store your salad properly for freshness. A well-made salad can be a healthy, tasty dish that fits into your meal plans. Enjoy your cooking and delight in each bite of your Zesty Black Bean Salad!](https://dishtreats.com/wp-content/uploads/2025/07/dc2c0f53-4615-45f1-afed-f531318cc377-768x768.webp)

![To make crispy baked sweet potato fries, you need just a few simple ingredients. Here’s what you’ll need: - 2 large sweet potatoes - 2 tablespoons extra-virgin olive oil - 1 teaspoon cornstarch - 1 teaspoon smoked paprika - 1/2 teaspoon garlic powder - 1/2 teaspoon onion powder - 1/4 teaspoon cayenne pepper (optional) - Salt and freshly ground black pepper - Fresh parsley for garnish These ingredients combine to create a flavorful and fun side dish. Sweet potatoes give a natural sweetness. Olive oil helps with that crispy texture. The cornstarch is the secret for extra crunch. Smoked paprika adds a nice depth of flavor. Garlic and onion powder bring warmth. Cayenne pepper can spice things up if you like it hot. Finally, salt and pepper enhance everything. Using fresh parsley on top not only looks nice but adds a fresh taste. This is the perfect mix for a tasty treat. You can find the full recipe in the recipe section to make it easy for you. 1. Preheat your oven to 425°F (220°C). It’s key for crispiness. 2. Line a large baking sheet with parchment paper. This helps fries not stick. 3. Take 2 large sweet potatoes. Rinse and cut them into even-sized fries. Try to keep them similar in size for even cooking. 4. Place the fries in a mixing bowl. Drizzle 2 tablespoons of olive oil over them. Mix well to coat each fry evenly. 1. Sprinkle 1 teaspoon of cornstarch over the fries. This helps them get that crispy texture. 2. Add spices: 1 teaspoon of smoked paprika, 1/2 teaspoon of garlic powder, 1/2 teaspoon of onion powder, and 1/4 teaspoon of cayenne pepper if you like spice. 3. Season with salt and black pepper to taste. Toss the fries gently to make sure they are all coated well with the seasonings. 1. Arrange the seasoned fries on your baking sheet. Make sure they are in a single layer. This allows air to flow and makes them crispy. 2. Bake in the preheated oven for 25 to 30 minutes. Flip the fries halfway through. This helps them brown evenly. 3. When they turn golden and crispy, they are ready. Let them cool for a few minutes before serving. Enjoy these crispy baked sweet potato fries with your favorite dips! For the full recipe, check out the detailed instructions. To get the best crispy fries, air circulation is key. When you spread the fries out on the baking sheet, make sure they aren't touching. This allows hot air to flow all around them. If your fries aren’t crispy enough, try adding a few extra minutes to the cooking time. Keep an eye on them to avoid burning. You can customize the spice levels based on your taste. If you like more heat, add more cayenne pepper. For a milder flavor, leave it out. You can also swap the spices for other favorites like chili powder or Italian herbs. Mix and match to find your perfect blend. An eye-catching way to serve your fries is in a cone or a basket with parchment paper. This makes them look fun and inviting. Pair your fries with tasty dipping sauces like spicy mayo, creamy ranch, or classic ketchup. It adds more flavor and makes the meal special. Enjoy your crispy baked sweet potato fries from the [Full Recipe]. {{image_4}} You can easily change the taste of your sweet potato fries. For a sweet and spicy option, drizzle them with maple syrup before baking. This will add a nice glaze and a kick of flavor. If you prefer herbs, try adding fresh rosemary or thyme. These herbs bring a savory touch that pairs well with the natural sweetness of the potatoes. Using an air fryer is a fantastic way to make crispy fries. Set your air fryer to 400°F (200°C) and cook them for about 15-20 minutes. Shake the basket halfway through to ensure even cooking. If you enjoy grilling, you can also grill sweet potato fries. Slice them thicker, brush with olive oil, and grill over medium heat for about 5-7 minutes on each side. This gives a nice smoky flavor. Sweet potato fries are great on their own, but you can elevate your meal. Pair them with grilled chicken, fish, or a fresh salad for a balanced dish. They also work well in meal prep. You can make a batch and store them in the fridge. Just reheat them for a quick snack or side dish. For a fun twist, serve them in a cone with a side of your favorite dipping sauce. Try creamy ranch, spicy mayo, or classic ketchup for added flavor. For the full recipe, check out the full recipe link! To keep your crispy baked sweet potato fries fresh, store them in the fridge. Place them in an airtight container. This helps maintain their flavor and texture. They can last for up to three days in the fridge. If you want to keep them longer, freezing is a great option. Place the fries in a freezer-safe bag. Remove as much air as you can before sealing. This prevents freezer burn and keeps them tasty. When you're ready to enjoy your leftovers, reheating is key. For crispy fries, use the oven. Preheat your oven to 400°F (200°C). Spread the fries in a single layer on a baking sheet. Heat for about 10 to 15 minutes, flipping halfway through. This method keeps the fries crispy. You can also use an air fryer. Set it to 380°F (193°C) and heat for about 5 to 7 minutes. Avoid using a microwave, as it can make the fries soggy. In the fridge, your fries can last about three days. In the freezer, they can last up to three months. When you store them correctly, you can enjoy them later without losing flavor or texture. Just remember to check for any signs of freezer burn if they are in the freezer for a while. How can I make sweet potato fries even crispier? To make your sweet potato fries crispier, soak them in cold water. Do this for at least 30 minutes. This helps remove excess starch. After soaking, dry them well with a towel. Also, use cornstarch before baking to create a crisp outer layer. Can I use regular potatoes instead? Yes, you can use regular potatoes. They will taste different but can still be delicious. You might need to adjust the cooking time. Regular potatoes may cook faster than sweet potatoes. What's the nutritional value of sweet potato fries? Sweet potato fries are high in vitamins A and C. They are also a good source of fiber. Compared to regular fries, they have fewer calories and more nutrients. This makes them a healthier choice for a snack or side dish. What is the optimal temperature for baking sweet potato fries? The best temperature for baking sweet potato fries is 425°F (220°C). This high heat helps them cook evenly and get crispy. How long should I bake them for the best results? Bake the fries for 25 to 30 minutes. Be sure to flip them halfway through to get an even golden color. They should look crispy and slightly browned when done. Can I use a different oil? Yes, you can use other oils like avocado oil or canola oil. Each oil has a different flavor, but all will work well for baking. What if I don't have cornstarch? If you don't have cornstarch, you can use potato starch or even flour. Both will help create a crisp texture. Just use the same amount as the cornstarch in the recipe. Making sweet potato fries is simple and fun. You learned the key ingredients and steps to create crispy fries. I shared tips for seasoning and presentation to elevate your meal. You can also explore variations and alternative cooking methods. Storing and reheating properly ensures you can enjoy leftovers without losing quality. Incorporate your favorite flavors and get creative. Remember, these fries are a tasty, healthy option for any meal. Enjoy your cooking adventure!](https://dishtreats.com/wp-content/uploads/2025/07/5c45319a-0858-4d48-b29a-502acd419023-768x768.webp)

. Start by peeling your sweet potatoes. Use a vegetable peeler for nice, even strips. Next, dice them into 1-inch cubes. This size helps them cook well. In a large bowl, toss the diced sweet potatoes with olive oil. Add smoked paprika, garlic powder, salt, and black pepper. Mix until every piece is coated. This step brings out the flavor. Preheat your oven to 400°F (200°C). This hot oven ensures crispy edges. Spread the seasoned sweet potatoes on a baking sheet. Make sure they are in a single layer for even cooking. Roast for 20-25 minutes. Stir halfway through to help with browning. The sweet potatoes should be tender and slightly caramelized when done. In a large skillet, combine the roasted sweet potatoes with black beans, corn, and diced tomatoes. Gently stir until everything is heated through. This mix creates a hearty base. Now, sprinkle the shredded cheddar cheese on top. Allow it to melt for about 3-5 minutes. Cover the skillet with a lid to speed up melting if needed. Once the cheese is melted, remove the skillet from heat. Top with jalapeños, green onions, and diced avocado. These additions add color and flavor. Finally, garnish with fresh cilantro. If you like, add a dollop of sour cream or Greek yogurt for creaminess. Serve your loaded sweet potato nacho skillet hot and enjoy the burst of flavors! For the complete cooking process, check the Full Recipe. To boost the flavor, consider adding different spices. You can use cumin or chili powder for a warm kick. A dash of cayenne pepper can also add heat. If you love fresh herbs, cilantro is perfect here. It adds a bright taste that pairs well with sweet potatoes. You can also try fresh parsley or green onions for a twist. Using a cast iron skillet can give your dish a nice crisp. It heats evenly and retains warmth well. If you prefer a non-stick pan, that works too. Just make sure your sweet potatoes do not stick. For even cooking, keep the heat steady. Stir often to prevent burning and ensure all ingredients meld nicely. For a great look, serve the skillet right at the table. This gives a rustic feel and makes sharing easy. You can add some colorful toppings, like diced avocado and sliced jalapeños. A sprinkle of cilantro adds fresh green color. For an extra crunch, serve with tortilla chips on the side. This adds texture and makes it even more fun to eat. Check out the Full Recipe for more serving ideas. {{image_4}} For a vegetarian or vegan touch, you can swap out the cheese. Try cashew cheese or nutritional yeast for a cheesy flavor without dairy. You can also pile on more plant-based toppings. Consider adding sautéed mushrooms, bell peppers, or even spinach. These ingredients add texture and boost nutrition. If you need gluten-free options, this dish is already a great choice. Sweet potatoes, beans, and veggies are naturally gluten-free. Just ensure any toppings or sauces are gluten-free too. For those who want high-protein variations, add cooked quinoa or lentils. You can also use a plant-based protein like tempeh or tofu. This way, you’ll keep the meal filling and nutritious. You can change the flavor profile by adding sweet or savory twists. Try mixing in some cinnamon or maple syrup for a sweet kick. This creates a unique balance with the savory ingredients. For international twists, consider adding spices from around the world. A sprinkle of taco seasoning gives a Mexican flair. Or, use curry powder for an Indian vibe. These simple changes can transform your loaded sweet potato nacho skillet. For the complete recipe, see [Full Recipe]. When storing your loaded sweet potato nacho skillet, let it cool first. This step helps avoid moisture buildup, which can make your dish soggy. Use an airtight container to keep it fresh. If stored properly, it lasts in the fridge for up to four days. To reheat leftovers, use a skillet for the best results. Heat on medium-low to keep the texture. Stir gently as you warm it up to avoid burning. Avoid the microwave if you can; it can make the dish soggy. If you must use it, heat in short bursts and stir often. You can freeze your loaded sweet potato nacho skillet for later use. Portion it into freezer-safe containers, leaving some space for expansion. It stays good for up to three months in the freezer. When ready to eat, thaw it in the fridge overnight before reheating. This keeps the flavors intact and the texture nice. You can use butternut squash or pumpkin. They have a similar texture and taste. Both options provide a nice sweetness. You can also try regular potatoes if you want a different flavor. Yes, you can prep some of the ingredients before. Roast the sweet potatoes a day ahead. Store them in the fridge. You can also mix the black beans, corn, and tomatoes in advance. Just heat everything up when ready to serve. To melt cheese evenly, use freshly shredded cheese. It melts better than pre-shredded cheese. Spread the cheese in an even layer on top of the skillet. Cover the skillet for a couple of minutes. This traps heat and helps the cheese melt smoothly. You can use many toppings for loaded nachos. Some popular choices include jalapeños, green onions, and diced avocado. For a twist, add pickled red onions or fresh salsa. Don't forget sour cream or Greek yogurt for creaminess. You can get creative and mix your favorite toppings! In this blog post, we explored how to create a delicious dish with sweet potatoes, black beans, and cheese. You learned about ingredient choices, measurements, and smart substitutions. I shared tips on roasting sweet potatoes and combining ingredients perfectly. We looked at variations for different diets and how to store leftovers. Remember, making this dish fun and flavorful is easy. Use the ideas provided to customize your meal, ensuring it fits your taste. Enjoy your cooking and make it a family favorite!](https://dishtreats.com/wp-content/uploads/2025/07/3c3c8a5c-337a-4892-8590-75b37c5e13f0-768x768.webp)
