Classic Waldorf Salad Fresh and Flavorful Recipe Guide

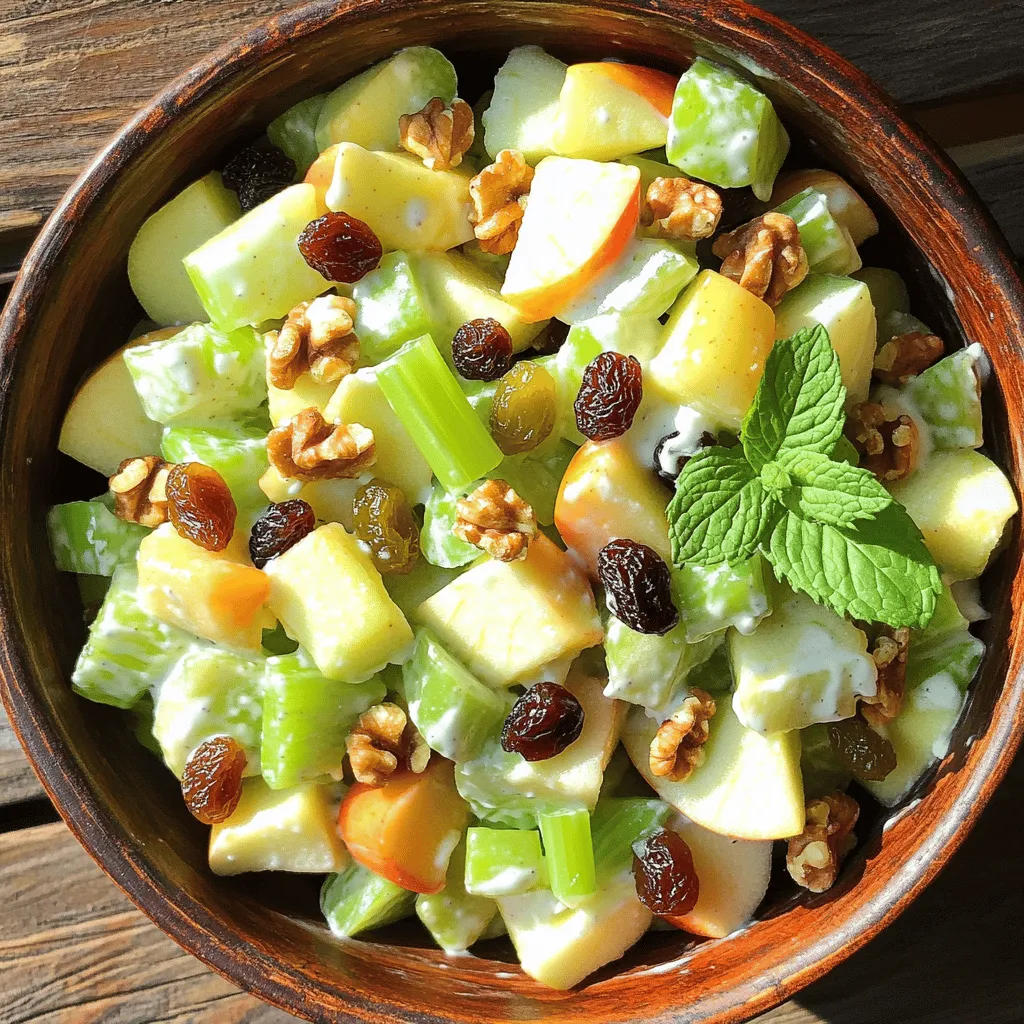
Are you ready to dive into the fresh and tasty world of Classic Waldorf Salad? In this guide, I’ll share my favorite recipe, packed with crisp apples, crunchy nuts, and creamy dressing. Whether you’re a salad lover or just looking to impress your friends, this dish is a perfect fit for any occasion. Let’s explore how to make this timeless favorite with easy steps, helpful tips, and fun variations. Grab your apron, and let’s get started!
Ingredients
List of Ingredients
To make a Classic Waldorf Salad, you need these simple and fresh ingredients:
- 2 cups of crisp Granny Smith apples, diced
- 1 cup of crunchy celery, finely chopped
- 1 cup of juicy grapes, halved (your choice of red or green)
- 1 cup of flavorful walnuts, toasted and coarsely chopped
- 1/2 cup of plump raisins
- 1/2 cup of creamy plain Greek yogurt
- 2 tablespoons of smooth mayonnaise
- 1 tablespoon of fresh lemon juice (about half a lemon)
- Salt and pepper to taste, for seasoning
- Fresh mint leaves, sprigs for garnish
Nutritional Information
This salad is not just tasty; it is also good for you. Here are some key points:
- Apples are high in fiber and vitamin C.
- Celery adds crunch and is low in calories.
- Walnuts provide healthy fats and protein.
- Greek yogurt offers protein and probiotics for gut health.
- The salad is colorful, which means it is rich in antioxidants.
Recommended Tools and Equipment
To prepare your Waldorf Salad, gather these tools:
- A large mixing bowl for combining ingredients
- A small mixing bowl for making the dressing
- A whisk or fork for blending the dressing
- A spatula or wooden spoon for folding ingredients together
- A cutting board and knife for chopping fruits and nuts
With these ingredients and tools, you can create a refreshing and delicious Classic Waldorf Salad.
Step-by-Step Instructions
Preparation of Ingredients
To make the Classic Waldorf Salad, start by gathering all your ingredients. You need two cups of crisp Granny Smith apples, one cup of crunchy celery, and one cup of juicy grapes. You can choose red or green grapes based on your taste. Next, grab one cup of flavorful walnuts that you will toast and chop. Also, get half a cup of plump raisins ready. Once you have everything, chop and dice the apples, celery, and grapes. This step is fun and helps you see the fresh colors!
Making the Dressing
Now, let’s make the dressing. In a small bowl, combine half a cup of creamy plain Greek yogurt with two tablespoons of smooth mayonnaise. Add one tablespoon of fresh lemon juice, and sprinkle in some salt and pepper to taste. Use a whisk to mix everything together until it is smooth and well combined. This dressing gives the salad its rich flavor.
Combining the Salad
In a large mixing bowl, take your chopped fruits and nuts. Add the diced apples, chopped celery, halved grapes, chopped walnuts, and raisins. Stir gently to mix the ingredients well. Then, pour the dressing over this colorful mix. Using a spatula, fold the dressing in so all the pieces get coated. Be careful not to mash the ingredients. After that, cover the bowl and chill the salad in the fridge for at least 30 minutes. This helps the flavors blend. Finally, toss gently before serving, and garnish with fresh mint leaves for a lovely touch.
Tips & Tricks
How to Achieve the Perfect Texture
To get a great texture in your Waldorf Salad, use fresh ingredients. Crunchy apples and celery add a nice bite. Make sure your grapes are sweet and juicy. Toast the walnuts to bring out their flavor and add a bit of crunch. When mixing, fold gently to keep the fruit intact. Over-mixing can turn your salad mushy.
Pairing Suggestions
Waldorf Salad pairs well with many dishes. Try it as a side with grilled chicken or fish. It also complements a light sandwich or a wrap. For a delightful lunch, serve it alongside a bowl of soup. The salad’s fresh flavors balance heavier meals well.
Presentation Tips
For a stunning look, serve your Waldorf Salad in clear glass bowls. This highlights the bright colors of the apples and grapes. Add a sprinkle of extra walnuts on top for a nice touch. You can also garnish with fresh mint leaves. This adds a pop of green and a pleasant aroma. For a fun twist, use individual cups for serving. This makes it easy for guests to enjoy without sharing.

Variations
Ingredient Substitutions
You can change the ingredients in the Waldorf salad for more variety. Instead of Granny Smith apples, try using sweet Fuji or tart Honeycrisp apples. If you need a nut-free option, swap walnuts for sunflower seeds. You can also replace Greek yogurt with sour cream or a dairy-free yogurt for a lighter dressing. For a crunchier texture, add chopped bell peppers or use toasted almonds instead of walnuts.
Dietary Modifications
If you follow a specific diet, you can still enjoy this salad. For a vegan version, use a plant-based yogurt and skip the mayonnaise. You can also replace the honey with maple syrup for sweetness. If you’re gluten-free, all the ingredients listed are naturally gluten-free, so no worries there. For those watching sugar intake, use unsweetened yogurt and skip the raisins.
Creative Twists on the Classic Recipe
Get creative with your Waldorf salad! Add a sprinkle of cinnamon for warmth or a touch of honey for extra sweetness. For a savory kick, mix in crumbled feta cheese or diced cooked chicken. Another fun idea is to add pomegranate seeds for a burst of flavor and color. You can also serve it in lettuce cups for a fun twist! Each variation can make your salad unique and delicious.
Storage Info
Best Ways to Store Leftovers
To keep your Waldorf salad fresh, store it in an airtight container. I recommend using glass or plastic containers with tight lids. Avoid metal containers, as they can affect the taste. If you have leftover dressing, store it separately. This keeps the salad crisp and the flavors bright.
How Long the Salad Lasts
When stored properly, the Waldorf salad lasts about three days in the fridge. After this, the apples may brown, and the texture can change. Always check for any off smells or changes in color before eating. Remember, it’s best enjoyed fresh, so plan your servings wisely!
Reheating and Serving Suggestions
Waldorf salad is best served cold and not reheated. The crunch of the apples and celery makes it refreshing. Before serving, give it a gentle stir to mix the ingredients again. You can also add more fresh mint leaves for a pop of flavor. For an extra touch, serve it in clear bowls to show off its vibrant colors!
FAQs
What is the history of Waldorf Salad?
Waldorf Salad began at the Waldorf Astoria Hotel in New York City. A chef named Oscar Tschirky created it in the late 1800s. The original salad had apples, celery, and walnuts. It used a simple dressing made from mayonnaise. Over time, people added grapes and different nuts. Today, it’s a popular dish at many gatherings.
Can I make Waldorf Salad ahead of time?
Yes, you can make Waldorf Salad ahead of time. I like to prepare it a few hours before serving. This allows the flavors to mix well. Just keep it in the fridge until you’re ready to serve. If you make it the night before, it will still taste great. Just give it a quick stir before serving.
What are the best apples for Waldorf Salad?
The best apples for Waldorf Salad are Granny Smith apples. They are crisp and tart. Their flavor contrasts nicely with the sweet grapes and creamy dressing. You can also use Honeycrisp apples for a sweeter option. Make sure to dice them just before adding to keep them fresh and crunchy.
This article covered all you need to know about making Waldorf Salad. We looked at the ingredients, tools, and step-by-step steps to create a perfect dish. I shared tips for texture and pairing ideas. You can even try fun twists with different ingredients. Remember to store your leftovers properly for the best taste. With this knowledge, you can make a tasty Waldorf Salad anytime you like. Enjoy creating delicious meals with confidence!


![For One Pot Fiesta Rice, you need: - 1 cup long-grain rice - 2 cups vegetable broth - 1 can (15 oz) black beans, drained and rinsed - 1 cup corn kernels (choice of fresh, frozen, or canned) - 1 red bell pepper, diced - 1 green bell pepper, diced - 1 small onion, finely chopped - 2 cloves garlic, minced These ingredients create a base full of colors and flavors. The rice absorbs all the tasty broth, making it fluffy and delicious. The black beans add protein, while the corn and peppers provide sweetness and crunch. You will also need: - 1 teaspoon ground cumin - 1 teaspoon chili powder - Salt and pepper to taste These spices give the dish its kick. Cumin adds warmth, while chili powder brings a bit of heat. Adjust the salt and pepper to balance the flavors just right. To finish off your meal, use: - Fresh cilantro, chopped (for garnish) - Lime wedges (for serving) Cilantro adds freshness, and lime juice brightens the dish. Together, they enhance the fiesta feel. The combination of these ingredients makes this dish not just tasty but also visually appealing. You can find the full recipe to guide you through the cooking process. - Heat olive oil and sauté onion and garlic. - Add diced bell peppers. Start by heating one tablespoon of olive oil in a large pot over medium heat. Once hot, add the finely chopped onion and minced garlic. Sauté for about three to four minutes. You want the onion to become soft and clear. The garlic will fill your kitchen with a lovely aroma. Next, toss in your diced red and green bell peppers. Cook them for two to three more minutes. Stir occasionally until they soften and brighten in color. - Incorporate spices and rice. - Simmer with vegetable broth. Now it's time to spice things up! Sprinkle in one teaspoon each of ground cumin and chili powder. Stir well to mix the spices into the onion and pepper mixture. Let them cook for one minute. This step helps release their rich flavors. Next, add one cup of long-grain rice to the pot. Stir it thoroughly so each grain gets coated with the mixture. Now, pour in two cups of vegetable broth. Turn the heat up to bring it to a boil. Once boiling, reduce the heat to low. Cover the pot and let it simmer for about 15 to 20 minutes. Do not lift the lid during this time; you want to keep the steam in. - Add black beans and corn. - Season and fluff. - Presentation tips. When the rice is tender and all the liquid is gone, gently fold in one can of drained black beans and one cup of corn. Allow the mixture to heat through for about five minutes on low heat. Afterward, taste your dish and season with salt and pepper as needed. Use a fork to fluff the rice gently, mixing all the ingredients together. For a beautiful presentation, serve the fiesta rice in bright bowls. Top with fresh cilantro and add lime wedges on the side. This adds a zesty touch and makes your meal look vibrant. Enjoy the colorful feast you've created! You can find the Full Recipe for more details. To prevent rice from sticking, rinse the rice before cooking. This step removes excess starch. After rinsing, dry the rice with a towel. This helps the grains stay separate. Next, use the right water ratio. For every cup of rice, use two cups of liquid. The right ratio keeps the rice fluffy. Simmering time is key for perfect rice. After bringing the pot to a boil, reduce the heat. Cover the pot tightly and let it simmer. Avoid lifting the lid during cooking. This keeps the steam inside, which is crucial. Allowing it to simmer for 15-20 minutes ensures even cooking. For an extra kick, try adding spices like paprika or oregano. These spices blend well with the base flavors. You can also add a pinch of cayenne for heat. Fresh ingredients like diced tomatoes or jalapeños work great too. Top your fiesta rice with fresh avocado or sour cream. It adds creaminess and balances the spice. Using pre-cooked ingredients saves time. You can find canned black beans and corn at the store. These options cut down your prep time significantly. You can also use pre-chopped veggies from the store. This helps you skip the chopping step. Quick prep ideas include using frozen vegetables. They cook fast and still taste fresh. Keep them on hand for busy nights. You can even prepare the rice ahead of time. Just reheat it when you're ready to serve. For the full recipe, check [Full Recipe]. {{image_4}} You can easily customize One Pot Fiesta Rice with protein. Try adding chicken or shrimp. For chicken, use bite-sized pieces and cook them first. Add them back in with the beans and corn. Shrimp cooks quickly, so toss them in during the last few minutes. They should turn pink when done. If you want a vegetarian dish, consider adding tofu or tempeh. Both soak up flavors well. Cut them into small cubes and sauté them with the veggies. You can also use extra beans to boost protein. Want a spicy kick? Add jalapeños to the mix. Dice them finely and sauté with the onions and garlic. This will give your dish a nice heat. Adjust the amount to fit your taste. For a Southwest edition, swap out black beans for pinto or kidney beans. You can also add diced tomatoes or corn salsa for a fresh taste. These small changes can make a big difference in flavor. If you're looking for alternatives to long-grain rice, try quinoa or cauliflower rice. Quinoa is packed with protein and cooks in about the same time. Rinse it well before cooking to remove any bitterness. Cauliflower rice is a great low-carb option. It cooks faster, so reduce your liquid and cooking time. You don't want it mushy. For a nuttier flavor, brown rice is another option. Just know it will take longer to cook, so adjust your time and liquid accordingly. These substitutes keep your meals fresh and exciting! Store your One Pot Fiesta Rice in an airtight container. It stays fresh for 3 to 5 days. Check for any signs of spoilage before using leftovers. To keep the rice at its best, let it cool down before sealing it. This helps prevent moisture build-up, which can cause mushy rice. You can freeze portions of One Pot Fiesta Rice for later. Use freezer-safe bags or containers. Make sure to remove as much air as possible to avoid freezer burn. It will last up to 3 months in the freezer. When you're ready to eat, thaw it overnight in the fridge. For quick meals, you can microwave frozen rice straight from the freezer. To reheat, place the rice in a pot with a splash of water. Cover and warm it over low heat. Stir occasionally to heat evenly. If it seems dry, add a bit more water. You can also microwave it. Just add a little water and cover it. After reheating, taste and adjust the flavors. You may want to add a squeeze of lime or a sprinkle of fresh cilantro for a burst of flavor. Can I use brown rice instead of white? Yes, you can use brown rice. It takes longer to cook. Add about 10-15 minutes to the cooking time. You may also need to add more broth to keep it moist. How do I adjust the recipe for more servings? To make more servings, simply double the ingredients. Use a larger pot to fit everything. Cooking time may not change much, but check the rice to be sure. What are the best side dishes to serve with One Pot Fiesta Rice? Some great sides include grilled veggies, avocado slices, or a fresh salad. You could also serve it with tortilla chips for a crunchy contrast. How to tell when the rice is cooked? The rice is ready when it has absorbed all the liquid. It should look fluffy and tender. You can taste a grain to check if it’s done. Can I substitute vegetable broth with chicken broth? Yes, chicken broth works well. It adds a different flavor that many people enjoy. Just make sure to choose low-sodium broth if you watch your salt intake. What is the calorie count per serving? Each serving has about 250 calories. This can vary based on additional toppings or sides added. Are there any allergens in this recipe? This recipe is generally free from common allergens. However, check the labels on canned goods for potential allergens. If you are sensitive to beans or corn, be cautious. This blog covered a simple recipe for One Pot Fiesta Rice. We explored ingredients like long-grain rice, black beans, and fresh veggies. I shared tips on cooking techniques and storage methods. You can enjoy many variations to suit your taste. Whether you prefer chicken, shrimp, or a spicy twist, the options are endless. This dish is easy to make and great for leftovers. Enjoy your cooking adventure!](https://dishtreats.com/wp-content/uploads/2025/07/eb10aa28-84d4-4922-bf2e-e4835b83e1a4-768x768.webp)


. Enjoy making your air fryer sweet potato chips! You now know how to make tasty sweet potato chips with an air fryer. We covered the needed ingredients, proper preparation, and seasoning. I shared tips for perfect crispiness and suggested flavor boosts. I also explored storage and reheating methods to keep your chips fresh. Try different seasonings and root veggies for variety. Enjoy the fun of making your own snacks!](https://dishtreats.com/wp-content/uploads/2025/06/63cc0e6b-da42-45de-be59-e2118d293653-768x768.webp)

