Classic Waldorf Salad Fresh and Flavorful Delight
![- 2 cups diced apples - 1 cup celery, thinly sliced - 1 cup red grapes, halved - 1/2 cup walnuts, chopped - 1/2 cup raisins or dried cranberries - 1 cup plain Greek yogurt - 1 tablespoon honey - 1/2 teaspoon fresh lemon juice - Salt and pepper to taste - Lettuce leaves for serving Fresh produce makes this salad shine. I love using crisp apples, like Granny Smith, for their tartness. They add a nice crunch. The celery brings a refreshing snap, while juicy red grapes add sweetness. Nuts and dried fruits give texture and flavor. Chopped walnuts are my go-to. Toast them for even more flavor. Raisins or dried cranberries add a touch of sweetness, balancing the dish well. For the dressing, I use plain Greek yogurt. It’s creamy and healthy. Honey adds sweetness, and a bit of lemon juice brightens the flavors. Season with salt and pepper to enhance everything. Finally, serve on fresh lettuce leaves. They make a great base and add color. This combination of ingredients creates a delightful Waldorf salad. You can find the full recipe at [Full Recipe]. - Start by adding 2 cups of diced apples to a large bowl. - Drizzle the apples with 1/2 teaspoon of fresh lemon juice. This keeps them fresh and bright. - Next, slice 1 cup of celery into thin pieces. Add this to the bowl. - Halve 1 cup of red grapes and toss them in too. - In the same bowl, mix the fruit with 1/2 cup of chopped walnuts. - Add 1/2 cup of raisins or dried cranberries for sweetness. Gently toss the mixture. - In a separate bowl, combine 1 cup of plain Greek yogurt with 1 tablespoon of honey. Stir until smooth. - Carefully fold the yogurt dressing into the fruit mixture. Make sure everything is coated. - Season with salt and pepper to taste, folding gently to mix. - Cover the bowl and chill it in the fridge for at least 30 minutes. This helps the flavors blend. - When ready, serve on fresh lettuce leaves for a beautiful presentation. Enjoy your Waldorf salad! - For the complete recipe, check out the Full Recipe. You can swap out fruits and nuts to suit your taste. Try pears or oranges for a fresh twist. For nuts, almonds or pecans work well, too. If you want a creamier texture, use Greek yogurt instead of mayonnaise. The yogurt adds protein and keeps the salad light. Toasting walnuts really boosts their flavor. Just place them in a dry pan over medium heat. Stir them until they smell nutty and are lightly browned. You can also adjust sweetness or tartness. If the salad is too sweet, add a dash of lemon juice. For more sweetness, drizzle in extra honey. Serve your Waldorf salad on crisp lettuce leaves for a vibrant look. Arrange the salad in a large bowl or individual cups. Garnish with mint leaves for a fresh pop of color. You can also sprinkle extra toasted walnuts on top for added crunch. These simple touches make your dish stand out. For the full recipe, refer to the Waldorf Wonderland Salad 🥗. {{image_4}} The classic Waldorf salad uses simple, fresh ingredients. It combines apples, celery, grapes, and walnuts in a creamy dressing. Modern twists can add new flavors. You might see variations like adding chicken or swapping yogurt for mayonnaise. These changes keep the dish fresh and fun. You can experiment with spices, too. A hint of cinnamon or nutmeg can add warmth. If you want a vegan Waldorf salad, swap Greek yogurt for a plant-based option. Silken tofu blended with lemon juice makes a great dressing. For a gluten-free version, check your nuts and dried fruits. Most are safe, but some brands add gluten. You can also cut calories by using low-fat yogurt. This keeps the creaminess while reducing fat. Seasonal fruits can enhance the Waldorf salad. In fall, add sliced pears for sweetness. In winter, pomegranate seeds add color and crunch. Fresh berries in summer create a bright, juicy contrast. Each season brings a new twist to this classic salad. Try different fruits to match the season and your taste. The full recipe allows you to mix and match as you please. To store leftover Waldorf salad, place it in an airtight container. This keeps the salad fresh. Use a lid or plastic wrap to seal it well. The salad can last up to 3 days in the fridge. After that, the texture and flavor may change. If you see any browning apples, it’s best to toss them out. You can prepare some ingredients in advance. Chop your apples, celery, and grapes a day before. Keep them in separate containers in the fridge. This saves time when you want to make the salad. If you want to freeze Waldorf salad, I suggest not freezing it whole. The fruits will lose their crunch. Instead, freeze just the nuts or dried fruits. This keeps them fresh longer. When you are ready, mix them in fresh, chilled salad. You can enjoy that fresh taste even after storage! For the full recipe, check out the Waldorf Wonderland Salad. Waldorf Salad dates back to the late 1800s. A chef at the Waldorf Astoria Hotel in New York created it. The original recipe had only apples, celery, and mayonnaise. Over time, people added more ingredients, like walnuts and grapes. This salad became popular at formal dinners and events. It has a classic, timeless appeal that many enjoy today. Yes, you can prepare Waldorf Salad ahead of time. Make it a few hours before serving for best results. Just follow the steps of mixing everything and keep it in the fridge. This helps the flavors blend well. If you plan to serve it the next day, be careful with the apples. They can brown, so use lemon juice to keep them fresh. Waldorf Salad is quite healthy! It features fresh fruits and nuts, which offer great nutrients. Apples provide fiber and vitamins, while walnuts add healthy fats. The Greek yogurt dressing gives protein and a creamy texture. This salad is a great choice for a light meal or side dish. Eating it can help you feel full and satisfied. You can find the full recipe for this delightful salad [here](#). Waldorf salad combines fresh produce, nuts, and a creamy dressing. You learned how to prepare it step-by-step. I shared tips to enhance flavor and presentation. Feel free to adjust ingredients based on your taste. You can also explore various dietary options and seasonal fruits. This salad is not only tasty but also healthy. With proper storage methods, you’ll enjoy it for days. Now, it's time to create your own delicious version!](https://dishtreats.com/wp-content/uploads/2025/06/24fb7af7-5454-4649-a19f-39fd463a867f.webp)
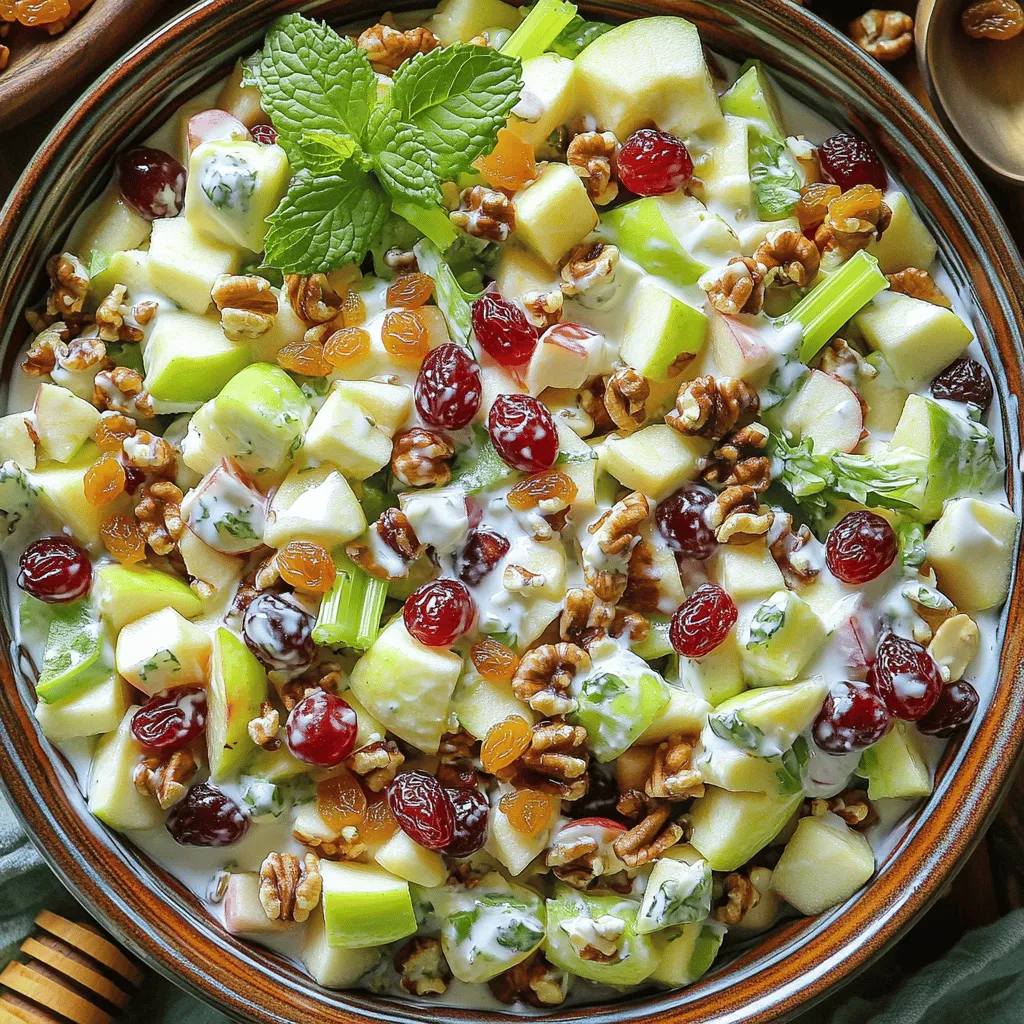
Are you ready to discover a fresh and tasty twist on a classic favorite? In this blog post, I’ll guide you through making a Classic Waldorf Salad that bursts with flavor and crunch. Loaded with crisp apples, juicy grapes, and crunchy walnuts, this salad is a delightful balance of sweet and savory. Whether you’re preparing for a picnic or a dinner party, this dish will impress everyone at the table. Let’s dive into the ingredients and get started!
Ingredients
Fresh Produce
- 2 cups diced apples
- 1 cup celery, thinly sliced
- 1 cup red grapes, halved
Nuts and Dried Fruits
- 1/2 cup walnuts, chopped
- 1/2 cup raisins or dried cranberries
Dressing Components
- 1 cup plain Greek yogurt
- 1 tablespoon honey
- 1/2 teaspoon fresh lemon juice
- Salt and pepper to taste
- Lettuce leaves for serving
Fresh produce makes this salad shine. I love using crisp apples, like Granny Smith, for their tartness. They add a nice crunch. The celery brings a refreshing snap, while juicy red grapes add sweetness.
Nuts and dried fruits give texture and flavor. Chopped walnuts are my go-to. Toast them for even more flavor. Raisins or dried cranberries add a touch of sweetness, balancing the dish well.
For the dressing, I use plain Greek yogurt. It’s creamy and healthy. Honey adds sweetness, and a bit of lemon juice brightens the flavors. Season with salt and pepper to enhance everything.
Finally, serve on fresh lettuce leaves. They make a great base and add color. This combination of ingredients creates a delightful Waldorf salad.
Step-by-Step Instructions
Preparation of Ingredients
- Start by adding 2 cups of diced apples to a large bowl.
- Drizzle the apples with 1/2 teaspoon of fresh lemon juice. This keeps them fresh and bright.
- Next, slice 1 cup of celery into thin pieces. Add this to the bowl.
- Halve 1 cup of red grapes and toss them in too.
Combining Ingredients
- In the same bowl, mix the fruit with 1/2 cup of chopped walnuts.
- Add 1/2 cup of raisins or dried cranberries for sweetness. Gently toss the mixture.
- In a separate bowl, combine 1 cup of plain Greek yogurt with 1 tablespoon of honey. Stir until smooth.
Final Assembly
- Carefully fold the yogurt dressing into the fruit mixture. Make sure everything is coated.
- Season with salt and pepper to taste, folding gently to mix.
- Cover the bowl and chill it in the fridge for at least 30 minutes. This helps the flavors blend.
- When ready, serve on fresh lettuce leaves for a beautiful presentation. Enjoy your Waldorf salad!
Tips & Tricks
Ingredient Substitutions
You can swap out fruits and nuts to suit your taste. Try pears or oranges for a fresh twist. For nuts, almonds or pecans work well, too. If you want a creamier texture, use Greek yogurt instead of mayonnaise. The yogurt adds protein and keeps the salad light.
Flavor Enhancement Tips
Toasting walnuts really boosts their flavor. Just place them in a dry pan over medium heat. Stir them until they smell nutty and are lightly browned. You can also adjust sweetness or tartness. If the salad is too sweet, add a dash of lemon juice. For more sweetness, drizzle in extra honey.
Presentation Ideas
Serve your Waldorf salad on crisp lettuce leaves for a vibrant look. Arrange the salad in a large bowl or individual cups. Garnish with mint leaves for a fresh pop of color. You can also sprinkle extra toasted walnuts on top for added crunch. These simple touches make your dish stand out.

Variations
Classic vs. Modern Waldorf Salad
The classic Waldorf salad uses simple, fresh ingredients. It combines apples, celery, grapes, and walnuts in a creamy dressing. Modern twists can add new flavors. You might see variations like adding chicken or swapping yogurt for mayonnaise. These changes keep the dish fresh and fun. You can experiment with spices, too. A hint of cinnamon or nutmeg can add warmth.
Dietary Modifications
If you want a vegan Waldorf salad, swap Greek yogurt for a plant-based option. Silken tofu blended with lemon juice makes a great dressing. For a gluten-free version, check your nuts and dried fruits. Most are safe, but some brands add gluten. You can also cut calories by using low-fat yogurt. This keeps the creaminess while reducing fat.
Seasonal Variants
Seasonal fruits can enhance the Waldorf salad. In fall, add sliced pears for sweetness. In winter, pomegranate seeds add color and crunch. Fresh berries in summer create a bright, juicy contrast. Each season brings a new twist to this classic salad. Try different fruits to match the season and your taste.
Storage Info
Refrigeration Guidelines
To store leftover Waldorf salad, place it in an airtight container. This keeps the salad fresh. Use a lid or plastic wrap to seal it well. The salad can last up to 3 days in the fridge. After that, the texture and flavor may change. If you see any browning apples, it’s best to toss them out.
Best Practices for Meal Prep
You can prepare some ingredients in advance. Chop your apples, celery, and grapes a day before. Keep them in separate containers in the fridge. This saves time when you want to make the salad.
If you want to freeze Waldorf salad, I suggest not freezing it whole. The fruits will lose their crunch. Instead, freeze just the nuts or dried fruits. This keeps them fresh longer. When you are ready, mix them in fresh, chilled salad. You can enjoy that fresh taste even after storage!
FAQs
What is the origin of Waldorf Salad?
Waldorf Salad dates back to the late 1800s. A chef at the Waldorf Astoria Hotel in New York created it. The original recipe had only apples, celery, and mayonnaise. Over time, people added more ingredients, like walnuts and grapes. This salad became popular at formal dinners and events. It has a classic, timeless appeal that many enjoy today.
Can I make Waldorf Salad ahead of time?
Yes, you can prepare Waldorf Salad ahead of time. Make it a few hours before serving for best results. Just follow the steps of mixing everything and keep it in the fridge. This helps the flavors blend well. If you plan to serve it the next day, be careful with the apples. They can brown, so use lemon juice to keep them fresh.
Is Waldorf Salad healthy?
Waldorf Salad is quite healthy! It features fresh fruits and nuts, which offer great nutrients. Apples provide fiber and vitamins, while walnuts add healthy fats. The Greek yogurt dressing gives protein and a creamy texture. This salad is a great choice for a light meal or side dish. Eating it can help you feel full and satisfied.
Waldorf salad combines fresh produce, nuts, and a creamy dressing. You learned how to prepare it step-by-step. I shared tips to enhance flavor and presentation. Feel free to adjust ingredients based on your taste. You can also explore various dietary options and seasonal fruits. This salad is not only tasty but also healthy. With proper storage methods, you’ll enjoy it for days. Now, it’s time to create your own delicious version!
![- 2 cups diced apples - 1 cup celery, thinly sliced - 1 cup red grapes, halved - 1/2 cup walnuts, chopped - 1/2 cup raisins or dried cranberries - 1 cup plain Greek yogurt - 1 tablespoon honey - 1/2 teaspoon fresh lemon juice - Salt and pepper to taste - Lettuce leaves for serving Fresh produce makes this salad shine. I love using crisp apples, like Granny Smith, for their tartness. They add a nice crunch. The celery brings a refreshing snap, while juicy red grapes add sweetness. Nuts and dried fruits give texture and flavor. Chopped walnuts are my go-to. Toast them for even more flavor. Raisins or dried cranberries add a touch of sweetness, balancing the dish well. For the dressing, I use plain Greek yogurt. It’s creamy and healthy. Honey adds sweetness, and a bit of lemon juice brightens the flavors. Season with salt and pepper to enhance everything. Finally, serve on fresh lettuce leaves. They make a great base and add color. This combination of ingredients creates a delightful Waldorf salad. You can find the full recipe at [Full Recipe]. - Start by adding 2 cups of diced apples to a large bowl. - Drizzle the apples with 1/2 teaspoon of fresh lemon juice. This keeps them fresh and bright. - Next, slice 1 cup of celery into thin pieces. Add this to the bowl. - Halve 1 cup of red grapes and toss them in too. - In the same bowl, mix the fruit with 1/2 cup of chopped walnuts. - Add 1/2 cup of raisins or dried cranberries for sweetness. Gently toss the mixture. - In a separate bowl, combine 1 cup of plain Greek yogurt with 1 tablespoon of honey. Stir until smooth. - Carefully fold the yogurt dressing into the fruit mixture. Make sure everything is coated. - Season with salt and pepper to taste, folding gently to mix. - Cover the bowl and chill it in the fridge for at least 30 minutes. This helps the flavors blend. - When ready, serve on fresh lettuce leaves for a beautiful presentation. Enjoy your Waldorf salad! - For the complete recipe, check out the Full Recipe. You can swap out fruits and nuts to suit your taste. Try pears or oranges for a fresh twist. For nuts, almonds or pecans work well, too. If you want a creamier texture, use Greek yogurt instead of mayonnaise. The yogurt adds protein and keeps the salad light. Toasting walnuts really boosts their flavor. Just place them in a dry pan over medium heat. Stir them until they smell nutty and are lightly browned. You can also adjust sweetness or tartness. If the salad is too sweet, add a dash of lemon juice. For more sweetness, drizzle in extra honey. Serve your Waldorf salad on crisp lettuce leaves for a vibrant look. Arrange the salad in a large bowl or individual cups. Garnish with mint leaves for a fresh pop of color. You can also sprinkle extra toasted walnuts on top for added crunch. These simple touches make your dish stand out. For the full recipe, refer to the Waldorf Wonderland Salad 🥗. {{image_4}} The classic Waldorf salad uses simple, fresh ingredients. It combines apples, celery, grapes, and walnuts in a creamy dressing. Modern twists can add new flavors. You might see variations like adding chicken or swapping yogurt for mayonnaise. These changes keep the dish fresh and fun. You can experiment with spices, too. A hint of cinnamon or nutmeg can add warmth. If you want a vegan Waldorf salad, swap Greek yogurt for a plant-based option. Silken tofu blended with lemon juice makes a great dressing. For a gluten-free version, check your nuts and dried fruits. Most are safe, but some brands add gluten. You can also cut calories by using low-fat yogurt. This keeps the creaminess while reducing fat. Seasonal fruits can enhance the Waldorf salad. In fall, add sliced pears for sweetness. In winter, pomegranate seeds add color and crunch. Fresh berries in summer create a bright, juicy contrast. Each season brings a new twist to this classic salad. Try different fruits to match the season and your taste. The full recipe allows you to mix and match as you please. To store leftover Waldorf salad, place it in an airtight container. This keeps the salad fresh. Use a lid or plastic wrap to seal it well. The salad can last up to 3 days in the fridge. After that, the texture and flavor may change. If you see any browning apples, it’s best to toss them out. You can prepare some ingredients in advance. Chop your apples, celery, and grapes a day before. Keep them in separate containers in the fridge. This saves time when you want to make the salad. If you want to freeze Waldorf salad, I suggest not freezing it whole. The fruits will lose their crunch. Instead, freeze just the nuts or dried fruits. This keeps them fresh longer. When you are ready, mix them in fresh, chilled salad. You can enjoy that fresh taste even after storage! For the full recipe, check out the Waldorf Wonderland Salad. Waldorf Salad dates back to the late 1800s. A chef at the Waldorf Astoria Hotel in New York created it. The original recipe had only apples, celery, and mayonnaise. Over time, people added more ingredients, like walnuts and grapes. This salad became popular at formal dinners and events. It has a classic, timeless appeal that many enjoy today. Yes, you can prepare Waldorf Salad ahead of time. Make it a few hours before serving for best results. Just follow the steps of mixing everything and keep it in the fridge. This helps the flavors blend well. If you plan to serve it the next day, be careful with the apples. They can brown, so use lemon juice to keep them fresh. Waldorf Salad is quite healthy! It features fresh fruits and nuts, which offer great nutrients. Apples provide fiber and vitamins, while walnuts add healthy fats. The Greek yogurt dressing gives protein and a creamy texture. This salad is a great choice for a light meal or side dish. Eating it can help you feel full and satisfied. You can find the full recipe for this delightful salad [here](#). Waldorf salad combines fresh produce, nuts, and a creamy dressing. You learned how to prepare it step-by-step. I shared tips to enhance flavor and presentation. Feel free to adjust ingredients based on your taste. You can also explore various dietary options and seasonal fruits. This salad is not only tasty but also healthy. With proper storage methods, you’ll enjoy it for days. Now, it's time to create your own delicious version!](https://dishtreats.com/wp-content/uploads/2025/06/24fb7af7-5454-4649-a19f-39fd463a867f-300x300.webp)


![To create the Roasted Beet and Goat Cheese Salad, you will need the following ingredients: - 4 medium beets, scrubbed and trimmed - 2 tablespoons extra virgin olive oil, divided - Sea salt and freshly ground black pepper to taste - 4 cups mixed greens (arugula, spinach, and kale) - 1/2 cup creamy goat cheese, crumbled - 1/4 cup walnuts, toasted and roughly chopped - 1/4 cup dried cranberries - 2 tablespoons balsamic vinegar - 1 tablespoon pure honey - Fresh herbs (basil or parsley) for garnish Each ingredient adds not just flavor, but also nutrition. Beets are rich in vitamins and minerals. They help boost your energy levels. Goat cheese brings a creamy texture and a tangy taste. It pairs well with the sweetness of beets and cranberries. Walnuts add crunch and healthy fats, while mixed greens provide fiber. The dressing of balsamic vinegar and honey ties all the flavors together. You can find the Full Recipe for step-by-step instructions to make this delightful salad. 1. Preheat the oven: Set your oven to 400°F (200°C). This makes sure the beets roast well. 2. Wrap the beets: Take each beet and wrap it in foil. Drizzle 1 tablespoon of olive oil on them. Add sea salt and black pepper for flavor. Seal the foil tightly. 3. Roast the beets: Place the wrapped beets on a baking sheet. Roast them in the oven for 45-60 minutes. They are done when a fork easily pierces them. 1. Peel and slice the beets: Let the beets cool a bit. Then, peel off the skin. I recommend wearing gloves to avoid stains. Cut the beets into wedges for a nice look. 2. Combine salad ingredients: In a large mixing bowl, add the mixed greens, sliced roasted beets, crumbled goat cheese, toasted walnuts, and dried cranberries. Gently mix everything together. 1. Prepare the dressing: In a small bowl, whisk together the balsamic vinegar, the last tablespoon of olive oil, and honey. Stir well until combined. Taste it and add salt and pepper as needed. 2. Dress the salad: Drizzle the dressing over the salad. Toss everything gently to coat the greens and other ingredients. 3. Serve the salad: Plate the salad right away. Garnish with fresh herbs for a pop of color and extra flavor. For the full recipe, check out the Beet the Ordinary: Roasted Beet and Goat Cheese Salad. - Choosing the right beet size for even cooking: I recommend using medium beets. They cook evenly and are easy to handle. If you use larger beets, they may take longer to roast, leading to uneven texture. Smaller beets cook too quickly and may dry out. - How to properly season the beets: Before wrapping the beets in foil, drizzle them with olive oil. Add a generous pinch of sea salt and freshly ground black pepper. This simple seasoning enhances their natural sweetness and flavor during roasting. - Creative ways to plate the salad: For a stunning presentation, use a large, flat platter. Layer mixed greens as a base. Fan out the roasted beet wedges on top and sprinkle crumbled goat cheese and walnuts over the salad. This method creates a colorful and inviting look. - Garnishing tips to elevate the dish: Fresh herbs can add color and flavor. A sprinkle of chopped basil or parsley brightens the dish. You can also use edible flowers for a special touch, making it perfect for gatherings or celebrations. - Best practices for prepping ingredients in advance: You can roast the beets a day ahead. Once cooled, wrap them in plastic to keep fresh. Store the mixed greens and other ingredients separately. This way, you can quickly assemble your salad just before serving, keeping everything crisp and tasty. For the complete recipe, see [Full Recipe]. {{image_4}} You can switch up the greens in your salad to make it special. Try using arugula for a peppery kick or romaine for a crisp bite. Each green offers a different taste and texture, giving your salad a new vibe. If you want to change the cheese, feta or blue cheese can work wonders. Feta adds a salty flavor, while blue cheese brings a bold touch. Both complement the sweetness of the beets nicely. The right dressing can elevate your salad. A citrus vinaigrette adds a bright and zesty flavor. Mix fresh lemon juice with olive oil for a quick option. If you want something creamy, a yogurt dressing is perfect. It pairs well with the tang of goat cheese and makes the salad feel lush. Don’t hesitate to experiment with different dressings to find your favorite. Add protein to make your salad more filling. Grilled chicken is a great choice, giving the salad a hearty feel. For a plant-based option, chickpeas work well. They add protein and texture. You can also sprinkle seeds, like pumpkin or sunflower seeds, for some crunch. Fresh fruit, such as sliced pears or apples, can add a sweet note. Each add-in brings its own charm to the dish, making it unique every time. Don’t forget to check out the Full Recipe for more inspiration! To keep your roasted beet and goat cheese salad fresh, store it in an airtight container. Place any leftovers in the fridge. The salad will stay good for about three days. Make sure to keep the dressing separate until you are ready to eat. This helps keep the greens crisp and fresh. If you want to store beets for longer, you can freeze them. First, roast the beets as in the Full Recipe. Let them cool, then peel and slice them. Place the slices in a freezer-safe bag, removing as much air as possible. Beets can last up to six months in the freezer. However, I do not recommend freezing the prepared salad. The greens won't hold up well after thawing. When it's time to eat your stored salad, you can reheat the beets if you like. Just warm them in the microwave for about 30 seconds. Toss the salad again after reheating. This helps mix the flavors back together. If you stored the salad dressed, consider adding a bit more dressing before serving. This keeps everything tasty and vibrant. How long do roasted beets last in the fridge? Roasted beets can last up to five days in your fridge. Store them in an airtight container. This way, they stay fresh and tasty for your salads. Can I use pre-cooked beets for this recipe? Yes, you can use pre-cooked beets. They are a great time-saver. Just cut them into wedges and add them to your salad. They will still taste delicious! What type of goat cheese is best for salads? A creamy goat cheese works best for this salad. It adds a nice richness and tang. Look for soft, crumbled varieties for easy mixing. Can I substitute goat cheese with a dairy-free option? Absolutely! You can use a dairy-free cheese made from nuts. Look for a creamy cashew cheese or tofu-based option. Both will provide a nice flavor. What are the health benefits of beet and goat cheese salad? This salad is packed with nutrients. Beets are high in fiber and antioxidants. Goat cheese adds protein and calcium. Together, they support heart health and digestion. How many calories are in a serving of this salad? One serving of this salad has about 300 calories. This includes the beets, goat cheese, nuts, and dressing. It’s a great balance of flavors and nutrients without too many calories. For the complete recipe, check out the Full Recipe. This salad combines roasted beets, fresh greens, and tangy goat cheese. You learned how to roast beets and mix vibrant ingredients for a delicious dish. Remember to choose the right beet size and season well for great texture. Don't hesitate to try different greens or dressings to make it your own. Salad prep can be easy, helping you save time. Enjoy this healthy meal that packs flavor and nutrients. Make it today and impress yourself with your cooking skills!](https://dishtreats.com/wp-content/uploads/2025/06/a3a0567a-1f00-4857-8ef4-d1e9b38b024f-768x768.webp)

![- 1 lb large shrimp, peeled and deveined - 4 cloves garlic, minced - 3 tablespoons olive oil - 1 teaspoon red pepper flakes (adjust to taste) - 1 tablespoon fresh lemon juice - 1 tablespoon fresh parsley, finely chopped - Salt and freshly ground black pepper to taste - Lemon wedges for serving For this easy garlic shrimp dish, you need just a few fresh ingredients. The shrimp should be large, peeled, and deveined. This helps them cook evenly and taste great. Fresh garlic is key. It gives the dish a strong flavor. Olive oil adds richness. Red pepper flakes bring heat, but you can adjust this to fit your taste. Adding lemon juice brightens the dish. Fresh parsley adds color and a hint of earthiness. Salt and black pepper finish the flavor. Serve with lemon wedges for that extra zing. You can find the complete recipe [Full Recipe]. This meal is quick to make and perfect for any night! - Rinse and dry shrimp - Mince garlic - Prepare lemon and parsley Start by rinsing the shrimp under cold water. Make sure to remove any dirt. Once rinsed, use paper towels to dry the shrimp. This helps achieve a nice sear later. Next, mince the garlic into small pieces. This adds flavor to the dish. Finally, cut the lemon in half and chop the parsley finely. Set these aside for later. - Heat olive oil - Sauté garlic - Cook shrimp In a large skillet, pour in the olive oil. Heat it over medium-high heat. Wait until the oil shimmers but does not smoke. Then, add the minced garlic. Sauté it for about 30 seconds. Stir it often to avoid burning. You will smell a great aroma when it’s ready. Now, add the shrimp in a single layer. Sprinkle red pepper flakes, salt, and black pepper on top. Cook the shrimp for 2-3 minutes on each side. They should turn pink and opaque. - Add lemon juice - Garnish with parsley - Serve with lemon wedges When the shrimp are done, take the skillet off the heat. Squeeze lemon juice over the shrimp and toss them gently. This adds a bright flavor. Next, sprinkle the chopped parsley on top for color. Lastly, transfer the shrimp to a serving plate and arrange lemon wedges around them. This makes the dish look nice and inviting. For the full recipe, check the detailed instructions above. Drying shrimp is key. It ensures a nice sear and prevents steaming. After rinsing, pat them dry with paper towels. This simple step makes a big difference in texture. Adjusting spice levels is easy. If you like heat, add more red pepper flakes. For a milder dish, reduce the amount. You control the flavor profile, making it your own. For presentation, use a large shallow dish. Arrange the shrimp and garnish with lemon wedges and parsley. This makes your meal look inviting and fresh. Pair this dish with crusty bread. It’s perfect for soaking up the flavorful garlic oil. A crisp salad or rice also works well. For drinks, try a chilled white wine. It complements the shrimp beautifully. You can find the full recipe in the earlier sections of this article. {{image_4}} You can change the flavor of your easy garlic shrimp by adding fresh herbs. Basil and cilantro bring a bright taste. Just chop them finely and sprinkle them in at the end. You can also mix in vegetables. Bell peppers add crunch and color. Spinach wilts down and adds nutrients. You can sauté these with the garlic to infuse their flavors into the shrimp. Grilling shrimp is fun and gives a smoky flavor. To grill, thread the shrimp on skewers and brush them with olive oil and seasoning. Grill them for about 2-3 minutes on each side until they are pink. If you prefer oven-baking, preheat your oven to 400°F. Place the shrimp in a single layer on a baking sheet. Drizzle with olive oil and season them. Bake for about 8-10 minutes. They will turn pink and cook through. Both methods keep the dish simple and delicious. For the full recipe, check out the Sizzling Garlic Shrimp Delight 🦐. To keep your garlic shrimp fresh, use airtight containers. Glass or plastic containers work well. Make sure they seal tightly to lock in flavor. Store the shrimp in the fridge. They will last for up to two days. After that, the quality may drop. When reheating, use low heat to keep the shrimp tender. A skillet is great for this. Add a splash of olive oil to help restore moisture. Stir gently to avoid overcooking. If you prefer the microwave, use a microwave-safe dish. Heat for short bursts, checking often. This way, you keep that tasty garlic flavor intact. Yes, you can use frozen shrimp. Just remember to thaw them first. To thaw shrimp properly, place them in the fridge overnight or run them under cold water for about 10-15 minutes. Make sure to dry them well with paper towels. This step ensures they cook evenly. To adjust the spice level, you can add or reduce red pepper flakes. For a milder dish, use less than a teaspoon. You can also add more garlic for flavor without heat. If you want more spice, add extra red pepper flakes or some sliced jalapeños while cooking. Garlic shrimp pairs well with many sides. Here are a few options: - Steamed rice or quinoa for a filling meal - Crusty bread to soak up the garlic oil - A fresh green salad for crunch and color - Roasted vegetables for extra flavor and nutrition These sides will enhance your garlic shrimp and make it a complete meal. For the full recipe, check out the section above. This blog post shared a simple and tasty garlic shrimp recipe. We covered key ingredients, easy steps, and useful tips. You learned how to cook shrimp perfectly and adjust flavors to your liking. We also explored variations and storage tips. Now you can enjoy this dish and impress friends at dinner. With your new skills, shrimp night will be a hit! Get creative and have fun with the recipe. Enjoy cooking and delighting your taste buds!](https://dishtreats.com/wp-content/uploads/2025/06/4ce86a88-9fc6-4710-ba94-882bfeda746c-768x768.webp)

