Skip to content
About
Contact
Cookie Policy
Copyright Policy
Disclaimer
Search
Home
Dinner
Appetizer
Desserts
Drinks
About
Contact
Privacy Policy
Toggle Menu
Home
/
Dinner
- Page 30
Dinner
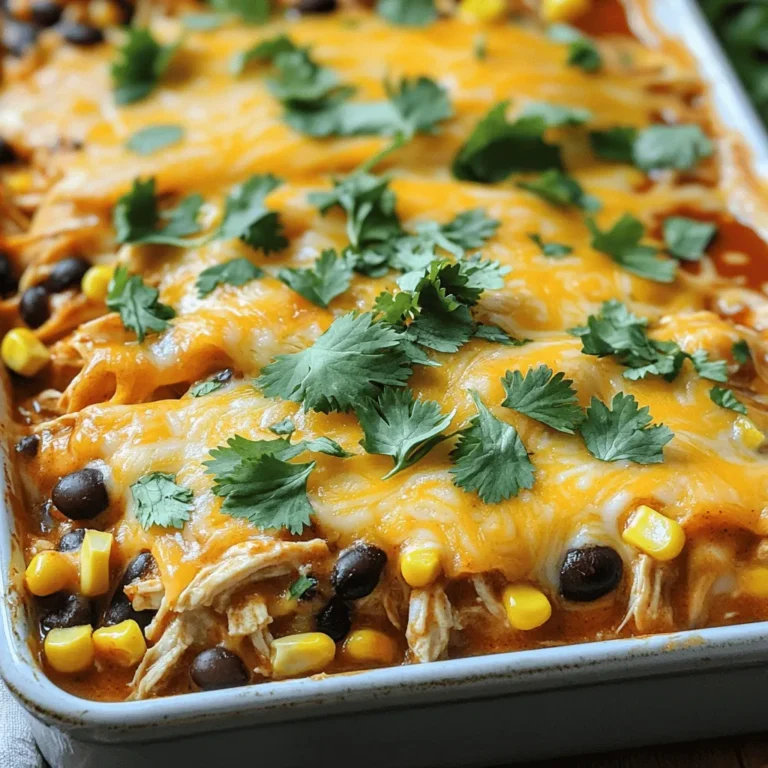
Chicken and Cheese Enchiladas Skillet Tasty Dinner Delight
Chicken and Rice Skillet Bake Simple Home Recipe
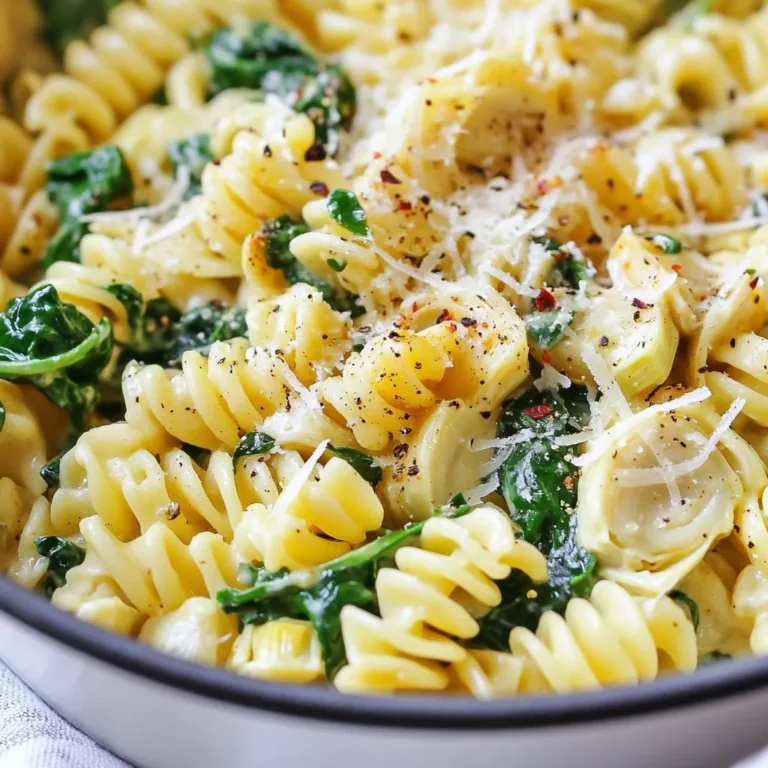
One-Pot Spinach Artichoke Pasta Creamy Delight
Three Cheese Stuffed Shells Delicious and Easy Recipe
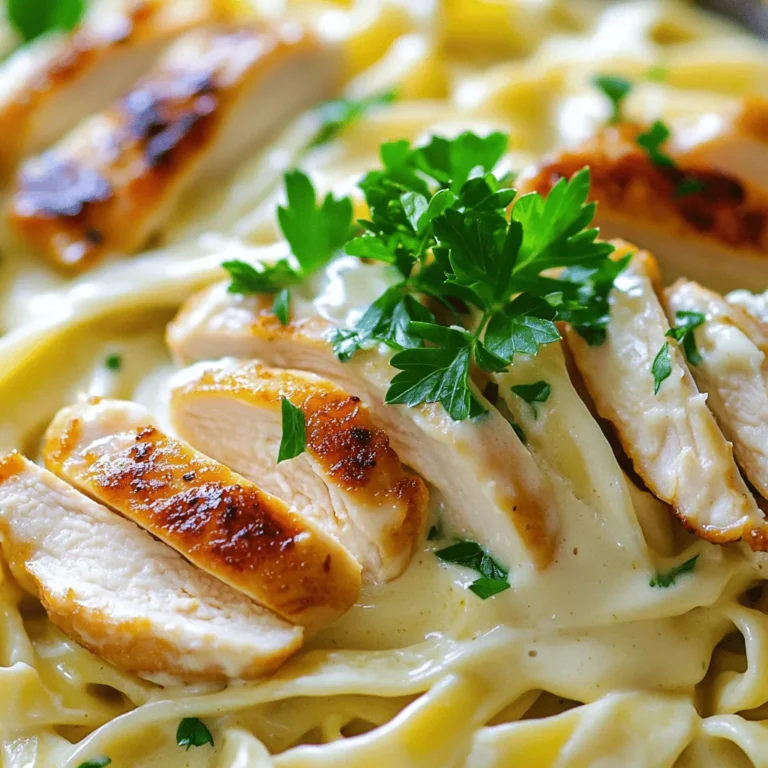
Easy Chicken Fettuccine Alfredo Creamy and Delicious Dish
One Pot Cajun Sausage Pasta Easy and Flavorful Dish
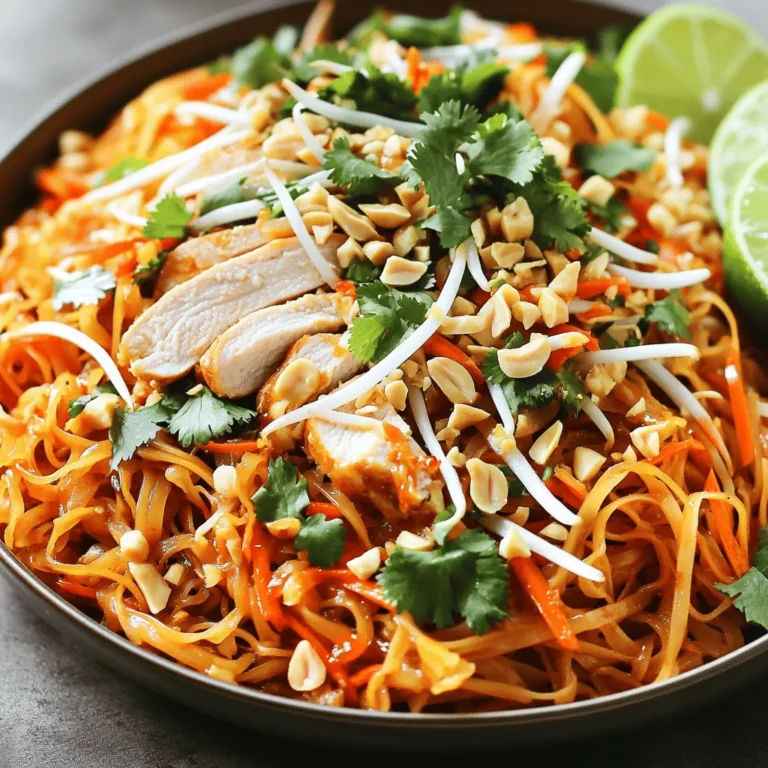
Spicy Chicken Pad Thai Bold and Flavorful Delight
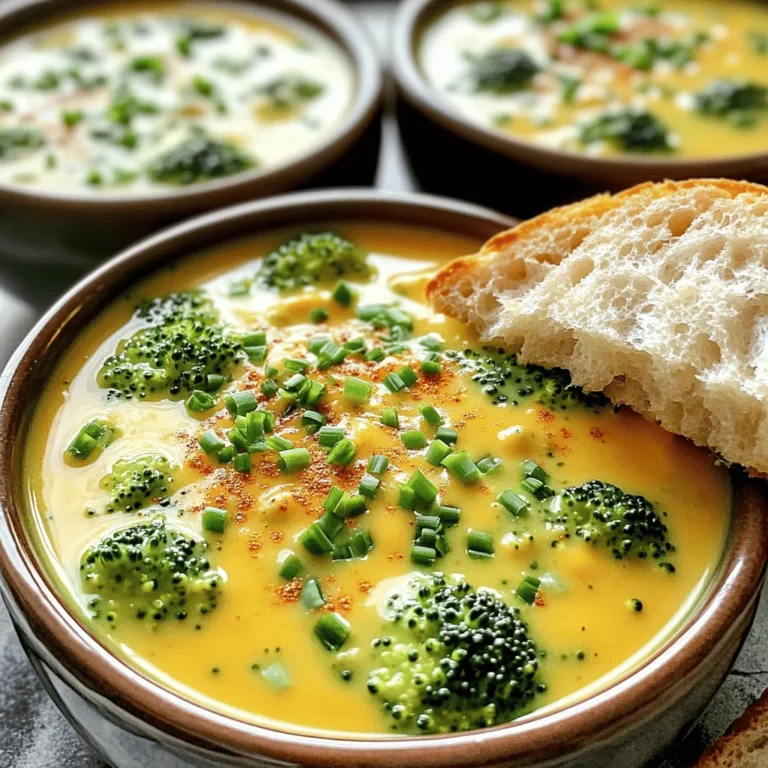
Easy Broccoli Cheddar Soup Quick and Creamy Recipe
Easy Chicken Enchilada Casserole Simple Family Meal
Homemade Chicken Gyros Flavorful and Easy Recipe
Page navigation
Previous Page
Previous
1
…
28
29
30
31
32
…
46
Next Page
Next
Home
Dinner
Appetizer
Desserts
Drinks
About
Contact
Privacy Policy
Toggle Menu Close
Search for:
Search


![- 12 oz (340g) penne pasta - 1 lb (450g) smoked sausage, sliced into rounds - 1 bell pepper, diced (choose your favorite color) - 1 medium onion, finely chopped - 3 cloves garlic, minced - 1 tablespoon Cajun seasoning - 1 teaspoon smoked paprika - 1/2 teaspoon cayenne pepper (adjust to your spice preference) - 2 cups low-sodium chicken broth - 1 cup heavy cream - Fresh parsley, chopped (for garnish) - Salt and freshly ground black pepper to taste When I make One Pot Cajun Sausage Pasta, I love how simple the ingredients are. You start with penne pasta, which cooks beautifully in the same pot. The smoked sausage gives it a rich flavor. Fresh veggies like bell pepper, onion, and garlic add color and crunch. For spices, Cajun seasoning gives that classic kick. A little smoked paprika adds depth, and cayenne pepper lets you control the heat. You can adjust it based on your taste. The chicken broth is key; it helps cook the pasta and keeps everything moist. When you add heavy cream, it makes the dish creamy and rich. Don’t forget the fresh parsley for a pop of color. A sprinkle of salt and pepper enhances all the flavors. You can find the full recipe with exact measurements and cooking steps. Enjoy making this easy and flavorful dish! 1. Heating the oil: Start by pouring two tablespoons of olive oil into a large pot. Heat it over medium heat until it shimmers. This takes about a minute. 2. Sautéing the sausage: Next, add one pound of sliced smoked sausage to the pot. Cook the sausage for about 4-5 minutes. Stir it until it turns brown and crispy. This adds great flavor. Then, remove the sausage from the pot and set it aside for later. 1. Cooking the bell pepper and onion: In the same pot, toss in one diced bell pepper and one finely chopped medium onion. Sauté these for about 3-4 minutes. You want them to soften and turn slightly translucent. 2. Adding garlic and spices: Now, add three minced garlic cloves. Cook for one more minute until it smells amazing. Then, stir in one tablespoon of Cajun seasoning, one teaspoon of smoked paprika, and half a teaspoon of cayenne pepper. Cook for another minute. This step brings out the flavors of the spices. 1. Combining ingredients in the pot: Carefully pour in two cups of low-sodium chicken broth. Use a wooden spoon to scrape any brown bits from the pot. Next, add 12 ounces of penne pasta and one can of undrained diced tomatoes. Mix everything well. 2. Simmering the mixture: Bring the mixture to a boil, then reduce the heat to low. Cover the pot and let it simmer for 12-15 minutes. Stir occasionally to keep the pasta from sticking. Cook until the pasta is tender and the liquid thickens. Now you can check the [Full Recipe] for additional details. To make sure your pasta does not stick, keep a close eye on the pot. Stir the pasta every few minutes while it cooks. This simple step prevents clumping and ensures even cooking. If you find your dish too thick, add a splash of chicken broth or water to loosen it up. For creaminess, adjust the amount of heavy cream to fit your taste. Start with one cup, then add more if you like it richer. Customizing the spice levels in your Cajun sausage pasta is easy. If you want more heat, add an extra pinch of cayenne pepper. You can also mix in some crushed red pepper flakes for a different kick. To add freshness, try throwing in herbs like thyme or oregano. These herbs bring depth to your dish and balance the spices well. Choosing the right pot is important for this dish. A large, deep pot works best since it holds all the ingredients and allows for easy stirring. I recommend using a heavy-bottomed pot to prevent burning. When sautéing, heat the oil until it shimmers, then add your sausage. This ensures a nice brown color and flavor. Always scrape the bottom of the pot to release any fond, which adds great taste to your sauce. {{image_4}} You can swap smoked sausage for different meats. Chicken or turkey sausage works well. They add less fat but keep great flavor. This dish still shines with these changes. For those with gluten issues, use gluten-free pasta. Options like brown rice pasta or chickpea pasta fit nicely. They change the texture but keep the taste. Want to change the spice? You can add more or less Cajun seasoning. If you like it mild, skip the cayenne pepper. For more heat, add a bit more. You can also add different vegetables. Spinach, zucchini, or mushrooms all mix well. They add color and nutrition, making the dish more exciting. Pair your pasta with sides for a well-rounded meal. A fresh salad adds crunch. Garlic bread brings warmth and comfort. For plating, serve in deep bowls. Garnish with fresh parsley for a pop of color. You can even sprinkle extra Cajun seasoning on top. This will enhance the flavors and make it look fancy. For the full recipe, check out One Pot Cajun Sausage Pasta. After you enjoy your One Pot Cajun Sausage Pasta, you may have leftovers. To store them, let the dish cool down first. Then, place it in an airtight container. This helps keep it fresh. You can keep it in the fridge for about 3 to 4 days. When you're ready to eat again, you can easily reheat it. Just place it in a pot over low heat, stirring often. You can also use the microwave. Heat it in short bursts, stirring in between, until it's warm. If you want to save the dish for longer, you can freeze it. First, let the pasta cool completely. Then, transfer it to a freezer-safe container. Make sure to leave some space at the top, as it may expand when frozen. You can freeze it for up to 3 months. To reheat from frozen, move it to the fridge overnight to thaw. Next, warm it in a pot or microwave until hot. You may need to add a splash of chicken broth or cream to keep it creamy. One Pot Cajun Sausage Pasta can last in the fridge for about 3 to 4 days. If you freeze it, aim to use it within 3 months for the best taste. Always check for signs of spoilage before eating. If you see any mold or if it smells off, it's best to throw it away. Remember, food safety is important for a delicious experience every time! Cajun seasoning is a blend of spices that gives dishes a bold flavor. It often includes paprika, garlic powder, onion powder, black pepper, cayenne pepper, and oregano. You can easily make it at home by mixing the following: - 1 tablespoon paprika - 1 teaspoon garlic powder - 1 teaspoon onion powder - 1 teaspoon black pepper - 1 teaspoon cayenne pepper - 1 teaspoon dried oregano - 1 teaspoon thyme Combine these in a bowl, and you have your own Cajun seasoning! This mix adds warmth and depth to your One Pot Cajun Sausage Pasta. Yes, you can easily make this dish vegetarian. Instead of sausage, you can use these options: - Plant-based sausage - Grilled mushrooms - Chopped tempeh These substitutes give a hearty texture. For protein, consider adding: - Chickpeas - Lentils - Tofu These choices keep the dish filling and nutritious while focusing on flavors. To amp up the heat in your pasta, you can adjust the spice levels. Here’s how: - Increase the cayenne pepper in the recipe. - Add crushed red pepper flakes while cooking. For more heat during cooking, try adding fresh chopped jalapeños or hot sauce. Just remember, start with a little and taste as you go! You want to enjoy the flavors without overwhelming your palate. This recipe is simple and delicious. We covered the best ingredients needed, such as penne pasta, smoked sausage, and fresh veggies. I shared tips for perfecting texture and flavor, plus ways to change things up. You can store leftovers easily and even freeze the dish for later. With this guide, cooking is quick and fun. So grab your ingredients and start creating a tasty meal today. Enjoy the process and make it your own!](https://dishtreats.com/wp-content/uploads/2025/06/1c4c8226-f553-4583-9158-57397e0bfaf8-768x768.webp)
![To make tasty chicken gyros, you need fresh and simple ingredients. Here’s what you will need: - 500g chicken breast, thinly sliced - 2 tablespoons olive oil - 1 tablespoon dried oregano - 1 teaspoon garlic powder - 1 teaspoon onion powder - 1 teaspoon smoked paprika - Salt and freshly ground black pepper, to taste - 4 pita breads - 1 cup Greek yogurt - 1 tablespoon fresh lemon juice - 1 cucumber, finely diced - 1 ripe tomato, finely diced - 1 small red onion, thinly sliced - Fresh parsley, chopped, for garnish These ingredients work together to create a rich flavor for your gyros. The chicken pairs well with the spices. The tzatziki adds a creamy texture that balances the dish. Feel free to add more flavors to your gyros. Here are some optional ingredients: - Feta cheese, crumbled - Bell peppers, thinly sliced - Hot sauce or chili flakes for spice These extras can personalize your gyros. They can boost the taste and make your meal even more exciting. Garnishes make your gyros look pretty and add flavor. Here are some great ideas: - Extra tzatziki sauce on the side - Sliced olives for a briny kick - Fresh mint or dill for added freshness Serve your gyros with a side of simple salad or roasted potatoes. This adds to the fun and makes a complete meal. For the full recipe, check the earlier section! To start, you need to make the chicken marinade. In a big bowl, mix the chicken breast with olive oil, dried oregano, garlic powder, onion powder, smoked paprika, salt, and pepper. Ensure every piece is coated well. Cover the bowl with plastic wrap or a lid. Let it sit in the fridge for at least 30 minutes. You can even marinate it for up to 2 hours. This step helps the chicken soak up all the flavors. Next, heat your grill or skillet over medium-high heat. When it's hot, add the marinated chicken slices. Cook them for about 6 to 8 minutes. Make sure to turn them occasionally. You want them golden brown and fully cooked. Use a meat thermometer to check the chicken's internal temperature. It should reach 75°C (165°F) to be safe to eat. While the chicken cooks, prepare the tzatziki sauce. In a medium bowl, mix Greek yogurt, fresh lemon juice, finely diced cucumber, salt, and pepper. Stir it well and set it aside. Letting it sit helps the flavors blend together nicely. This sauce adds a cool taste to your gyros. It's a perfect match for the warm chicken. For the full recipe including all ingredients and steps, see [Full Recipe]. When making chicken gyros, many people make simple errors. Here are some to watch for: - Not marinating long enough: Marinate your chicken for at least 30 minutes. Longer gives better flavor. - Overcrowding the grill: Give each piece space. This helps the chicken cook evenly. - Skipping the meat thermometer: Always check if chicken is at 75°C (165°F). This keeps it safe to eat. You can easily change the recipe to fit your needs. Here are some ideas: - Gluten-free: Use gluten-free pita or lettuce wraps instead of pita bread. - Dairy-free: Swap Greek yogurt with a non-dairy yogurt for the tzatziki sauce. - Low-carb: Serve the chicken on a salad instead of using pita bread. Grilling chicken gyros can be easy with a few tips: - Heat control: Make sure your grill is hot before adding chicken. This gives nice grill marks. - Avoid pressing down: Don’t press the chicken with a spatula. This releases juices and dries it out. - Let it rest: Always let the chicken rest after cooking. This keeps it juicy when you slice it. Using these tips will help you craft great homemade chicken gyros. For the complete recipe, check out the Full Recipe section. {{image_4}} You can swap chicken with other meats. Try beef, lamb, or pork. Each protein brings its own taste. Marinate them the same way as chicken. This gives you tasty options for your gyros. For example, beef adds a rich flavor. Lamb has a unique zest. Pork is juicy and tender. All these variations keep your meals exciting. If you prefer plant-based meals, there are great choices. Use marinated mushrooms or eggplant as your base. Grilled zucchini or bell peppers work well too. For protein, try chickpeas or lentils. These options are filling and tasty. You can still make a delicious tzatziki sauce with vegan yogurt. This lets everyone join in on the fun. Want to change up the flavor? Add spices like cumin or coriander to the marinade. This gives your gyros a warm, earthy taste. You can also try different herbs, like mint or dill. They add a fresh twist. For a kick, include hot sauce or chili flakes. Each tweak can create a new flavor experience. Enjoy creating your own unique version of homemade chicken gyros. For the full recipe, check the earlier section. To keep your leftover gyros fresh, wrap them tightly. I recommend using plastic wrap or aluminum foil. This helps prevent air from getting in and keeps the flavors locked in. Place the wrapped gyros in an airtight container or a resealable bag. Store them in the fridge for up to three days. If you notice any extra moisture, you can add a paper towel inside to absorb it. Reheating gyros can be easy. To maintain their taste and texture, use a skillet or grill. Heat it over medium heat. Place the gyros in the skillet for about 3-4 minutes. Turn them halfway through so they warm evenly. If you prefer, you can also use a microwave. Just remember to wrap them in a damp paper towel. This keeps them from drying out. Heat for 30 seconds, then check. If they need more time, heat in 10-second bursts. If you want to save gyros for later, freezing is a great option. Start by letting the cooked chicken cool completely. Then, wrap the chicken in plastic wrap. Place it in a freezer-safe bag or container. You can freeze the chicken for up to three months. When you are ready to eat, thaw it in the fridge overnight. Reheat it as mentioned earlier. You can also freeze the tzatziki sauce separately. Just remember to stir it well after thawing. To make tzatziki sauce, mix Greek yogurt, fresh lemon juice, and diced cucumber. Add salt and pepper for taste. This sauce adds a cool, creamy touch to your gyros. It’s simple and fresh. Let it sit for a few minutes to blend the flavors. Yes, you can use store-bought pita bread. It saves time and works well. Just warm the pita on the grill or in a skillet. This makes it soft and ready to hold your tasty filling. Homemade pita is great, but store-bought is quick and easy. Serve chicken gyros with a side of Greek salad or roasted veggies. You can also add extra tzatziki for dipping. For drinks, try a refreshing lemonade or some iced tea. These sides enhance your meal and bring more flavor to the table. For the full recipe, check out the complete guide on making Homemade Chicken Gyros. Homemade chicken gyros are easy and fun to make. We covered key ingredients, cooking steps, and tips to avoid mistakes. You can add your own twist by using different proteins or flavors. Storing leftovers or prepping meals ahead keeps dinner simple. With all this info, you can create a tasty meal your whole family will love. Enjoy making gyros that bring great joy to your table!](https://dishtreats.com/wp-content/uploads/2025/06/a33d49ac-ff2d-4809-8657-a37e258bd1fd-768x768.webp)