Skip to content
About
Contact
Cookie Policy
Copyright Policy
Disclaimer
Search
Home
Dinner
Appetizer
Desserts
Drinks
About
Contact
Privacy Policy
Toggle Menu
Home
/
Dinner
- Page 17
Dinner
Maple Glazed Brussels Sprouts Delightful and Simple Dish
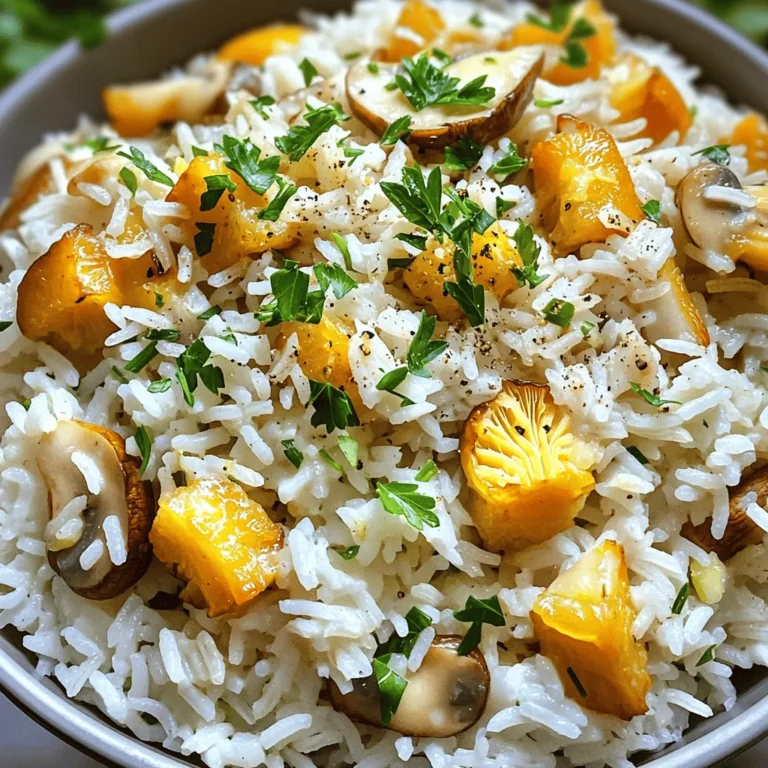
Garlic Butter Mushroom Rice Easy and Flavorful Meal
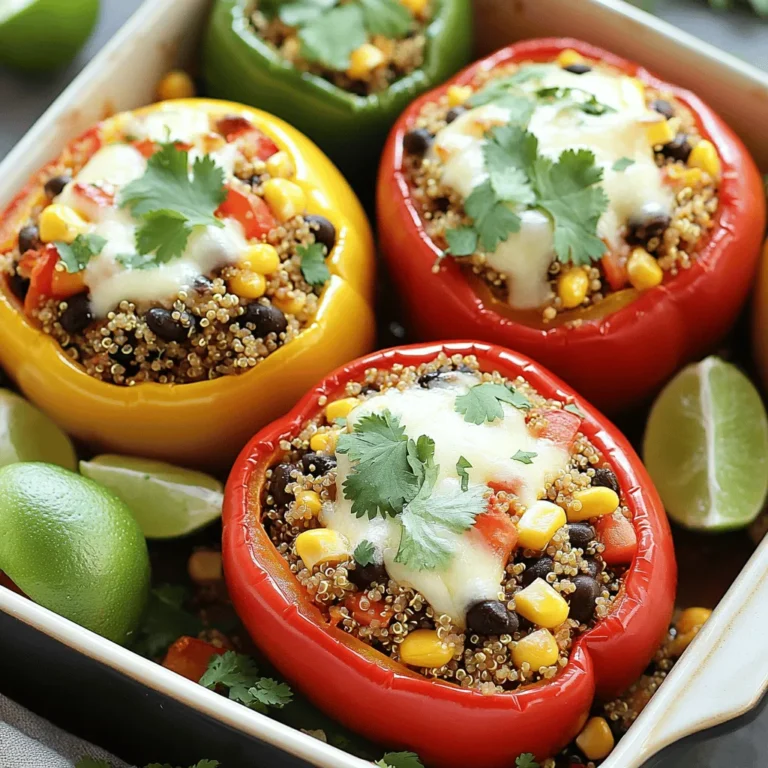
Mexican Quinoa Stuffed Peppers Flavorful and Healthy
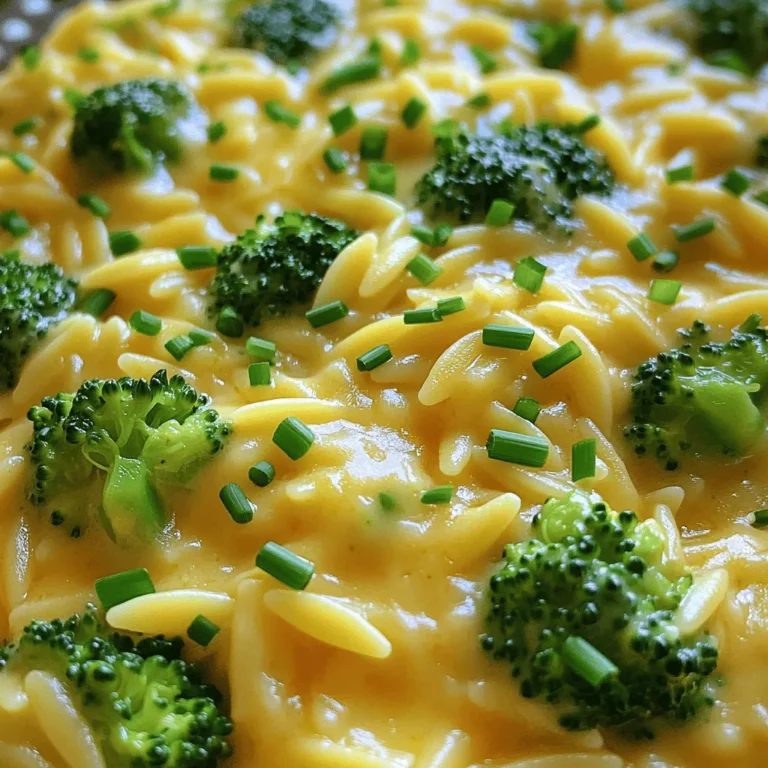
Creamy Broccoli Cheddar Orzo Simple and Tasty Dish
Lemon Garlic Scallops Savory and Quick Recipe Guide
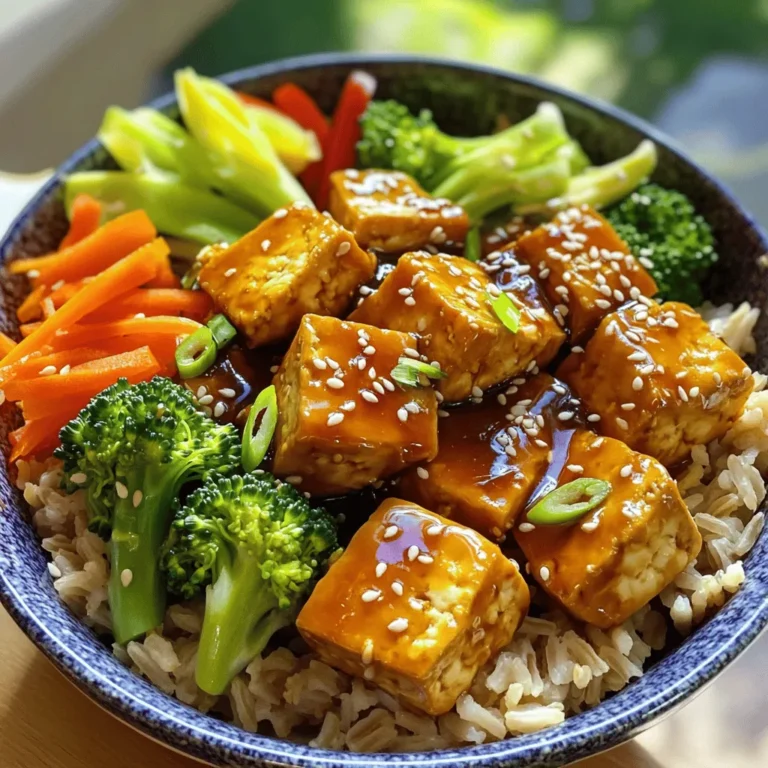
Teriyaki Tofu Bowls Flavorful and Wholesome Meal
Instant Pot Creamy Mac and Cheese Delicious Recipe
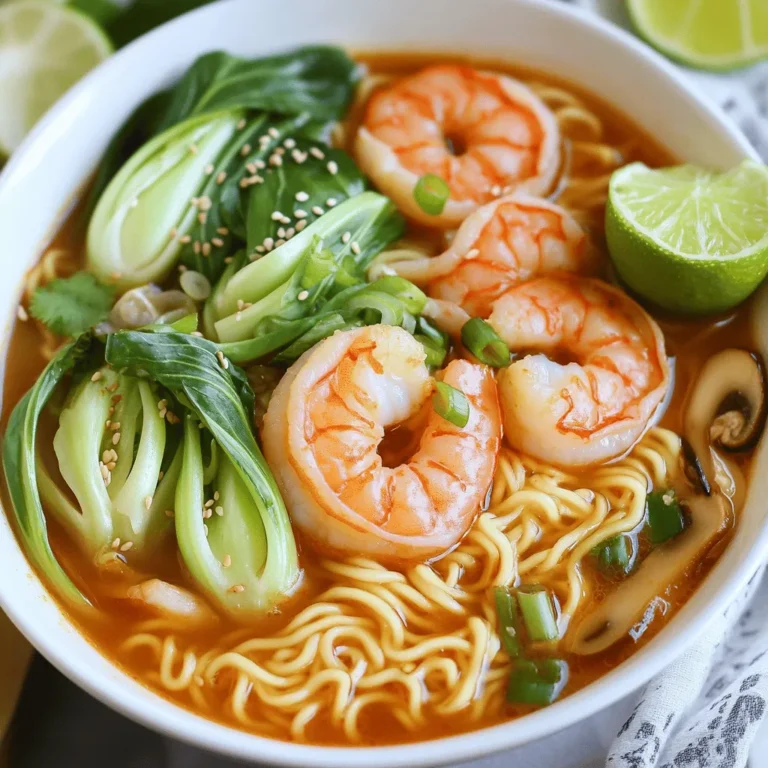
Spicy Shrimp Ramen Bowls Flavorful and Satisfying Meal
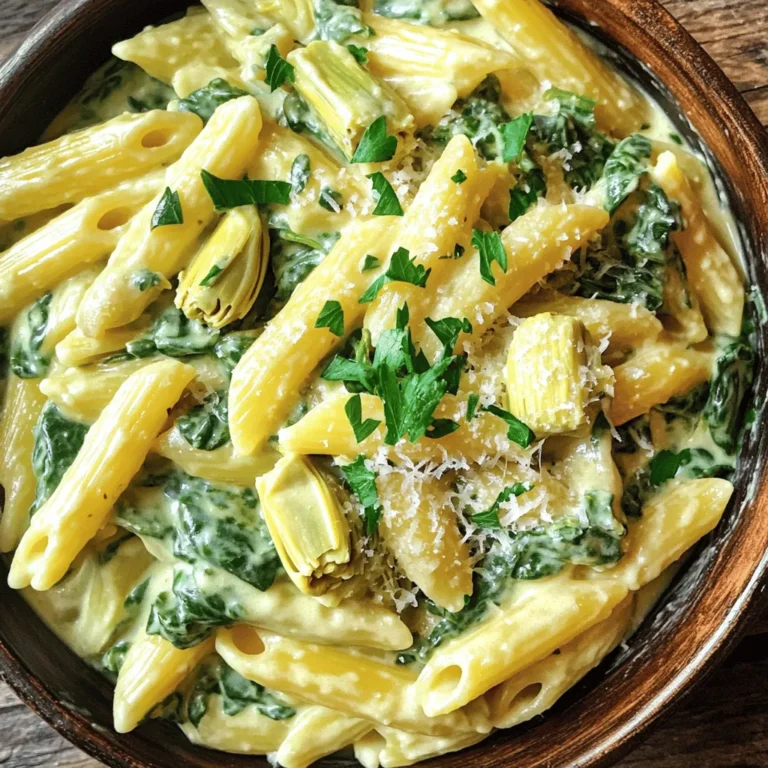
Creamy Spinach Artichoke Pasta Delightful Dinner Dish
Garlic Butter Lemon Salmon Foil Packs Quick and Tasty
Page navigation
Previous Page
Previous
1
…
15
16
17
18
19
…
46
Next Page
Next
Home
Dinner
Appetizer
Desserts
Drinks
About
Contact
Privacy Policy
Toggle Menu Close
Search for:
Search

![To make this tasty dish, gather these simple ingredients: - 1 pound Brussels sprouts, trimmed and halved - 3 tablespoons extra virgin olive oil - 1/4 cup pure maple syrup - 2 tablespoons balsamic vinegar - 1 teaspoon Dijon mustard - 1/2 teaspoon fine sea salt - 1/4 teaspoon freshly ground black pepper - 1/4 cup pecans, roughly chopped for added crunch - 1/4 cup dried cranberries for a touch of sweetness - Fresh thyme leaves for an aromatic garnish (optional) You can easily adjust ingredient amounts based on what you need. Here are some quick conversions: - If you want to make more, use 2 pounds of sprouts and double the glaze. - For less, cut the amounts in half. This still keeps the taste great. - In a pinch, you can swap the pecans for walnuts or almonds. This dish not only tastes good but is also good for you. Here’s a quick look at what’s inside: - Calories: About 200 per serving - Fat: 12 grams (mostly healthy fats from olive oil and nuts) - Carbohydrates: 24 grams (includes natural sugars from maple syrup) - Fiber: 5 grams (great for digestion from Brussels sprouts) - Protein: 3 grams (from nuts and sprouts) This breakdown helps you see the benefits of each ingredient. Enjoy making this dish with fresh, seasonal produce for the best flavor and health benefits. For the complete recipe, check out the Full Recipe. Start by preheating your oven to 400°F (200°C). This step is key for getting perfect crispness. While the oven warms up, clear your kitchen counter. Gather all your tools and ingredients. Having everything ready makes cooking much easier. Take 1 pound of Brussels sprouts. Trim off the ends and cut them in half. Place the halved sprouts in a large mixing bowl. Add 3 tablespoons of extra virgin olive oil and 1/2 teaspoon of fine sea salt. Sprinkle in 1/4 teaspoon of freshly ground black pepper. Toss the sprouts until they are well coated. This ensures each sprout gets flavor. Spread the seasoned Brussels sprouts on a baking sheet. Make sure the cut sides face down. This helps them brown nicely. Place the baking sheet in your preheated oven. Roast for 20-25 minutes. They should be crispy and golden. While they roast, make the maple glaze. In a small saucepan, mix 1/4 cup of pure maple syrup, 2 tablespoons of balsamic vinegar, and 1 teaspoon of Dijon mustard. Heat over medium heat but do not let it boil. Once the sprouts are ready, drizzle the glaze over them. Toss gently to coat. Return the glazed sprouts to the oven for 5 more minutes. This step caramelizes the glaze, making it rich and tasty. After that, take them out and add 1/4 cup of roughly chopped pecans and 1/4 cup of dried cranberries. These add crunch and sweetness. If you want, garnish with fresh thyme leaves for even more flavor. For the full details, check the Full Recipe. When you pick Brussels sprouts, look for bright green ones. They should feel firm and heavy in your hand. Avoid any that have yellow leaves or feel soft. The size matters too; smaller sprouts are sweeter and more tender. If you can, buy them on the stalk. They stay fresh longer that way. Caramelization makes Brussels sprouts sweet and tasty. To get it right, roast them cut-side down. This lets them get nice and brown. Make sure they have space on the baking sheet. If they are too close together, they will steam instead of roast. Use high heat, about 400°F, for best results. Check them halfway through and give them a stir for even cooking. One big mistake is overcooking the sprouts. They should be tender but still have a bit of crunch. Avoid using too much glaze; it can make them soggy. Always glaze right after roasting, then caramelize them for just a few minutes. This step adds flavor without losing the sprout's crispness. Lastly, don’t skip the nuts and cranberries; they add great texture and taste. For the full recipe, check the [Full Recipe]. {{image_4}} You can change the taste of maple glazed Brussels sprouts by adding different nuts or seeds. Try walnuts for a rich flavor or sunflower seeds for a crunch. Almonds also work well; they add a nice texture and nutty taste. Each option gives a new twist to your dish. Just sprinkle them on top after roasting for the best crunch and flavor. If you need to adjust for dietary needs, it’s easy. Use agave syrup instead of maple syrup for a vegan option. For a nut-free dish, skip the pecans and use pumpkin seeds. You can also swap balsamic vinegar with apple cider vinegar for a light zing. These swaps keep the dish tasty while meeting your needs. Brussels sprouts shine in fall and winter, but you can adapt them year-round. In spring, add fresh herbs like basil or parsley for brightness. In summer, pair with grilled corn for a sweet twist. You can also mix in seasonal veggies like carrots or sweet potatoes for color and taste. This way, your dish stays fresh and exciting no matter the season. For the full recipe, check out the Maple Glazed Brussels Sprouts Delight. After enjoying your maple glazed Brussels sprouts, store leftovers right. Place them in an airtight container. They will stay fresh for about three days in the fridge. Keep them away from strong-smelling foods. This helps maintain their flavor. When you reheat, aim to keep the sprouts crispy. Use your oven for the best results. Preheat it to 350°F (175°C). Spread the sprouts on a baking sheet. Heat them for about 10-15 minutes. This method helps keep them crunchy and flavorful. You can also microwave them for quick reheating, but they may not stay as crispy. If you want to enjoy these sprouts later, freezing works too. First, let them cool completely. Spread them on a baking sheet in a single layer. Freeze until solid, then transfer to a zip-top bag. They can last up to three months in the freezer. When ready to eat, thaw them overnight in the fridge. Reheat using the oven for the best taste. Enjoy your tasty treat again! Yes, you can prepare these Brussels sprouts ahead of time. After roasting them, let them cool. Store them in an airtight container in the fridge. They stay fresh for up to three days. When you're ready to serve, just reheat them in the oven. This keeps them crispy and tasty. These Brussels sprouts pair well with many dishes. Serve them alongside roasted chicken or grilled salmon for a complete meal. They also shine as a side dish for holiday dinners. You can even enjoy them with a grain salad or pasta for a light lunch. The sweet glaze adds a nice touch to any plate. You can easily change the sweetness of the glaze. If you want it sweeter, add more maple syrup. Start with an extra tablespoon and taste as you go. For a less sweet glaze, reduce the maple syrup. You can add more balsamic vinegar to balance the flavor. Adjust it to match your taste! We explored how to make Maple Glazed Brussels Sprouts from start to finish. You learned about ingredients, cooking steps, and storage tips. I shared helpful tricks to avoid mistakes and ensure a tasty outcome. You can now customize your dish with variations and serve it with confidence. Remember, fresh ingredients and careful roasting lead to the best flavors. Enjoy making this dish and impress your family and friends. With practice, your skills will grow. Happy cooking!](https://dishtreats.com/wp-content/uploads/2025/07/6c550e47-e99c-4554-a6d4-422f3e5f831a-768x768.webp)
![To make lemon garlic scallops, you need fresh and simple ingredients. Here is what you will need: - 1 pound sea scallops, thawed if previously frozen - 3 tablespoons extra virgin olive oil - 4 cloves garlic, finely minced - Zest and juice of 1 large lemon - Sea salt and freshly cracked black pepper, to taste - 1 tablespoon fresh parsley, finely chopped - Lemon slices for an elegant garnish Sea scallops are best for this dish. They have a sweet flavor and a firm texture. Choose bright, glossy scallops with a clean scent. Avoid any that smell fishy. Fresh garlic adds a punch of flavor. It gives depth and richness to the dish. Lemon brings brightness and acidity, balancing the sweet scallops. The zest adds an extra layer of lemony goodness. When sourcing ingredients, look for a trusted fish market. Ask about the origin of the scallops. Fresh, high-quality ingredients make a big difference in taste. You want to create a dish that shines with flavor and freshness. For the olive oil, choose a high-quality extra virgin variety. It enhances the overall flavor profile. Fresh parsley adds color and freshness at the end. Always use fresh herbs for the best taste. By selecting quality ingredients, you set the stage for a memorable meal. Follow the [Full Recipe] to create this delightful dish! First, drying scallops is key. Use paper towels to pat them dry. Moisture will stop them from searing well. Next, season both sides with sea salt and black pepper. A light touch works wonders here. When you place them in the skillet, space them out. Overcrowding will steam them instead of searing them. Heat your olive oil in a large skillet on medium-high heat. Watch for it to shimmer but not smoke. Carefully add the dry scallops in a single layer. Let them sear for 2-3 minutes without moving them. This helps form a nice golden crust. Once they look brown, gently flip them using tongs. Now, add the minced garlic to the pan. Cook for another 2-3 minutes. Stir the garlic to stop it from burning. The scallops should become opaque and fully cooked. Remove the skillet from heat right after cooking. Add the lemon zest and juice to the pan. Toss the scallops gently so they soak up the flavors. Lastly, sprinkle fresh parsley over the top. This adds color and fresh taste. For serving, place the scallops on a plate and drizzle the pan juices over them. Garnish with lemon slices for an elegant touch. You can pair them with sautéed greens or a crisp salad for a complete meal. - Overcooking scallops: This is a big mistake. Scallops cook fast. If you cook them too long, they become rubbery. Aim for a golden crust on the outside and opaque inside. - Not using enough oil for searing: Oil helps create a nice crust. If you skimp on oil, the scallops may stick. Use at least three tablespoons to get good results. - Ignoring the resting time post-cooking: Let your scallops rest for a minute after cooking. This helps them stay juicy. Don’t rush this step! - Recommended skillet types for best results: A heavy skillet works best. Cast iron or stainless steel distributes heat evenly. Avoid non-stick pans; they won’t give you a good sear. - Importance of temperature control: Start with a hot skillet. If it's too cool, scallops won’t brown. Heat the oil until it shimmers. This shows it’s ready for the scallops. - Suggestions for seasoning variations: Besides lemon and garlic, try fresh herbs or spices. Thyme, chili flakes, or even a splash of white wine can add depth. Experiment to find your favorite mix! For the full recipe, check out the details above and get cooking! {{image_4}} You can elevate your lemon garlic scallops with a few simple tweaks. - Incorporating herbs: Add fresh thyme or basil for a fragrant twist. These herbs enhance the dish’s aroma and add depth to the flavor. - Alternative citrus options: Try lime or orange juice for a unique taste. Each citrus brings its own brightness and pairs nicely with scallops. - Adding heat: If you like spice, sprinkle in some chili flakes or drizzle Sriracha. The heat balances the dish’s richness and excites your taste buds. Pair your scallops with sides to create a full meal. Here are some ideas: - Suggested side dishes: Serve with sautéed greens for a fresh crunch. A light salad or creamy risotto also works well to complement the scallops. - Pairing with wines or cocktails: A chilled white wine, like Sauvignon Blanc, enhances the dish. For cocktails, a gin and tonic is refreshing and bright. - Plating ideas: For a restaurant-style look, place the scallops on a clean plate. Drizzle the pan juices over them and add lemon slices for a pop of color. A sprinkle of parsley adds a final touch of green. For the full recipe, check out the Lemon Garlic Scallops recipe. After you finish your Lemon Garlic Scallops, store any extras right. First, place them in a shallow, airtight container. This helps keep them fresh. You can put them in the fridge for up to two days. If you wait longer, the taste and texture change. To reheat, use a non-stick skillet. Heat it over low to medium heat. Add a splash of water or broth to keep them moist. Cover the pan with a lid. This method helps keep the scallops tender. You can freeze scallops, but do it right. Raw scallops freeze well if you place them in a sealed bag. Remove as much air as possible. They can stay fresh for up to three months. If you want to freeze cooked scallops, make sure they cool first. Then, follow the same bag method. To thaw, leave them in the fridge overnight. Never thaw scallops in warm water. This can ruin their texture. When you reheat frozen scallops, use low heat again. Check them often to avoid overcooking. Enjoy your scallops as fresh as possible! For the full recipe, check out the details above. You should use sea scallops for this recipe. Sea scallops are larger and have a sweet taste. Bay scallops are smaller and can be more delicate. They work well in soups or pasta but may not sear as nicely. When picking scallops at the market, look for these signs: - They should smell fresh, like the ocean. - The meat should be firm and glossy. - Avoid scallops that look dry or have brown spots. Yes, you can use other oils. Grapeseed oil or avocado oil are good options. They have high smoke points, too. Using different oils can change the flavor. Olive oil adds a rich taste, while grapeseed is lighter. Choose based on your preference and what you have on hand. Perfectly cooked scallops are opaque and firm. They should have a golden crust outside. The safe internal temperature for scallops is 145°F (63°C). Use a food thermometer to check. If you don’t have one, look for that golden color and firm texture. For a full recipe, check out the Lemon Garlic Scallops guide! Lemon garlic scallops are a tasty dish that combines fresh ingredients and simple steps. Using quality sea scallops, fresh garlic, and lemon makes all the difference. I shared tips for cooking and avoiding common mistakes, like overcooking. Remember, you can customize your flavors with herbs or spices. Enjoy your cooking journey. Perfect scallops can impress anyone. With practice, you’ll master this dish and feel confident serving it. Take your time and savor the process!](https://dishtreats.com/wp-content/uploads/2025/07/19c1a638-1668-4343-8a69-d1fc169e2d79-768x768.webp)
![Here’s what you need for a creamy, dreamy mac and cheese: - 1 lb elbow macaroni - 4 cups water - 2 tablespoons unsalted butter, divided - 1 teaspoon garlic powder - 1 teaspoon onion powder - ½ teaspoon smoked paprika - Salt and pepper, to taste - 2 cups sharp cheddar cheese, shredded - 1 cup mozzarella cheese, shredded - ½ cup cream cheese, softened - ½ cup whole milk Gather these ingredients to make your Instant Pot creamy mac and cheese. The elbow macaroni cooks perfectly in the Instant Pot, soaking up all the flavors. The two types of cheese give a rich taste. Cream cheese adds smoothness, while whole milk makes it extra creamy. Each spice, like garlic and paprika, adds a nice touch. Want to make your mac and cheese even better? Try these add-ins: - Cooked bacon for a salty crunch - Steamed broccoli for a healthy twist - Diced tomatoes for freshness - Jalapeños for heat Feel free to mix and match! You can make it just how you like. For the full recipe, check out the detailed cooking steps. Gather all your ingredients. You will need: - 1 lb elbow macaroni - 4 cups water - 2 tablespoons unsalted butter, divided - 1 teaspoon garlic powder - 1 teaspoon onion powder - ½ teaspoon smoked paprika - Salt and pepper, to taste - 2 cups sharp cheddar cheese, shredded - 1 cup mozzarella cheese, shredded - ½ cup cream cheese, softened - ½ cup whole milk Measure everything out before you start. This makes cooking easier and faster. Pour 4 cups of water into your Instant Pot. Add the elbow macaroni, 1 tablespoon of unsalted butter, garlic powder, onion powder, smoked paprika, and a pinch of salt. Stir this mix well to coat the pasta. Now, close the lid and set the valve to sealing. Choose the manual cooking option and set the timer to cook on high pressure for 4 minutes. Once the time is up, do a quick release by moving the valve to venting. Open the lid once the steam has escaped. Add the remaining tablespoon of unsalted butter, shredded cheddar cheese, shredded mozzarella cheese, softened cream cheese, and whole milk. Stir everything together with a spatula until it’s creamy. If it’s too thick, add a little more milk for a smoother texture. Season with salt and pepper to your liking. Stir again to mix in the flavors. For the complete recipe, check out the Full Recipe. Enjoy your creamy mac and cheese! To make your mac and cheese super creamy, use a mix of cheeses. I love combining sharp cheddar and mozzarella. The cheddar gives a bold flavor, while mozzarella adds stretchiness. Cream cheese also helps create a rich texture. If it's too thick, add a splash of whole milk. This will help achieve the creamy consistency you want. Here are some great cheese combos: - Sharp cheddar - Mozzarella - Cream cheese - Gruyere - Fontina Mixing these cheeses gives depth and flavor. Try different amounts to find your favorite mix. You can also add a bit of parmesan for a salty kick. Common mistakes can ruin your dish. First, don't overcook the pasta. Set your timer for 4 minutes. Overcooked pasta becomes mushy. Second, be careful when releasing steam. Always use a kitchen towel for safety. Lastly, remember to season well. Taste your mac and cheese before serving. Add more salt and pepper if needed. For more details, check out the Full Recipe. {{image_4}} You can make your mac and cheese heartier by adding protein. Cooked chicken or crispy bacon works great. Simply chop the cooked chicken or crumble the bacon into pieces. Stir it in after mixing the cheese. This adds flavor and makes it a full meal. For a vegan twist, swap the dairy for plant-based ingredients. Use cashew cream or coconut milk in place of whole milk. Replace the cheese with vegan cheese or nutritional yeast for a cheesy taste. This keeps the dish creamy while making it dairy-free. Add extra flavor by mixing in spices and herbs. A dash of cayenne pepper gives it a kick. Fresh herbs like basil or thyme add brightness. Try Italian seasoning for a different twist. You can also add mustard powder for depth. Experiment to find your favorite mix. For the full recipe, check out [Full Recipe]. To store your creamy mac and cheese, let it cool first. Place it in an airtight container. You can keep it in the fridge for up to three days. Make sure it is sealed tightly to keep it fresh. If you want to enjoy it later, consider freezing it. When you want to reheat mac and cheese, use the microwave or stovetop. If using the microwave, place your serving in a bowl. Add a splash of milk to keep it creamy. Heat it in short bursts, stirring in between. For the stovetop, warm it in a pot over low heat. Stir well and add milk if needed. This helps it regain its creamy texture. To freeze mac and cheese, use an airtight container or freezer bag. Make sure it is cool before you put it in. It can last in the freezer for up to three months. When you are ready to eat it, thaw it overnight in the fridge. Then, reheat using one of the methods above. This way, you can enjoy that yummy flavor again! For the full recipe, check the details above. Yes, you can use gluten-free pasta in this recipe. Just choose your favorite brand. Cook times may vary slightly, so check the package instructions. Gluten-free pasta can be just as creamy and tasty as regular pasta. To spice up your mac and cheese, add cayenne pepper or red pepper flakes. Start with a small amount, like 1/4 teaspoon, and taste as you go. You can also mix in some diced jalapeños for a fresh kick. Adjust it based on your spice level preference. Any Instant Pot model works well for this creamy mac and cheese. I recommend using a model with at least a 6-quart capacity. This size gives enough room for the pasta and water. The Instant Pot Duo or Ultra are popular choices, offering great features for beginners and pros alike. For the full recipe, check the link. This blog has shared everything you need for perfect mac and cheese in your Instant Pot. We covered the needed ingredients, cooking steps, and tips to avoid mistakes. You learned how to make it creamy and flavorful, even with variations. Remember to store leftovers properly for later. Keep experimenting with flavors and ingredients to find what you enjoy. Each recipe can be a new adventure. Enjoy your cooking journey!](https://dishtreats.com/wp-content/uploads/2025/07/aef5e05b-bf60-4c96-8d62-11668510c0c6-768x768.webp)
 for Garlic Butter Lemon Salmon Foil Packs. In this article, you learned how to make Garlic Butter Lemon Salmon Foil Packs. We covered the main ingredients, step-by-step cooking instructions, and helpful tips to ensure success. You can also explore flavor variations and storage options for leftovers. This dish is simple yet delicious, making it perfect for dinner. With these techniques, you can impress friends and family with your cooking. Enjoy your meal and feel proud of your kitchen skills!](https://dishtreats.com/wp-content/uploads/2025/07/636e4153-d701-4cda-a9a1-5094e2b11f0e-768x768.webp)