Skip to content
About
Contact
Cookie Policy
Copyright Policy
Disclaimer
Search
Home
Dinner
Appetizer
Desserts
Drinks
About
Contact
Privacy Policy
Toggle Menu
Home
/
Dinner
- Page 16
Dinner
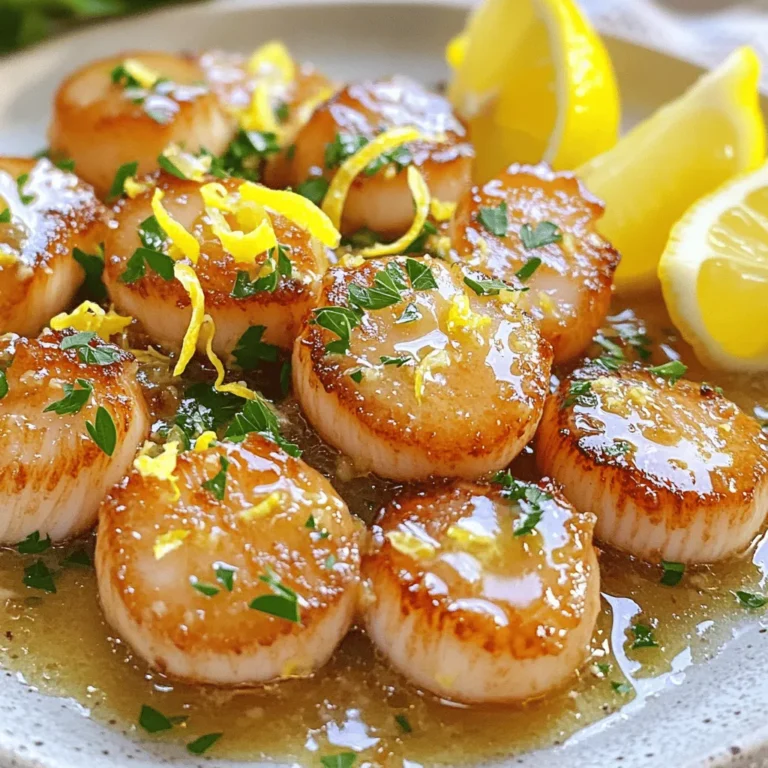
Garlic Lemon Butter Scallops Tasty Seafood Delight
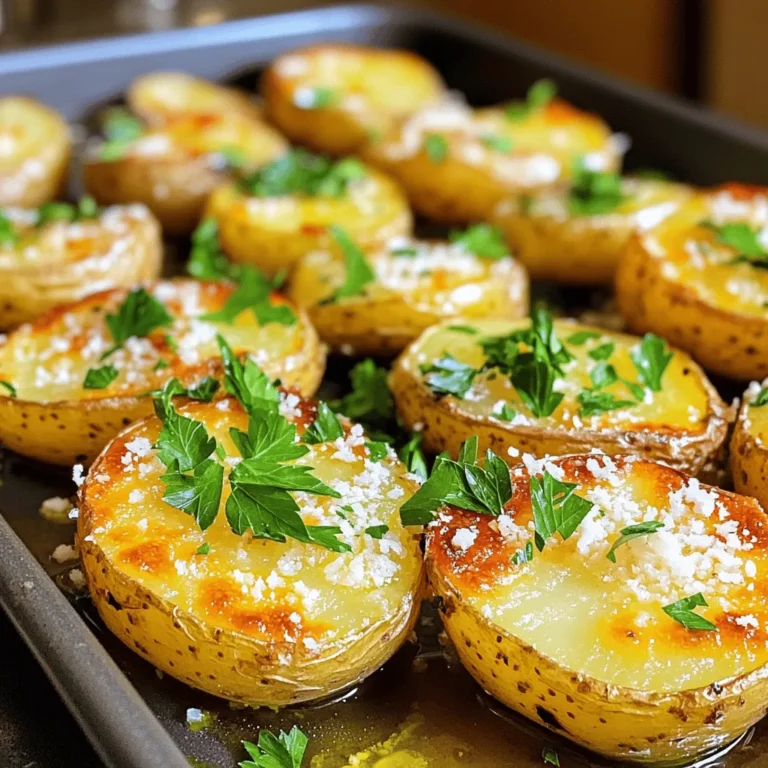
Parmesan Herb Roasted Potatoes Flavorful Side Dish
Baked Parmesan Crusted Chicken Easy Dinner Delight
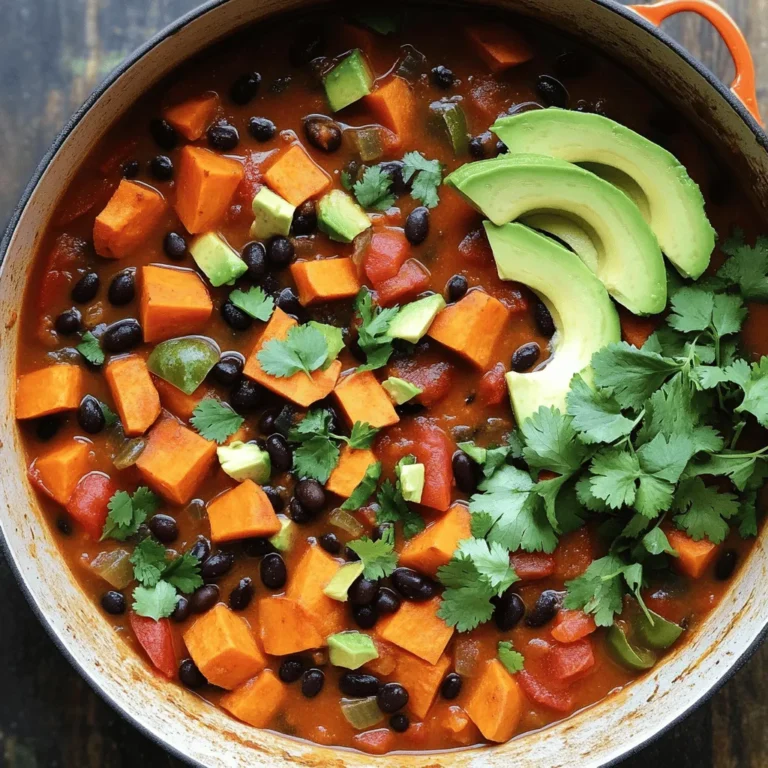
Sweet Potato Black Bean Chili Flavorful and Hearty Dish
Greek Chicken Gyros Flavorful and Simple Recipe
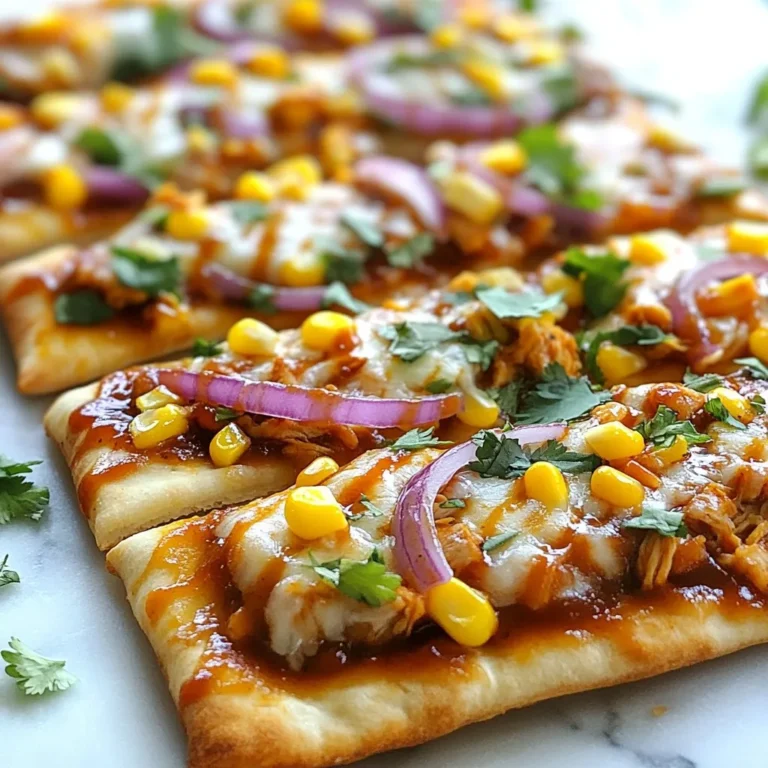
BBQ Chicken Flatbread Pizza Tasty and Easy Recipe
Spicy Peanut Zoodle Bowl Bold and Flavorful Meal
BBQ Ranch Chicken Salad Flavorful and Easy Recipe
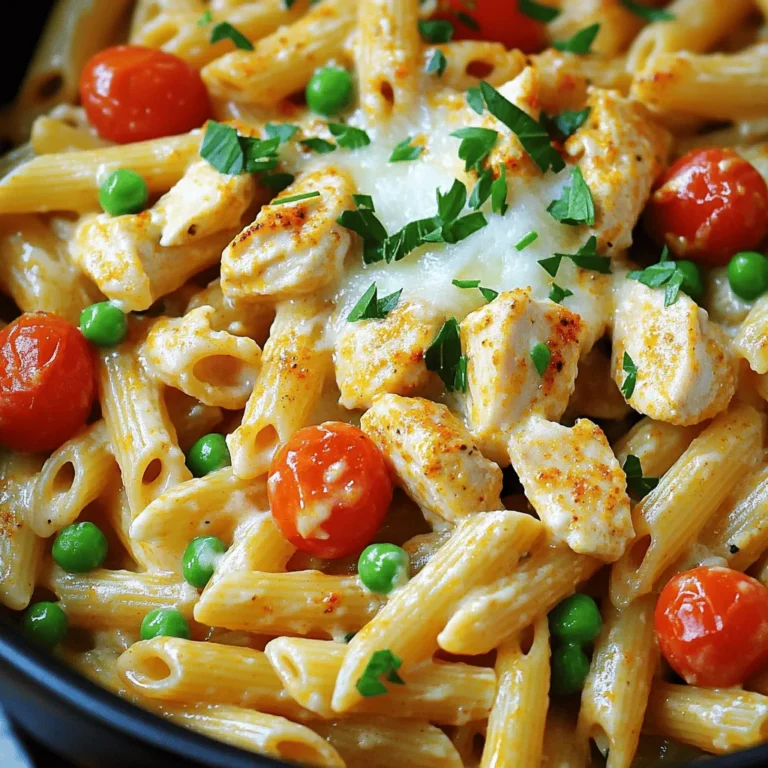
One-Pot Creamy Cajun Pasta Flavorful and Easy Meal
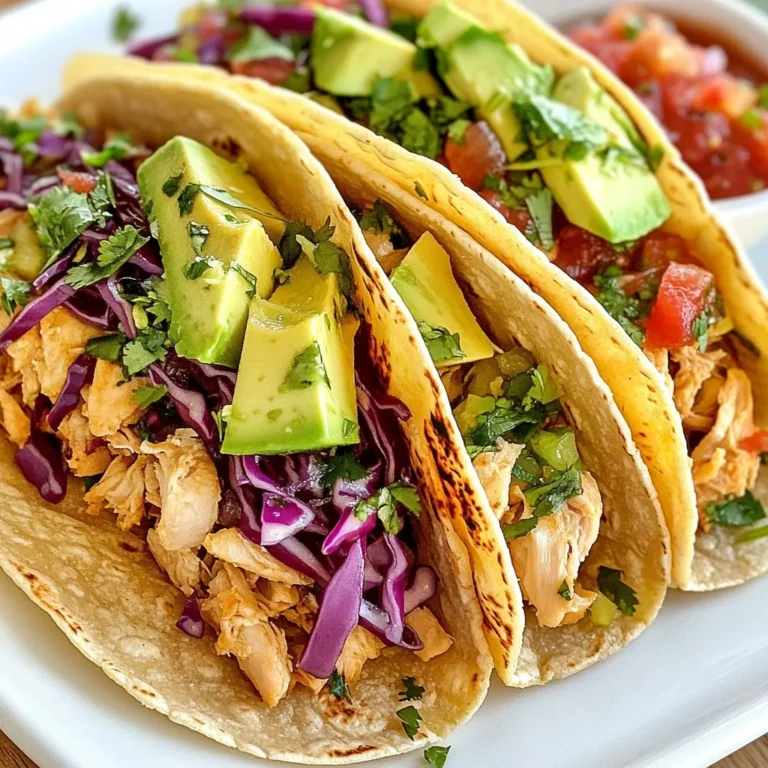
Cilantro Lime Chicken Tacos Flavorful and Fresh Meal
Page navigation
Previous Page
Previous
1
…
14
15
16
17
18
…
46
Next Page
Next
Home
Dinner
Appetizer
Desserts
Drinks
About
Contact
Privacy Policy
Toggle Menu Close
Search for:
Search

![- 4 boneless, skinless chicken breasts - 1 cup finely grated Parmesan cheese - 1 cup panko breadcrumbs - 2 teaspoons garlic powder - 1 teaspoon onion powder - 1 teaspoon dried Italian herbs - Salt and pepper to taste - 2 large eggs - 2 tablespoons olive oil - 1 tablespoon fresh parsley (for garnish) This dish starts with simple, fresh ingredients. The chicken breasts are the star, offering lean protein. The Parmesan cheese gives a rich, savory flavor. I love panko breadcrumbs for their crunch. They make the crust crispy and delightful. For seasoning, I use garlic and onion powders. They add depth to the chicken. Dried Italian herbs bring a nice touch of flavor. Don't forget salt and pepper for balance. The breading mixture includes eggs and olive oil. The eggs help the coating stick well. Olive oil adds richness. Fresh parsley is for garnish. It brightens up the dish and adds color. You can find the full recipe in the article for more details. Each ingredient plays an important role in making this dish a winner. - Preheat your oven to 400°F (200°C). - Line a baking sheet with parchment paper or grease it with olive oil. - Combine 1 cup of finely grated Parmesan cheese, 1 cup of panko breadcrumbs, and the seasonings. You can use 2 teaspoons of garlic powder, 1 teaspoon of onion powder, and 1 teaspoon of dried Italian herbs. Add salt and pepper to taste. Mix everything well in a bowl and set aside. - Take 4 boneless, skinless chicken breasts. Dip each breast into the egg mixture, then coat it in the breadcrumb mix. Make sure to cover it completely. Arrange the coated chicken on the baking sheet, leaving space between each piece. - Drizzle olive oil (2 tablespoons) over the coated chicken for added flavor and crispiness. - Bake the chicken for 25-30 minutes. It is ready when it turns golden and reaches an internal temperature of 165°F (75°C). You can find the full recipe to follow along while you cook. To get that amazing crispiness, you need an even coating. Make sure to press the breadcrumb mixture onto the chicken well. This helps the crust stick. Drizzle a little extra olive oil on top before baking. This oil adds a great crunch and helps the chicken brown nicely. Want to kick up the taste? Try adding different spices to the breadcrumb mix. You can mix in paprika for a smoky flavor or some crushed black pepper for a bit of heat. Fresh herbs like thyme or rosemary can also add a nice touch. Experiment until you find your favorite blend! This dish pairs well with lemon wedges. Squeeze some lemon juice over the chicken for brightness. A fresh salad is also a great side. It balances the meal and adds crunch. Try a simple green salad with a light vinaigrette to round out your plate! For the full recipe, check out the [Full Recipe]. {{image_4}} You can make this dish even more delicious by adding cheese. Try mixing in shredded mozzarella for a cheesy twist. This extra layer of gooey goodness makes every bite special. You can also use different types of cheese. Parmesan pairs well with cheddar, gouda, or even pepper jack. Each choice brings a new flavor to the table. For those who like a kick, add crushed red pepper flakes to the breadcrumb mix. This small change can bring big heat. Adjust the amount to suit your taste. Just a pinch can make your chicken sing with flavor. If you want a low-carb version, swap panko for almond flour. Almond flour gives you a nice crunch without the carbs. This option is great for anyone watching their carbs. It keeps the dish light while still being tasty. For the Full Recipe, you’ll find all the details you need to make this meal shine. Store leftovers in an airtight container in the fridge for up to 3 days. This keeps the chicken fresh and safe to eat. When ready to enjoy, just take it out and reheat. You can freeze the breaded chicken before baking for up to 2 months. This option is great for meal prep. Just coat the chicken and place it in a freezer-safe container. When you are ready to cook, bake it straight from the freezer. Reheat in the oven to maintain crispiness rather than using the microwave. Preheat your oven to 350°F (175°C) and bake for about 10-15 minutes. This way, your chicken will stay crunchy and delicious. Enjoy it as if it was freshly made! Yes, chicken thighs can be used for more flavor and moisture. Chicken thighs are juicier than breasts. They provide a rich taste that pairs well with the crispy coating. You can follow the same steps in the recipe. Just adjust the baking time if needed. Serve with pasta, steamed vegetables, or a simple green salad. Pasta with olive oil and garlic makes a great side. Steamed broccoli or green beans add color and nutrients. A light salad with lemon dressing balances the meal perfectly. These options make dinner fun and flavorful! Reduce ingredient quantities accordingly while maintaining ratios. For example, if you need two servings, simply cut the chicken and other ingredients in half. This keeps the flavors balanced and the dish just as tasty. You can easily scale it up or down based on your needs. This post outlined how to make Baked Parmesan Crusted Chicken, from ingredients to storage tips. We covered key steps, including creating a crispy coating and baking methods. To achieve perfect results, remember to coat evenly and explore flavor options. Enjoy this dish with sides like pasta or salad. With easy adjustments for servings, this recipe fits any table. Try it out and savor every bite!](https://dishtreats.com/wp-content/uploads/2025/07/ab4c9608-7523-42b9-8dc2-3e25f574410b-768x768.webp)
 and [Tzatziki Recipe 2](#). Serve gyros with crispy fries or a fresh Greek salad. You can also add pickled vegetables for extra crunch. A glass of refreshing lemonade pairs well too. In this post, we explored making Greek Chicken Gyros. We looked at key ingredients like chicken thighs and fresh toppings. Following easy steps, you learned how to marinate and cook chicken perfectly. We shared tips for grilling and serving for the best taste. You can even try different proteins or vegetarian options. Now, you’re ready to make delicious gyros. Enjoy sharing this tasty dish with others!](https://dishtreats.com/wp-content/uploads/2025/07/f3d3865c-0788-4b9a-9d14-bf25eefe6fbb-768x768.webp)

![- 2 cups cooked chicken, shredded - 4 cups mixed salad greens - 1 cup cherry tomatoes - 1 cup corn - 1 ripe avocado - 1/2 cup red onion - 1 cup shredded cheddar cheese - 1/2 cup ranch dressing - BBQ sauce - Salt and freshly ground black pepper - Crispy tortilla strips, fresh cilantro leaves When making BBQ Ranch Chicken Salad, start with fresh, quality ingredients. The chicken brings protein and heartiness. I love using shredded chicken that is moist and flavorful. Mixed salad greens add crunch and color. You can choose your favorites like romaine, arugula, or baby spinach. Cherry tomatoes bring sweetness. Always cut them in half to make them easy to eat. Corn adds a pop of sweetness too, and you can use canned or fresh. I prefer fresh corn when it’s in season for the best taste. The avocado adds creaminess. A ripe avocado makes the salad smooth and rich. Red onion gives a nice bite. Keep it thinly sliced so it does not overpower. Shredded cheddar cheese adds a delightful sharpness, making each bite even tastier. The ranch dressing is creamy and tangy, tying everything together. Pair it with BBQ sauce for a smoky flavor boost. This combo is truly delicious. For seasoning, use salt and freshly ground black pepper. These simple touches really enhance the flavors. Lastly, crispy tortilla strips add a fun crunch. Fresh cilantro leaves not only look great but also add a fresh taste. You can find the full recipe [Full Recipe]. Enjoy mixing these ingredients for a vibrant, tasty salad! - Combine shredded chicken with BBQ sauce. - Use a large bowl for easy mixing. - Season with salt and black pepper to taste. - Mix until the chicken is fully coated. This step is key. The BBQ sauce gives the chicken a sweet and smoky flavor. It makes the salad pop with taste. - Create the salad base with mixed greens. - Spread the greens evenly in a large bowl. - Layer fresh ingredients: tomatoes, corn, avocado, and onion. - Arrange each ingredient for a colorful look. The vibrant colors make the salad appealing. Each bite brings a different taste, making it fun to eat! - Top with BBQ chicken and cheddar cheese. - Spoon the chicken evenly over the fresh veggies. - Drizzle with ranch dressing, adjusting to your liking. - Toss gently with clean hands or tongs to mix. This salad is now ready to impress! The creamy ranch dressing and savory chicken blend perfectly. Check the [Full Recipe] for more tips! To make your BBQ Ranch Chicken Salad shine, adjust the ranch dressing to your taste. If you love creamy flavors, add more dressing. For a lighter touch, use less. This lets you control how rich the salad feels. Make sure all ingredients mix well. This way, each bite has a bit of everything. An even spread of chicken, veggies, and cheese creates balance. For a lovely presentation, serve the salad in individual bowls or on a large platter. This makes it easy for everyone to take their share. Add some cilantro leaves and crispy tortilla strips on top. These toppings not only look great but also add flavor and crunch. A colorful display of greens and toppings makes the salad more appealing. Feel free to experiment with different seasonings. A dash of chili powder can add a nice kick. You might also try garlic powder or smoked paprika for depth. Also, think about adding extra ingredients for more variety. Black beans, diced peppers, or even fresh corn can bring new tastes. Each addition offers a chance to create your perfect salad blend. For more details on making this delicious salad, check out the Full Recipe. {{image_4}} You can easily change the protein in this salad. If you want a different taste, use pulled pork or tofu instead of chicken. Both options add great flavor. For a seafood twist, grilled shrimp works well. The shrimp adds a nice, light touch to the salad. While ranch dressing is a favorite, you can swap it out. Blue cheese dressing gives a strong flavor. A vinaigrette adds a tangy kick that brightens the salad. You can also make your own dressing blends. Mix yogurt with herbs for a fresh taste. Don't be afraid to add more veggies. Bell peppers, cucumbers, and radishes give a nice crunch. You can also roast vegetables like zucchini or carrots. Roasting adds a warm, rich taste that contrasts nicely with the cool salad. For a full recipe, check out the BBQ Ranch Chicken Salad with a Crunchy Twist. Store your BBQ Ranch Chicken Salad in an airtight container. This keeps it fresh and tasty. For best results, eat it within 2-3 days. The longer it sits, the soggier it may get. If you want to freeze some, consider freezing the chicken separately. This helps keep the chicken tasty when you eat it later. Avoid freezing the salad with dressing. The dressing makes the greens soggy, and nobody likes that! To refresh your leftovers, toss them with fresh greens. This adds crunch and makes it feel new again. If you want to reheat the BBQ chicken, do it separately. This keeps it warm without making the salad wilt. To make BBQ Ranch Chicken Salad, follow these simple steps: 1. Prepare the BBQ Chicken: Mix shredded chicken with BBQ sauce in a big bowl. Add salt and black pepper. Stir until the chicken is well coated. 2. Build the Salad Base: In another large bowl, spread the mixed greens evenly. This is your salad's base. 3. Layer Fresh Ingredients: Add halved cherry tomatoes, corn, diced avocado, and sliced red onion on top of the greens. This creates a colorful layer. 4. Top with BBQ Chicken: Spoon the BBQ chicken evenly over the fresh layers. This ensures every bite has flavor. 5. Add Creamy Cheese: Sprinkle shredded cheddar cheese over the salad. Let it melt slightly into the warm chicken. 6. Drizzle with Dressing: Pour ranch dressing over the salad. Adjust the amount to fit your taste. 7. Toss Gently: Use clean hands or tongs to mix everything. Make sure the ranch dressing coats all the ingredients. 8. Taste Test: Before serving, taste the salad. Add more salt or black pepper if needed. 9. Add Crunch and Garnish: Top with crispy tortilla strips and fresh cilantro for a nice finish. This process makes a delicious and colorful salad. For the complete recipe, check the Full Recipe above. Yes, you can prep this salad ahead of time. Here are some tips: - Cook the Chicken: You can cook and shred the chicken a day in advance. Store it in the fridge with BBQ sauce. - Chop Veggies: Cut the vegetables, like tomatoes and onions, a few hours before serving. Keep them in airtight containers. - Store Dressing Separately: Keep the ranch dressing separate until serving. This keeps the greens fresh and crisp. - Combine Before Serving: Mix everything together just before you eat. This keeps your salad from becoming soggy. This BBQ Ranch Chicken Salad goes great with several side dishes. Here are some ideas: - Crusty Bread: A nice loaf of bread pairs well and adds a hearty touch. - Chips: Tortilla chips or potato chips add crunch and fun. - Fruit Salad: A fresh fruit salad adds sweetness and a refreshing taste. - Grilled Veggies: Grilled vegetables complement the salad's flavors. - Coleslaw: A crunchy coleslaw gives a nice contrast to the salad. These sides enhance your BBQ Ranch Chicken Salad experience. Enjoy! We explored a tasty BBQ Ranch Chicken Salad. You learned about the main and optional ingredients, along with step-by-step instructions for making it. You also picked up tips for perfecting the salad and ideas for variations. Don’t forget to check the storage info for leftovers. This salad is easy to adjust, making it a fun dish for everyone. Enjoy this recipe and make it your own!](https://dishtreats.com/wp-content/uploads/2025/07/4c564630-ecab-497d-8bae-b951c19ef4f1-768x768.webp)