Skip to content
About
Contact
Cookie Policy
Copyright Policy
Disclaimer
Search
Home
Dinner
Appetizer
Desserts
Drinks
About
Contact
Privacy Policy
Toggle Menu
Home
/
Appetizer
- Page 20
Appetizer
Chicken and Cheese Quesadilla Skillet Delight Recipe
Air Fryer Parmesan Zucchini Fries Crispy and Tasty
Homemade Soft Pretzels Delicious and Easy Recipe
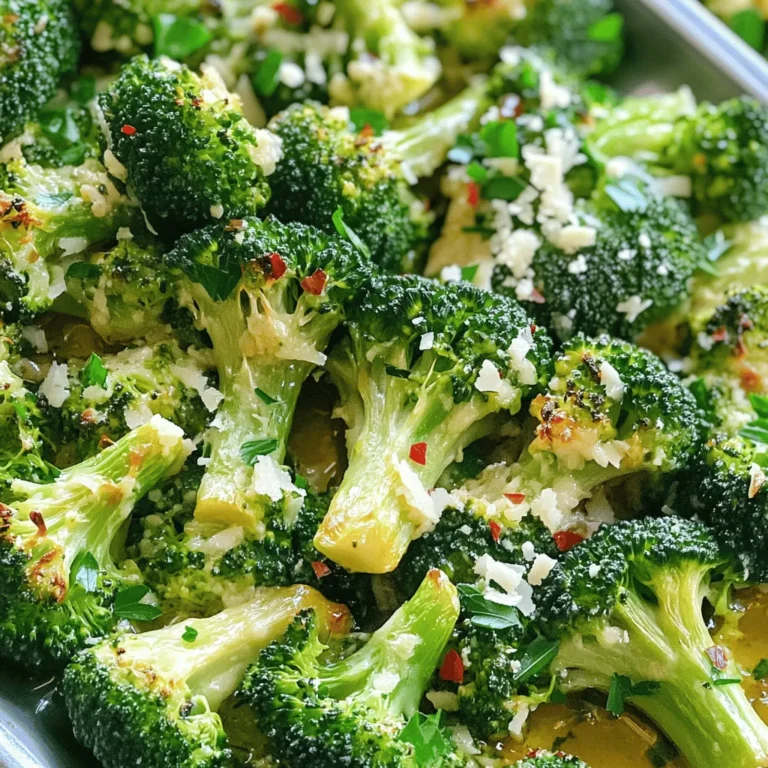
Lemon Garlic Roasted Broccoli Crispy and Flavorful Dish
Grilled Peach Caprese Salad Fresh and Flavorful Dish
Air Fryer Sweet Potato Chips Crunchy and Flavorful Snack
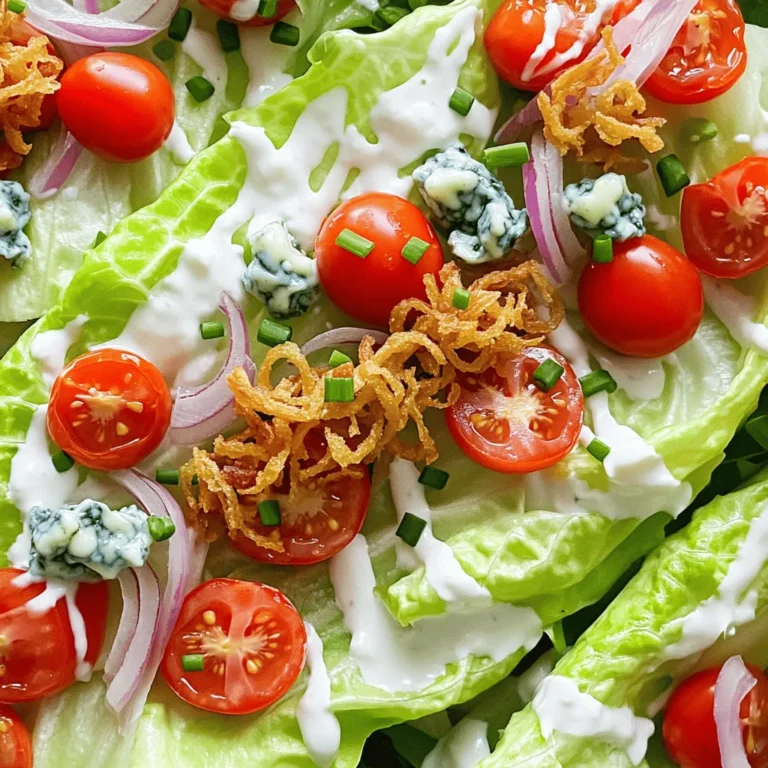
Classic Wedge Salad Flavorful and Refreshing Choice
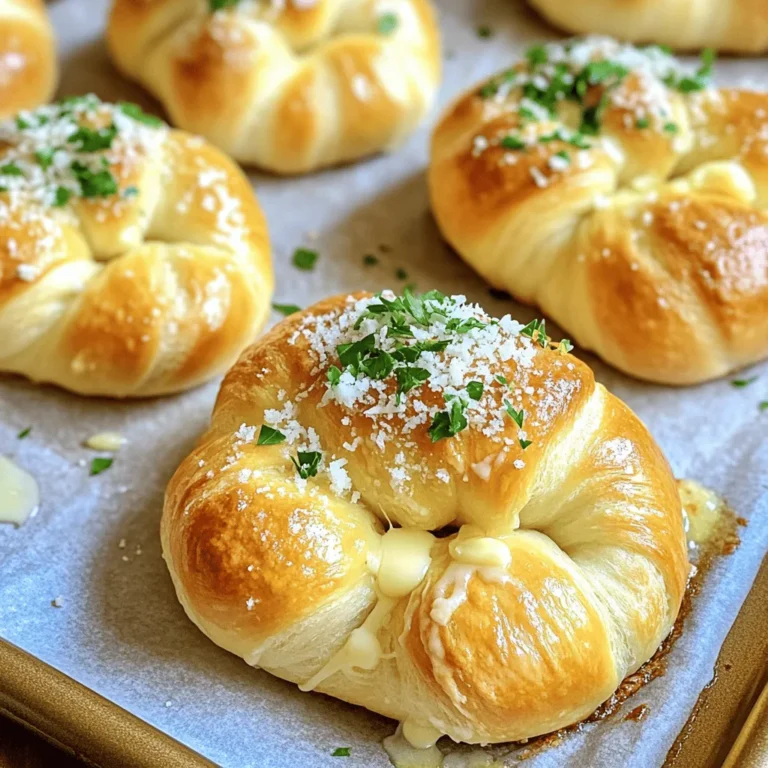
Easy Garlic Parmesan Knots Flavorful and Simple Recipe
Sriracha Honey Chicken Wings Irresistible Flavor Hit
Buffalo Chicken Meatballs Flavorful and Easy Recipe
Page navigation
Previous Page
Previous
1
…
18
19
20
21
22
…
25
Next Page
Next
Home
Dinner
Appetizer
Desserts
Drinks
About
Contact
Privacy Policy
Toggle Menu Close
Search for:
Search

![- 2 cups cooked chicken, shredded - 1 cup shredded cheddar cheese - 1 cup shredded Monterey Jack cheese - 4 large flour tortillas - 1 small onion, diced - 1 bell pepper, diced - 2 tablespoons olive oil - 1 teaspoon ground cumin - 1 teaspoon smoked paprika - ½ teaspoon garlic powder - Salt and black pepper to taste - Fresh cilantro, chopped - Sour cream - Salsa To make the Chicken and Cheese Quesadilla Skillet, gather these simple ingredients. The chicken gives it a hearty base. Cheese adds that melty goodness we all love. Using flour tortillas helps hold everything together. You can pick your favorite bell pepper color to add a pop of brightness. The spices elevate the flavor. Ground cumin offers a warm, earthy taste. Smoked paprika adds a hint of smokiness. Garlic powder gives a nice kick. Don’t forget the salt and black pepper to enhance all the flavors. Finally, for garnishes, fresh cilantro provides a burst of freshness. Serving it with sour cream and salsa makes each bite even better. You can find the full recipe at the beginning of this article. Enjoy your cooking! - Heat the skillet with olive oil - Add diced onion and bell pepper First, grab a large skillet and set it over medium heat. Pour in two tablespoons of olive oil and let it warm up. You want the oil to shimmer, which shows it's ready. Next, toss in the diced onion and bell pepper. Sauté them for about five minutes. Stir occasionally until they are soft and fragrant. This step builds a great flavor base for your quesadilla. - Mix in shredded chicken - Season with spices and cook until heated Now it's time to add the star of our dish: shredded chicken. Stir it in with the veggies. Sprinkle in one teaspoon of ground cumin, one teaspoon of smoked paprika, and half a teaspoon of garlic powder. Add salt and black pepper to taste. This mix brings out all the flavors. Cook everything for another three to five minutes. You want the chicken to heat up and soak in those tasty spices. - Distribute cheese and layer tortillas - Cover and cook until golden brown, flipping carefully Next, lower the heat to a gentle simmer. Grab half of your shredded cheddar and Monterey Jack cheese. Spread it evenly over the chicken and veggies. Place two tortillas on top, pushing them down gently. Now, add the rest of the cheese, followed by the other two tortillas. Cover the skillet with a lid and let it cook for four to five minutes. This will make the bottom crispy and let the cheese melt. When the bottom turns golden brown, carefully flip the quesadilla with a spatula. Cook for another four to five minutes until the second side is also golden and the cheese is gooey. For the complete recipe, check out the Full Recipe section! To get crispy tortillas, heat your skillet well. Use medium heat and add enough olive oil. Let the oil shimmer before adding your tortillas. Cook until golden brown on each side, about 4-5 minutes. For gooey cheese, use a mix of cheddar and Monterey Jack. These cheeses melt nicely together. Layer the cheese between tortillas and cover the skillet. This helps the cheese melt evenly and creates a delicious pull when you slice. To boost flavors, add spices like chili powder or cayenne pepper. These spices add a nice kick. You can also mix in fresh herbs, such as cilantro or parsley, for freshness. Pair your quesadilla with sides like guacamole or pico de gallo. These add extra flavor and texture. A squeeze of lime juice brightens up the dish too. For the best results, use a non-stick skillet. This helps avoid sticking and makes flipping easier. Cast iron skillets are also great for even heat. Use a wide spatula for flipping the quesadilla. This helps keep it intact. A pizza cutter is perfect for slicing your quesadilla into wedges. For the full recipe, check out the detailed instructions above. {{image_4}} You can easily change up the protein in your quesadilla. If you want beef, use ground beef or steak strips. For a seafood twist, shrimp works great too. If you're feeling vegetarian, try black beans or mushrooms. These options keep the dish fresh and fun. Want more heat? Add sliced jalapeños or diced green chilies to bring spice. You can also change the cheese for different flavors. Try pepper jack for a kick or gouda for a smokier taste. Mixing cheeses adds depth and makes every bite exciting. You can serve quesadillas in stacks or as traditional wedges. Stacking them makes a fun dinner party dish. For dips, consider guacamole, ranch, or a zesty salsa. These enhance the meal and let everyone personalize their bites. Enjoy exploring these variations while making your own Chicken and Cheese Quesadilla Skillet Delight! For the full recipe, check out the [Full Recipe]. To store leftovers, let your quesadilla cool first. Then, wrap each piece tightly in plastic wrap. This keeps them fresh. Place the wrapped quesadillas in an airtight container. I recommend using glass or BPA-free plastic containers for safety. They can last in the fridge for about three days. For reheating quesadillas, the best method is using a skillet. Heat your skillet over medium heat. Place the quesadilla in the skillet and cover it with a lid. This will help the cheese melt evenly. You can also use an oven at 350°F (175°C) for about 10 minutes. This keeps the tortilla crispy. Avoid using a microwave, as it can make the quesadilla soggy. To freeze leftovers, wrap each quesadilla in plastic wrap. Then, place them in a freezer-safe bag or container. Make sure to remove as much air as possible. They can stay frozen for up to three months. When you are ready to eat, thaw them in the fridge overnight. Reheat as mentioned before to enjoy a tasty meal again. Making a Chicken and Cheese Quesadilla Skillet is quick and easy. It takes about 10 minutes to prep and around 20 minutes to cook. In total, you can enjoy this dish in about 30 minutes. Yes, you can make this dish gluten-free. Simply swap the flour tortillas for corn tortillas or gluten-free tortillas. Both options work well and keep the flavors intact. For sides, I suggest fresh guacamole, a light salad, or refried beans. These add a nice touch to your meal. For drinks, a cold lemonade or a light beer works well with the flavors. You could also try a refreshing iced tea. This blog post covered everything you need for a tasty Chicken and Cheese Quesadilla Skillet. I shared the key ingredients, step-by-step cooking tips, and even fun variations. Remember to store leftovers well and try reheating them for that crunch. With these tips, you can enjoy a delicious meal anytime. Experiment and make it your own! Make cooking fun and tasty with these simple ideas. Enjoy your next quesadilla adventure!](https://dishtreats.com/wp-content/uploads/2025/06/644c33a7-6eb8-49b0-b6be-df01f2332de8-768x768.webp)
![To make these Air Fryer Parmesan Zucchini Fries, you need just a few simple items. Gather these ingredients: - 2 medium zucchinis, sliced into thin fries - 1 cup breadcrumbs (recommended: panko) - 1/2 cup grated Parmesan cheese - 1 teaspoon garlic powder - 1 teaspoon Italian seasoning - 1/2 teaspoon salt - 1/4 teaspoon black pepper - 2 large eggs, beaten - Olive oil spray Each ingredient plays a key role. The zucchinis provide a fresh base. Panko breadcrumbs add great crunch. Parmesan cheese gives a rich, cheesy flavor. Garlic powder and Italian seasoning make your fries tasty. Salt and pepper enhance all the flavors. Eggs act as glue for the coating. The olive oil spray keeps everything crisp. When selecting zucchinis, choose firm ones with smooth skin. They should feel heavy for their size. This tells you they are fresh. The breadcrumbs should be light and airy, perfect for frying. If you're feeling adventurous, try different herbs or cheeses! For the full recipe, check out this [Full Recipe]. 1. Preheat your air fryer to 400°F (200°C). This step is key for a crispy finish. 2. Wash and dry the zucchinis. Clean veggies are a must for great taste. 3. Cut the zucchinis into 1/4 inch thick fries. Make sure they are even for uniform cooking. 1. In a medium bowl, combine breadcrumbs, Parmesan cheese, garlic powder, Italian seasoning, salt, and black pepper. This mix gives the fries a tasty crust. 2. In a separate bowl, beat the eggs until smooth. This egg wash will help the coating stick well. 1. Dip each zucchini fry in the beaten eggs. Let any extra egg drip back into the bowl. 2. Roll the zucchini in the breadcrumb mixture. Press gently to coat all sides evenly. This ensures every bite is full of flavor. 1. Lightly spray the air fryer basket with olive oil. This helps prevent sticking. 2. Arrange the coated zucchini fries in a single layer in the basket. Avoid crowding to keep them crispy. 3. Mist the tops of the fries with olive oil spray. This adds a lovely golden color. 4. Cook for 10-12 minutes, flipping halfway. This makes sure each side cooks evenly. Once you follow these steps, you will have crispy and tasty Air Fryer Parmesan Zucchini Fries. For the complete recipe, refer to the section above. Enjoy! To keep your zucchini fries crispy, avoid overcrowding the air fryer basket. When fries sit too close, they steam instead of crisp. It’s best to cook in batches if needed. Also, mist the tops of fries lightly with olive oil. This simple step helps them brown nicely. Want to spice things up? Consider adding cayenne pepper for heat. A little goes a long way! You can also play around with different herbs or seasonings. Try adding smoked paprika or fresh thyme for a unique twist. Each option can add depth to the flavor. Pair your zucchini fries with great dipping sauces. I love zesty marinara or creamy ranch. They add a fun taste contrast. For serving, arrange the fries in a single layer on a platter. Garnish with fresh herbs or a sprinkle of more Parmesan cheese for a lovely touch. Add a small bowl of sauce in the center for a delightful display. For the complete recipe, check out the Full Recipe section. {{image_4}} You can switch up the coating for your zucchini fries. Using gluten-free breadcrumbs works great if you need a gluten-free option. They still get nice and crispy. You can also try different cheeses like mozzarella or cheddar. Each cheese brings a unique flavor that can enhance your fries. Don't stop at zucchini! You can add other veggies like eggplant or carrots. Cut them into fries, just like the zucchini. This makes your dish colorful and fun. You might also mix in spices like paprika or cumin. These spices bring extra warmth and flavor to your fries. You can cook zucchini fries in different ways. The air fryer gives you crispy results in less time. Baking in the oven is another option. It takes longer but still tastes great. Stovetop frying is also a choice. You’ll need more oil, but the flavor is rich and satisfying. Each method has its perks, so feel free to experiment! To store Air Fryer Parmesan Zucchini Fries in the fridge, let them cool first. Place the fries in an airtight container. This keeps them fresh for up to three days. I recommend using glass containers, as they seal well and prevent moisture. If you want to save your fries for longer, freeze them. Lay the cooked fries on a baking sheet in a single layer. Freeze for about an hour. Once frozen, transfer them to a freezer bag. This method stops them from sticking together. They can last in the freezer for about two months. To reheat, place the frozen fries in the air fryer. Set it to 400°F (200°C) and cook for about 8-10 minutes. This will help keep them crispy. You can also reheat them in an oven for a similar effect. Air Fryer Parmesan Zucchini Fries stay fresh in the fridge for about 3 to 4 days. To store, place them in an airtight container. For longer storage, freeze them. They can last up to 2 months in the freezer. To freeze, lay them flat on a baking sheet first, then transfer them to a freezer bag. This helps keep them from sticking together. Yes, you can prepare these fries ahead of time. Slice the zucchinis and coat them in the breadcrumb mixture. Keep them in the fridge for up to 24 hours. When you're ready, air fry them directly from the fridge. If you freeze them, let them thaw in the fridge overnight before cooking. This helps them cook evenly and stay crispy. These zucchini fries taste great with many dishes. Serve them with a tangy marinara sauce or creamy ranch dressing for dipping. They also pair well with grilled chicken or fish. For a fun twist, try serving them alongside a fresh salad or as a side to tacos. Their crunch adds a nice texture contrast to softer dishes. Absolutely! You can use yellow squash instead of green zucchini. They have a similar taste and texture. If you have gifted zucchinis from friends or family, feel free to use those too. Just make sure they are firm and fresh for the best results. This recipe is very flexible and lets you enjoy various types of squash. In this post, I shared a simple recipe for Air Fryer Parmesan Zucchini Fries. You learned the ingredients, step-by-step instructions, and useful tips for crispiness. Experiment with flavors or make different versions to keep it fresh. Remember to store leftovers properly for later enjoyment. This dish is easy to make and pairs well with various dips. Enjoy your healthy snack, and have fun trying out new ideas!](https://dishtreats.com/wp-content/uploads/2025/06/3cf59b94-4108-4e4b-8eff-d7b1557676e8-768x768.webp)

![Creating a Grilled Peach Caprese Salad is simple and fun. Here’s what you need: - Ripe peaches - Fresh mozzarella - Mixed greens - Cherry tomatoes - Fresh basil leaves - Balsamic glaze - Extra virgin olive oil - Salt and black pepper Each ingredient plays a key role in this dish. Ripe peaches bring sweetness. Fresh mozzarella adds creaminess. Mixed greens provide a nice crunch. Cherry tomatoes add color and flavor. Fresh basil contributes a fragrant touch. The balsamic glaze adds a tangy finish. Extra virgin olive oil enhances the taste. Lastly, salt and pepper bring everything together. For the full recipe, check out the steps to make this tasty salad. Trust me, your taste buds will thank you! - Preheat the grill to medium-high heat. This helps create great grill marks. - Ensure your grill grates are clean and lightly oiled. This prevents sticking. - Start by cutting the peaches in half and removing the pit. - Brush the cut sides of the peach halves with olive oil. This adds flavor and helps them grill well. - Place the peach halves cut side down on the grill. Grill for about 3-4 minutes. You want those nice grill marks. - Once they soften slightly, remove them. Let them cool for a couple of minutes. - Grab a large serving platter. Create a bed of mixed greens in the center. - Place the grilled peach halves on top of the greens. Spread them out for a nice look. - Next, add slices of fresh mozzarella around the peaches. Then scatter halved cherry tomatoes. - Tear fresh basil leaves and sprinkle them over the salad. This adds a lovely aroma. - Finally, drizzle balsamic glaze over the salad. Add salt and black pepper to taste. - For the best flavor, serve the salad right away. You can chill it a bit if you prefer. For the complete recipe, check out the [Full Recipe]. To get perfect grill marks on your peaches, heat your grill to medium-high. Brush the cut sides of each peach half with olive oil. This helps prevent sticking and adds flavor. Look for ripe peaches that yield slightly when pressed. They should be fragrant and have a bright color. Presentation matters! Try arranging your salad in a spiral pattern. You can also layer the ingredients in single servings. This makes each plate look special. Pair your salad with a crisp white wine or a light red. Both will enhance the flavors of the dish. Want to mix things up? Try using different dressings like a lemon vinaigrette or honey mustard. Fresh herbs like mint or dill can add a twist. You could also sprinkle some chili flakes for a little heat. These simple changes will keep your salad exciting. For the full recipe, check here: [Full Recipe]. {{image_4}} You can change up your Grilled Peach Caprese Salad by swapping fruits. Try using ripe nectarines or plums instead of peaches. These fruits provide a sweet touch and work well on the grill. You can also use strawberries or even grilled pineapple for a fun twist. For cheese, fresh mozzarella is the classic choice. However, you can try burrata for a creamier texture. Feta cheese adds a salty punch, while goat cheese gives a tangy flavor. Each cheese brings its own flair to the dish. To make this salad vegan, skip the cheese and use a plant-based alternative. Cashew cheese or tofu can work well. Drizzle a vegan balsamic glaze for that sweet touch. If you need a gluten-free option, this salad is naturally gluten-free. Just make sure your balsamic glaze is gluten-free as well. Enjoy fresh ingredients without any worries. For the best flavor, pick peaches in late summer. They are sweet and juicy in this season. In spring, try using asparagus or snap peas for a fresh crunch. In winter, roasted root vegetables like beets can replace fresh greens. Add some nuts for extra texture and flavor. Adapt your salad to fit the season and enjoy a fresh taste year-round. For the complete recipe of Grilled Peach Caprese Salad, check the Full Recipe. To keep your Grilled Peach Caprese Salad fresh, store it properly. First, separate the components. This way, the flavors stay bright and fresh. - Peaches: Place grilled peaches in a sealed container. Store them in the fridge for up to three days. - Salad Greens: Keep mixed greens in a dry, airtight container. This keeps them crisp and fresh. - Cheese and Tomatoes: Store mozzarella and cherry tomatoes in separate containers. This helps prevent sogginess. - Balsamic Glaze: Keep the glaze in a small jar. It can last for weeks in the fridge. You might wonder if you should reheat grilled peaches. I recommend enjoying them cold. Their flavor shines best this way. But if you prefer warm peaches, here’s how to heat them: - Microwave: Place peaches on a microwave-safe plate. Heat for about 10-20 seconds. Check them often to avoid overheating. - Stovetop: Heat a non-stick pan over low heat. Add a dash of olive oil and warm the peaches for a minute. For other salad ingredients, like mozzarella and tomatoes, it’s best to enjoy them cold too. Mixing warm and cold can lead to a fun flavor contrast in your dish. To make this dish, follow these simple steps: 1. Preheat your grill to medium-high heat. 2. Brush cut sides of halved peaches with olive oil. 3. Grill peach halves cut side down for 3-4 minutes. 4. On a platter, spread mixed greens for a base. 5. Place grilled peaches on top of the greens. 6. Add mozzarella slices and halved cherry tomatoes around the peaches. 7. Scatter torn basil leaves over the salad. 8. Drizzle balsamic glaze on top, then season with salt and pepper. 9. Serve right away or chill slightly before serving. Fresh mozzarella is the classic choice for Caprese salad. Its creamy texture balances the sweetness of grilled peaches. You can also try burrata for extra creaminess. Feta adds a tangy twist, while goat cheese can give a bold flavor. Choose based on your taste preferences to enhance your salad. You can prep parts of the salad ahead of time. Grill the peaches and store them in the fridge. Wash and dry the greens and tomatoes, keeping them fresh. Assemble everything just before serving to maintain flavor and texture. This way, your salad stays fresh and tasty. Check the [Full Recipe] for more details. This blog shared how to make a Grilled Peach Caprese Salad. You learned about choosing ripe peaches, grilling them, and assembling the salad. Tips on serving and variations helped you create your own version. Remember to store leftovers properly to keep them fresh. With these insights, you can enjoy a delicious, refreshing salad anytime. Trust that your skills will shine. Enjoy experimenting with flavors and ingredients to make it uniquely yours. Your summer gatherings will never be the same!](https://dishtreats.com/wp-content/uploads/2025/06/c765deb6-47e2-46b1-bbfc-9b058c8c2a51-768x768.webp)
. Enjoy making your air fryer sweet potato chips! You now know how to make tasty sweet potato chips with an air fryer. We covered the needed ingredients, proper preparation, and seasoning. I shared tips for perfect crispiness and suggested flavor boosts. I also explored storage and reheating methods to keep your chips fresh. Try different seasonings and root veggies for variety. Enjoy the fun of making your own snacks!](https://dishtreats.com/wp-content/uploads/2025/06/63cc0e6b-da42-45de-be59-e2118d293653-768x768.webp)