Skip to content
About
Contact
Cookie Policy
Copyright Policy
Disclaimer
Search
Home
Dinner
Appetizer
Desserts
Drinks
About
Contact
Privacy Policy
Toggle Menu
Home
/
Appetizer
- Page 13
Appetizer
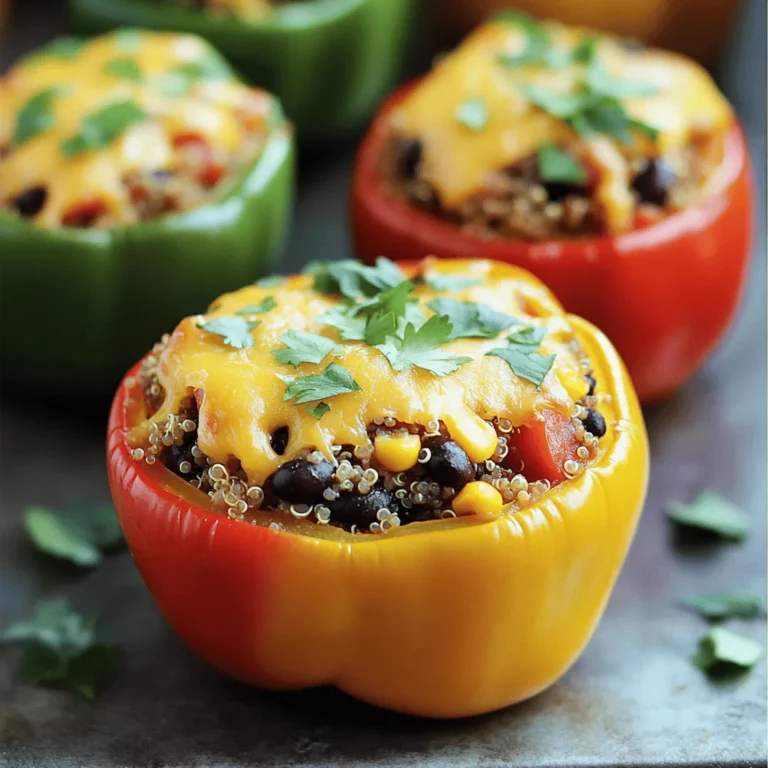
Stuffed Mini Bell Peppers Flavorful and Easy Recipe
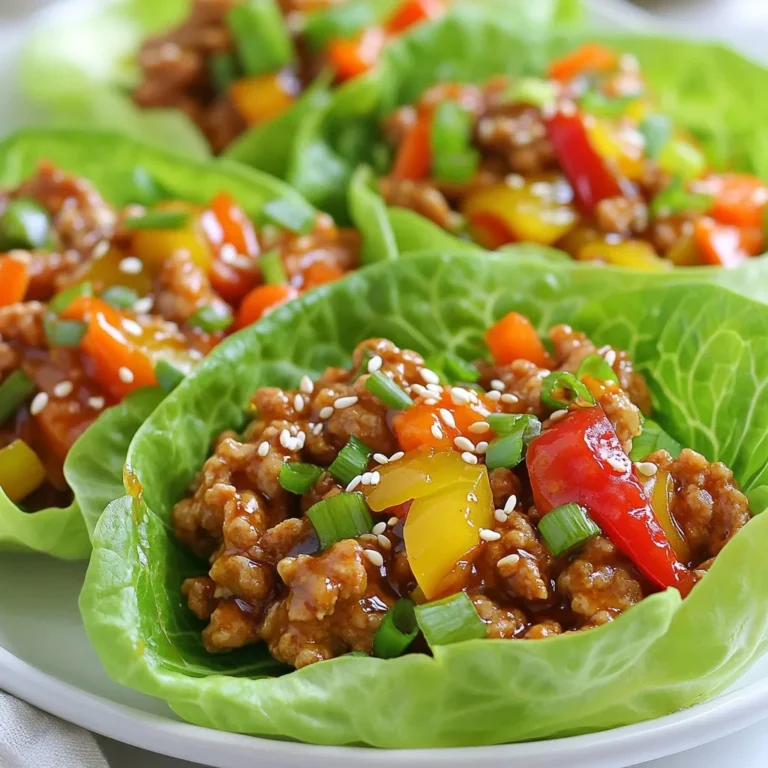
Asian Chicken Lettuce Wraps Flavorful and Simple Dish
Roasted Garlic Parmesan Cauliflower Simple Side Dish
Crispy Baked Sweet Potato Fries Easy and Delicious Recipe
Sun-Dried Tomato Chickpea Salad Fresh and Flavorful Meal
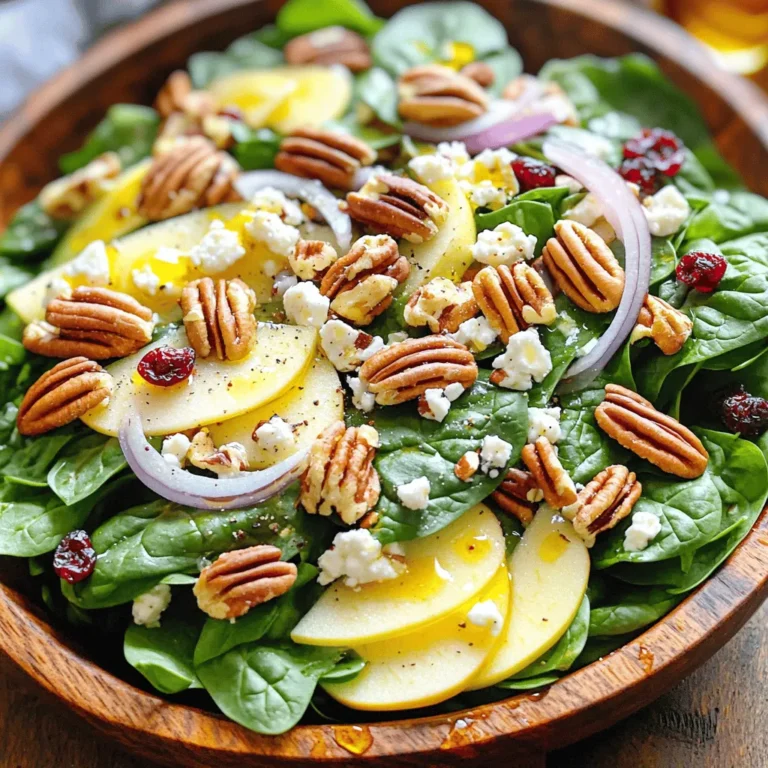
Spinach Apple Pecan Salad Fresh and Flavorful Meal
BBQ Cauliflower Bites Crispy and Flavorful Snack
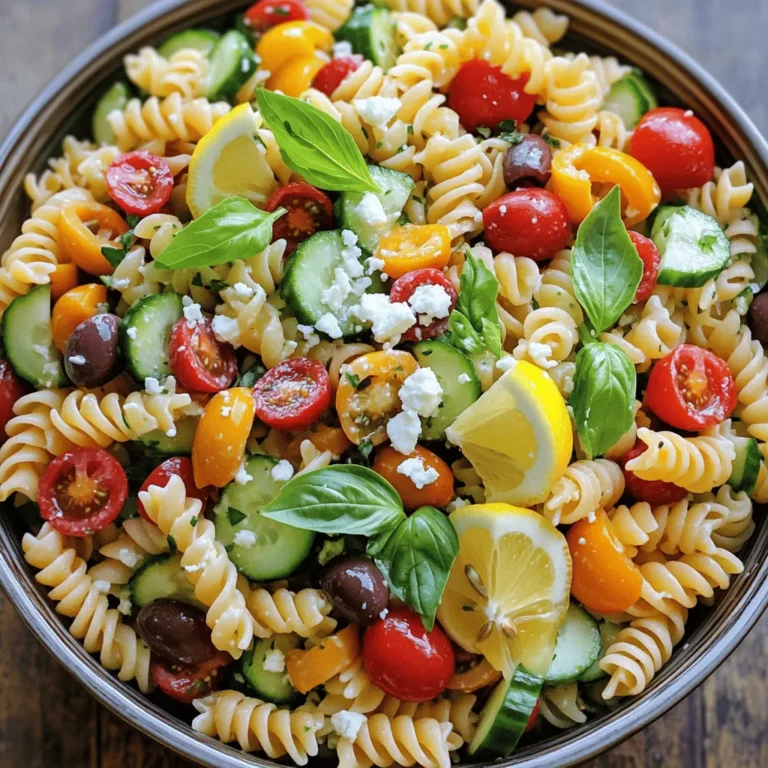
Lemon Basil Pasta Salad Fresh and Flavorful Delight
Teriyaki Chicken Lettuce Cups Flavorful and Fresh Dish
Lemon Basil Chickpea Salad Fresh and Flavorful Dish
Page navigation
Previous Page
Previous
1
…
11
12
13
14
15
…
25
Next Page
Next
Home
Dinner
Appetizer
Desserts
Drinks
About
Contact
Privacy Policy
Toggle Menu Close
Search for:
Search

 link for all details! Asian Chicken Lettuce Wraps are fun, tasty, and easy to make. We covered key ingredients, step-by-step cooking, and helpful tips. You can mix things up with different proteins and veggies. Storing leftovers is simple, too. This dish is perfect for quick meals or impressing guests. Use the recipe and ideas to create your own version. Enjoy every bite, and share your creations!](https://dishtreats.com/wp-content/uploads/2025/07/cde1ffe3-32d5-41af-a230-f4c5c520fc8a-768x768.webp)

![To make crispy baked sweet potato fries, you need just a few simple ingredients. Here’s what you’ll need: - 2 large sweet potatoes - 2 tablespoons extra-virgin olive oil - 1 teaspoon cornstarch - 1 teaspoon smoked paprika - 1/2 teaspoon garlic powder - 1/2 teaspoon onion powder - 1/4 teaspoon cayenne pepper (optional) - Salt and freshly ground black pepper - Fresh parsley for garnish These ingredients combine to create a flavorful and fun side dish. Sweet potatoes give a natural sweetness. Olive oil helps with that crispy texture. The cornstarch is the secret for extra crunch. Smoked paprika adds a nice depth of flavor. Garlic and onion powder bring warmth. Cayenne pepper can spice things up if you like it hot. Finally, salt and pepper enhance everything. Using fresh parsley on top not only looks nice but adds a fresh taste. This is the perfect mix for a tasty treat. You can find the full recipe in the recipe section to make it easy for you. 1. Preheat your oven to 425°F (220°C). It’s key for crispiness. 2. Line a large baking sheet with parchment paper. This helps fries not stick. 3. Take 2 large sweet potatoes. Rinse and cut them into even-sized fries. Try to keep them similar in size for even cooking. 4. Place the fries in a mixing bowl. Drizzle 2 tablespoons of olive oil over them. Mix well to coat each fry evenly. 1. Sprinkle 1 teaspoon of cornstarch over the fries. This helps them get that crispy texture. 2. Add spices: 1 teaspoon of smoked paprika, 1/2 teaspoon of garlic powder, 1/2 teaspoon of onion powder, and 1/4 teaspoon of cayenne pepper if you like spice. 3. Season with salt and black pepper to taste. Toss the fries gently to make sure they are all coated well with the seasonings. 1. Arrange the seasoned fries on your baking sheet. Make sure they are in a single layer. This allows air to flow and makes them crispy. 2. Bake in the preheated oven for 25 to 30 minutes. Flip the fries halfway through. This helps them brown evenly. 3. When they turn golden and crispy, they are ready. Let them cool for a few minutes before serving. Enjoy these crispy baked sweet potato fries with your favorite dips! For the full recipe, check out the detailed instructions. To get the best crispy fries, air circulation is key. When you spread the fries out on the baking sheet, make sure they aren't touching. This allows hot air to flow all around them. If your fries aren’t crispy enough, try adding a few extra minutes to the cooking time. Keep an eye on them to avoid burning. You can customize the spice levels based on your taste. If you like more heat, add more cayenne pepper. For a milder flavor, leave it out. You can also swap the spices for other favorites like chili powder or Italian herbs. Mix and match to find your perfect blend. An eye-catching way to serve your fries is in a cone or a basket with parchment paper. This makes them look fun and inviting. Pair your fries with tasty dipping sauces like spicy mayo, creamy ranch, or classic ketchup. It adds more flavor and makes the meal special. Enjoy your crispy baked sweet potato fries from the [Full Recipe]. {{image_4}} You can easily change the taste of your sweet potato fries. For a sweet and spicy option, drizzle them with maple syrup before baking. This will add a nice glaze and a kick of flavor. If you prefer herbs, try adding fresh rosemary or thyme. These herbs bring a savory touch that pairs well with the natural sweetness of the potatoes. Using an air fryer is a fantastic way to make crispy fries. Set your air fryer to 400°F (200°C) and cook them for about 15-20 minutes. Shake the basket halfway through to ensure even cooking. If you enjoy grilling, you can also grill sweet potato fries. Slice them thicker, brush with olive oil, and grill over medium heat for about 5-7 minutes on each side. This gives a nice smoky flavor. Sweet potato fries are great on their own, but you can elevate your meal. Pair them with grilled chicken, fish, or a fresh salad for a balanced dish. They also work well in meal prep. You can make a batch and store them in the fridge. Just reheat them for a quick snack or side dish. For a fun twist, serve them in a cone with a side of your favorite dipping sauce. Try creamy ranch, spicy mayo, or classic ketchup for added flavor. For the full recipe, check out the full recipe link! To keep your crispy baked sweet potato fries fresh, store them in the fridge. Place them in an airtight container. This helps maintain their flavor and texture. They can last for up to three days in the fridge. If you want to keep them longer, freezing is a great option. Place the fries in a freezer-safe bag. Remove as much air as you can before sealing. This prevents freezer burn and keeps them tasty. When you're ready to enjoy your leftovers, reheating is key. For crispy fries, use the oven. Preheat your oven to 400°F (200°C). Spread the fries in a single layer on a baking sheet. Heat for about 10 to 15 minutes, flipping halfway through. This method keeps the fries crispy. You can also use an air fryer. Set it to 380°F (193°C) and heat for about 5 to 7 minutes. Avoid using a microwave, as it can make the fries soggy. In the fridge, your fries can last about three days. In the freezer, they can last up to three months. When you store them correctly, you can enjoy them later without losing flavor or texture. Just remember to check for any signs of freezer burn if they are in the freezer for a while. How can I make sweet potato fries even crispier? To make your sweet potato fries crispier, soak them in cold water. Do this for at least 30 minutes. This helps remove excess starch. After soaking, dry them well with a towel. Also, use cornstarch before baking to create a crisp outer layer. Can I use regular potatoes instead? Yes, you can use regular potatoes. They will taste different but can still be delicious. You might need to adjust the cooking time. Regular potatoes may cook faster than sweet potatoes. What's the nutritional value of sweet potato fries? Sweet potato fries are high in vitamins A and C. They are also a good source of fiber. Compared to regular fries, they have fewer calories and more nutrients. This makes them a healthier choice for a snack or side dish. What is the optimal temperature for baking sweet potato fries? The best temperature for baking sweet potato fries is 425°F (220°C). This high heat helps them cook evenly and get crispy. How long should I bake them for the best results? Bake the fries for 25 to 30 minutes. Be sure to flip them halfway through to get an even golden color. They should look crispy and slightly browned when done. Can I use a different oil? Yes, you can use other oils like avocado oil or canola oil. Each oil has a different flavor, but all will work well for baking. What if I don't have cornstarch? If you don't have cornstarch, you can use potato starch or even flour. Both will help create a crisp texture. Just use the same amount as the cornstarch in the recipe. Making sweet potato fries is simple and fun. You learned the key ingredients and steps to create crispy fries. I shared tips for seasoning and presentation to elevate your meal. You can also explore variations and alternative cooking methods. Storing and reheating properly ensures you can enjoy leftovers without losing quality. Incorporate your favorite flavors and get creative. Remember, these fries are a tasty, healthy option for any meal. Enjoy your cooking adventure!](https://dishtreats.com/wp-content/uploads/2025/07/5c45319a-0858-4d48-b29a-502acd419023-768x768.webp)
![The Sun-Dried Tomato Chickpea Salad is simple to make and full of flavor. Here’s what you need: - 1 can (15 oz) chickpeas, thoroughly drained and rinsed - 1/2 cup sun-dried tomatoes, roughly chopped - 1/4 cup red onion, finely diced - 1/2 cucumber, peeled and diced - 1/4 cup feta cheese, crumbled into small pieces - 2 tablespoons fresh parsley, finely chopped - 2 tablespoons extra virgin olive oil - 1 tablespoon freshly squeezed lemon juice - 1 teaspoon dried oregano - Salt and freshly ground black pepper, to taste This mix of ingredients creates a bright, fresh dish. Chickpeas add protein and fiber. Sun-dried tomatoes give a sweet and tangy taste. The red onion adds a sharp bite, while cucumber brings crunch. Feta cheese adds creaminess to the salad. Fresh parsley brightens the flavors. Make sure to use high-quality extra virgin olive oil for the best taste. Fresh lemon juice adds a zesty kick. Dried oregano brings an earthy flavor that ties everything together. Adjust salt and pepper to your liking for a perfect balance. For the full recipe, follow the steps to enjoy this delightful salad. It's quick to prepare and great for lunch or dinner! To make this salad, start with a large mixing bowl. Combine the following ingredients: - 1 can (15 oz) chickpeas, thoroughly drained and rinsed - 1/2 cup sun-dried tomatoes, roughly chopped - 1/4 cup red onion, finely diced - 1/2 cucumber, peeled and diced - 1/4 cup feta cheese, crumbled into small pieces Gently stir the ingredients together. This ensures an even distribution of flavors and textures. In a separate small bowl, whisk together the dressing ingredients: - 2 tablespoons extra virgin olive oil - 1 tablespoon freshly squeezed lemon juice - 1 teaspoon dried oregano - Salt and freshly ground black pepper, to taste Mix until well combined. You want the oil and lemon juice to emulsify, meaning they blend into a smooth mixture. Drizzle the dressing over the salad base. Toss gently to coat everything evenly. Be careful not to break the chickpeas or feta cheese. After mixing, sprinkle the freshly chopped parsley on top. Give it one last gentle toss. Cover the salad and let it rest for at least 15 minutes. This time allows the flavors to meld together, enhancing the taste. You can serve it chilled or at room temperature for the best experience. For the full recipe, check the ingredients and instructions above. To make your Sun-Dried Tomato Chickpea Salad stand out, choose a nice serving bowl. A colorful bowl can catch the eye and add to the meal. You can layer the salad to show off its colors. Start with chickpeas at the bottom, then add layers of sun-dried tomatoes, cucumbers, and red onions. For garnishing, sprinkle extra parsley leaves on top. This adds a fresh touch. You can also add a few crumbles of feta cheese over the top. This gives a nice contrast to the vibrant colors of the salad. If you want to impress, serve it with crusty bread or pita on the side. You can make this salad ahead of time. Store it in the fridge for a quick meal later. After you mix it, cover the salad well. It stays fresh for 2 to 3 days. The flavors will deepen as it sits. For meal prepping, divide the salad into single-serving containers. This makes it easy to grab and go. Keep the dressing separate until you are ready to eat. This keeps the salad crisp and fresh. Enjoy your meal! For the full recipe, check out the details above. {{image_4}} You can switch out chickpeas for other beans. Black beans or kidney beans work well. They add a different taste and texture. If you want to try lentils, they can also be good. For a dairy-free option, use a vegan feta cheese. There are many brands available. You can also skip the cheese and add more vegetables. This keeps the salad fresh and tasty. To boost the flavor, add spices like cumin or paprika. These spices can take your salad to a new level. You could also add bell peppers or corn for a nice crunch. If you want more protein, add grilled chicken or tofu. These options make the salad heartier. You can even mix in some nuts or seeds for added texture. For the full recipe, check out the details above and create your own delicious twist! To keep your Sun-Dried Tomato Chickpea Salad fresh, use these tips: - Store in an airtight container. - Layer ingredients to prevent sogginess. - Keep dressing separate until serving. - Use glass containers for better preservation. Glass keeps the salad fresh longer. It also helps you see the colorful layers. Your salad lasts up to three days in the fridge. After that, it may lose its crunch. Watch for these signs of spoilage: - Change in smell or color. - Soft or mushy chickpeas. - Feta cheese that appears slimy. If you notice these signs, it's best to throw it away. Enjoy the salad while it's fresh for the best taste! For the full recipe, click [Full Recipe]. To make this salad, start by gathering your ingredients. You need chickpeas, sun-dried tomatoes, red onion, cucumber, feta cheese, parsley, olive oil, lemon juice, oregano, salt, and pepper. 1. In a large bowl, mix the chickpeas, sun-dried tomatoes, cucumber, onion, and feta. 2. In a small bowl, whisk olive oil, lemon juice, oregano, salt, and pepper together. 3. Pour the dressing over the salad and toss gently. 4. Add the parsley and mix lightly. 5. Let the salad rest for 15 minutes. This helps the flavors blend well. You can find the full recipe above for detailed steps. Yes! This salad is perfect for meal prep. You can prepare it a day in advance. Just store it in an airtight container in the fridge. The flavors will deepen, making it taste even better. Make sure to keep the salad covered to keep it fresh. This salad pairs well with many dishes. Here are some ideas: - Grilled chicken or fish for added protein. - Crusty bread or pita to scoop up the salad. - A light soup like tomato basil for a cozy meal. - Roasted vegetables for a colorful plate. These options will enhance your meal and make it even more enjoyable! This blog post detailed how to create a refreshing Sun-Dried Tomato Chickpea Salad. We covered the necessary ingredients, simple steps to prepare, and tips for presentation. You can enhance this salad with various substitutes or flavors. Proper storage ensures freshness and keeps meals tasty longer. Remember, this salad is not just easy to make—it's also adaptable. Enjoy making it your own, and delight your taste buds with every bite. Your next meal can be both fun and healthy!](https://dishtreats.com/wp-content/uploads/2025/07/f0fe0f85-1842-4358-ad7f-ac591425fdaf-768x768.webp)

![- 1 can (15 oz) chickpeas, thoroughly drained and rinsed - 1 cup cherry tomatoes, halved - 1 cucumber, diced into bite-sized pieces - 1 bell pepper (any color), diced - 1/4 red onion, finely chopped - 1/4 cup fresh basil leaves, roughly chopped - Juice of 1 large lemon (about 2 tablespoons) - 3 tablespoons high-quality extra-virgin olive oil - Salt and black pepper to taste - 1/4 teaspoon garlic powder - 1/4 teaspoon red pepper flakes (optional, for a bit of heat) In this Lemon Basil Chickpea Salad, the key ingredients make all the difference. Chickpeas are the star of the show. They add protein and a nice bite. The fresh produce items like cherry tomatoes, cucumbers, and bell peppers bring color and crunch. The red onion adds a mild zing. Fresh basil gives that lovely aroma and flavor. The dressing components are just as important. The lemon juice adds brightness, while the olive oil provides richness. Garlic powder adds depth, and the optional red pepper flakes can give it a kick. This mix creates a delightful balance of flavors. - Additional vegetables - Herbs and spices You can easily customize this salad. Feel free to add more vegetables. Some great options are carrots, radishes, or even avocado. These extras can add different textures and flavors. You can also play with herbs and spices. Try adding cilantro for a fresh twist or cumin for an earthy note. The beauty of this salad lies in its versatility. You can make it your own while keeping it fresh and vibrant. For the full recipe, check out the details above. First, gather your ingredients. Grab a large mixing bowl. Add the chickpeas that you drained and rinsed. Next, toss in the halved cherry tomatoes. After that, add the diced cucumber, diced bell pepper, and finely chopped red onion. Now, it's time for the fresh basil. Gently mix the chopped basil leaves into the bowl. This adds a bright, fresh flavor. For the dressing, take a small bowl. Combine the lemon juice, extra-virgin olive oil, garlic powder, salt, and black pepper. If you like heat, add red pepper flakes. Whisk these together until smooth. This zesty dressing will tie everything together nicely. Drizzle the dressing over your salad in the mixing bowl. Now, use clean hands or a large spoon to toss everything together. Make sure all the ingredients get coated with the dressing. After tossing, taste your salad. Adjust the seasoning if needed. You might want more salt, pepper, or lemon juice for extra flavor. Let the salad sit for at least 10 minutes. This resting time helps the flavors blend. You can serve it chilled or at room temperature, whichever you prefer. For presentation, serve your salad in a large, shallow bowl. You can also use individual plates if you like. Garnish with a sprinkle of chopped basil and a few whole cherry tomatoes. This makes a beautiful display. Consider pairing this salad with crusty bread or pita chips. These sides add nice texture and balance to the meal. For the full recipe, check the earlier section. Enjoy! To keep your Lemon Basil Chickpea Salad fresh, store it in an airtight container. This helps prevent air from spoiling the flavors. Place it in the fridge right after serving. It will stay good for about three days. If you notice extra liquid forming, drain it before serving again. This keeps the salad from getting soggy. To maintain the crispness of the veggies, avoid mixing in the dressing until you're ready to eat. Prepping this salad ahead of time is easy and smart. You can chop the veggies and rinse the chickpeas a day before. Just store them separately in the fridge. This saves time when you're ready to serve. Allowing the salad to rest for at least 10 minutes before serving enhances the flavors. Letting the chickpeas soak up the lemon dressing makes each bite burst with taste. For the best results, try to make it a few hours in advance. The flavors will only get better! For the Full Recipe, visit the main article. {{image_4}} You can make your Lemon Basil Chickpea Salad even better with protein. For vegetarians, great options include: - Tofu: Firm tofu adds a nice texture. - Quinoa: This grain packs protein and adds a nutty taste. - Edamame: These young soybeans give a pop of color and flavor. If you want to add meat or seafood, here are some ideas: - Grilled Chicken: Slice it thin for easy mixing. - Shrimp: Cooked shrimp adds a sweet and savory twist. - Tuna: Canned tuna is a quick and tasty option. You can change the flavor of your salad with different dressings. Try these options: - Balsamic Vinaigrette: Sweet and tangy, it pairs well with veggies. - Honey Mustard: Adds a sweet zing that brightens the salad. - Avocado Dressing: Creamy and rich, it makes the salad feel special. Consider adding seasonal ingredients too. Use: - Corn: Fresh corn is sweet and crunchy in summer. - Avocado: Creamy avocados add richness in spring. - Roasted Squash: Perfect for fall, it adds warmth and flavor. For more recipes, check out the Full Recipe! The Lemon Basil Chickpea Salad packs a punch of nutrients. Each serving has about 200 calories. Most of these calories come from healthy fats and proteins. The salad offers: - Protein: Chickpeas are a great source. You get about 10 grams per serving. - Carbohydrates: The salad contains around 25 grams, mostly from chickpeas and veggies. - Fats: With olive oil, you’ll find about 9 grams of healthy fats. This dish also shines with vitamins and minerals: - Vitamin A: From bell peppers and tomatoes, good for your vision. - Vitamin C: The lemon juice and tomatoes boost your immune system. - Iron: Chickpeas provide iron, helping with blood health. This salad is very friendly for many diets. - Vegan-friendly attributes: The recipe uses no animal products. All ingredients are plant-based. This makes it perfect for vegans. - Gluten-free status: All the ingredients are gluten-free. You can enjoy this salad without worry if you have gluten sensitivity. Enjoy this fresh and colorful salad knowing it supports a healthy lifestyle! For the complete recipe, check out the [Full Recipe]. Lemon Basil Chickpea Salad lasts about 3 to 5 days in the fridge. To store it, place it in an airtight container. This keeps the salad fresh and safe to eat. Make sure to check for any changes in smell or color before eating leftovers. Yes, you can use dried chickpeas! First, soak 1 cup of dried chickpeas in water for 8 hours or overnight. After soaking, drain and rinse them. Then, cook them in a pot with water for about 1 to 1.5 hours, or until tender. Drain and let them cool before adding to your salad. This salad pairs well with many dishes. Consider serving it with grilled chicken or fish for protein. You can also add pita bread or crusty bread for a complete meal. For a lighter option, enjoy it with a fresh fruit salad. To add some heat, mix in red pepper flakes. Start with 1/4 teaspoon, then taste and adjust. You can also add diced jalapeños or hot sauce for extra kick. This will give your salad a nice spicy twist! For the full recipe, check the [Full Recipe]. This blog post covered how to make a Lemon Basil Chickpea Salad. We discussed key ingredients like chickpeas and fresh veggies, plus optional add-ins. You learned step-by-step instructions for mixing and tossing the salad. I shared storage tips and variations to suit your taste. In closing, this salad is simple, healthy, and flexible. Enjoy experimenting with flavors and combinations to make it your own!](https://dishtreats.com/wp-content/uploads/2025/07/d3747d36-0043-45e0-9a82-fe789303a34f-768x768.webp)