Skip to content
About
Contact
Cookie Policy
Copyright Policy
Disclaimer
Search
Home
Dinner
Appetizer
Desserts
Drinks
About
Contact
Privacy Policy
Toggle Menu
Home
/
Appetizer
- Page 11
Appetizer
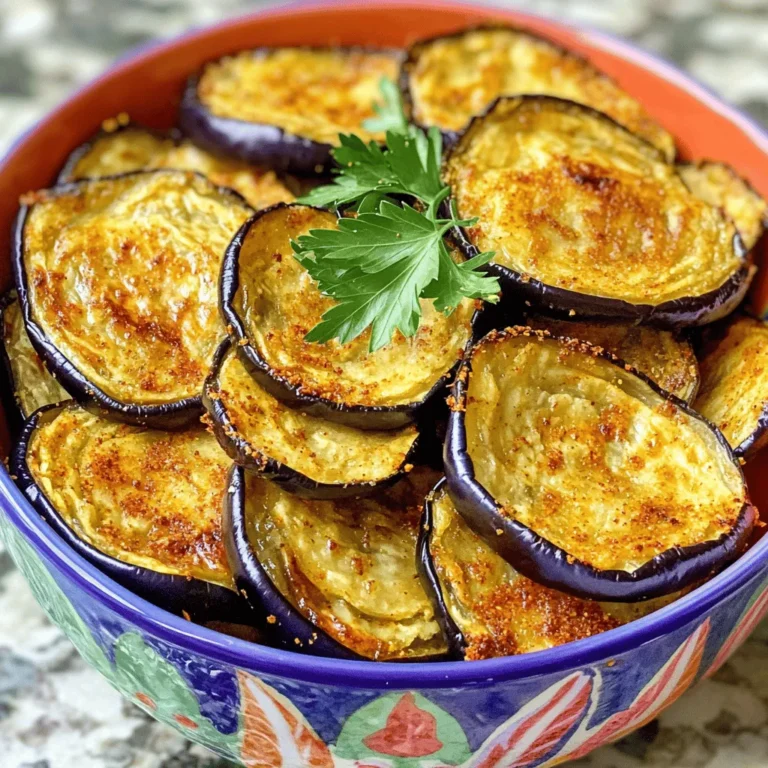
Baked Eggplant Chips Crispy and Flavorful Snack
Zesty Greek Pasta Salad Fresh and Flavorful Delight
Crispy Cauliflower Bites Healthy and Tasty Snack
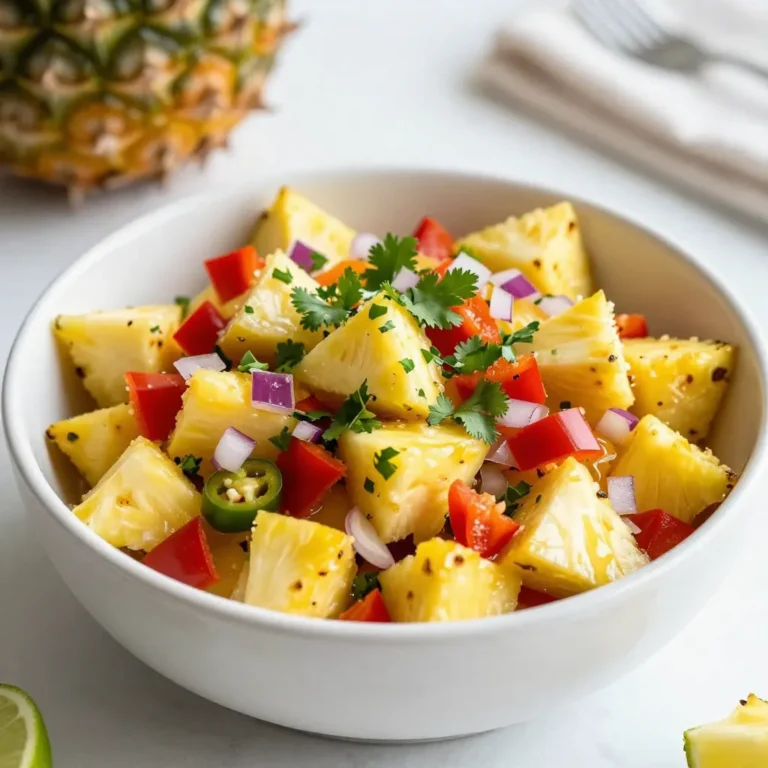
Fresh Pineapple Salsa Flavorful and Easy Recipe
Cheesy Pull Apart Garlic Bread Irresistible Delight
Zesty Black Bean Salad Fresh and Flavorful Delight
Grilled Mediterranean Veggie Skewers Fresh and Tasty
Buffalo Cauliflower Tacos Flavor-Packed and Easy Recipe
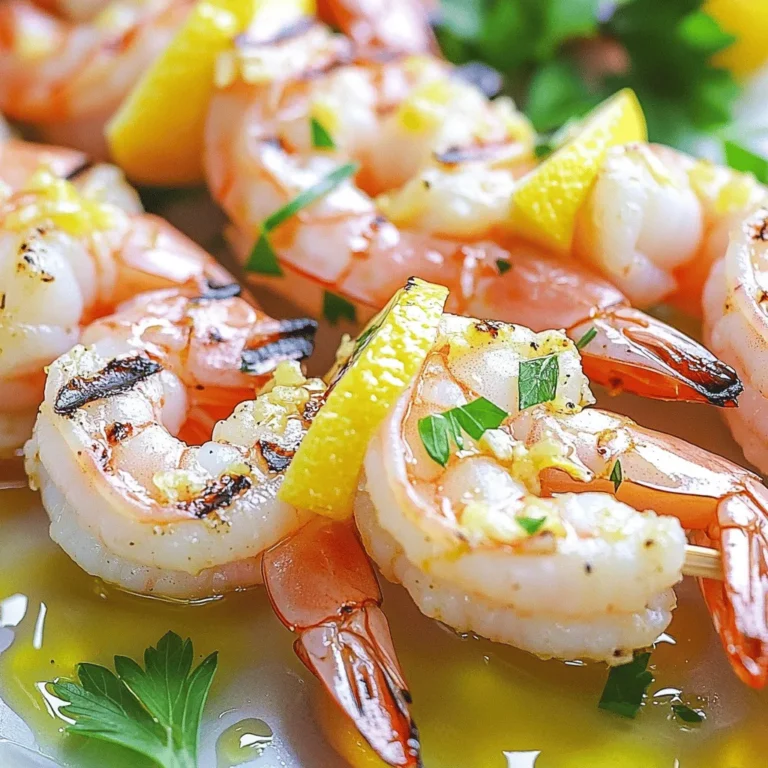
Lemon Garlic Shrimp Skewers Flavorful and Easy Dish
Crispy Air Fryer Chickpeas Easy and Healthy Snack
Page navigation
Previous Page
Previous
1
…
9
10
11
12
13
…
25
Next Page
Next
Home
Dinner
Appetizer
Desserts
Drinks
About
Contact
Privacy Policy
Toggle Menu Close
Search for:
Search


![- 1 can (15 oz) black beans, thoroughly rinsed and drained - 1 cup sweet corn (use fresh, frozen, or canned) - 1 large red bell pepper, diced into bite-sized pieces - 1 ripe avocado, diced - 1/2 medium red onion, finely chopped for a milder flavor - 1 cup cherry tomatoes, halved for bursts of sweetness - 1/4 cup fresh cilantro, finely chopped for an aromatic touch The foundation of my zesty black bean salad lies in the fresh ingredients. Black beans serve as the protein-packed base. They add a creamy texture and earthy flavor. Sweet corn brings a pop of sweetness, balancing the dish. A red bell pepper adds crunch and color. Diced avocado gives a rich, buttery taste. Finely chopped red onion adds a mild bite, while halved cherry tomatoes provide juicy bursts. Finally, fresh cilantro adds a bright finish, tying all the flavors together. - 2 tablespoons freshly squeezed lime juice - 1 tablespoon high-quality olive oil - 1 teaspoon ground cumin for warmth - 1 teaspoon garlic powder for depth - Salt and freshly cracked black pepper to taste The dressing is key to making the salad come alive. Fresh lime juice adds a zesty kick. Olive oil brings richness and ties the salad together. Ground cumin adds a warm, earthy note. Garlic powder deepens the flavor profile. Finally, salt and black pepper enhance all the tastes, making each bite delightful. - Portion size and garnishes - Optional accompaniments For serving, I like to present the salad in a large, colorful bowl. This makes it inviting and fun. You can also portion it into individual cups for a neat look. Garnish with extra cilantro leaves and lime wedges for a fresh touch. This salad pairs well with grilled chicken or fish. It also makes a great filling for wraps or tacos. Enjoy the zesty flavors and vibrant colors! For the full recipe, check out the details above. To start, grab a big mixing bowl. Add the rinsed black beans, sweet corn, diced red bell pepper, diced avocado, finely chopped red onion, halved cherry tomatoes, and chopped cilantro. Mix them all together well. Make sure each ingredient spreads out. This ensures every bite is full of flavor. Next, take a small bowl. In it, whisk together the freshly squeezed lime juice, olive oil, ground cumin, garlic powder, and a good pinch of salt and black pepper. Keep whisking until the dressing is smooth and well mixed. This mixture will bring out the best in the salad. Now, drizzle the dressing over your salad mixture. Using a large spoon or spatula, gently toss everything together. You want each piece coated with that zesty dressing. After tossing, taste the salad. You can add more lime juice or salt if needed. Let the salad sit for 10-15 minutes at room temperature. This resting time helps all the flavors blend nicely before you serve it. Check out the Full Recipe to see all the details! To make your Zesty Black Bean Salad shine, adjust the seasoning to suit your taste. Start with a little salt and pepper, then taste. If it needs more, add gradually until it’s perfect. You can also squeeze in a splash of extra lime juice. This adds brightness and makes the flavors pop. Using canned ingredients can save you time. Canned black beans and corn are quick and easy. Just rinse and drain them well. If you prefer fresh, that’s great too! Prepping ingredients in advance can also help. Chop your veggies the day before. Store them in the fridge until you’re ready to mix. Serving style can make your salad more appealing. Use a large, colorful bowl to showcase the bright ingredients. You can also serve it in cups for individual portions. Garnish with extra cilantro leaves and lime wedges. This adds a fresh look and invites guests to enjoy your creation. For the full recipe, check the details above! {{image_4}} You can easily swap beans in this salad. Try pinto beans or kidney beans for a different taste. Each bean brings its own flavor and texture. Adding or substituting vegetables can change the salad’s vibe. Consider diced cucumber for crunch or chopped jalapeño for heat. Roasted red peppers can add a smoky note. Use what you like! This salad is vegan and gluten-free. It fits well into many diets. If you want more protein, add grilled chicken or shrimp. Both options pair great with the zesty flavors. You can also use tofu or tempeh for a plant-based protein boost. Both options add texture while keeping it healthy. Want to mix up the dressing? Try a simple vinaigrette with balsamic vinegar instead of lime juice. It adds a sweet tang. You could also use a creamy dressing, like ranch or avocado dressing. This change can make the salad richer and more filling. For a spicy kick, add some hot sauce to your dressing. Experiment to find your favorite combination! For the full recipe and more ideas, check the [Full Recipe]. Store Zesty Black Bean Salad in an airtight container. Glass containers work best, but plastic ones are fine too. Make sure everything is sealed tight. This keeps the flavors fresh. Keep the salad in the fridge for the best taste. To batch prepare, mix all ingredients except avocado. Add avocado just before serving. This keeps it from browning. You can store the salad for up to three days. After that, it may lose its crunch and flavor. You can freeze black bean salad, but I don’t recommend it. Freezing changes the texture of the ingredients. If you decide to freeze it, do so without avocado. To thaw, place the salad in the fridge overnight. This helps it retain some freshness. Yes, you can make this salad ahead of time. It tastes even better after resting. To prep, mix all the salad ingredients in a bowl. Keep the dressing separate until you're ready to serve. This keeps the salad fresh and crunchy. Store the salad in a sealed container in the fridge. It can last up to two days. Just remember to add the dressing just before serving. This salad pairs well with many dishes. Try serving it with grilled chicken or fish for a complete meal. You can also enjoy it with tacos or burritos for a fun twist. It works great as a side dish for barbecues. If you want a lighter meal, serve it with whole-grain pita bread. The flavors blend well with many cuisines. Yes, this salad is very healthy! Black beans are rich in protein and fiber, which help you feel full. They also support heart health and digestion. The fresh veggies add vitamins and minerals. Avocado provides healthy fats that are good for your skin. The lime juice boosts your vitamin C intake. Overall, this salad is a great choice for a nutritious meal. For the full recipe, check out the vibrant Zesty Black Bean Salad! This blog post covered the essentials for making a delicious black bean salad. We explored fresh ingredients, dressings, serving ideas, and tips for great flavor. You can customize it to fit your taste and dietary needs, too. Remember to store your salad properly for freshness. A well-made salad can be a healthy, tasty dish that fits into your meal plans. Enjoy your cooking and delight in each bite of your Zesty Black Bean Salad!](https://dishtreats.com/wp-content/uploads/2025/07/dc2c0f53-4615-45f1-afed-f531318cc377-768x768.webp)
![- 1 large zucchini, sliced into thick rounds - 1 red bell pepper, cut into 1-inch squares - 1 yellow bell pepper, cut into 1-inch squares - 1 red onion, cut into large chunks - 8 cherry tomatoes, whole - 1 cup mushrooms, halved - 3 tablespoons extra virgin olive oil - 2 teaspoons dried oregano - 1 teaspoon garlic powder - Salt and black pepper to taste - Fresh parsley, finely chopped (for garnish) - 8 skewers (if using wooden skewers, soak in water for 30 minutes prior to use) Choosing the right ingredients is key to making these grilled Mediterranean veggie skewers shine. Fresh, colorful vegetables not only taste better but also look great on the plate. I love using seasonal veggies for the best flavor. You can mix and match as you like. The extra virgin olive oil adds richness and helps the spices stick. Dried oregano gives that classic Mediterranean taste. Garlic powder adds depth without the hassle of fresh garlic. Don't forget to season with salt and black pepper. This simple step makes a big difference in flavor. Fresh parsley as a garnish not only adds color but also a fresh taste that brightens up the dish. When preparing the skewers, remember to soak wooden skewers in water first. This prevents them from burning on the grill. If you use metal skewers, you can skip this step. For the full recipe, check out the details above. Enjoy preparing these delicious veggie skewers! - Preheat grill to medium-high heat. - In a bowl, combine the vegetables: zucchini, bell peppers, onion, tomatoes, and mushrooms. - In a small bowl, mix olive oil, oregano, garlic powder, salt, and pepper. - Drizzle the marinade over the veggies. Toss until all pieces are coated. - Thread the marinated vegetables onto skewers. Alternate colors for a bright look. - Place the skewers on the hot grill. Grill for 10-12 minutes. - Turn the skewers occasionally. This helps them cook evenly. - Remove skewers from the grill and let them cool slightly. - Just before serving, sprinkle fresh parsley on top for a nice finish. For the complete details, check the [Full Recipe]. For the best grilled Mediterranean veggie skewers, pick seasonal vegetables. Fresh veggies taste better and add more flavor. Look for zucchini, bell peppers, and red onions. They offer great colors and textures. When you shop, choose firm, bright vegetables. Avoid any that feel soft or look dull. You can spice up your marinade. Try adding fresh herbs like basil or thyme. They add a nice touch. You can also use lemon juice for a zesty flavor. For oils, consider using avocado or sesame oil. Each type brings a unique taste to the skewers. To get those perfect grill marks, heat your grill well. A hot grill helps sear the veggies. Place the skewers at an angle for better marks. Turn them every few minutes. This promotes even cooking and prevents burning. To stop veggies from sticking, oil the grill grates lightly. You can also brush oil on the skewers before grilling. For the full recipe, check the details above! {{image_4}} You can mix up your veggie skewers with many different vegetables. Try adding eggplant, asparagus, or zucchini for a tasty twist. Each vegetable brings its unique flavor and texture. Think about color too! Using red, yellow, green, and purple veggies makes your skewers look bright and fun. This also helps to attract kids and picky eaters. More colors usually mean more vitamins and minerals, too! Want to add protein? Try tofu or tempeh for a plant-based option. Marinate them just like the veggies for great flavor. If you prefer meat, chicken or shrimp works well. Marinate your choice of meat in olive oil, herbs, and spices. This adds depth to your skewers. It’s an easy way to make a filling meal. Don’t be afraid to play with flavors! Try different marinades. A simple lemon juice and herb mix can brighten the dish. You can also use spicy sauces for a kick. Before serving, drizzle some fresh dressing on top. This adds a burst of flavor and makes the dish even more appealing. For the full recipe, check out the complete guide. To store leftover skewers, let them cool down first. Place them in an airtight container. You can use glass or plastic containers. Make sure the lid seals well to keep the flavors fresh. For freezing skewers safely, wrap each skewer in plastic wrap. Then, place them in a freezer bag. This keeps them from getting freezer burn. When you reheat, take them out and thaw in the fridge overnight. To warm them up, place them on a grill or in the oven. Heat them until they are hot, about 5 to 10 minutes. These skewers can last up to 4 days in the refrigerator. After that, they may start to lose flavor and texture. Watch for signs that the skewers have gone bad. If they smell off or look slimy, it’s best to toss them. Always trust your senses when it comes to food safety. For the full recipe, check the section above. Yes, you can prep these skewers in advance. Start by cutting the vegetables. Place them in a bowl. Drizzle with olive oil and spices. Toss until coated. Cover the bowl and refrigerate. This keeps them fresh and ready to grill. I recommend marinating for at least 30 minutes. This allows the flavors to soak in well. Grill these skewers on medium-high heat. This ensures even cooking. Aim for a temperature of about 400°F (200°C). Grill for 10-12 minutes. Turn the skewers every few minutes. This will give you nice grill marks. Check the veggies for tenderness. They should be soft but still slightly firm. You can use wooden, metal, or bamboo skewers. Each has its benefits. Wooden skewers need soaking in water for 30 minutes. This prevents burning on the grill. Metal skewers are reusable and sturdy. They can handle heavy vegetables well. Bamboo skewers are lightweight and easy to find. Choose what works best for you! For the full recipe, refer to the earlier section. In this blog post, I shared a simple way to make tasty vegetable skewers. We covered the ingredients, preparation steps, and grilling techniques. You learned tips to choose fresh veggies, add flavors, and create fun variations. Remember, you can customize skewers to suit your taste. Enjoy the grilling process and share your creations with friends and family. Happy grilling!](https://dishtreats.com/wp-content/uploads/2025/07/4b70700e-9f85-4317-b9e4-a855a04e592b-768x768.webp)

![- 1 can (15 oz) of chickpeas - 2 tablespoons extra virgin olive oil - Spice seasoning options: smoked paprika, garlic powder, ground cumin Crispy air fryer chickpeas need just a few simple ingredients. First, grab a can of chickpeas. They provide protein and fiber. Next, use extra virgin olive oil for richness. This oil helps the spices stick and adds flavor. For seasoning, I love smoked paprika, garlic powder, and ground cumin. These spices add depth and warmth to the dish. - Chopped fresh parsley or cilantro for garnishing - Alternative spices for flavor enhancement You can add fresh herbs like parsley or cilantro to make it pop. They add a burst of color and freshness. Feel free to play with spices. Try cayenne for heat or even cinnamon for a sweet twist. The options are endless! If you want to see the full recipe, check it out [Full Recipe]. - Preheat air fryer to 400°F (200°C). - Rinse and dry chickpeas thoroughly. Start by preheating your air fryer. Set it to 400°F (200°C) and let it heat for about five minutes. While it warms up, rinse the chickpeas well. It’s key to remove all the canning liquid. After rinsing, spread the chickpeas on a kitchen towel. Pat them dry gently. This step helps them get that perfect crisp. - Mix chickpeas with olive oil and spices. - Transfer to air fryer basket. In a large bowl, add the dried chickpeas. Pour in two tablespoons of olive oil. Sprinkle in smoked paprika, garlic powder, ground cumin, sea salt, and black pepper. Mix well so every chickpea gets coated. Next, transfer the seasoned chickpeas to the air fryer basket. Make sure they are in a single layer. Crowding the basket can lead to uneven cooking. - Set cooking time for 15–20 minutes. - Shake basket every 7 minutes for even cooking. Set the timer for 15 to 20 minutes. It’s important to shake the basket every seven minutes. This ensures all sides get crispy. Look for a nice golden-brown color and a satisfying crunch. When they’re done, let them cool for a few minutes. They will crisp up even more as they cool. If you like, garnish with chopped parsley or cilantro for a fresh touch before serving. To get the best crunch, drying chickpeas is key. Start by rinsing them well. Then, spread them on a clean kitchen towel and gently pat them dry. This step removes excess moisture, which helps them crisp up nicely in the air fryer. Next, set your air fryer to 400°F (200°C). Preheat it for about 5 minutes. This heat is crucial for achieving that perfect texture. When you place the chickpeas in the basket, make sure they are in a single layer. Overcrowding can lead to soggy chickpeas. Crispy chickpeas pair well with many dips. Hummus and tzatziki are two of my favorites. They add creaminess that balances the crunch. You can also toss them into salads for an extra crunch or use them to top soups. If you want to get creative, try using crispy chickpeas as a snack on their own. They make a great addition to trail mixes or can be sprinkled on popcorn for a fun twist. Chickpeas are not just tasty; they're nutritious too. They are high in protein and fiber. This makes them a filling snack that can help you feel satisfied. Air frying reduces the amount of oil needed, so you get a low-calorie snack option without sacrificing flavor. These crispy chickpeas are a great way to enjoy a healthy snack without the guilt. You can feel good about munching on them anytime! For the full recipe, check the section above. {{image_4}} You can change the flavor of your crispy air fryer chickpeas. One fun option is to add spice. Try cayenne or chili powder for a spicy kick. Just mix in a little with your other spices before cooking. If you prefer sweet snacks, go for cinnamon and sugar. This will give your chickpeas a unique twist that's fun and tasty. These chickpeas are healthy and fit many diets. They are naturally gluten-free and vegan-friendly. This means everyone can enjoy them! For those watching their salt intake, you can lower the sodium. Simply reduce or skip the sea salt in the recipe for a low-sodium version. If you're hosting a party, you might want more chickpeas. To increase the batch size, just double or triple the ingredients. The cooking time may stay the same, but keep an eye on them. You can also swap chickpeas for other legumes like black beans or lentils. They will work well in the air fryer and offer different flavors. Each option can give you a fun new snack! Check out the [Full Recipe](#) for detailed steps on making these crispy delights! To store your crispy chickpeas, use an airtight container. This will help them stay crunchy. A glass jar or a plastic container with a tight lid works well. Make sure to let them cool completely before sealing. This step prevents moisture buildup. You can easily reheat chickpeas in an air fryer. Set it to 350°F (175°C) and heat for about 5 minutes. This method keeps them crispy. If you prefer the oven, place them on a baking sheet at the same temperature. Check often to avoid sogginess. Crispy chickpeas last for about 3 days at room temperature. If you store them in the fridge, they may last a bit longer, but they can lose some crispiness. For best results, enjoy them fresh! To make air fryer chickpeas crispy, first dry them well. After rinsing, spread them on a clean towel and pat them dry. Removing moisture is key for that perfect crunch. Next, toss the chickpeas with olive oil and spices. The oil helps them crisp up in the air fryer. Set your air fryer to 400°F (200°C). Cook them for 15 to 20 minutes, shaking the basket every 7 minutes. This ensures even cooking and a nice, golden-brown color. Keep an ear out for a satisfying crunch as they cook. Let them cool for a few minutes after frying. They will get even crunchier as they cool. Yes, you can use dried chickpeas, but they require more prep. Start by soaking the dried chickpeas overnight. This softens them and reduces cooking time. After soaking, rinse and boil them until tender, about 1 to 2 hours. Once cooked, follow the same steps to dry and season them. Air frying time may be longer, as dried chickpeas need to lose more moisture. Pay close attention to their texture for that perfect crunch. Crispy chickpeas pair well with many dips. Try hummus for a classic touch. Tzatziki offers a cool contrast. You can also serve them with guacamole for a creamy twist. For a spicy kick, mix them with a sriracha mayo. These dips enhance the flavors of the chickpeas. They make for a fun and tasty snack or appetizer. Enjoy exploring different combinations to find your favorite! For the full recipe, check out the [Full Recipe]. Crispy air fryer chickpeas are easy and fun to make. We covered the main ingredients, like chickpeas and olive oil, and talked about spices for extra flavor. You learned preparation steps, tips for crispiness, and fun ways to enjoy this snack. Try different spices or dips to keep it exciting. Crispy chickpeas are a tasty, healthy option for any event. Enjoy your cooking and happy snacking!](https://dishtreats.com/wp-content/uploads/2025/07/61bc6060-fad3-40a7-be2f-ccc6788a1d37-768x768.webp)