Skip to content
About
Contact
Cookie Policy
Copyright Policy
Disclaimer
Search
Home
Dinner
Appetizer
Desserts
Drinks
About
Contact
Privacy Policy
Toggle Menu
Home
/
Appetizer
- Page 10
Appetizer
Creamy Greek Yogurt Ranch Dip Easy and Flavorful Treat
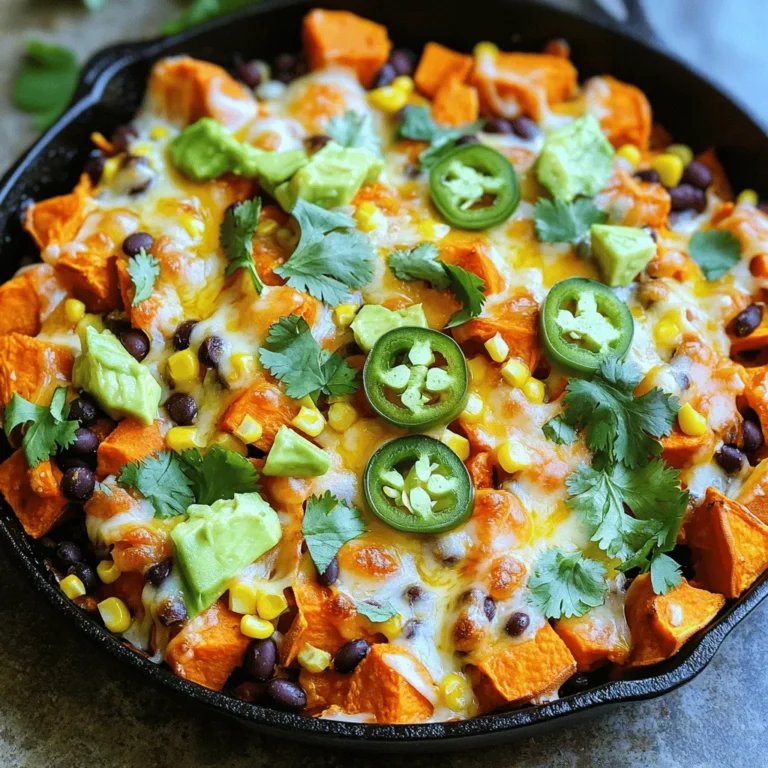
Loaded Sweet Potato Nacho Skillet Flavorful Delight
Crispy Parmesan Ranch Potato Skins Tasty Snack Delight
Loaded Sweet Potato Nacho Skillet Flavorful and Fun
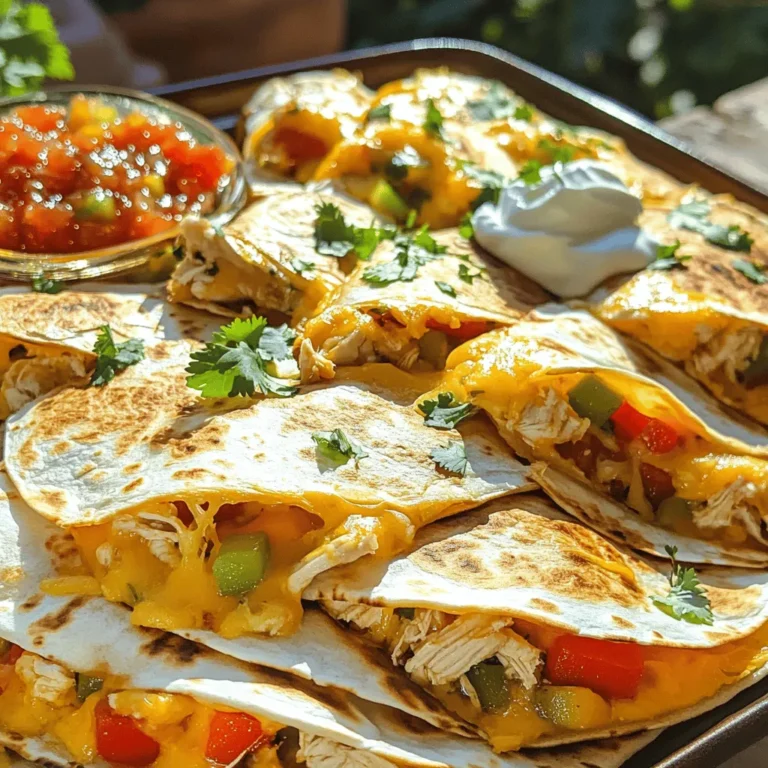
Cheesy Sheet Pan Chicken Quesadillas Easy Dinner Delight
Crispy Parmesan Ranch Potato Skins Tasty Snack Recipe
Pickle Ranch Chicken Salad Croissants for Easy Lunch
Pickle Ranch Chicken Bites Flavorful Snack Recipe
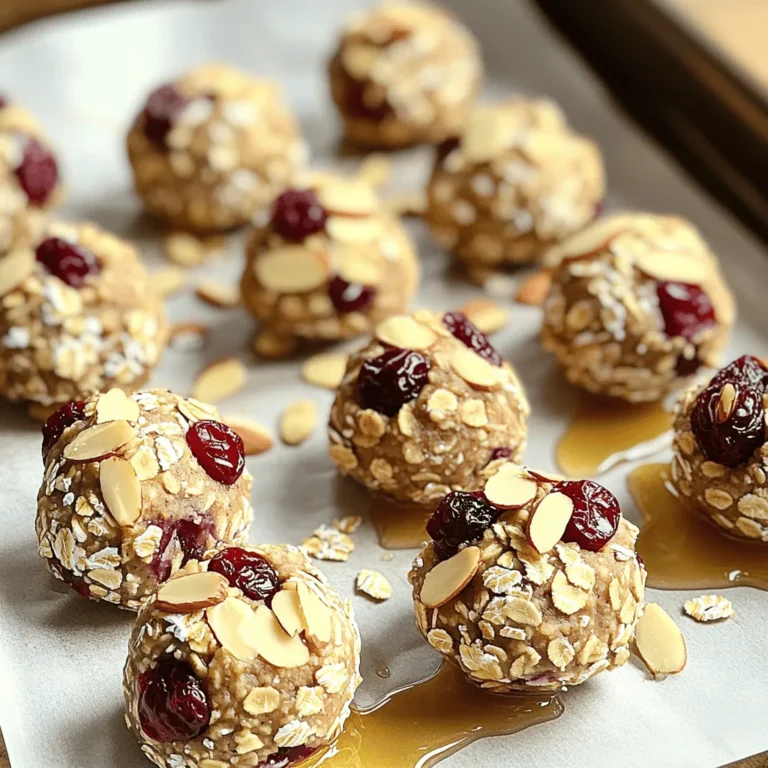
Cherry Almond Breakfast Bites Healthy and Tasty Treat
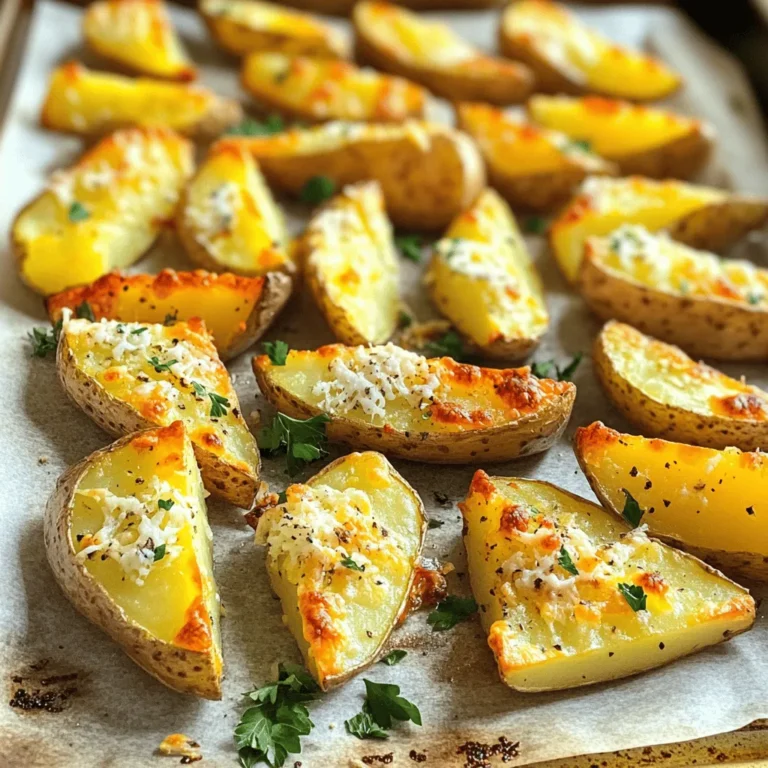
Garlic Parmesan Potato Wedges Crispy and Flavorful Treat
Page navigation
Previous Page
Previous
1
…
8
9
10
11
12
…
25
Next Page
Next
Home
Dinner
Appetizer
Desserts
Drinks
About
Contact
Privacy Policy
Toggle Menu Close
Search for:
Search

![- 1 cup plain Greek yogurt - 1/4 cup creamy mayonnaise - 1 tablespoon freshly squeezed lemon juice - 1 teaspoon garlic powder - 1 teaspoon onion powder - 1 teaspoon dried dill weed - 1 teaspoon dried parsley - 1/2 teaspoon sea salt - 1/4 teaspoon freshly ground black pepper - 1/4 teaspoon smoked paprika - Assorted fresh vegetables (carrots, celery, bell peppers, cucumber) To make a delicious Creamy Greek Yogurt Ranch Dip, you need a few simple ingredients. Start with the main trio: Greek yogurt, creamy mayonnaise, and lemon juice. The yogurt gives the dip its rich and tangy base. The mayonnaise adds a smooth, creamy texture, while the lemon juice brightens the flavors. Next, you’ll want to gather your seasonings. Garlic powder and onion powder add a savory punch. Dried dill weed and parsley bring in that classic ranch flavor. Salt, black pepper, and smoked paprika round out the taste, adding depth and a hint of spice. Finally, think about what to dip. Fresh veggies like carrots, celery, bell peppers, and cucumber work perfectly. They add crunch and freshness, creating a balanced snack. For the full recipe, check out the details above. First, grab a medium-sized mixing bowl. In this bowl, add 1 cup of plain Greek yogurt and 1/4 cup of creamy mayonnaise. These two ingredients create a rich base for our dip. Use a whisk or spatula to blend them well until smooth. It should look creamy and inviting. Next, squeeze in 1 tablespoon of freshly squeezed lemon juice. This adds a nice tang to the dip. Now, sprinkle in the seasonings: 1 teaspoon each of garlic powder, onion powder, dried dill weed, and dried parsley. Add 1/2 teaspoon of sea salt, 1/4 teaspoon of freshly ground black pepper, and 1/4 teaspoon of smoked paprika. These flavors will come together beautifully. Now it's time to whisk everything together. Vigorously mix the ingredients until the dip is fully combined. It should be smooth and creamy, with a lovely thickness. Take a taste and adjust the seasonings as needed. If you want more flavor, feel free to add a pinch of salt or a few more herbs. Your taste buds will guide you. Once you're happy with the flavor, it's time to chill the dip. Cover the bowl with plastic wrap or transfer the dip to an airtight container. Place it in the refrigerator for at least 30 minutes. This step allows the flavors to meld and deepen. When you're ready to enjoy, take the dip out of the fridge. Serve it chilled with an assortment of fresh vegetables for dipping, like carrots, celery, bell peppers, and cucumber. This adds a vibrant touch and makes for a fun snack! For the complete recipe, check out the [Full Recipe]. To make your Creamy Greek Yogurt Ranch Dip even tastier, try using fresh herbs. Fresh chives, dill, or parsley can add great flavor. You can also adjust the lemon juice for more tanginess. A little extra juice can brighten the dip. If you want a thicker dip, add more Greek yogurt. It will make the dip creamier. You can also cut back on the mayonnaise for a lighter version. This keeps the flavor while reducing calories. This dip is perfect for parties and gatherings. It pairs well with crackers or pita chips. Serve it with an array of fresh veggies, like carrots or cucumbers. They make great dippers, adding crunch to your snack. For the full recipe, check the earlier sections. {{image_4}} You can easily change the herbs in this dip. Fresh herbs like chives or basil work great. They add a nice twist to the flavor. Dried herbs can also give you different tastes. Think about using oregano or thyme for a unique touch. If you love some heat, add a spicy twist. Incorporate hot sauce or cayenne pepper. This will give your dip a zesty kick. You can also add chopped jalapeños for extra spice. Just be careful with the amount; you want to enjoy the heat, not overpower it! For a vegan version, swap the yogurt and mayonnaise. Use a plant-based yogurt and vegan mayo. Make sure all seasonings are plant-based too. This way, you can enjoy the same creamy dip without any animal products. It's delicious and fits many diets! For the full recipe, check out the link above. To keep your creamy Greek yogurt ranch dip fresh, store it in an airtight container. This helps prevent any odors from other foods in your fridge. You can enjoy the dip for up to one week. Just make sure to seal it tightly. Freezing this dip is not recommended. The texture may change after thawing, making it watery. Only freeze if it is necessary. If you must, use a freezer-safe container. If you freeze the dip, place it in the refrigerator to thaw. This method gives you the best results. Once thawed, stir it well before serving again. This helps bring back the creamy texture. Yes, non-fat can be used for a lighter version. This choice keeps the dip creamy while cutting down on fat. The flavor remains rich and satisfying. The dip lasts up to one week in the refrigerator. Store it in an airtight container to keep it fresh. I find it gets even better after a day. Fresh veggies, crackers, pita chips, or pretzels are great options. Carrots, celery, and bell peppers work well. You can get creative with your dippers! Yes, all ingredients are gluten-free; verify brands to be sure. This makes it a perfect snack for anyone with gluten sensitivities. Yes, it’s recommended to make it a few hours ahead to enhance flavors. The longer it sits, the more the flavors blend. I often prepare it the night before. This blog post shared a tasty Greek yogurt dip recipe. We covered the key ingredients, easy steps, and tips to make it even better. You learned how to customize the dip, try vegan options, and store it correctly. Think of this dip for your next party or snack. It’s healthy, easy to make, and perfect with fresh veggies or chips. Enjoy your tasty dip and feel good about sharing it with friends!](https://dishtreats.com/wp-content/uploads/2025/07/4dca82da-d028-43ac-94fd-c211b04a114a-768x768.webp)
. Start by peeling your sweet potatoes. Use a vegetable peeler for nice, even strips. Next, dice them into 1-inch cubes. This size helps them cook well. In a large bowl, toss the diced sweet potatoes with olive oil. Add smoked paprika, garlic powder, salt, and black pepper. Mix until every piece is coated. This step brings out the flavor. Preheat your oven to 400°F (200°C). This hot oven ensures crispy edges. Spread the seasoned sweet potatoes on a baking sheet. Make sure they are in a single layer for even cooking. Roast for 20-25 minutes. Stir halfway through to help with browning. The sweet potatoes should be tender and slightly caramelized when done. In a large skillet, combine the roasted sweet potatoes with black beans, corn, and diced tomatoes. Gently stir until everything is heated through. This mix creates a hearty base. Now, sprinkle the shredded cheddar cheese on top. Allow it to melt for about 3-5 minutes. Cover the skillet with a lid to speed up melting if needed. Once the cheese is melted, remove the skillet from heat. Top with jalapeños, green onions, and diced avocado. These additions add color and flavor. Finally, garnish with fresh cilantro. If you like, add a dollop of sour cream or Greek yogurt for creaminess. Serve your loaded sweet potato nacho skillet hot and enjoy the burst of flavors! For the complete cooking process, check the Full Recipe. To boost the flavor, consider adding different spices. You can use cumin or chili powder for a warm kick. A dash of cayenne pepper can also add heat. If you love fresh herbs, cilantro is perfect here. It adds a bright taste that pairs well with sweet potatoes. You can also try fresh parsley or green onions for a twist. Using a cast iron skillet can give your dish a nice crisp. It heats evenly and retains warmth well. If you prefer a non-stick pan, that works too. Just make sure your sweet potatoes do not stick. For even cooking, keep the heat steady. Stir often to prevent burning and ensure all ingredients meld nicely. For a great look, serve the skillet right at the table. This gives a rustic feel and makes sharing easy. You can add some colorful toppings, like diced avocado and sliced jalapeños. A sprinkle of cilantro adds fresh green color. For an extra crunch, serve with tortilla chips on the side. This adds texture and makes it even more fun to eat. Check out the Full Recipe for more serving ideas. {{image_4}} For a vegetarian or vegan touch, you can swap out the cheese. Try cashew cheese or nutritional yeast for a cheesy flavor without dairy. You can also pile on more plant-based toppings. Consider adding sautéed mushrooms, bell peppers, or even spinach. These ingredients add texture and boost nutrition. If you need gluten-free options, this dish is already a great choice. Sweet potatoes, beans, and veggies are naturally gluten-free. Just ensure any toppings or sauces are gluten-free too. For those who want high-protein variations, add cooked quinoa or lentils. You can also use a plant-based protein like tempeh or tofu. This way, you’ll keep the meal filling and nutritious. You can change the flavor profile by adding sweet or savory twists. Try mixing in some cinnamon or maple syrup for a sweet kick. This creates a unique balance with the savory ingredients. For international twists, consider adding spices from around the world. A sprinkle of taco seasoning gives a Mexican flair. Or, use curry powder for an Indian vibe. These simple changes can transform your loaded sweet potato nacho skillet. For the complete recipe, see [Full Recipe]. When storing your loaded sweet potato nacho skillet, let it cool first. This step helps avoid moisture buildup, which can make your dish soggy. Use an airtight container to keep it fresh. If stored properly, it lasts in the fridge for up to four days. To reheat leftovers, use a skillet for the best results. Heat on medium-low to keep the texture. Stir gently as you warm it up to avoid burning. Avoid the microwave if you can; it can make the dish soggy. If you must use it, heat in short bursts and stir often. You can freeze your loaded sweet potato nacho skillet for later use. Portion it into freezer-safe containers, leaving some space for expansion. It stays good for up to three months in the freezer. When ready to eat, thaw it in the fridge overnight before reheating. This keeps the flavors intact and the texture nice. You can use butternut squash or pumpkin. They have a similar texture and taste. Both options provide a nice sweetness. You can also try regular potatoes if you want a different flavor. Yes, you can prep some of the ingredients before. Roast the sweet potatoes a day ahead. Store them in the fridge. You can also mix the black beans, corn, and tomatoes in advance. Just heat everything up when ready to serve. To melt cheese evenly, use freshly shredded cheese. It melts better than pre-shredded cheese. Spread the cheese in an even layer on top of the skillet. Cover the skillet for a couple of minutes. This traps heat and helps the cheese melt smoothly. You can use many toppings for loaded nachos. Some popular choices include jalapeños, green onions, and diced avocado. For a twist, add pickled red onions or fresh salsa. Don't forget sour cream or Greek yogurt for creaminess. You can get creative and mix your favorite toppings! In this blog post, we explored how to create a delicious dish with sweet potatoes, black beans, and cheese. You learned about ingredient choices, measurements, and smart substitutions. I shared tips on roasting sweet potatoes and combining ingredients perfectly. We looked at variations for different diets and how to store leftovers. Remember, making this dish fun and flavorful is easy. Use the ideas provided to customize your meal, ensuring it fits your taste. Enjoy your cooking and make it a family favorite!](https://dishtreats.com/wp-content/uploads/2025/07/3c3c8a5c-337a-4892-8590-75b37c5e13f0-768x768.webp)
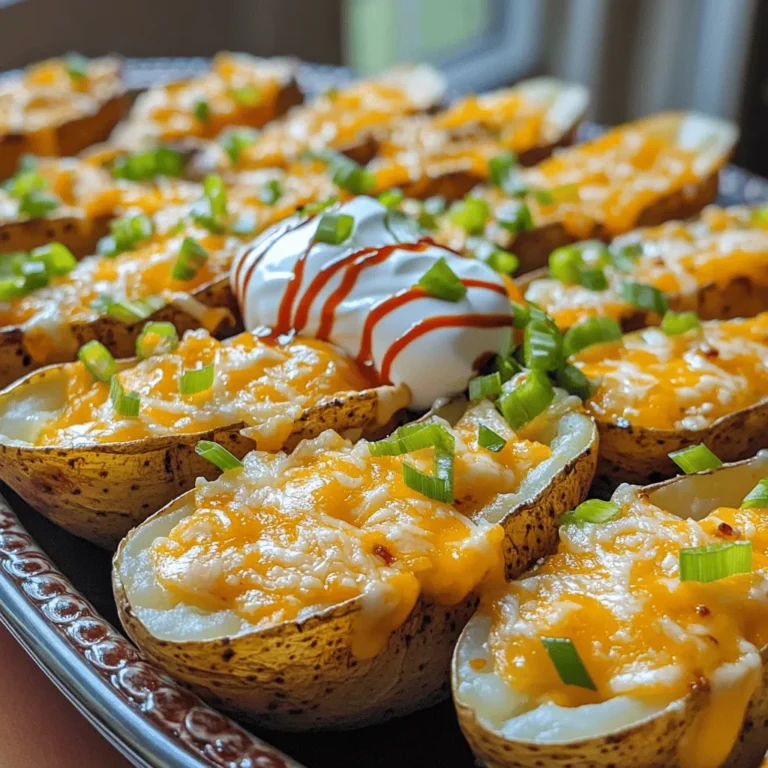
![To make Crispy Parmesan Ranch Potato Skins, gather these simple ingredients: - 4 large russet potatoes - 1 cup shredded sharp cheddar cheese - 1/2 cup grated Parmesan cheese - 1/4 cup sour cream - 2 tablespoons ranch seasoning mix - 1/4 cup green onions, chopped - 3 tablespoons olive oil - Salt and pepper to taste - Optional: hot sauce for serving These items will help you create a tasty snack that everyone loves. The russet potatoes give a sturdy base, while the cheese brings flavor and creaminess. The ranch seasoning mix adds a punch of taste that makes these skins special. I always keep a few extra green onions on hand for garnish. They add color and a mild onion flavor that enhances the dish. I recommend using fresh ingredients for the best results. Fresh potatoes will give you a crispier skin. The cheese should be high-quality for a richer flavor. If you like spice, have hot sauce ready for a kick! For the full recipe, visit the [Full Recipe] section. 1. Preheat your oven to 400°F (200°C) to get it ready for baking. 2. Scrub the russet potatoes under cold running water. Dry them completely with a clean towel. 3. Prick each potato with a fork six to eight times. This helps steam escape while they bake. 1. Rub each potato with olive oil. Make sure they are well-coated. 2. Sprinkle salt on the potatoes for extra flavor. 3. Place the potatoes on the middle rack of the oven. Bake for 45-60 minutes. Check their doneness by piercing with a fork. 1. Once baked, let the potatoes cool for about 10 minutes. This makes them easier to handle. 2. Slice each potato in half lengthwise. Now you have boat-like shapes! 3. Scoop out a bit of the flesh, leaving about 1/4 inch intact along the skin. 1. Brush the insides of each potato skin with olive oil. Season with salt and pepper for taste. 2. Add a generous amount of shredded cheddar cheese in each skin. Then sprinkle the remaining Parmesan cheese on top. 3. Put the filled skins back in the oven, cut-side up. Bake for an extra 10-15 minutes. The cheese should melt and the edges should crisp. 4. While baking, mix the remaining Parmesan cheese, ranch seasoning, and chopped green onions in a bowl. 5. When the potato skins are crispy, take them out. Top each skin with the ranch mix. 6. Return the potato skins to the oven for 5 more minutes. This lets the flavors meld beautifully. Enjoy your Crispy Parmesan Ranch Potato Skins hot, served with sour cream and optional hot sauce! For complete details, refer to the Full Recipe. To make your potato skins crispy, follow these simple steps: - Bake at a high temperature: Set your oven to 400°F (200°C). High heat gets the skins nice and crisp. - Use olive oil: Coat the skins well in olive oil. This helps them crisp up and adds flavor. - Season well: Don’t skip the salt and pepper. Seasoning is key for great taste. You can switch up the cheese for your potato skins. Here are some ideas: - Monterey Jack: This cheese melts well and adds a creamy texture. - Gouda: It gives a smoky flavor that pairs nicely with ranch. - Feta: For a tangy twist, sprinkle some crumbled feta on top. Balancing flavors is important. Use milder cheeses with stronger toppings. Adding more flavor is easy! Here are some tips: - Spices: Try adding paprika or garlic powder for extra kick. - Herbs: Fresh herbs like parsley or chives brighten up the dish. - Toppings: Consider adding crispy bacon bits or diced tomatoes for extra texture. These tips help you make the best crispy Parmesan ranch potato skins. For the complete recipe, check out the Full Recipe section. {{image_4}} For a twist, try different spice blends. You can use garlic powder, onion powder, or smoked paprika. Each adds a unique taste. You can also switch the ranch seasoning for taco seasoning. It gives a fun and zesty flavor. - Garlic powder - Onion powder - Smoked paprika - Taco seasoning Explore different flavor profiles. For a spicy kick, add cayenne pepper or chili powder. If you like fresh herbs, try dill or parsley. These choices keep your potato skins exciting and tasty. Get creative with toppings to suit your taste. You can add crispy bacon bits for a savory crunch. If you're vegan, top with dairy-free cheese or avocado. - Crispy bacon bits - Dairy-free cheese - Avocado slices For a fresh touch, add chopped tomatoes or jalapeños. You can also sprinkle some fresh cilantro or green onions. This way, everyone can enjoy their potato skins just how they like them. Pair your potato skins with a hearty soup or salad. A warm chili or creamy broccoli soup works well. These sides make a filling meal. - Hearty chili - Creamy broccoli soup - Fresh garden salad You can also serve them with grilled chicken or fish. This gives a nice balance to your meal. The crispy potato skins shine as a fun side dish. For more ideas, check out the full recipe. To keep your crispy potato skins fresh, store them in the fridge. Place them in an airtight container. They will stay good for about 3 days. Make sure they cool completely before sealing. This helps prevent excess moisture. When you want to enjoy your leftovers, use an oven for the best taste. Preheat it to 350°F (175°C). Place the potato skins on a baking sheet. Heat them for about 10-15 minutes. This keeps them crispy. Avoid using a microwave, as it can make them soggy. Yes, you can freeze potato skins! To freeze, let them cool completely. Place them in a single layer on a baking sheet. Freeze them for about 1-2 hours. After that, transfer them to a freezer bag. Remove as much air as possible. For thawing, place the skins in the fridge overnight before reheating. The best potatoes for potato skins are large russet potatoes. They have thick skin and a fluffy interior. This makes them perfect for holding toppings. Their size allows for a good amount of filling. Plus, they get crispy when baked, which is what we want. Yes, you can prepare them ahead of time. Bake the potatoes and scoop out the flesh. Store the skins in the fridge until you're ready to bake. Just add cheese and toppings before the final bake. This saves time and makes serving easier. To keep potato skins crispy, follow these tips: - Ensure you coat the skins with olive oil. - Bake them at a high temperature. - Avoid overcrowding the baking sheet. - Don't cover them while they cool. These steps help maintain crunchiness and flavor. Crispy Parmesan Ranch Potato Skins go well with several sauces. Here are some tasty pairings: - Sour cream - Ranch dressing - Hot sauce - Guacamole - Salsa These sauces add flavor and enhance your snack experience. Yes, you can freeze potato skins for later use. Bake the skins and let them cool completely. Then, store them in airtight containers. They can last a couple of months in the freezer. When ready to enjoy, bake them directly from frozen. This way, you get to savor that crispy goodness again! This blog post guides you on making Crispy Parmesan Ranch Potato Skins, covering every step. You learned about needed ingredients and how to prepare them. I shared tips for achieving crispy skins and creative topping ideas. You also discovered ways to store and reheat leftovers. Enjoy making this tasty treat! With your new skills, you can impress friends and family. These potato skins are simple and delicious.](https://dishtreats.com/wp-content/uploads/2025/07/2d854721-5686-49a1-8fc7-db971342c8a3-768x768.webp)
![- Cooked chicken - Creamy mayonnaise - Dill pickle relish - Ranch seasoning mix - Green onions - Celery - Salt and black pepper - Buttery croissants - Lettuce leaves - Dill pickle slices To make the Pickle Ranch Chicken Salad Croissants, you need a few simple ingredients. Start with cooked chicken. Shredded chicken works best, and you can use leftover rotisserie chicken if you like. Next, grab creamy mayonnaise, which adds richness and binds everything together. You will also need some dill pickle relish. This gives the salad a tangy kick. For flavor, add a packet of ranch seasoning mix. It brings a burst of taste to the dish. Then, you will need green onions and celery. They add crunch and freshness to the chicken salad. Don’t forget salt and black pepper to season your salad to your liking. For the base, use buttery croissants. They are soft and flaky, perfect for holding the chicken salad. You’ll also need lettuce leaves to line the croissants and keep them from getting soggy. Lastly, you can add dill pickle slices on the side for extra crunch and flavor. You can find the full recipe [Full Recipe] in the next section. First, we mix the chicken salad. Start with two cups of cooked chicken, shredded. Add half a cup of creamy mayonnaise and a quarter cup of dill pickle relish. Then, mix in one tablespoon of ranch seasoning. Stir until everything is well combined. Next, we season the mixture. Taste your chicken salad and add salt and black pepper to your liking. This step is key for great flavor. Now, we assemble the croissants. Carefully slice each croissant in half. Place a lettuce leaf on the bottom half. This keeps the croissant from getting soggy. Let’s combine the base ingredients. In a large bowl, mix the chicken, mayonnaise, relish, and ranch seasoning. Use a spatula to blend well. Now, we add vegetables for crunch. Toss in a quarter cup of finely chopped green onions and celery. Mix until all the veggies are evenly spread throughout. Finally, we make the chicken salad shine. After seasoning, ensure everything is properly mixed. This is the moment when you can adjust the flavor if needed. For the finishing touch, scoop the chicken salad onto the lettuce-covered croissant halves. Pile it high for a tasty bite! Don't forget to garnish with extra dill pickle slices for added flavor. For the full recipe, refer to the beginning section. To get the best texture for your chicken salad, start with shredded chicken. It's key to keep the pieces small and evenly shredded. This helps each bite feel tender and smooth. Use cooked chicken that’s still warm, as it mixes better with the other ingredients. When it comes to seasoning, don’t hold back. The ranch seasoning mix adds a great taste. I always suggest starting with a tablespoon. You can adjust to your liking. Taste as you mix. Add salt and pepper, a little at a time, until it’s just right. Presentation can make your croissants stand out. Arrange them neatly on a platter. You can serve them whole or cut in half for easy grabbing. Place a small bowl of extra dill pickles next to them. This adds a nice touch and makes it easy for guests. For sides, consider serving fresh fruit or a light salad. A simple green salad pairs nicely. You can even add some crunchy chips for texture. This makes for a fun and tasty meal that everyone will enjoy. {{image_4}} You can change this recipe to suit your taste. Here are some ideas. - Alternative proteins to try: Instead of chicken, use turkey or canned tuna. Both work well and give a new twist. For a meat-free option, try chickpeas or tofu for a healthy plant-based salad. - Different seasoning blends: Swap the ranch mix for other blends, like garlic or lemon pepper. You can also add some hot sauce for a spicy kick. If you seek healthier choices, here are some easy swaps. - Low-calorie alternatives: Use Greek yogurt instead of mayonnaise. This keeps the creamy texture but cuts calories. You can also use less chicken or add more veggies to lighten it up. - Gluten-free options for croissants: Look for gluten-free croissants at your local store. You can also use lettuce wraps or gluten-free bread for a crunchy and satisfying meal. Explore these variations to make your Pickle Ranch Chicken Salad Croissants even more exciting. For the full recipe, check the recipe section above. To keep your pickle ranch chicken salad croissants fresh, store any leftovers in an airtight container. This helps prevent drying out. You can place a paper towel in the container to absorb moisture. The best time to eat them is within three days for optimal taste. After that, the croissants may become soggy or lose flavor. You might want to enjoy your croissants warm. To reheat them, use an oven or toaster oven. Heat at 350°F for about 5-7 minutes. This keeps the croissants crisp. Avoid using a microwave, as it can make them chewy. If you have extra chicken salad, you can use it in wraps or on a bed of greens. This way, you can create a new meal with the leftovers that is just as tasty! Can I use rotisserie chicken? Yes, rotisserie chicken works great in this recipe. It saves time and adds flavor. Simply shred the chicken and mix it in. How do I make this salad ahead of time? You can make the salad a day in advance. Store it in an airtight container in the fridge. Just assemble the croissants when you’re ready to serve. What are some good sides to serve with these croissants? Some tasty sides include fresh fruit, chips, or a simple green salad. These pair well and add color to your plate. Where can I buy ready-made chicken salad? You can find ready-made chicken salad at grocery stores or deli counters. Look for local options for the freshest taste. Can I substitute the croissants with other bread? Yes, you can use any bread you like. Try using bagels, pita, or even lettuce wraps for a low-carb option. This blog post covered how to make a tasty chicken salad for croissants. You learned the key ingredients and the steps for mixing and assembling. I shared tips to get the best flavors and textures. You can also try different proteins or seasonings to make it your own. Store any leftovers properly to keep them fresh. This dish is great for gatherings or a simple meal at home. Enjoy making your delicious chicken salad and impress your friends and family!](https://dishtreats.com/wp-content/uploads/2025/07/dff408d1-932c-47c7-977b-b0a9332b2143-768x768.webp)
![- 1 lb boneless, skinless chicken breasts, cut into bite-sized pieces - 1 cup dill pickle juice - 1 cup all-purpose flour - 1 teaspoon onion powder - 1 teaspoon garlic powder - 1 teaspoon paprika - 1 teaspoon black pepper - 1/2 teaspoon salt - 2 large eggs, beaten - 1 cup breadcrumbs (use panko for added crunch) - 1/2 cup ranch dressing - Fresh dill, for garnish (optional) These ingredients create a tasty flavor mix. The chicken gets a nice tang from the dill pickle juice. The spices add warmth and depth. The ranch dressing gives a creamy finish. You will need some basic tools for the best results. Here’s what I suggest: - Mixing bowls for marinating and breading - A whisk for beating the eggs - A baking sheet lined with parchment paper or greased - Measuring cups and spoons for accuracy These tools help streamline your cooking process. They ensure that each step flows smoothly and efficiently. If you want to change things up, here are some easy swaps: - Use chicken thighs instead of breasts for more flavor. - Swap out ranch dressing for blue cheese dressing for a bolder taste. - Try gluten-free flour if you need a gluten-free option. - Use crushed cornflakes instead of breadcrumbs for extra crunch. These substitutions can make the recipe your own. You can keep it fun and exciting while still enjoying the core flavors. For the complete recipe, check the [Full Recipe]. To start, grab a mixing bowl. Place the bite-sized chicken pieces into it. Pour in the dill pickle juice, making sure the chicken is fully submerged. Cover the bowl with plastic wrap or a lid. Now, let it chill in the fridge. For best results, marinate for at least one hour. If you have time, overnight is even better. This step adds so much flavor to the chicken! Next, let’s set up a breading station. You will need three bowls. In the first bowl, mix the all-purpose flour with onion powder, garlic powder, paprika, black pepper, and salt. Stir well until everything is combined. In the second bowl, pour in the beaten eggs. Whisk them until they are smooth. In the third bowl, fill it with breadcrumbs, preferably panko. Panko gives a nice crunch to the bites. After marinating, take the chicken out of the fridge. Gently pat the chicken pieces dry with paper towels. Start by dredging each piece in the flour mix. Make sure to shake off any extra flour. Next, dip the chicken into the beaten eggs. Finally, coat the chicken well with the breadcrumbs. Now, preheat your oven to 400°F (200°C). Prepare a baking sheet by lining it with parchment paper or greasing it lightly. Arrange the breaded chicken bites in a single layer. Bake for 15-20 minutes. They should turn golden brown and crispy. Check that the internal temperature reaches 165°F (75°C). Once cooked, move the chicken bites to a serving platter. Drizzle ranch dressing on top and sprinkle with fresh dill if you like. This adds a lovely touch! For the full recipe, be sure to check the details. To get crispy chicken bites, follow a few key steps. First, make sure to marinate the chicken in dill pickle juice. This adds flavor and helps keep the meat moist. Next, dry the chicken pieces well before breading. Excess moisture can lead to soggy bites. When coating, use seasoned flour first, then dip in egg, and finally cover with breadcrumbs. I recommend using panko breadcrumbs for extra crunch. Bake at 400°F (200°C) until golden brown and fully cooked. Avoid common mistakes for the best results. Do not rush the marination process; it is crucial for flavor. Skipping the drying step can lead to less crispy bites. Also, ensure you do not overcrowd the baking sheet. Leave space between each piece to allow hot air to circulate. Lastly, check the internal temperature. Chicken should reach 165°F (75°C) to be safely eaten. For tailgating or parties, serve these bites with extra ranch dressing for dipping. This adds a nice creamy touch. You can also pair them with fresh pickle slices for added crunch. For a fun twist, consider setting up a dipping station. Include various sauces, like buffalo sauce or honey mustard. This lets guests customize their bites. {{image_4}} Want some heat? Add hot sauce to the marinade. This gives your chicken bites a spicy kick. You can also mix cayenne pepper into the flour. Adjust the amount to your taste. This adds flavor without overwhelming the pickle taste. If you enjoy heat, this variation is for you! Looking for a lighter option? Use an air fryer to cook your chicken bites. This method cuts down on oil and keeps them crisp. Preheat your air fryer to 400°F (200°C). Place the breaded chicken in a single layer. Cook for about 12-15 minutes. Check that they reach an internal temperature of 165°F (75°C). You get a crunchy texture without deep frying! Want a veggie twist? Try using cauliflower instead of chicken. Cut cauliflower into bite-sized florets. Marinate them in the dill pickle juice for the same time. Follow the same breading and cooking steps. Bake or air fry until golden and crispy. This gives you a tasty, plant-based snack that everyone will love. You can find the full recipe for Pickle Ranch Chicken Bites and try these fun variations! To keep your leftover chicken bites fresh, place them in an airtight container. Make sure they cool down to room temperature before sealing. This method helps prevent moisture, which can make them soggy. Store the container in the fridge for up to three days. When you're ready to enjoy your chicken bites again, reheating properly is key. I recommend using an oven or an air fryer for the best results. Preheat the oven to 375°F (190°C). Place the chicken bites on a baking sheet and heat for about 10-15 minutes. This method helps restore their crispy texture. If using an air fryer, set it to 350°F (175°C) and heat for about 5-7 minutes. If you want to save some chicken bites for later, freezing is a great option. First, let them cool completely. Then, arrange the bites in a single layer on a baking sheet and freeze for about an hour. Once frozen, transfer them to a freezer-safe bag or container. They can last up to three months in the freezer. When you're ready to eat, just reheat them from frozen, following the tips above for that perfect crunch. For the full recipe, check out the details above. The best way to marinate chicken is to use a flavorful liquid. For Pickle Ranch Chicken Bites, you will soak the chicken in dill pickle juice. This juice adds a zesty kick and keeps the meat juicy. Place the cut chicken in a bowl and cover it with the pickle juice. Make sure all pieces are fully submerged. Cover the bowl and refrigerate for at least an hour. For even better flavor, let it marinate overnight. This method works well for any chicken dish. Yes, you can use frozen chicken for this recipe. However, it is best to thaw the chicken first. Place it in the fridge overnight or submerge it in cold water for quicker thawing. Once thawed, cut the chicken into bite-sized pieces. After that, follow the marination steps as usual. Using frozen chicken may change the texture slightly, but it will still taste great. To make a low-carb version of Pickle Ranch Chicken Bites, you can skip the breadcrumbs. Instead, coat the chicken pieces in crushed pork rinds or almond flour. Both options give a nice crunch without the carbs. You can also use a low-carb ranch dressing for dipping. This way, you keep the flavor and texture while making it suitable for a low-carb diet. Enjoy your tasty bites without the guilt! In this post, we explored how to make Pickle Ranch Chicken Bites. We discussed key ingredients, cooking essentials, and helpful substitutions. I shared step-by-step instructions for marinating, breading, and baking. You learned tips for crispy bites and common mistakes to avoid. We covered variations like spicy bites and vegetarian options. Finally, I provided storage tips and answered FAQs. Try these bites for your next gathering. They’re fun, easy, and full of flavor! Enjoy your cooking adventure!](https://dishtreats.com/wp-content/uploads/2025/07/7f7f749c-ecc1-4920-b674-4460a511463b-768x768.webp)