Spiced Apple Cider Donuts Delicious Fall Treat Recipe


Fall is here, and it’s time to indulge in flavors that warm the heart. Let’s make spiced apple cider donuts, the perfect treat for the season! With fresh apple cider and warm spices, these donuts are bound to become your new favorite comfort food. Follow me for a simple recipe that will bring warmth and joy to your kitchen. You won’t want to miss out on this delicious fall delight!
Why I Love This Recipe
- Comforting Flavor: The warm spices and fresh apple cider create a cozy, nostalgic taste that’s perfect for fall.
- Easy to Make: This recipe is straightforward, making it ideal for both novice bakers and seasoned pros.
- Delightful Texture: The donuts are soft and fluffy, offering a delightful bite that pairs well with the sweet coating.
- Perfect for Sharing: With a yield of 12 donuts, they are great for gatherings, parties, or simply enjoying with family.
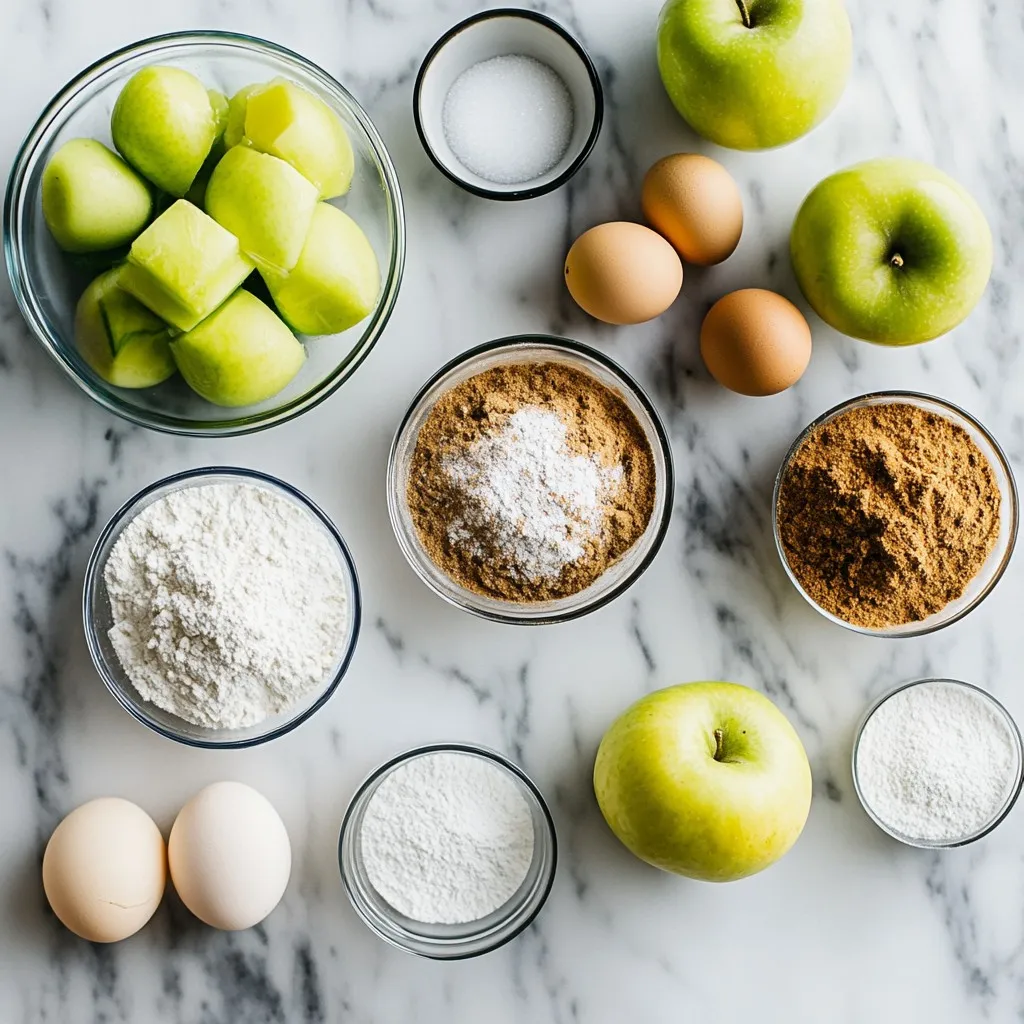
Ingredients
To make spiced apple cider donuts, you need these ingredients:
- 2 cups fresh apple cider
- 1/2 cup unsalted butter, melted
- 1 cup granulated sugar
- 2 large eggs, at room temperature
- 2 cups all-purpose flour, sifted
- 1 tsp baking powder
- 1/2 tsp baking soda
- 1 tsp ground cinnamon
- 1/2 tsp ground nutmeg
- 1/4 tsp ground ginger
- 1/4 tsp salt
- 1 cup powdered sugar (for finishing)
- 2 tbsp cinnamon sugar (for finishing)
Each ingredient plays a key role in your donuts. Fresh apple cider gives the donuts their sweet, fruity taste. Unsalted butter adds richness, while granulated sugar enhances sweetness. Eggs bind the mixture and help the donuts rise.
Using sifted all-purpose flour ensures a light texture. Baking powder and baking soda help the donuts rise and become fluffy. The spices—cinnamon, nutmeg, and ginger—bring warmth and depth to each bite. Salt balances the flavors. Finally, the powdered sugar and cinnamon sugar make a sweet coating that completes the treat.
Gather these ingredients before you start. This makes the process smooth and fun!
Step-by-Step Instructions
Preparation Steps
1. Reducing the apple cider: Start by pouring two cups of fresh apple cider into a medium saucepan. Heat it over medium-high until it boils. Once it bubbles, lower the heat and let it simmer. This should take around 20 to 25 minutes. The cider will thicken and reduce to about one cup. After that, remove it from the heat and let it cool for a few minutes.
2. Preheating the oven: While the cider cools, preheat your oven to 350°F (175°C). Grease your donut pan lightly with non-stick spray or butter. This step helps the donuts pop out easily after baking.
3. Mixing wet ingredients: In a large bowl, combine half a cup of melted unsalted butter and one cup of granulated sugar. Mix them until they blend well. Then, add the cooled reduced cider and whisk until smooth. Now, add the two large eggs one at a time, mixing until everything is well combined.
4. Combining dry ingredients: In another bowl, whisk together two cups of sifted all-purpose flour, one teaspoon of baking powder, half a teaspoon of baking soda, one teaspoon of ground cinnamon, half a teaspoon of ground nutmeg, a quarter teaspoon of ground ginger, and a quarter teaspoon of salt. Make sure they mix evenly.
5. Folding mixtures together: Now, take the dry mix and gently fold it into the wet mix using a spatula. Be careful not to over-mix; a few lumps are okay. This keeps the donuts light and fluffy.
6. Filling the donut pan: Use a spoon to fill each cavity of the donut pan with the batter. Fill them about three-quarters full. This allows enough room for the donuts to rise while baking.
7. Baking process: Place the filled pan in the oven and bake for 10 to 12 minutes. They are done when they spring back gently when touched, and a toothpick comes out clean when inserted in the center. Let them cool in the pan for five minutes before moving them to a wire rack.
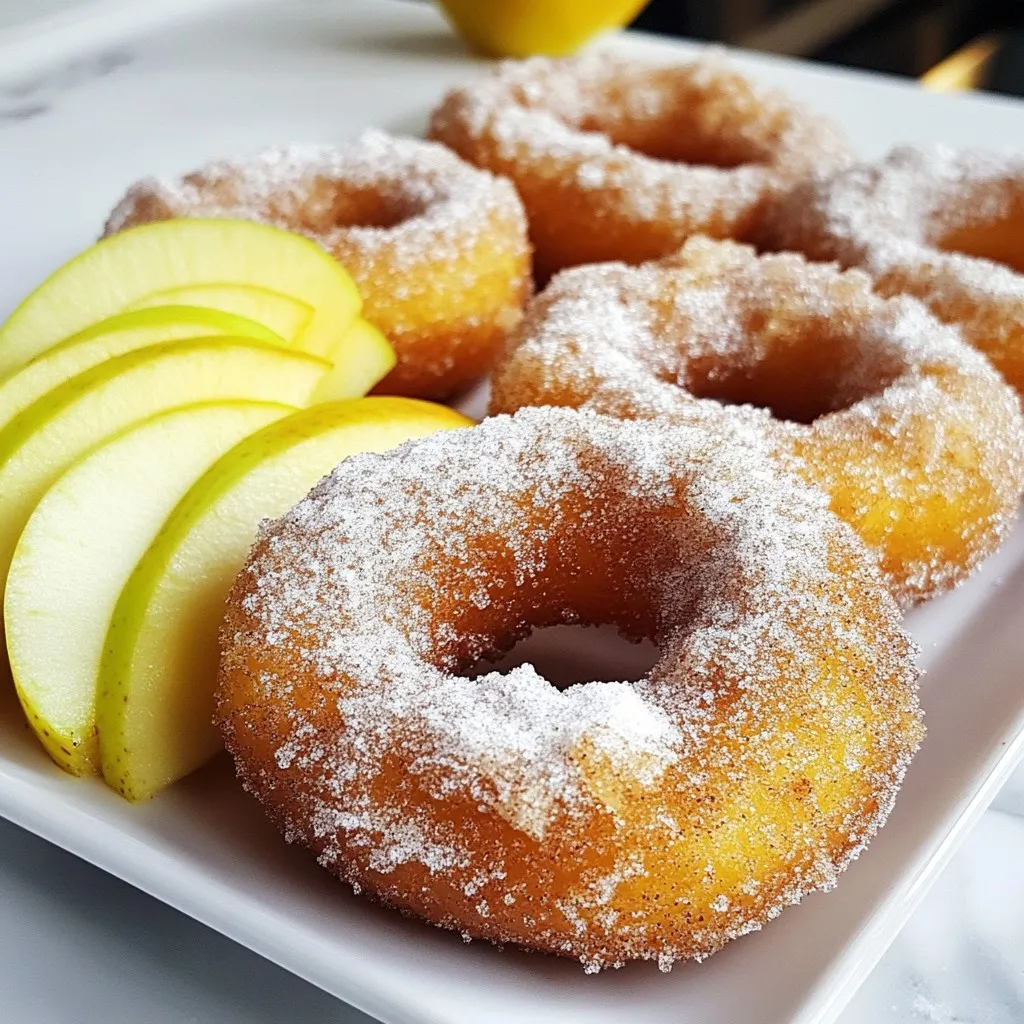
8. Coating in sugar: While the donuts are warm, mix one cup of powdered sugar and two tablespoons of cinnamon sugar in a shallow bowl. Roll each donut gently in this mixture until fully coated. This adds a sweet finish and enhances the flavor.
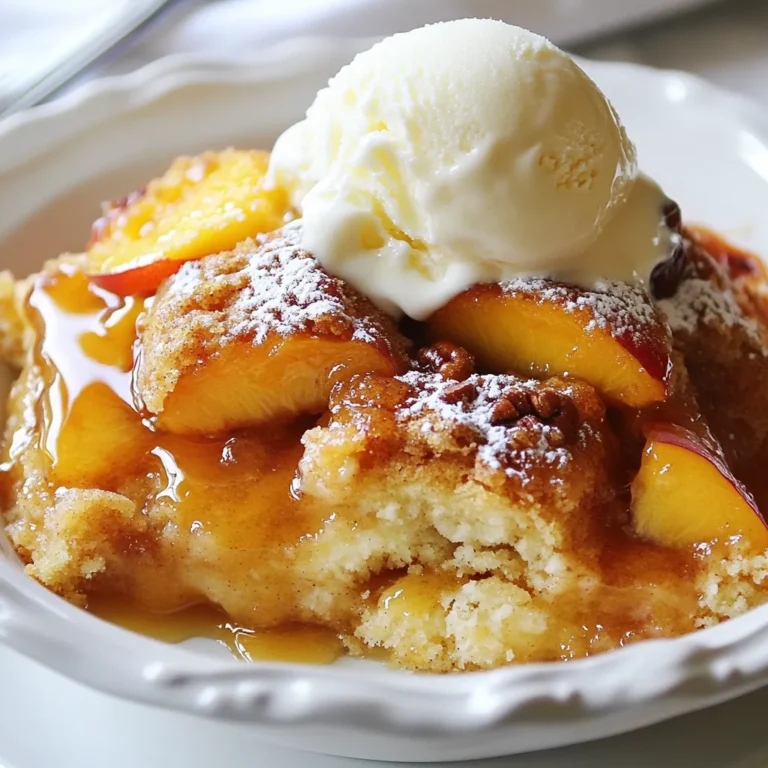
9. Serving suggestions: Serve these delightful donuts warm or at room temperature. They pair wonderfully with a hot mug of apple cider or a cup of coffee. For a lovely presentation, arrange them on a rustic wooden platter with thin apple slices and a sprinkle of cinnamon. Enjoy the cozy flavors of fall!
Tips & Tricks
Perfecting the Recipe
To make the best spiced apple cider donuts, focus on the batter’s consistency. You want it thick but pourable. If it feels too runny, add a touch more flour. If it’s too thick, add a bit of cider.
For baking, set your oven to 350°F (175°C). Bake the donuts for 10 to 12 minutes. Check for doneness by pressing lightly on the top. If it springs back, they’re ready. A toothpick inserted should come out clean.
Avoid over-mixing your batter. Gently fold the dry ingredients into the wet ones. A few lumps are okay and help keep the donuts light.
Serving Recommendations
Pair these donuts with a warm drink. Hot apple cider or coffee makes a great match. Both drinks enhance the flavors of the spices.
For presentation, arrange the donuts on a rustic wooden platter. Surround them with thin apple slices and sprinkle a light dusting of cinnamon. This setup looks inviting and highlights the fall theme, making your treat even more special.
Pro Tips
- Use Fresh Cider: For the best flavor, use fresh apple cider rather than bottled varieties. Fresh cider has a more vibrant taste that enhances the donuts.
- Don’t Overmix: When combining the wet and dry ingredients, mix just until combined. Overmixing can lead to dense donuts instead of light and fluffy ones.
- Check for Doneness: Use a toothpick to test the donuts for doneness. Insert it into the center; it should come out clean when they are fully baked.
- Coating Technique: For an even sugar coating, roll the warm donuts gently in the sugar mixture, ensuring all sides are covered for that perfect sweet finish.
Variations
Flavor Combinations
You can change the taste of your spiced apple cider donuts with fun add-ins. Here are some ideas:
- Adding nuts or chocolate chips: Mix in chopped walnuts or pecans for a crunch. You can also add dark or milk chocolate chips for a sweet twist.
- Seasonal spice variations: Try adding cloves or cardamom for a warm flavor. These spices enhance the autumn vibe and add depth.
- Glazing options instead of coating in sugar: Instead of rolling in sugar, you can glaze the donuts. A simple mix of powdered sugar and apple cider creates a sweet glaze.
Dietary Adjustments
If you need to make your donuts fit special diets, here are some easy swaps:
- Gluten-free adaptations: Use a gluten-free flour blend in place of all-purpose flour. This keeps the texture light and fluffy.
- Vegan substitutes: Replace eggs with flax eggs. Mix 1 tablespoon of flaxseed meal with 2.5 tablespoons of water. Let it sit until it thickens. You can also use coconut oil instead of butter for a vegan option.
Storage Info
Best Storage Practices
To keep your spiced apple cider donuts fresh, store them in an airtight container. This container keeps air out and moisture in, which helps the donuts stay soft. They can last about three days at room temperature. If you want to keep them longer, freezing is a great option. Wrap each donut tightly in plastic wrap and place them in a freezer-safe bag. They can last up to three months in the freezer.
Reheating Instructions
When you’re ready to enjoy your donuts again, reheating is key. The best way is to use the oven. Preheat your oven to 350°F (175°C). Place the donuts on a baking sheet and heat them for about 5 minutes. This warms them up without making them dry. If you’re in a hurry, you can use the microwave. Heat them for about 10-15 seconds. Just be careful, as microwaving for too long can make them tough. Enjoy your fresh-tasting donuts!
FAQs
How to make spiced apple cider donuts from scratch?
To make spiced apple cider donuts from scratch, follow these steps:
1. Reduce 2 cups of fresh apple cider in a saucepan until it measures 1 cup.
2. Preheat your oven to 350°F (175°C) and prepare a donut pan.
3. Mix melted butter and sugar in a bowl, then add the reduced cider and eggs.
4. In another bowl, combine flour, baking powder, baking soda, spices, and salt.
5. Fold the dry mix into the wet mix until just combined.
6. Fill the donut pan and bake for 10–12 minutes.
7. Cool slightly, then coat in powdered and cinnamon sugar.
Can I use store-bought apple cider?
Yes, you can use store-bought apple cider. It saves time but may lack depth. Fresh cider gives a richer flavor, so choose what fits your taste!
What can I substitute for butter in this recipe?
You can use coconut oil or unsweetened applesauce as a butter substitute. Both will keep the donuts moist and tasty.
How long do these donuts last?
These donuts last about 2-3 days at room temperature in an airtight container. They taste best fresh!
Are spiced apple cider donuts suitable for freezing?
Yes, these donuts freeze well! Place them in a freezer bag. They can last up to 3 months in the freezer. Just thaw and coat in sugar before serving.
Making spiced apple cider donuts is fun and simple. We started with the right ingredients: fresh apple cider, butter, and spices. I shared step-by-step instructions to ensure you succeed. Tips helped you perfect the recipe, and variations let you get creative. The storage and reheating advice ensures your treats stay fresh. In the end, you can enjoy delicious donuts in many ways. With these ideas, you can impress friends and family anytim

Spiced Apple Cider Donuts
Ingredients
- 2 cups fresh apple cider
- 1/2 cup unsalted butter, melted
- 1 cup granulated sugar
- 2 large eggs, at room temperature
- 2 cups all-purpose flour, sifted
- 1 tsp baking powder
- 1/2 tsp baking soda
- 1 tsp ground cinnamon
- 1/2 tsp ground nutmeg
- 1/4 tsp ground ginger
- 1/4 tsp salt
- 1 cup powdered sugar (for finishing)
- 2 tbsp cinnamon sugar (for finishing)
Instructions
- Pour the apple cider into a medium saucepan and bring it to a boil over medium-high heat. Once boiling, lower the heat to a simmer and allow it to reduce for about 20–25 minutes, or until it thickens and measures approximately 1 cup. Remove from heat and let it cool for a few minutes.
- Prepare your oven by preheating it to 350°F (175°C). Lightly grease a donut pan with non-stick cooking spray or butter to ensure easy removal of the donuts after baking.
- In a large mixing bowl, combine the melted butter and granulated sugar, stirring until well blended. Add the reduced apple cider and whisk to combine smoothly. Incorporate the eggs, one at a time, whisking until everything is homogenous.
- In a separate bowl, whisk together the sifted flour, baking powder, baking soda, ground cinnamon, nutmeg, ginger, and salt until evenly mixed.
- Gradually fold the dry mixture into the wet ingredients with a spatula, mixing gently until just combined. Do not over-mix — a few small lumps are perfectly fine.
- Spoon the delightful batter into the prepared donut pan, filling each cavity approximately three-quarters full to allow for rising.
- Place the pan in the preheated oven and bake for about 10–12 minutes, or until the donuts spring back when lightly touched, and a toothpick inserted in the center comes out clean. Allow the donuts to cool in the pan for about 5 minutes before transferring them to a wire rack to cool completely.
- While the donuts are still warm, mix the powdered sugar and cinnamon sugar in a shallow bowl. Submerge each donut in the sugar mixture, gently rolling until fully coated for a sweet, flavorful finish.
- Treat yourself to these delightful donuts warm or at room temperature. They pair perfectly with a hot mug of apple cider or your favorite coffee for a cozy experience.

![To make this delightful chilled peach soup, gather these main ingredients: - 4 ripe peaches, peeled and pitted - 1 cup plain Greek yogurt - 1 cup almond milk - 2 tablespoons honey (or maple syrup for a vegan option) - Juice of 1 lemon - 1 teaspoon vanilla extract - A pinch of salt These ingredients create a creamy and fruity flavor. The ripe peaches give sweetness and vibrancy. Greek yogurt adds creaminess and protein. Almond milk keeps it light and smooth. Honey or maple syrup sweetens it naturally. Lemon juice brightens the taste, while vanilla adds warmth. For an extra touch, consider these garnishes: - Fresh mint leaves for garnish - Crushed pistachios for topping (optional) Mint leaves add a fresh burst of flavor and color. Crushed pistachios give a nice crunch and a nutty taste. You can easily swap out some ingredients if needed: - Use coconut yogurt instead of Greek yogurt for a dairy-free version. - Substitute regular milk for almond milk if you prefer. - Adjust the sweetener; agave nectar works well too. - Try adding a splash of orange juice for a different citrus note. These substitutions help you customize the soup to your taste or dietary needs. You still get a refreshing and delicious chilled peach soup with any of these changes. For the full recipe, visit the [Full Recipe]. Start by washing the peaches well. Peeling them is next. Use a sharp knife to cut the peaches into small, even chunks. This helps them blend smoothly. Remove the pits and add the chopped peaches to your blender. Now, it’s time to mix everything. Add the Greek yogurt, almond milk, honey, lemon juice, vanilla extract, and a pinch of salt to the blender with the peaches. Each ingredient enhances the flavor and texture of the soup. Blend the mixture on high speed. You want it to be smooth and creamy. If you like a little texture, pulse the blender a few times instead of blending non-stop. This gives you control over the final consistency. Taste the soup. If it needs more sweetness or tang, add more honey or lemon juice. Once blended, pour the soup into a bowl or pitcher. Cover it tightly and place it in the fridge for at least two hours. This chilling time allows flavors to mix well. When ready to serve, stir the soup again. Pour it into bowls and garnish with fresh mint leaves and crushed pistachios. For a fancy touch, use chilled bowls. This chilled peach soup is perfect for a light dessert or starter. For the full recipe, check out the details above! To select the best peaches, look for ripe, fragrant fruit. They should have a slight give when you gently press them. Avoid peaches with bruises or soft spots. Choosing freestone peaches makes your prep easier. These peaches separate cleanly from the pit. You can tweak the flavor of your chilled peach soup. If you want it sweeter, add more honey or maple syrup. For more tartness, squeeze in more lemon juice. Always taste as you go. This way, you find the perfect balance for your palate. When blending, start on low speed, then increase. This helps break down the peaches evenly. If you like some texture, pulse the blender a few times instead of blending fully. For a creamier soup, blend longer. Always check the consistency before serving. You want it smooth but not too thin. For more detailed steps, check the Full Recipe. {{image_4}} You can easily make this soup vegan. Just swap Greek yogurt for coconut yogurt. It adds a nice creaminess. Use maple syrup instead of honey for sweetness. You can also try different plant-based milk. Almond, oat, or soy milk work well too. This way, everyone can enjoy a tasty bowl of chilled peach soup. Want to spice it up? Add a pinch of cinnamon or ginger for warmth. These spices can add depth to the sweet peaches. Fresh herbs can make it even better. Try basil or rosemary for a unique twist. Just a small amount can change the flavor profile completely. To change the texture, consider using different fruits. Add diced mango or berries for a fruity crunch. You can also mix in some chia seeds for a fun texture. Blending in some silken tofu can make the soup creamier. Each variation brings a new taste and feel to your chilled peach soup. For the full recipe, check out the details above. Store leftover chilled peach soup in an airtight container. This keeps the soup fresh. Make sure to cool it first before sealing. If you don’t have a container, you can use plastic wrap. Just cover the bowl tightly. Chilled peach soup lasts about 3 to 5 days in the fridge. After that, it may lose its flavor and freshness. Always check for signs of spoilage before eating. If it smells sour or changes color, it's best to toss it. You can freeze chilled peach soup for up to 3 months. Pour it into freezer-safe containers, leaving some space at the top. This allows for expansion when frozen. To enjoy later, thaw it in the fridge overnight. Stir well before serving to restore its smooth texture. For the full recipe, see the section above. Serve chilled peach soup in a bowl or a small glass. I love using chilled bowls for that extra touch. You can drizzle a bit of almond milk on top. A mint leaf adds a great pop of color. This soup works well as a light starter or a refreshing dessert. Yes, you can use frozen peaches. Just make sure they are thawed first. This keeps the soup smooth and creamy. Frozen peaches may change the taste slightly, but they still taste great. Chilled peach soup is quite healthy. It has ripe peaches, Greek yogurt, and almond milk. These ingredients offer vitamins, protein, and healthy fats. The honey adds natural sweetness, making it a tasty and nutritious choice. Enjoy it without guilt! You can mix in other fruits like berries or mangoes. Simply chop them up and blend them with peaches. Adjust the sweetness to match the fruit you choose. This gives you a unique flavor every time. Enjoy experimenting with seasonal fruits for variety! Chilled peach soup is a refreshing treat. We covered the main ingredients, like fresh peaches, and how to blend them for the best flavor. I shared tips on choosing, storing, and even varying the recipe for vegan options. Remember, this soup is easy to make and fun to try. Enjoy exploring different flavors or garnishes to suit your taste. Now, it’s time to make your own chilled peach soup and savor each bite!](https://dishtreats.com/wp-content/uploads/2025/07/cde2237f-ab80-4fd7-9ae6-23109d9f52c0-768x768.webp)

![To make these tasty peanut butter banana oat bars, you'll need a few simple items. Here’s your shopping list: - 2 ripe bananas, well mashed - 1 cup peanut butter (smooth or crunchy) - 1/2 cup honey or maple syrup - 2 cups rolled oats - 1/2 teaspoon ground cinnamon - 1/4 teaspoon salt - Optional ingredients for enhancement: - 1/2 cup dark chocolate chips - 1/4 cup chopped nuts These ingredients come together to create a sweet, hearty snack. The ripe bananas add natural sweetness and moisture. The peanut butter gives a rich, creamy texture. Oats provide a filling base that keeps you energized. You can choose honey or maple syrup for sweetness. The cinnamon adds warmth and flavor, while salt enhances all the tastes. If you want to make them extra special, add dark chocolate chips or nuts for crunch. You can find the full recipe at the end of this guide. Enjoy gathering your ingredients and preparing for a delicious treat! - Preheat your oven to 350°F (175°C). - Line an 8x8 inch baking pan with parchment paper. - Combine bananas and peanut butter in a large mixing bowl. - Incorporate honey or maple syrup into the mixture. - Mix in oats, cinnamon, and salt. - Add dark chocolate chips and nuts if desired. - Spread the mixture into the prepared pan. - Bake for 20-25 minutes until golden brown. - Allow the bars to cool in the pan before transferring to a wire rack. - Cut into squares or rectangles. These simple steps lead you to a tasty treat. Follow the [Full Recipe] for more details. Enjoy your healthy snack! To make the best peanut butter banana oat bars, use overripe bananas. They add natural sweetness and moisture. Mix your ingredients well to get an even consistency. If you don’t mix well, some bites may taste different. Make your bars look great! Dust them with a sprinkle of cinnamon. You can also drizzle some extra peanut butter on top. This small touch adds flavor and makes them look appealing. Serve them on a decorative plate for a nice touch. A beautiful plate can make your snack feel special. Don’t be afraid to get creative! You can try adding spices like nutmeg or vanilla extract. These spices can bring out new flavors in your bars. Just a pinch can change your whole snack experience. Have fun experimenting to find your favorite taste! For the full recipe, check out the section above. {{image_4}} If you want a nut-free option, you can swap the peanut butter. Use sunflower seed butter or almond butter. Both options give a great taste. Sunflower seed butter adds a nice, nutty flavor without nuts. Almond butter gives a creamy texture that works well too. This change makes the bars safe for kids with nut allergies. For a gluten-free version, choose certified gluten-free rolled oats. Regular oats can often have gluten. Using gluten-free oats ensures everyone can enjoy these bars. They still taste delicious and keep all the good flavors. You won’t lose any texture or taste with this swap. To change the flavor, add dried fruits like cranberries or raisins. These fruits bring a sweet and chewy contrast to the bars. You can also mix in some chopped nuts for extra crunch. Feel free to get creative and use your favorite dried fruits. This way, you can make each batch of bars unique and exciting. Try these variations to find your favorite way to enjoy these tasty Peanut Butter Banana Oat Bars. If you want the full recipe, check out the section above. Store your peanut butter banana oat bars in an airtight container. This keeps them fresh at room temperature. If you want to keep them longer, put them in the fridge. They will stay good for about a week. If you want to save some bars for later, wrap them tightly in plastic wrap. Then, cover them with foil to prevent freezer burn. You can freeze them for up to three months. Just thaw them in the fridge when you're ready to enjoy. When you're ready to eat a bar, warm it in the microwave. A few seconds will give it a soft texture. This small step makes a big difference in taste and enjoyment. Yes, you can make these bars vegan. Just swap honey for maple syrup. Also, check that your chocolate chips are dairy-free. Look for golden brown edges and a set center. This means they are ready to come out. If you need a substitute, applesauce works well. It adds moisture and sweetness to the bars. When stored properly, these bars last up to a week in the fridge. You can freeze them for longer storage, too. Peanut butter banana oat bars are easy and tasty. You start by mixing ripe bananas, peanut butter, and oats. Then, you bake them until golden brown. Remember to cool and slice before serving. You can store them at room temp or freeze for later. Try adding dried fruits or other nut butters for more fun. With these simple steps, you can enjoy healthy snacks for days! Enjoy experimenting with your own versions!](https://dishtreats.com/wp-content/uploads/2025/06/65bd505b-0ff3-4866-91fc-ab6a46460c2c-768x768.webp)