Honey Garlic Soy Salmon Flavorful and Easy Recipe

Are you ready to impress your family with a delightful and simple dish? In this blog post, I’ll guide you through making Honey Garlic Soy Salmon. This recipe packs a punch of flavor, combining sweet honey with savory garlic and soy sauce. Whether you’re a kitchen novice or a skilled cook, I promise you will find this recipe easy and enjoyable. Let’s dive into the delicious details!
Why I Love This Recipe
- Flavor Fusion: This dish perfectly balances sweet and savory flavors, making each bite irresistible.
- Quick and Easy: With just a few ingredients and minimal prep time, this recipe is perfect for busy weeknights.
- Health Benefits: Salmon is packed with omega-3 fatty acids, making this meal not just delicious but nutritious too.
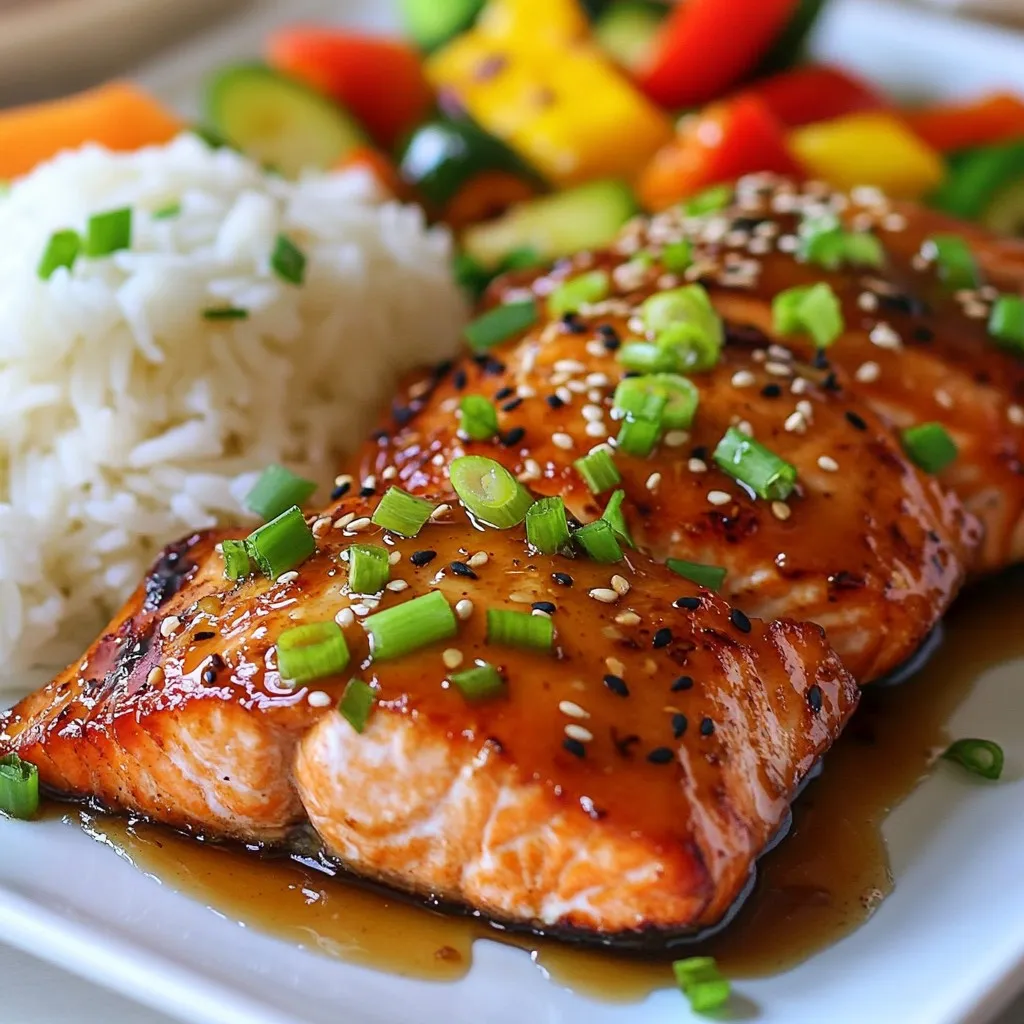
- Stunning Presentation: The garnishes of green onions and sesame seeds elevate the dish, making it visually appealing for any dinner table.
Ingredients
To make Honey Garlic Soy Salmon, you need the following ingredients:
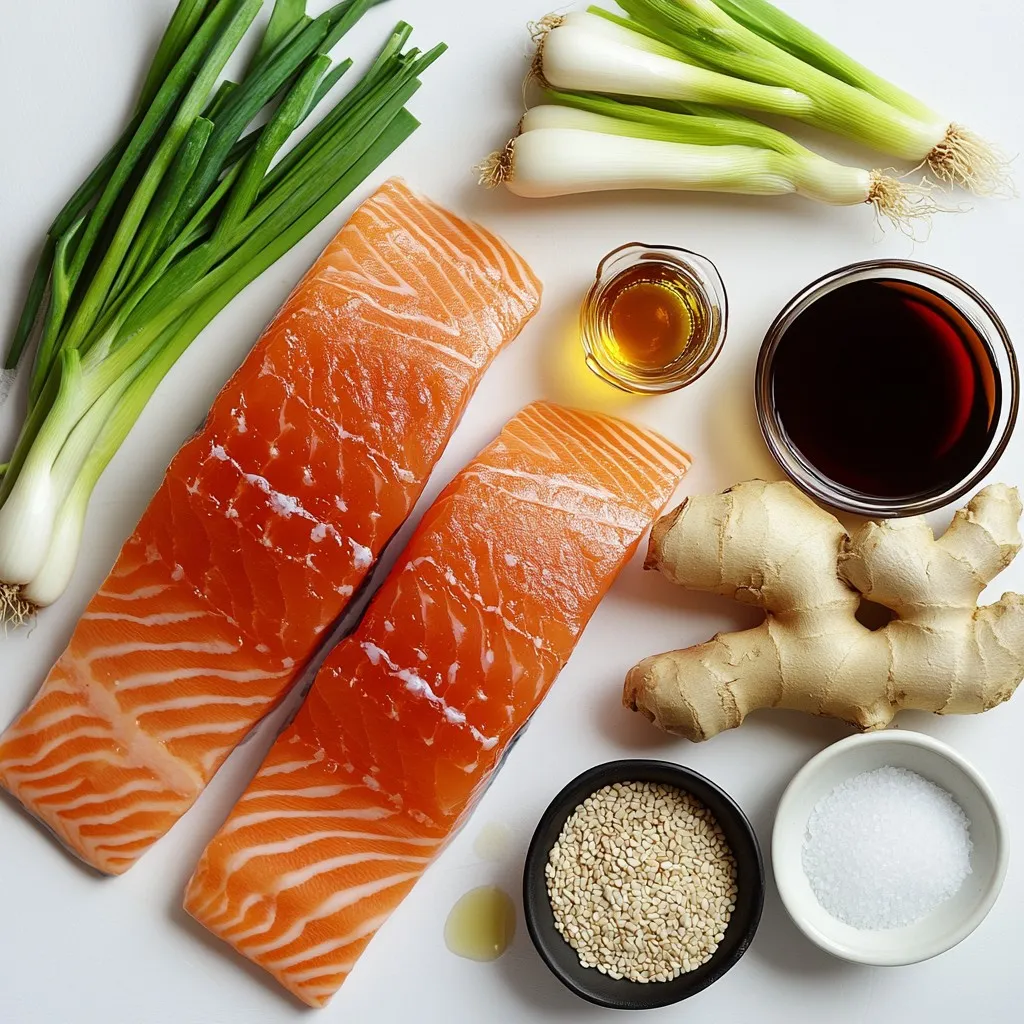
- 4 salmon fillets
- 1/4 cup honey
- 1/4 cup low-sodium soy sauce
- 3 cloves garlic, finely minced
- 1 tablespoon fresh ginger, freshly grated
- 2 tablespoons sesame oil
- 1 tablespoon rice vinegar
- 1 tablespoon cornstarch (optional, for a thicker sauce)
- Salt and pepper, to taste
- 2 green onions, thinly sliced (for garnish)
- Sesame seeds, for garnish
This simple list makes it easy to shop. Salmon is the star here, but honey, soy sauce, and garlic bring the flavor. Fresh ginger adds a nice kick. The sesame oil gives a lovely nutty taste. Rice vinegar adds a little zing. You can use cornstarch if you want a thicker sauce. Don’t forget salt and pepper for seasoning. The green onions and sesame seeds make a tasty and pretty garnish. Each ingredient plays a part in making this dish pop!
Step-by-Step Instructions
Preparing the Marinade
To make the marinade, start by mixing the following ingredients in a medium bowl:
- 1/4 cup honey
- 1/4 cup low-sodium soy sauce
- 3 cloves garlic, finely minced
- 1 tablespoon fresh ginger, freshly grated
- 2 tablespoons sesame oil
- 1 tablespoon rice vinegar
Whisk them together until they blend well. This creates a tasty and fragrant mix.
Tips for whisking properly:
- Use a whisk or fork for a smooth mix.
- Make sure the honey dissolves completely.
Marinating the Salmon
Next, season each salmon fillet with salt and pepper on both sides. This step adds flavor to the fish. Place the fillets in the bowl with the marinade. Make sure each piece is fully coated.
Recommended marinating time:
Let the salmon sit in the fridge for at least 30 minutes. This helps the salmon absorb all those delicious flavors.
Baking the Salmon
Now it’s time to bake the salmon. Preheat your oven to 400°F (200°C). Line a baking sheet with parchment paper. This makes cleanup easy and stops the fish from sticking.
After marinating, take the salmon out of the bowl and place it on the lined baking sheet, skin side down. Save the leftover marinade for later.
Cooking time and doneness indicators:
Bake the salmon for about 12-15 minutes. You’ll know it’s done when it flakes easily with a fork. This means it’s perfectly cooked and ready to enjoy!
Tips & Tricks
Cooking Techniques
Cooking salmon skin-side down is key. This helps keep the fish moist and adds flavor. The skin protects the flesh from drying out. It also crisps up nicely, giving you a tasty texture.
To check for doneness, gently poke the fish with a fork. If it flakes easily, it is ready. You can also use a meat thermometer. A safe internal temperature is 145°F (63°C).
Flavor Enhancement
Using fresh ingredients makes a big difference. Fresh garlic and ginger add bold flavors. Dried herbs or spices can work, but fresh is best. If you want more depth, try adding a splash of lime juice or a pinch of red pepper flakes.
You can also enhance the dish with sesame seeds or chopped herbs. These small additions can boost both flavor and visual appeal.
Presentation Tips
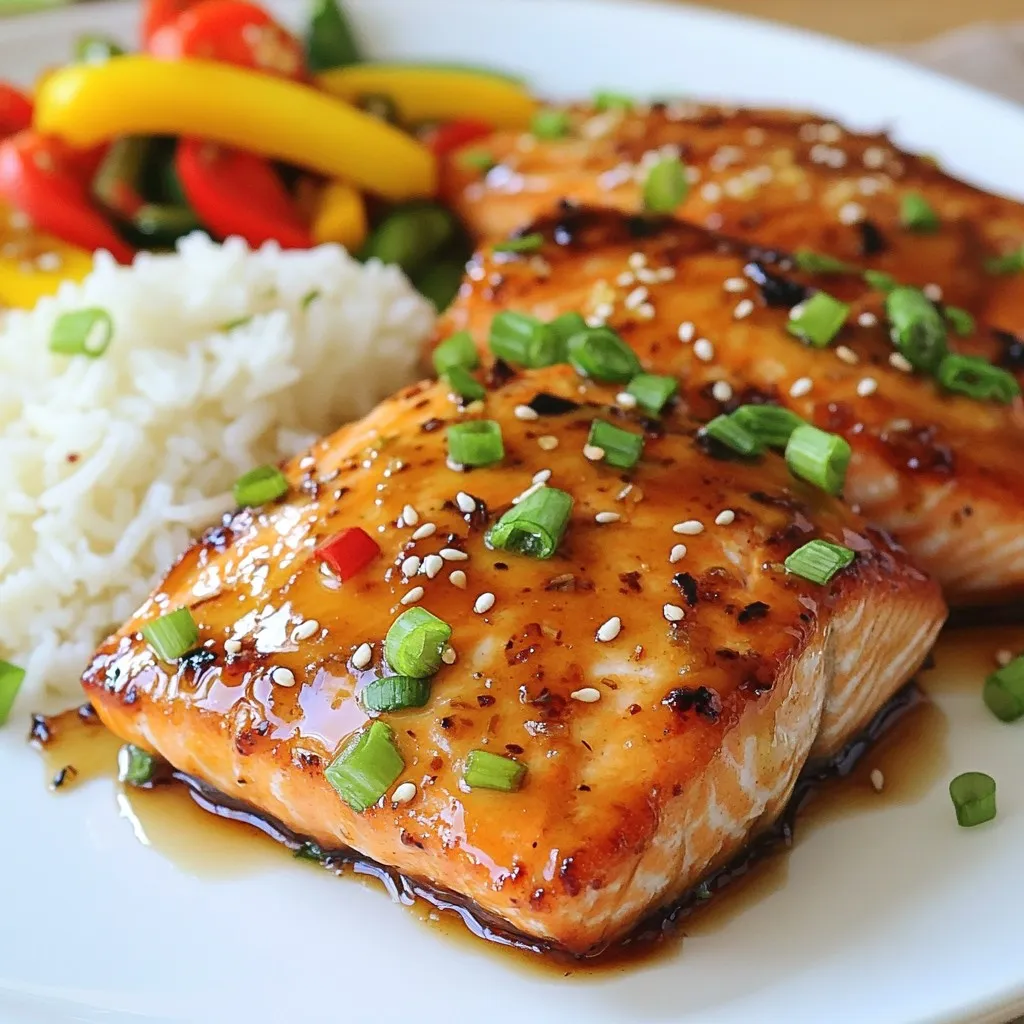
For serving, place the salmon on a bed of fluffy rice. This adds color and makes the dish more filling. You can also serve it with grilled veggies for a rainbow of flavors.
When plating, drizzle the thickened sauce over the salmon. Then, sprinkle with green onions and sesame seeds. This makes the dish look fancy and inviting.
Pro Tips
- Marinate Longer for Deeper Flavor: For an even richer taste, consider marinating the salmon for 1-2 hours or even overnight. This allows the salmon to absorb more of the marinade’s flavors.
- Use Fresh Ingredients: Fresh garlic and ginger will enhance the overall taste of the dish. If possible, avoid powdered substitutes for the best results.
- Don’t Overcook the Salmon: Keep an eye on the salmon while it bakes. It’s done when it flakes easily with a fork. Overcooking can lead to dry salmon.
- Serve with a Side: Pair the salmon with steamed rice, quinoa, or grilled vegetables to create a balanced meal and add color to your plate.
Variations
Alternative Protein Options
If you want to switch things up, try different proteins. Cod or tilapia work great. Both have mild flavors that soak up the marinade well. For a vegetarian option, use tofu. Firm tofu holds up well and absorbs all the delicious flavors.
Flavor Adjustments
You can change the sweetness in the sauce. If you like it sweeter, add more honey. If you want less, cut back a bit. For some heat, sprinkle in chili flakes. This gives the dish a nice kick without overpowering it.
Side Dishes
Pair your salmon with simple sides. Steamed rice makes a great base. You can also add vibrant grilled vegetables. They add color and nutrition to your plate. For sauce pairings, consider a light soy sauce or a tangy vinaigrette. These options enhance the meal and offer variety.
Storage Info
Refrigeration Guidelines
After you cook the honey garlic soy salmon, let it cool. Store leftovers in an airtight container. This keeps the fish fresh and prevents odors. The salmon lasts up to three days in the fridge. Always check for any off smells before eating.
Freezing Instructions
To freeze the salmon, wrap it tightly in plastic wrap or foil. Then, place it in a freezer bag. This helps avoid freezer burn. The salmon can stay good for up to three months. When you want to eat it, thaw it in the fridge overnight. This keeps the texture nice and moist.
Reheating Tips
Reheating salmon can dry it out. To keep it moist, try using a microwave with a cover. Heat it for short bursts, about 30 seconds at a time. You can also reheat it in the oven at 275°F (135°C). This method keeps the fish tender. Make sure to check that it warms through but does not overcook. Enjoy your tasty salmon!
FAQs
How to make honey garlic soy salmon in a pan?
You can easily make honey garlic soy salmon on the stovetop. First, heat a skillet over medium heat. Add sesame oil until it is hot. Place the salmon fillets skin-side down in the pan. Cook for about 5-6 minutes without moving them. This helps create a nice crust. Then, flip the fillets carefully. Pour the marinade over the salmon. Cover the pan and let it cook for another 4-5 minutes. This ensures the salmon cooks through and stays moist.
Is sesame oil necessary for the recipe?
Sesame oil adds a rich, nutty flavor to the dish. However, if you don’t have it, you can use other oils. Olive oil or canola oil work well as substitutes. You can also add a splash of toasted sesame oil at the end for extra flavor. Just remember, the taste will change a bit without sesame oil.
Can I use regular soy sauce instead of low-sodium?
Yes, you can use regular soy sauce. Just keep in mind it has more salt. This can make your dish saltier than expected. If you choose regular soy sauce, reduce the added salt in the recipe. Taste as you go to find the right balance. Adjustments help you enjoy the right flavor without it being too salty.
This recipe highlights how to make honey garlic soy salmon. You learned about essential ingredients like salmon, honey, and soy sauce. I shared step-by-step instructions for marinating and baking, along with helpful tips and variations.
By trying this dish, you can impress anyone at your table. Cooking at home can be fun and rewarding. Enjoy creating your own version, and remember that the right techniques can elevate your meal. Happy cookin

Sweet & Savory Honey Garlic Soy Salmon
Ingredients
- 4 fillets salmon
- 1/4 cup honey
- 1/4 cup low-sodium soy sauce
- 3 cloves garlic, finely minced
- 1 tablespoon fresh ginger, freshly grated
- 2 tablespoons sesame oil
- 1 tablespoon rice vinegar
- 1 tablespoon cornstarch (optional, for a thicker sauce)
- to taste salt and pepper
- 2 green onions thinly sliced (for garnish)
- to taste sesame seeds (for garnish)
Instructions
- In a medium mixing bowl, combine the honey, low-sodium soy sauce, minced garlic, grated ginger, sesame oil, and rice vinegar. Whisk together until well blended to create a fragrant marinade.
- Season each salmon fillet with salt and pepper on both sides. Carefully place the fillets into the bowl with the marinade, ensuring they are fully coated. Cover the bowl with plastic wrap and refrigerate for a minimum of 30 minutes to allow the flavors to meld.
- Preheat your oven to 400°F (200°C). Line a baking sheet with parchment paper for easy cleanup and to prevent sticking.
- Once marinated, remove the salmon fillets from the marinade and place them on the lined baking sheet, skin side down. Reserve the marinade for later use.
- Bake the salmon in the preheated oven for approximately 12-15 minutes. The fish should flake easily with a fork when fully cooked.
- While the salmon is baking, pour the reserved marinade into a small saucepan. Bring the mixture to a gentle boil over medium heat. If you desire a thicker sauce, combine the cornstarch with a small amount of cold water to create a slurry, then stir this into the simmering sauce. Let it simmer and thicken for about 5-7 minutes, stirring occasionally until you achieve your desired consistency.
- When the salmon is ready, remove it from the oven and generously drizzle the thickened sauce over each fillet.
- Finally, garnish the dish with sliced green onions and a sprinkle of sesame seeds before serving for an appetizing finish.