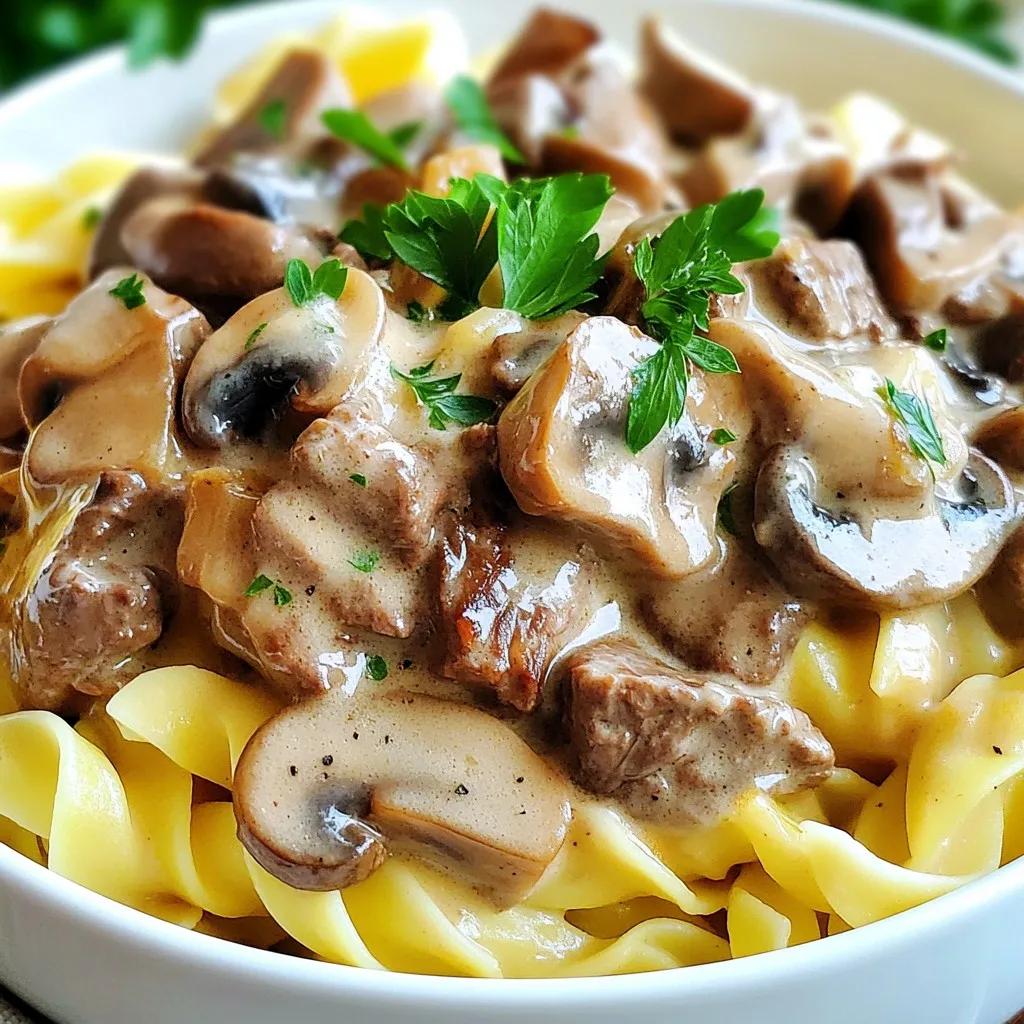
One-Pot Creamy Beef Stroganoff Simple and Tasty Meal

Craving a cozy meal that’s both simple and delicious? Look no further than my One-Pot Creamy Beef Stroganoff! This dish packs rich flavors into a single pot, making cleanup a breeze. Whether you’re new to cooking or a seasoned chef, you’ll find step-by-step tips and tasty variations to suit any palate. Let’s dive into this easy recipe and make dinner the highlight of your day!
Why I Love This Recipe
- Quick and Easy: This one-pot dish comes together in just 30 minutes, making it perfect for busy weeknights.
- Rich and Creamy Flavor: The combination of sour cream and beef broth creates a luscious sauce that coats the noodles beautifully.
- Comfort Food Classic: Beef stroganoff is a timeless favorite that warms the heart and satisfies the soul.
- Minimal Cleanup: Cooking everything in one pot means less time spent washing dishes and more time enjoying your meal.
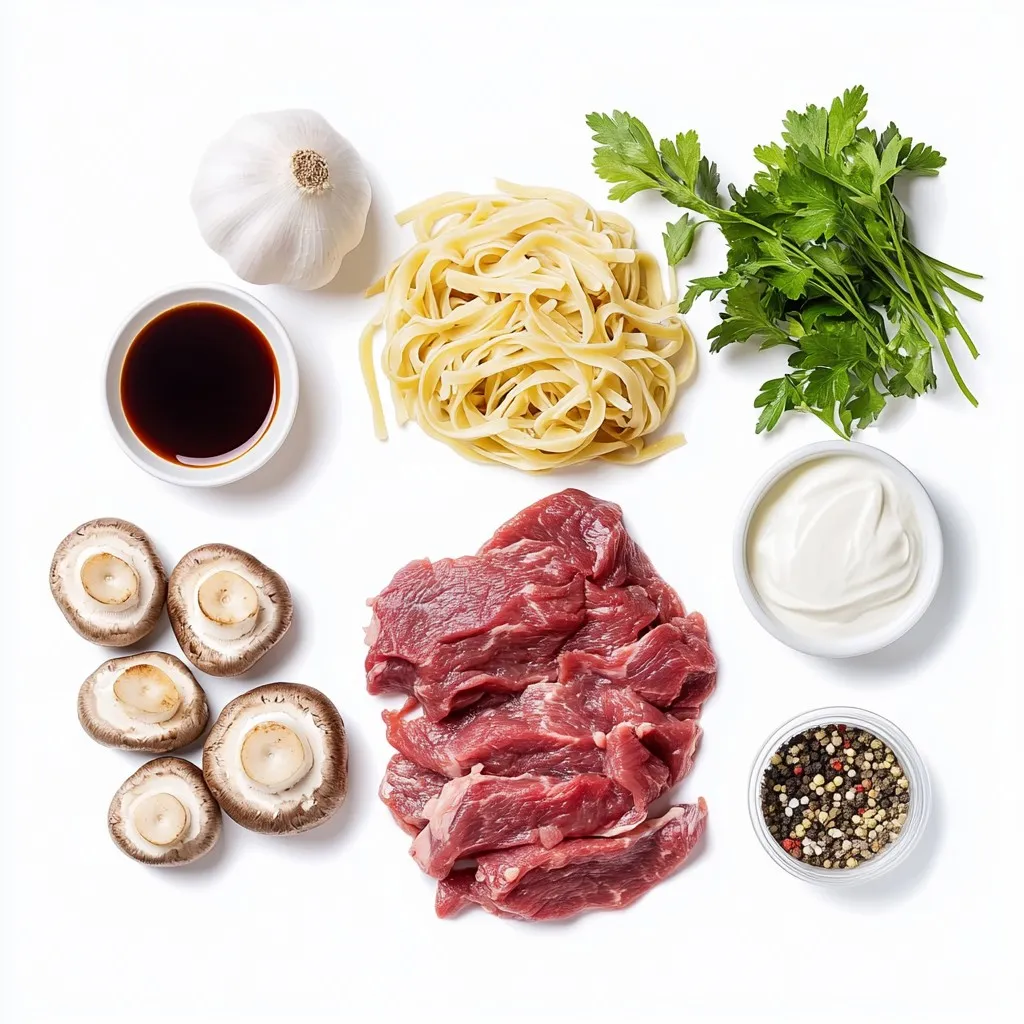
Ingredients
Complete list of ingredients
- 1 pound beef sirloin, thinly sliced
- 1 tablespoon extra virgin olive oil
- 1 medium onion, finely chopped
- 2 cloves garlic, minced
- 8 ounces mushrooms, sliced (button or cremini work well)
- 4 cups low-sodium beef broth
- 1 teaspoon Worcestershire sauce
- 2 teaspoons Dijon mustard
- 8 ounces egg noodles
- 1 cup sour cream (preferably full-fat for creaminess)
- Salt and freshly ground black pepper to taste
- Fresh parsley, chopped (for garnish)
Explanation of ingredient roles
Each ingredient in this dish plays a key role. The beef sirloin is the star, offering rich flavor and protein. The olive oil helps brown the beef, adding depth. Onions and garlic give a sweet and savory base to the sauce. Mushrooms add earthiness and texture. The beef broth forms the liquid base, while Worcestershire sauce and Dijon mustard enhance the flavor with tangy notes. Egg noodles soak up the sauce, bringing the dish together. Sour cream adds creaminess, making it rich and smooth. Finally, salt and pepper balance the flavors, and parsley adds a fresh touch.
Substitutions for special diets
If you need gluten-free options, swap egg noodles for gluten-free pasta. You can also use a gluten-free beef broth. For a lighter version, use low-fat sour cream or Greek yogurt instead of full-fat sour cream. If you prefer a plant-based option, use mushrooms and lentils in place of beef. Swap the beef broth for vegetable broth. These substitutions keep the dish tasty and satisfying while meeting your dietary needs.

Step-by-Step Instructions
Preparation and initial browning of beef
Start by heating 1 tablespoon of olive oil in a large pot over medium-high heat. Once the oil is hot, add 1 pound of thinly sliced beef sirloin. Season the beef with salt and black pepper. Sauté the beef for about 3-4 minutes until it’s browned on all sides. This step builds flavor. After browning, remove the beef from the pot and set it aside on a plate.
Sautéing onions and garlic
Next, without wiping the pot, add 1 medium chopped onion and 2 minced garlic cloves. Sauté them for 2-3 minutes. Stir often until the onion is soft and turns translucent. This adds a great base flavor to your stroganoff. Be careful not to burn the garlic, as it can turn bitter.
Cooking mushrooms and simmering with broth
Now, it’s time for the mushrooms. Add 8 ounces of sliced mushrooms to the pot. Stir them in and cook for about 5 minutes until they soften and release their juices. Then, pour in 4 cups of low-sodium beef broth. Add 1 teaspoon of Worcestershire sauce and 2 teaspoons of Dijon mustard. Mix everything well and bring it to a gentle boil. Once boiling, add 8 ounces of egg noodles. Ensure they are fully submerged. Cover the pot and reduce the heat. Let it simmer for 10-12 minutes, stirring occasionally. This will cook the noodles perfectly, soaking up all those rich flavors.
Tips & Tricks
Best practices for tender beef
To keep beef tender, slice it thinly against the grain. This helps break down the fibers. Don’t rush the browning step; let it cook well for flavor. Cook over medium-high heat for a nice sear. Avoid overcrowding the pot; give the beef space to brown.
How to enhance creaminess of the dish
Use full-fat sour cream for the best creaminess. Stir it in at the end, when the heat is low. You can also add a splash of heavy cream if you want extra richness. Mixing in a bit of cream cheese can add a nice tang and texture, too.
Common mistakes to avoid
One common mistake is boiling the sour cream. It can curdle and ruin the dish. Another mistake is not seasoning enough. Don’t forget to taste and adjust the salt and pepper. Finally, be careful with the noodles. Stir them often to prevent sticking.
Pro Tips
- Choose the Right Beef: Use tender cuts like sirloin or filet mignon for the best texture and flavor in your stroganoff.
- Don’t Skip the Searing: Searing the beef properly adds depth to the dish. Make sure to let it brown well before removing it from the pot.
- Use Full-Fat Sour Cream: For a creamier and richer sauce, opt for full-fat sour cream instead of low-fat versions.
- Fresh Herbs for Garnish: A sprinkle of fresh parsley not only adds color but also enhances the overall flavor of the dish.

Variations
Adding vegetables (peas, carrots, etc.)
You can make this dish even better with more veggies. Adding peas, carrots, or bell peppers boosts flavor and nutrition. Adding these veggies is easy. Toss them in with the mushrooms. Cook them until tender. This gives your stroganoff a colorful look and a tasty crunch.
Different protein options (chicken or turkey)
If you prefer chicken or turkey, they work great too. Use thin cuts of chicken breast or turkey. Follow the same steps as with beef. Cook them until golden and then add your broth and noodles. The flavor changes slightly, but it remains creamy and delicious.
Vegetarian or vegan adaptations
For a vegetarian or vegan version, swap the beef for mushrooms or tofu. Use vegetable broth instead of beef broth. Replace sour cream with coconut cream or a vegan sour cream. The dish will still be creamy and rich. Your veggie stroganoff will impress everyone at the table.
Storage Info
How to store leftovers properly
Store your leftover creamy beef stroganoff in an airtight container. Let it cool down first. Place it in the fridge if you plan to eat it within three days. If you hold onto it longer, freezing is best.
Reheating tips for best texture
When you reheat stroganoff, do it slowly. Use a pot on low heat. Stir often to keep it creamy. If it seems thick, add a little beef broth or water. This keeps the sauce smooth and tasty.
Freezing instructions for future use
To freeze stroganoff, divide it into portions. Use freezer-safe containers or bags. Label them with the date. It can be frozen for up to three months. When ready to eat, thaw it in the fridge overnight before reheating.
FAQs
Can I make this dish in advance?
Yes, you can make beef stroganoff ahead of time. Prepare the dish, then cool it down. Store it in an airtight container in the fridge for up to three days. When you’re ready to eat, reheat it on low heat. Stir it often to keep it creamy.
What can I serve with beef stroganoff?
Beef stroganoff pairs well with many sides. Here are some ideas:
- Steamed green beans
- Garlic bread
- Mashed potatoes
- A fresh green salad
These sides add extra flavor and make your meal more filling.
Can I use different types of noodles?
Yes! You can use various noodles for beef stroganoff. Egg noodles are classic, but here are some options:
- Fettuccine
- Penne
- Gluten-free pasta
Choose your favorite type. Just adjust the cooking time based on the noodle you pick.
This blog post covered all you need to make a great beef stroganoff. We explored ingredients, how each one works, and substitutions for special diets. I provided clear steps for cooking and tips to make everything perfect. You learned about fun variations, storage, and answering common questions.
With this knowledge, you can create a tasty dish that works for everyone. Enjoy cooking and sharing your new beef stroganof

One-Pot Creamy Beef Stroganoff
Ingredients
- 1 pound beef sirloin, thinly sliced
- 1 tablespoon extra virgin olive oil
- 1 medium onion, finely chopped
- 2 cloves garlic, minced
- 8 ounces mushrooms, sliced
- 4 cups low-sodium beef broth
- 1 teaspoon Worcestershire sauce
- 2 teaspoons Dijon mustard
- 8 ounces egg noodles
- 1 cup sour cream
- to taste salt
- to taste freshly ground black pepper
- for garnish fresh parsley, chopped
Instructions
- In a large pot or Dutch oven, heat the olive oil over medium-high heat. Carefully add the thinly sliced beef sirloin, seasoning it generously with salt and freshly ground black pepper. Sauté for about 3-4 minutes, stirring occasionally, until the beef is browned all over. Once browned, remove the beef from the pot, transferring it onto a plate and setting it aside.
- Without wiping the pot, add the finely chopped onion and minced garlic. Sauté for 2-3 minutes, or until the onion becomes soft and translucent, stirring frequently to avoid burning the garlic.
- Incorporate the sliced mushrooms into the pot, stirring to combine. Cook for about 5 minutes, until the mushrooms have softened and released their juices.
- Carefully pour in the low-sodium beef broth, followed by the Worcestershire sauce and Dijon mustard. Stir the mixture well and bring it to a gentle boil over medium heat.
- Add the egg noodles to the boiling broth, ensuring they are fully submerged. Stir gently, then cover the pot. Reduce the heat and let it simmer for about 10-12 minutes, or until the noodles are cooked al dente, stirring occasionally to prevent sticking.
- Once the noodles are cooked, reduce the heat to low and return the browned beef to the pot. Stir in the sour cream until the mixture is well combined and creamy. Allow it to cook for an additional 2-3 minutes until heated through, but do not let it boil.
- Taste the dish and adjust the seasoning with additional salt and freshly ground black pepper as desired.
- Serve your creamy beef stroganoff hot, garnishing each bowl with a sprinkle of chopped fresh parsley for a pop of color and freshness.


![- 2 grilled chicken breasts, shredded - 1 cup BBQ sauce (choice of homemade or your favorite store-bought) - 4 cups mixed greens (combination of spinach, arugula, and romaine) - 1 cup cherry tomatoes, halved - 1 cup corn (freshly cooked, canned, or frozen) - 1 ripe avocado, diced - ½ cup red onion, finely sliced - ½ cup shredded cheddar cheese - ¼ cup fresh cilantro, chopped (optional for garnish) - Salt and freshly ground black pepper, to taste - Tortilla chips, for serving on the side Gather these ingredients before you start cooking. Grilled chicken gives a great flavor. You can use any BBQ sauce you like. If you want homemade sauce, that works too! The salad greens add crunch and freshness. Cherry tomatoes and corn give sweetness. Avocado adds creaminess. Red onion gives a nice bite. Shredded cheese makes everything richer. The cilantro is optional, but it adds a nice touch. Finally, don’t forget the tortilla chips for a fun crunch on the side. This combination makes for a bright, colorful, and tasty BBQ chicken salad bowl. For the complete recipe, follow the steps provided in the article. First, shred your grilled chicken breasts. Place the chicken in a medium bowl. Next, pour in your BBQ sauce. You can use homemade sauce or your favorite store-bought kind. Mix it well. Make sure every piece of chicken gets coated with the sauce. This step is key to getting great flavor. After mixing, set the chicken aside. Let it sit for a few minutes. This allows the flavors to meld together. Grab a large salad bowl for this part. Start by adding your mixed greens, which can include spinach, arugula, and romaine. Next, toss in the halved cherry tomatoes, corn, and sliced red onion. Use salad tongs or your hands to mix the greens and veggies. You want everything to be evenly distributed. Now, gently add the diced avocado. Take care to fold it in without mashing it. This keeps the avocado pieces intact and adds a creamy texture. Now it’s time for the fun part! Divide your colorful salad mixture into individual serving bowls. This makes for a beautiful display. On top of each bowl, add a generous scoop of the BBQ chicken. Finish each bowl with a sprinkle of shredded cheddar cheese. This adds richness and flavor. If you like, you can also garnish with fresh cilantro. This step gives a nice touch. Serve your bowls with tortilla chips on the side. They add a satisfying crunch to the meal. For the full recipe, check out the earlier section. Grilling chicken gives it a smoky flavor. This method adds a nice char. Baking chicken is easier and keeps it juicy. Choose what fits your time and setup. For great BBQ flavor, marinate the chicken overnight. This helps the sauce soak in well. Boost your BBQ sauce with spices. Try adding garlic powder, onion powder, or smoked paprika. Fresh herbs like oregano or thyme can also work wonders. If you want cheese alternatives, try feta or goat cheese. Both add a tangy kick to your salad. Layer your salad ingredients for a beautiful look. Start with greens, then add the chicken. Place colorful toppings like tomatoes and corn on top. Use bright bowls to make the meal pop. Vibrant tortilla chips add a fun touch and great crunch. For the full recipe, check back to the beginning! {{image_4}} You can make BBQ chicken salad bowls even more fun by swapping ingredients. Instead of grilled chicken, try using pulled pork or even tofu for a vegetarian option. These proteins still soak up that yummy BBQ flavor. For salad greens, don't feel stuck with just one type. You can mix in kale, romaine, or even baby spinach. Each green adds a new taste and texture. You might also consider adding different vegetables like bell peppers or cucumbers. They can add a nice crunch and freshness to your bowls. While BBQ sauce is a star, you can explore other dressings too. Ranch dressing gives a creamy twist. A tangy vinaigrette can make the salad lighter. Try mixing BBQ sauce with ranch for a unique blend. Don't hesitate to play with BBQ sauce flavors. You could use a spicy version for a kick or a honey BBQ for sweetness. Each type creates a new experience every time you make this dish. When serving your BBQ chicken salad bowls, think about sides that go well. Cornbread or sweet potato fries are great options. They can balance the salad's freshness with some warmth. Get creative with your bowls. Use large lettuce leaves as edible bowls or even hollowed-out bell peppers. This makes your meal fun and different. Plus, it adds color and excitement to your table. For more ideas, check out the Full Recipe to get inspired on how to mix things up! To keep your BBQ chicken salad fresh, store it in the fridge. Use airtight containers. This helps keep the flavors and textures intact. You can also separate the chicken from the salad if you prefer. For reheating BBQ chicken, place it in a microwave-safe dish. Heat it for short intervals, about 30 seconds at a time. Stir it in between to ensure even heating. You want it warm, not hot, to keep the chicken juicy. You can safely eat your prepared salad for up to three days. After that, the greens may wilt and lose their crunch. If you want to keep it longer, consider freezing some components. You can freeze the BBQ chicken for up to three months. Just make sure to package it well in freezer bags. The salad greens and toppings should stay in the fridge, as freezing changes their texture. For a full recipe on how to make this delicious dish, check the [Full Recipe]. It takes about 15 minutes to prep and 15 minutes to cook. So, in total, you’ll need around 30 minutes. This quick time makes it perfect for busy days. Yes, you can prepare this salad ahead of time! Just keep the salad and chicken separate until you’re ready to eat. This way, the greens stay fresh and crisp. You can store the chicken in the fridge for up to three days. When you are ready, mix them together for a tasty meal. If you want to swap out BBQ sauce, you can try teriyaki sauce for a sweet twist. Ranch dressing also works well if you prefer something creamy. Each option gives a different flavor, making your salad fun and unique. To make this recipe gluten-free, choose a gluten-free BBQ sauce. Many brands offer tasty options. Also, ensure your tortilla chips are gluten-free. This way, you can enjoy this dish without worry! This blog post detailed how to create tasty BBQ chicken salad bowls. You learned about key ingredients, from grilled chicken to colorful salad greens. We discussed step-by-step instructions for preparing and assembling the salad, along with cool tips for flavor and presentation. You also discovered variations for ingredients, sauces, and serving suggestions. Now, you can enjoy these bowls at home. Try new flavors and enjoy your meals. With simple swaps, your salad will always be fresh and fun.](https://dishtreats.com/wp-content/uploads/2025/06/ab007e5c-1328-4456-8678-35604ca2185e-768x768.webp)
![To make crispy sweet and sour chicken, you need some key ingredients. Here’s what to gather: - 1 lb (450g) chicken breast, cut into bite-sized pieces - 1 cup cornstarch - 2 large eggs, beaten - Oil for frying - Salt and black pepper to taste These ingredients form the base of your dish. The chicken gives protein, while cornstarch creates that crispy texture. Eggs help the cornstarch stick to the chicken. Adding vibrant colors and fresh flavors is easy with the right vegetables and fruits. Here’s what you’ll need: - 1 cup bell peppers, chopped (mix of colors for visual appeal) - 1 cup pineapple chunks (fresh or canned) - 1 cup onion, chopped - 3 cloves garlic, minced The bell peppers and onions add crunch and sweetness. Pineapple brings a juicy burst of flavor. Garlic adds depth to the dish. The sweet and sour sauce makes this dish memorable. Gather these components: - 1/2 cup ketchup - 1/4 cup apple cider vinegar - 1/4 cup brown sugar - 2 tablespoons soy sauce - 1 tablespoon cornstarch mixed with 2 tablespoons water (for slurry) This sauce balances sweetness and tang. Ketchup gives a rich base, while apple cider vinegar adds a zesty kick. Brown sugar enhances the sweetness, and soy sauce adds umami. The cornstarch slurry thickens the sauce perfectly. For the full recipe, check out the complete list of steps to follow. Happy cooking! Start by seasoning the chicken pieces with salt and pepper. This simple step adds great flavor. Next, dredge each piece in cornstarch. Make sure to shake off any extra cornstarch. This helps create a nice, crispy crust. After that, dip the chicken pieces into the beaten eggs. This coating will help the cornstarch stick well. In a large skillet, heat oil over medium-high heat. You want the oil to shimmer before adding the chicken. Fry the chicken in batches. Avoid crowding the pan to keep the chicken crispy. Cook each piece for about 4-5 minutes per side. When golden brown, use a slotted spoon to remove the chicken. Place it on paper towels to drain any excess oil. Lower the heat to medium. In the same pan, add chopped onions and bell peppers. Sauté them for about 3-4 minutes or until soft. This brings out their sweetness. Then, add minced garlic and cook for another minute. The aroma will fill your kitchen and make your mouth water. In a bowl, whisk together the sauce ingredients: ketchup, apple cider vinegar, brown sugar, and soy sauce. Combine these until smooth. Pour this sweet and tangy sauce over the sautéed vegetables. Stir gently to mix everything together. The colors and smells will be inviting. Raise the heat slightly and bring the sauce to a gentle simmer. This helps blend the flavors. Once it simmers, add pineapple chunks for sweetness. Then, mix the cornstarch slurry and pour it in. Stir continuously until the sauce thickens, which takes about 2-3 minutes. You want it to coat the chicken well. Add the crispy chicken back into the pan. Carefully fold it into the thickening sauce. Toss everything gently to coat each piece of chicken. Once warmed through, the dish is ready to serve. For a great presentation, plate it over fluffy rice or steamed quinoa. You can also garnish it with sesame seeds and green onions for extra flair. To get that perfect crispy texture, start with your oil. Heat it well, around 350°F (175°C) is ideal. If the oil isn't hot enough, your chicken will soak up oil and get soggy. Fry the chicken in batches to avoid crowding. This keeps the oil temperature steady. Once fried, place the chicken on paper towels. This helps drain off any extra oil. For a twist on the classic sauce, try adding a splash of orange juice. It brightens the flavor. You can also swap brown sugar with honey for a different sweetness. Using fresh ginger in your sauce will give an extra kick. Remember to taste as you mix. Adjust salt and pepper to suit your taste buds. Presentation makes your dish look more appealing. Serve your crispy sweet and sour chicken over fluffy white rice or quinoa. Sprinkle sesame seeds on top for crunch. Finely chopped green onions add a pop of color. You can even add a few slices of fresh pineapple on the side for a tropical touch. This will make your meal look vibrant and inviting. {{image_4}} You can switch up the protein in this dish. Shrimp works great and cooks fast. Just sauté it until it turns pink. Tofu is another good option. Use firm tofu for the best texture. Cut it into cubes and fry until golden. Pork also fits well. Use pork tenderloin or chops, cut into bite-sized pieces. Each protein adds its own flavor, keeping things exciting. You can mix in different veggies for added nutrition. Broccoli is a great choice. It adds a nice crunch and color. Carrots give a sweet flavor and vibrant look. Snap peas are another fun option. They stay crisp and add a pop of freshness. Feel free to combine any of these for a colorful plate. It makes your meal more appealing and nutritious. You can easily tweak the sauce to match your taste. If you like heat, add some red pepper flakes or sriracha. This will spice up the dish nicely. For sweetener options, you can swap brown sugar for honey or maple syrup. This change adds a different flavor twist. Adjust the acidity by adding more vinegar or a squeeze of lime juice. Each change can create a new experience with this classic dish. For the full recipe, check out the detailed instructions earlier. After enjoying your crispy sweet and sour chicken, store any leftovers in an airtight container. This keeps the dish fresh for up to three days. Before storing, let the chicken cool down to room temperature. This prevents condensation, which can make the chicken soggy. If you have sauce left over, store it separately to keep the chicken crispy. To freeze your crispy sweet and sour chicken, place it in a freezer-safe container or bag. Make sure to remove as much air as possible. This helps avoid freezer burn. It can stay good for about one month. When you're ready to eat, thaw it overnight in the fridge. For the best taste and texture, reheat your chicken in an oven. Preheat the oven to 350°F (175°C). Spread the chicken on a baking sheet and cover with foil. Heat for about 15-20 minutes or until warm. This method helps keep the chicken crispy. You can also reheat it in a skillet over medium heat. Just add a splash of water to the pan to create steam, which helps warm it without drying out. Enjoy your leftovers just as much as the first time! To make crispy sweet and sour chicken, start with these steps: 1. Prep Chicken: Cut chicken breast into bite-sized pieces. Season with salt and pepper. Dredge in cornstarch, then coat in beaten eggs. 2. Fry Chicken: Heat oil in a skillet over medium-high heat. Fry chicken pieces until golden brown, about 4-5 minutes per side. Drain on paper towels. 3. Sauté Vegetables: Lower heat and add chopped onion and bell peppers to the same pan. Cook for 3-4 minutes. Add minced garlic and cook for another minute. 4. Prepare Sauce: Mix ketchup, apple cider vinegar, brown sugar, and soy sauce in a bowl. Pour this mixture over the vegetables in the pan. 5. Thicken Sauce: Bring the sauce to a gentle simmer. Add pineapple chunks and cornstarch slurry. Stir until the sauce thickens, about 2-3 minutes. 6. Combine Chicken and Sauce: Add the fried chicken back into the pan. Toss gently to coat the chicken in the sauce. 7. Serve: Let the dish rest for a minute. Serve it over rice or quinoa for a complete meal. Yes, you can prepare some parts in advance. Cook the chicken and the sauce ahead of time. Store them separately in airtight containers in the fridge. You can keep the chicken for up to three days. The sauce will last about a week. When ready to serve, reheat the chicken and sauce together in a pan. This keeps the chicken crispy and the sauce fresh. Yes, you can make a vegetarian version! Use tofu instead of chicken. Press the tofu to remove excess moisture, then cut it into cubes. Coat and fry the tofu pieces just like you would with chicken. You can also use seitan or tempeh for a similar texture. The sauce remains the same, giving you that sweet and sour flavor. I love serving crispy sweet and sour chicken with steamed rice or quinoa. You can also pair it with: - Fried rice - Noodles - Steamed broccoli - A fresh cucumber salad These sides complement the dish well and add color to your plate. Enjoy your meal! For the complete recipe, check the [Full Recipe]. Crispy sweet and sour chicken is a delightful dish. We explored key ingredients, cooking methods, and tips for perfecting it. You learned how to achieve that crispy texture and enhance flavors. Remember, try different proteins and veggies for variety. Proper storage keeps leftovers fresh. This dish is not only tasty but also versatile. Enjoy making and sharing it with friends and family. Let your kitchen creativity shine with this classic recipe!](https://dishtreats.com/wp-content/uploads/2025/05/ffc138cc-1bdb-4282-b515-13f85bd5dbd6-768x768.webp)
![To make a delicious Vegan Lentil Shepherd's Pie, you will need: - 1 cup green or brown lentils, thoroughly rinsed - 3 cups vegetable broth - 1 medium onion, finely diced - 2 cloves garlic, minced - 2 medium carrots, diced into small cubes - 2 celery stalks, finely diced - 1 cup peas (fresh or frozen) - 2 tablespoons tomato paste - 1 tablespoon soy sauce or tamari - 1 teaspoon dried thyme - 1 teaspoon dried rosemary - Salt and freshly cracked pepper to taste - 4 large potatoes, peeled and chopped into chunks - 1/4 cup unsweetened plant-based milk (such as almond or soy) - 2 tablespoons vegan butter or olive oil You can enhance your shepherd's pie with these optional ingredients: - 1 teaspoon smoked paprika for a hint of smokiness - 1 tablespoon nutritional yeast for a cheesy flavor - 1 cup mushrooms, diced, for a hearty texture - A splash of red wine for depth of flavor This recipe serves 4-6 and is a healthy choice. Each serving has: - Approximately 300 calories - 14 grams of protein - 10 grams of fiber - Low in saturated fat - Rich in vitamins A and C from the veggies When you make this Vegan Lentil Shepherd’s Pie, you enjoy a meal that is tasty, filling, and good for you. For the complete cooking details, check out the Full Recipe. To cook the lentils, start by rinsing 1 cup of green or brown lentils. Next, place them in a medium pot with 3 cups of vegetable broth. Bring this mix to a boil, then reduce the heat. Let it simmer for 20-25 minutes. You want the lentils to be tender but not mushy. Drain any leftover liquid and put the lentils aside. In a large skillet, heat a drizzle of olive oil over medium heat. Add 1 diced onion and sauté for about 5 minutes until soft. Then, include 2 minced garlic cloves, 2 diced carrots, and 2 diced celery stalks. Cook this mix for another 5-7 minutes until all the veggies are tender. Now, stir in the cooked lentils, 1 cup of peas, 2 tablespoons of tomato paste, and 1 tablespoon of soy sauce. Add 1 teaspoon of dried thyme, 1 teaspoon of dried rosemary, and some salt and pepper. Let this simmer for about 5 minutes. While the lentil mix simmers, you can prepare the potatoes. Bring a large pot of salted water to a boil. Add 4 large, peeled, and chopped potatoes. Cook them until fork-tender, about 15-20 minutes. Drain the potatoes and return them to the pot. Mash them using a potato masher. Mix in 1/4 cup of plant-based milk and 2 tablespoons of vegan butter. Keep mashing until smooth and creamy. Adjust the seasoning with salt and pepper. Preheat your oven to 375°F (190°C). Grease a baking dish and spoon the lentil mixture into the bottom. Spread the creamy mashed potatoes over the top. Use a fork to create peaks for texture. Bake the pie for 25-30 minutes until the top is golden and crispy. This dish is now ready to enjoy! For the full recipe, check out the detailed instructions above. To make creamy mashed potatoes, start with hot potatoes. Use a potato masher or ricer for the best texture. Gradually add unsweetened plant-based milk and vegan butter for creaminess. Mix until smooth, but avoid over-mixing. A pinch of salt enhances the flavor. Use fresh ingredients for depth. Start by sautéing onions until soft. Add garlic, carrots, and celery for sweetness. Cook them until tender. Incorporate the lentils with herbs like thyme and rosemary. This step brings out the flavors. Don't forget to season with salt and pepper. Let it simmer briefly to blend all the tastes. Serve your Vegan Lentil Shepherd’s Pie hot. Pair it with a crisp green salad for balance. You can also add crusty bread for a hearty touch. For extra flair, sprinkle fresh parsley on top before serving. This adds color and freshness to your meal. Explore different side dishes like roasted vegetables or quinoa for variety. Enjoy your delightful and wholesome dinner! For the full recipe, check the [Full Recipe]. {{image_4}} You can make this lentil shepherd's pie gluten-free. Simply replace soy sauce with coconut aminos. This swap keeps the flavor but avoids gluten. Always check labels to ensure all ingredients are gluten-free. If you're avoiding lentils, try chickpeas or black beans as protein sources. For a nut-free version, skip the plant-based milk and use vegetable broth for mashing. You can also use cauliflower instead of potatoes for a low-carb twist. Incorporate seasonal vegetables to boost flavor and nutrition. Fresh spinach or zucchini works great in the filling. Mushrooms add a nice umami taste, too. Don't be afraid to mix it up based on what's in season. This keeps your dish fresh and exciting. For the full recipe, refer to the beginning of this article. To store your Vegan Lentil Shepherd's Pie, let it cool first. Once cooled, cover it tightly with plastic wrap or foil. You can also use an airtight container. Store it in the fridge for up to four days. This keeps the flavors intact and helps maintain the pie's texture. If you want to save some pie for later, freezing is a great option. Cut the pie into individual portions. Wrap each piece in plastic wrap and then in foil. This prevents freezer burn. Place the wrapped pieces in a freezer bag. You can freeze them for up to three months. When you are ready to enjoy, just thaw it in the fridge overnight. To reheat your shepherd's pie, use the oven for the best results. Preheat your oven to 350°F (175°C). Remove the pie from the fridge or freezer and unwrap it. Place it in a baking dish. Cover the dish with foil to keep it moist. Heat it for about 25-30 minutes if cold. If it’s frozen, it might take up to 45 minutes. Remove the foil for the last 5-10 minutes to crisp the top. Enjoy your delicious meal just like it was fresh! Yes, you can use canned lentils. Just drain and rinse them first. They cook faster. This saves time. For this recipe, use about 1.5 cups of canned lentils. You can serve it with a fresh salad or steamed vegetables. A side of crusty bread also works well. The pie is hearty, so keep sides light. It lasts for 3 to 5 days in the fridge. Store it in an airtight container. Reheat it in the oven or microwave. Yes, you can prepare it a day in advance. Assemble the pie, then cover it and chill. Bake it just before serving for the best taste. Check out the Full Recipe for more details! This blog post covered how to make a tasty vegan lentil shepherd's pie. We explored essential and optional ingredients, plus nutritional info. I provided clear, step-by-step cooking methods. You learned tips for creamy mashed potatoes and flavorful lentils. We noted variations for different diets and the best ways to store leftovers. In closing, I hope you enjoy making this dish! It’s a great meal for everyone.](https://dishtreats.com/wp-content/uploads/2025/06/9ba9e126-74d7-4f69-86a8-52952e7f4e77-768x768.webp)

![- 4 chicken thighs (bone-in, skin-on) - 2 tablespoons jerk seasoning - 1 tablespoon olive oil - Salt and pepper to taste - 1 ripe pineapple, peeled and diced into small cubes - 1 red bell pepper, diced into small pieces - 1 small red onion, finely chopped - 1 jalapeño, deseeded and minced (adjust for spice preference) - Juice of 1 fresh lime - Fresh cilantro, chopped (for garnish) For this jerk chicken with pineapple salsa recipe, use chicken thighs for their rich flavor. The jerk seasoning adds a spicy and smoky kick. The pineapple and vegetables bring freshness and sweetness to the dish. - Adjust spice levels: If you want less heat, skip the jalapeño or use less jerk seasoning. - Additional garnishes: Lime wedges and extra cilantro make great toppings. You can also add avocado for creaminess. Feel free to customize these ingredients according to your taste. The key is to balance heat, sweetness, and freshness. For the full recipe, check out the [Full Recipe]. Start by mixing the chicken thighs with jerk seasoning, olive oil, salt, and pepper. Use your hands to coat each piece well. This step is key for flavor. Cover the bowl with plastic wrap and place it in the fridge. Marinate for at least 1 hour, but overnight gives the best taste. In a clean bowl, combine diced pineapple, red bell pepper, red onion, and jalapeño. Squeeze the juice of one lime over it and add a pinch of salt. Stir gently to mix. Let this salsa rest for at least 15 minutes. This resting time allows the flavors to blend nicely. Heat your grill or grill pan to medium-high. Take the chicken out of the marinade and let any extra drip off. Grill the chicken for about 6-8 minutes on each side. Use a meat thermometer to check that it reaches 165°F (75°C). This ensures it is fully cooked and safe to eat. Arrange the grilled jerk chicken on a platter. Spoon the bright pineapple salsa over the top. For a finishing touch, sprinkle fresh cilantro on the dish. You can also serve it on a rustic wooden board with lime wedges and extra pineapple chunks. This adds a fun, tropical vibe to your meal. For the full recipe, check out the [Full Recipe]. The key to great jerk chicken is marinating well. Many people rush this step, but a good marinating time is essential. Aim for at least one hour, or overnight if you can. This allows the chicken to soak up the flavors deeply. Common mistakes to avoid: - Skipping the marinade: This makes the chicken bland. - Using too much heat: Jerk seasoning has a kick. Balance it with other flavors. - Not resting the chicken: Skipping this step makes the meat dry. Flavor enhancements: - Add some lime zest to your marinade for extra tang. - Try a bit of honey for a hint of sweetness. - Use smoked paprika for a deeper, richer flavor. The salsa adds brightness to the dish. Choosing ripe pineapples is key to great flavor. Tips for selecting ripe pineapples: - Look for pineapples with a sweet smell at the base. - The skin should be golden and slightly firm. - Press gently; it should give just a little. Variations for additional flavor: - Add diced mango for extra sweetness. - Mix in some chopped mint for a fresh twist. - Try a dash of cumin for a warm, earthy note. These tips will help you create a jerk chicken dish that shines. Don't forget to check out the Full Recipe for more details! {{image_4}} You can swap chicken for other meats. Try pork or turkey. Both soak up jerk flavor well. If you prefer seafood, shrimp or fish works too. Just keep an eye on cooking times. Seafood cooks quickly, so grill it for just a few minutes. Feel free to play with the vegetables. You can use different peppers like green or yellow. Red onions are great, but sweet onions add a nice touch too. Want to mix it up? Add diced mango or avocado to the salsa. Fresh herbs like mint or basil can add fun flavors too. For gluten-free options, check your jerk seasoning. Make sure it has no gluten. You can enjoy jerk chicken without any worries. If you're looking for low-carb choices, skip the sugar in the salsa. You can also serve the chicken with a salad instead of rice. This keeps it fresh and light. To store leftovers, place the jerk chicken in an airtight container. Let it cool to room temperature before sealing. This helps keep it fresh longer. Jerk chicken can stay in the fridge for up to three days. When you are ready to eat, reheat it in the oven or on the grill. Heat it to 165°F (75°C) for safe eating. Avoid reheating in the microwave if you want crispy skin. Yes, you can freeze jerk chicken. Wrap it tightly in plastic wrap and then place it in a freezer-safe bag. It can last up to three months in the freezer. For thawing, move the chicken to the fridge overnight. If you need it fast, you can also use the microwave on the defrost setting. After thawing, make sure to heat it well before serving. This keeps it tasty and safe to eat. For the full recipe, visit the [Full Recipe]. I suggest marinating the chicken for at least one hour. For the best flavor, try to marinate overnight. This allows the jerk seasoning to soak in deeply, making the chicken tasty and juicy. Jerk chicken pairs well with a variety of sides. Some great options are: - Rice and peas - Grilled vegetables - Coleslaw - Fried plantains - Cornbread These sides balance the rich flavors of the chicken. Yes, you can make the salsa ahead of time. I recommend preparing it a few hours before serving. This gives the salsa time to rest. The flavors will mix better, making it even more delicious. Jerk seasoning has a unique and bold flavor. It combines heat from peppers, sweetness from spices, and a hint of smokiness. Common ingredients include allspice, thyme, and garlic. This mix creates a savory and vibrant taste. The spice level of jerk chicken can vary. It depends on the amount of jalapeño you use. If you want less heat, remove the seeds. For more spice, add extra jalapeño or a hotter pepper. Adjusting the seasoning lets you enjoy the dish at your preferred heat level. You learned about making jerk chicken with easy steps and key ingredients. Focus on marinating the chicken and crafting the pineapple salsa for the best flavor. Enjoy grilling techniques to get that perfect char. Remember to avoid common mistakes while cooking. You can also try different proteins and flavor swaps for variety. Store leftovers properly to enjoy later. Your jerk chicken can impress anyone at the table. Now, it’s time to put this knowledge to use and enjoy your delicious creation!](https://dishtreats.com/wp-content/uploads/2025/06/27cc5104-89a5-4e73-8f97-3d018bc709fa-768x768.webp)
