Creamy Cauliflower Alfredo Easy and Healthy Recipe
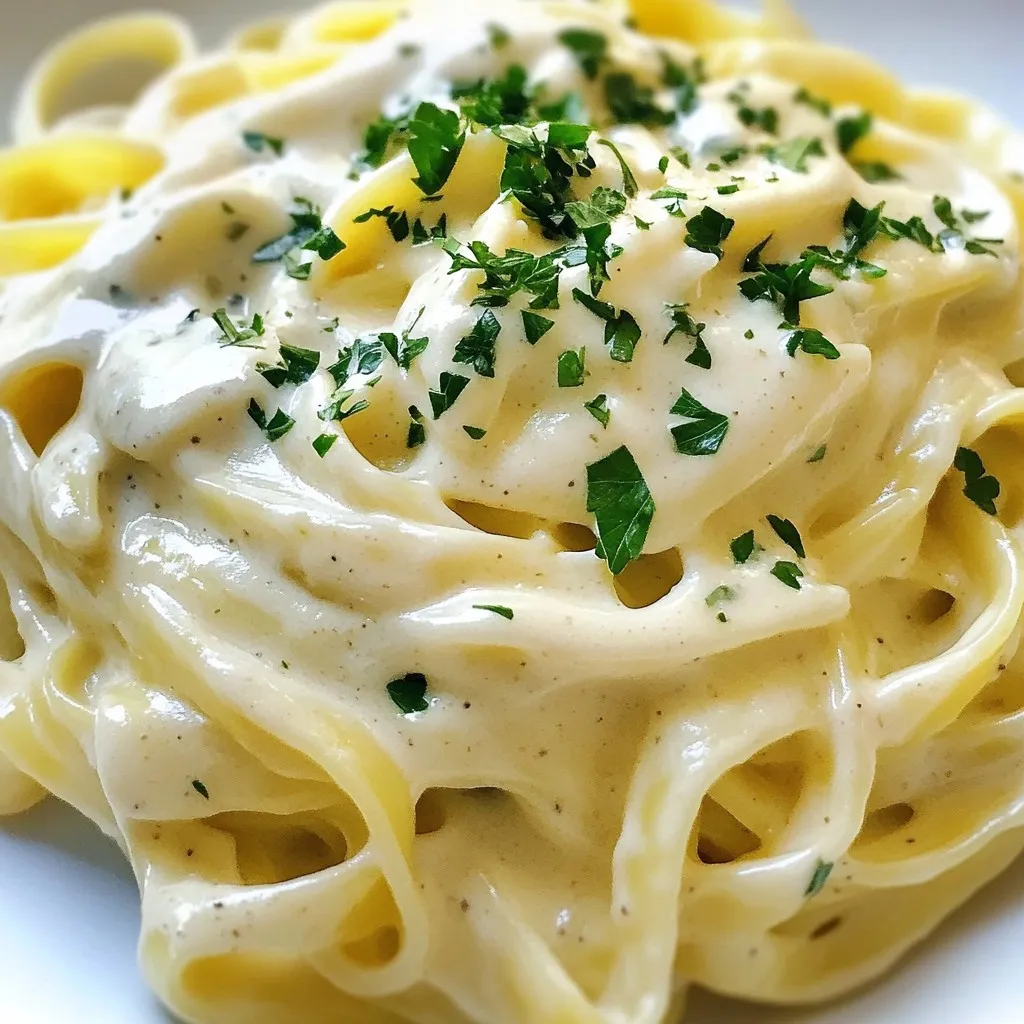
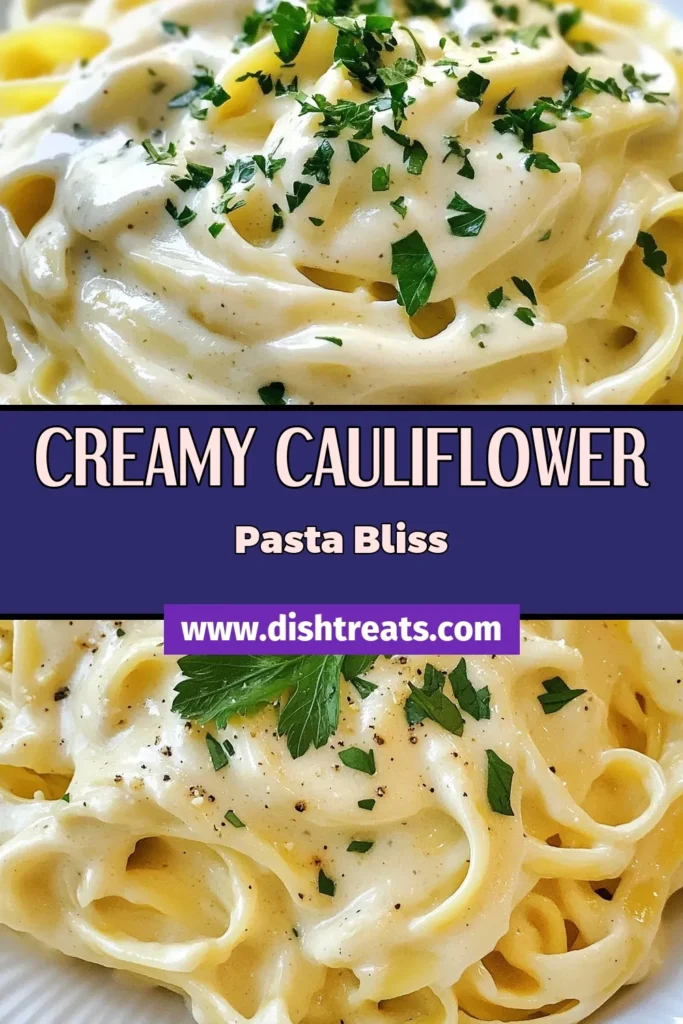
Looking for a healthier twist on a classic dish? My Creamy Cauliflower Alfredo recipe swaps heavy cream for tender cauliflower, giving you a rich, satisfying sauce that’s packed with flavor. With simple ingredients like garlic, olive oil, and almond milk, you can whip this up in no time. Perfect for busy weeknights or impressing guests, this recipe is sure to become a favorite. Let’s dive into how to make this delicious dish!
Why I Love This Recipe
- Healthier Alternative: This creamy cauliflower Alfredo sauce is a lighter take on traditional Alfredo, providing a deliciously rich flavor without the heavy cream.
- Flavor Packed: The combination of garlic, lemon juice, and nutritional yeast creates a savory depth that elevates the dish to restaurant-quality.
- Simple Ingredients: It uses simple, wholesome ingredients that are easy to find, making it perfect for weeknight dinners or meal prep.
- Versatile: This sauce is not just for fettuccine; it can be used with any pasta or even as a creamy base for vegetables and grains.
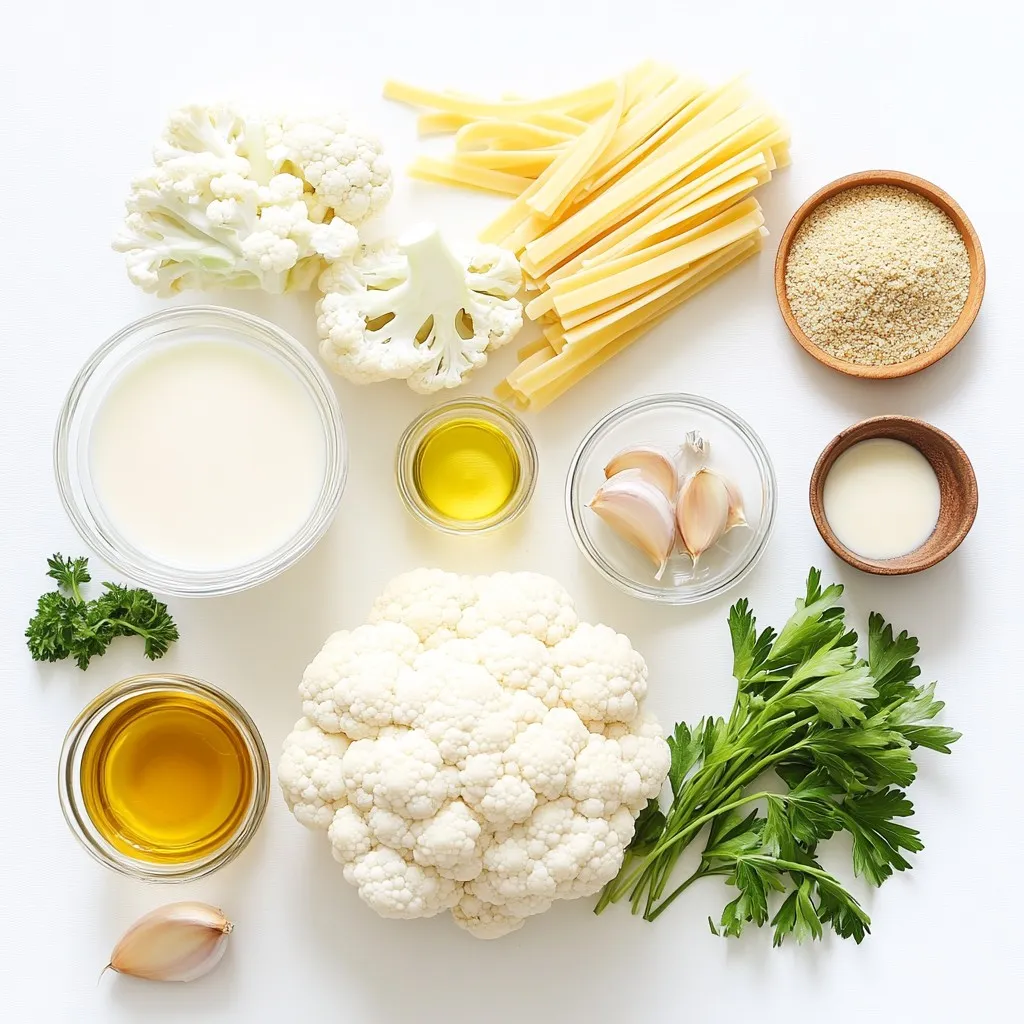
Ingredients
Main Ingredients
- Chopped cauliflower florets
- Extra virgin olive oil
- Minced garlic
- Vegetable broth
- Unsweetened almond milk
The main ingredients make this dish healthy and creamy. Chopped cauliflower florets serve as the base. They add nutrition and flavor. Extra virgin olive oil gives richness. Minced garlic adds a warm, savory taste. Vegetable broth enhances the overall flavor. Unsweetened almond milk brings creaminess without dairy.
Additional Seasonings
- Nutritional yeast
- Fresh lemon juice
- Onion powder
- Salt and pepper
These seasonings elevate your dish. Nutritional yeast gives a cheesy taste and is packed with nutrients. Fresh lemon juice adds brightness and balances the flavors. Onion powder brings depth. Salt and pepper enhance all the tastes, making every bite delicious.
Pasta Choices
- Fettuccine pasta
- Alternatives to fettuccine
Fettuccine pasta is the classic choice for this sauce. Its flat shape holds the creamy sauce well. You can use other pasta types, too. Try penne or spaghetti for a fun twist. No matter the pasta, the creamy cauliflower sauce will shine.
Step-by-Step Instructions
Cooking the Pasta
To start, fill a large pot with salted water. Bring it to a rolling boil. Add 1 pound of fettuccine. Stir occasionally to prevent sticking. Cook according to the package, usually about 8-10 minutes. When the pasta is al dente, drain it. Do not forget to save ½ cup of the starchy water. Set the pasta aside for now.
Preparing the Cauliflower
Next, take your medium head of cauliflower. Chop it into small florets. In a separate pot, combine these florets with 1 ½ cups of vegetable broth. Cover the pot and bring it to a boil. Once boiling, lower the heat. Let it simmer for about 10-12 minutes. Check if the cauliflower is fork-tender. If it is, you are ready to blend.
Blending the Sauce
After draining the cauliflower, place it in a high-speed blender. Add 2 tablespoons of extra virgin olive oil, 3 minced garlic cloves, and ½ cup of unsweetened almond milk. Also, include ½ cup of nutritional yeast, 2 tablespoons of fresh lemon juice, and 1 teaspoon of onion powder. Season with salt and pepper. Blend until smooth and creamy. If the sauce is too thick, add some reserved pasta water to reach your desired consistency.
Combining Pasta and Sauce
In a large mixing bowl, add the cooked fettuccine. Pour the creamy cauliflower sauce over the pasta. Toss everything gently. Make sure every strand of pasta is well-coated with the sauce.
Serving and Garnishing
Now it’s time to serve. Dish the creamy pasta onto plates or in bowls. For a pop of color and flavor, sprinkle freshly chopped parsley on top. You can also add a dash of nutritional yeast for extra flavor. For a fun presentation, twirl the fettuccine into nests before serving. Enjoy your delicious meal!
Tips & Tricks
Making the Sauce Creamier
To make your sauce even creamier, try adding a bit of cashew cream. Blend soaked cashews with water for a rich texture. You can also mix in some vegan cream cheese for a velvety touch.
For perfect blending, use a high-speed blender. Blend the cauliflower mixture until it’s fully smooth. If needed, scrape down the sides to ensure everything gets blended well.
Flavor Enhancements
To boost flavor, add spices like nutmeg or smoked paprika. These spices bring warmth and depth to the dish. Fresh herbs like thyme or basil can brighten the taste.
Always taste your sauce while mixing. You can add more salt or a splash of lemon juice to enhance flavors. Don’t be afraid to experiment with different seasonings.
Cooking Time Optimization
While your cauliflower cooks, multitask by boiling the pasta. This saves time and keeps everything warm. Keep an eye on both to ensure they finish at the same time.
If you’re short on time, use a pressure cooker for the cauliflower. Cook it for just 5 minutes under high pressure. This method speeds up cooking and locks in flavors.
Pro Tips
- Cooking Cauliflower: Steam the cauliflower instead of boiling it to retain more nutrients and flavor.
- Adjusting Consistency: If the sauce is too thick, add more vegetable broth or almond milk gradually until you reach your desired creaminess.
- Flavor Enhancements: Experiment with adding a pinch of nutmeg or smoked paprika for a unique twist on the classic Alfredo flavor.
- Serving Suggestions: Serve with a sprinkle of red pepper flakes for a touch of heat and extra flavor.

Variations
Vegan Alternatives
You can easily make this dish vegan. Use plant-based cream instead of almond milk. For added flavor, add cashew cream or coconut milk. Nutritional yeast already gives a cheesy taste, but feel free to add more. For protein, add chickpeas or tofu. They blend well with the sauce and add nutrition.
Gluten-Free Options
If you need a gluten-free dish, choose gluten-free pasta. Brands like brown rice or quinoa pasta work well. For the sauce, it’s already gluten-free, but always check ingredients. You can adjust the seasoning to match your taste. This makes it safe for those with gluten sensitivity.
Flavor Variations
Want to change up the flavor? Add spinach or peas to the sauce for extra veggies. Try mushrooms or bell peppers for a different taste. If you like meat, shrimp or grilled chicken work great too. Just cook them separately and mix them in before serving.
Storage Info
Refrigerator Storage
Store leftovers in an airtight container. Make sure the container is sealed well. This keeps the Alfredo sauce fresh and tasty. I recommend eating it within 3 to 4 days.
Freezing the Sauce
To freeze the sauce, let it cool first. Pour it into freezer-safe bags or containers. Squeeze out as much air as possible before sealing. This helps prevent freezer burn. You can freeze the sauce for up to 3 months.
When you’re ready to use it, thaw the sauce in the fridge overnight. You can also use the microwave on low power to speed up thawing.
Reheating Tips
To reheat without losing texture, stovetop is best. Heat it gently in a pan over low heat. Stir often and add a splash of almond milk if it thickens.
You can use the microwave too. Heat in short bursts and stir between each. This avoids hot spots and keeps the sauce creamy.
FAQs
Can I use frozen cauliflower?
Yes, you can use frozen cauliflower. Just rinse it under cold water. This helps remove ice crystals. Then, cook it for a shorter time. Frozen cauliflower usually cooks faster. Aim for about 8-10 minutes in the broth until tender. Blend it the same way as fresh.
What can I substitute for nutritional yeast?
You can use grated Parmesan cheese or ground cashews. Both will add a nice flavor. Parmesan gives a cheesy taste, while cashews add creaminess. If you want a nut-free option, try using a bit of miso paste. It will change the flavor a bit but still taste great.
Is this recipe customizable?
Absolutely! You can change the pasta type. Use gluten-free pasta or zoodles. You can also add veggies like spinach or mushrooms for extra nutrients. For more protein, toss in cooked chicken or chickpeas. The sauce can also be spiced up with red pepper flakes or herbs.
How long does this dish keep?
In the fridge, this dish lasts about 3-5 days. Store it in an airtight container. If you see any mold or smell something off, it’s best to toss it. You can also store the sauce separately from the pasta for better freshness.
Can I make this sauce in advance?
Yes, you can make the sauce ahead of time. Let it cool and store it in the fridge. It will keep well for up to 3 days. When you’re ready to use, just reheat it on low heat. Add a splash of almond milk to help with creaminess.
This blog post detailed how to make a creamy cauliflower pasta dish. We covered the main ingredients like cauliflower and garlic, plus all the seasonings that enhance the flavor. I shared step-by-step instructions from cooking the pasta to mixing in the sauce. You learned tips for making the sauce creamier and how to store leftovers.
Remember, cooking is about learning and having fun. Try different variations to make this recipe your own! Enjoy your time in the kitchen and happy cookin

Dreamy Creamy Cauliflower Alfredo
Ingredients
- 1 medium head cauliflower, chopped into florets
- 2 tablespoons extra virgin olive oil
- 3 cloves garlic, minced
- 1.5 cups vegetable broth
- 0.5 cup unsweetened almond milk
- 0.5 cup nutritional yeast
- 2 tablespoons fresh lemon juice
- 1 teaspoon onion powder
- to taste salt and pepper
- 1 pound fettuccine pasta (or pasta of your choice)
- for garnish fresh parsley, finely chopped
Instructions
- In a large pot, fill with salted water and bring to a vigorous boil. Add the fettuccine, stirring occasionally until al dente, following the package instructions (usually about 8-10 minutes). Once cooked, drain the pasta but reserve ½ cup of the starchy pasta water for later use. Set the cooked fettuccine aside.
- In a separate pot, combine the chopped cauliflower with the vegetable broth. Cover the pot and bring to a boil, then reduce the heat and let it simmer. Cook until the cauliflower is fork-tender, approximately 10-12 minutes.
- After draining the cauliflower, transfer it to a high-speed blender. Add the olive oil, minced garlic, almond milk, nutritional yeast, lemon juice, onion powder, and a pinch of salt and pepper. Blend on high until the mixture is silky smooth and creamy. If the sauce appears too thick, gradually incorporate the reserved pasta water until the desired consistency is reached.
- Taste the creamy sauce and adjust seasonings as necessary; add more salt, pepper, or a splash of lemon juice to elevate the flavor to your liking.
- In a large mixing bowl, introduce the cooked fettuccine to the creamy cauliflower sauce. Toss gently but thoroughly to ensure each strand of pasta is luxuriously coated with the sauce.
- Dish out the pasta onto plates or into bowls, garnishing generously with freshly chopped parsley for added vibrancy and flavor.