Creamed Corn Casserole Simple and Tasty Recipe

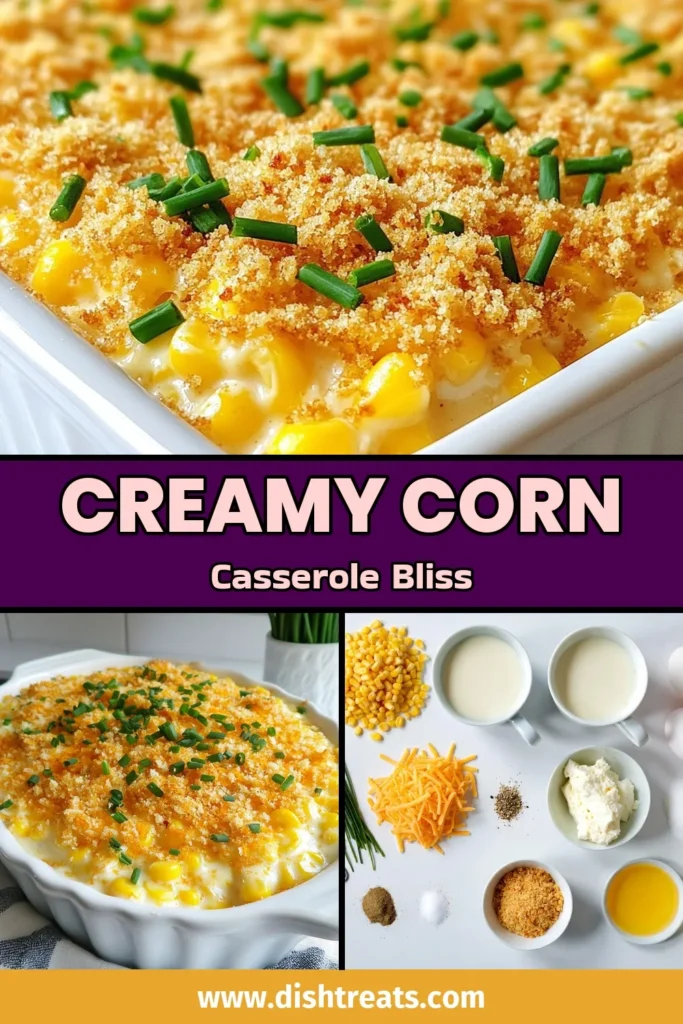
Are you ready to dive into a warm, creamy dish that will impress your family? This Creamed Corn Casserole is simple, tasty, and perfect for any meal. I’ll guide you step by step through making it, from the first mix to the final bake. Whether you need a side dish for a holiday or just a cozy weeknight dinner, this recipe has you covered. Let’s get cooking!
Why I Love This Recipe
- Comforting Flavor: This casserole combines the sweetness of corn with creamy textures and savory cheese, creating a comforting and satisfying dish that warms the heart.
- Easy to Prepare: With simple ingredients and straightforward steps, this recipe is perfect for both novice cooks and seasoned chefs looking for a quick weeknight meal.
- Versatile Dish: This casserole can be served as a side dish or a main course, making it adaptable for family dinners, potlucks, or even holiday gatherings.
- Kid-Friendly: With its cheesy goodness and sweet corn flavor, this dish is sure to please even the pickiest eaters, making it a hit for family meals.
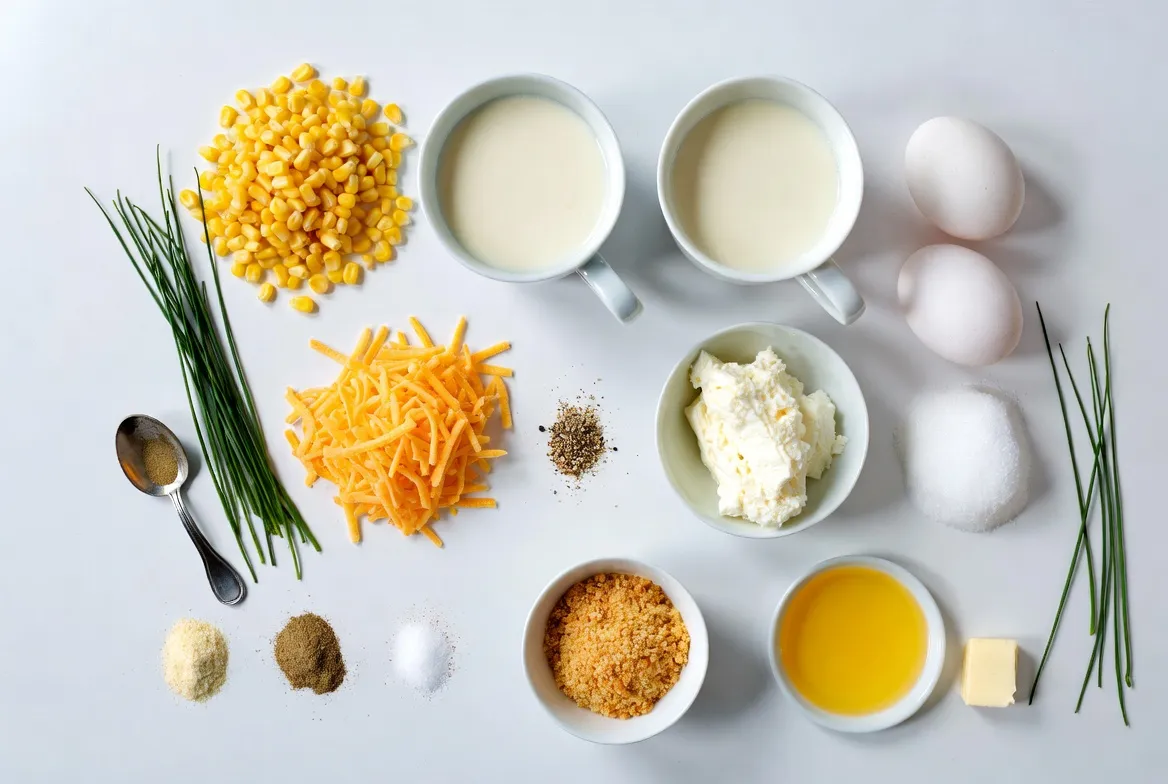
Ingredients
Complete List of Ingredients
- 2 cups fresh or frozen corn kernels
- 1 cup heavy cream
- 1 cup milk
- 1/2 cup sharp cheddar cheese, shredded (plus extra for topping)
- 1/2 cup cream cheese, softened to room temperature
- 2 large eggs
- 1/4 cup granulated sugar
- 1 teaspoon baking powder
- 1/2 teaspoon garlic powder
- 1/2 teaspoon onion powder
- Salt and pepper to taste
- 1/2 cup breadcrumbs
- 2 tablespoons melted butter
- Fresh chives, finely chopped (for garnish, optional)
Ingredient Substitutions
You can swap heavy cream with half-and-half for a lighter dish. Whole milk works well in place of regular milk, too. If you want a dairy-free option, use almond milk and a dairy-free cream cheese. For cheese lovers, swap sharp cheddar with gouda or pepper jack for a twist. You can also leave out the sugar if you prefer a less sweet casserole.
Key Ingredients Explained
- Corn: This is the star of the dish. It adds sweetness and texture. You can use fresh corn in season or frozen corn for convenience.
- Cream Cheese: This gives the casserole its creamy base. It adds richness and helps bind the dish. Make sure it is softened for easy mixing.
- Cheddar Cheese: This adds a savory flavor. Using sharp cheddar gives a nice kick. Reserve some for topping to create a golden crust.
- Eggs: Eggs help set the casserole, giving it a firm structure. They also add some protein.
- Breadcrumbs: They create a crunchy topping, adding a great contrast to the creamy filling. You can use plain or seasoned breadcrumbs for extra flavor.
Step-by-Step Instructions
Prepping the Oven for Baking
First, you need to preheat your oven. Set it to 350°F (175°C). This step is key for even cooking. A hot oven helps the casserole rise and brown nicely.
Creating the Corn Base
In a large bowl, combine 2 cups of corn kernels, 1 cup of heavy cream, and 1 cup of milk. Stir them well. Ensure all the corn is coated. This mix forms the base of your casserole. It adds sweetness and creaminess.
Whipping Up the Cream Cheese Mixture
In another bowl, take 1/2 cup of softened cream cheese. Use an electric mixer or whisk to whip it smooth. Then, add 2 large eggs, 1/4 cup of sugar, 1 teaspoon of baking powder, 1/2 teaspoon of garlic powder, 1/2 teaspoon of onion powder, and a pinch of salt and pepper. Beat until it’s fully mixed and creamy.
Combining Ingredients for a Creamy Texture
Gently fold the cream cheese mixture into the corn base. Be careful here! You want to keep that creamy texture while mixing. Ensure all ingredients blend well. This step is where the magic starts!
Adding the Cheddar Cheese
Now, lightly fold in 1/2 cup of shredded sharp cheddar cheese. Set aside a little for the topping. The cheese adds flavor and richness to the dish. It makes every bite delicious!
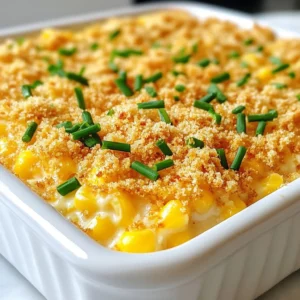
Baking the Casserole
Pour the complete mixture into a greased 9×9-inch baking dish. Spread it evenly. In a separate bowl, mix 1/2 cup of breadcrumbs with 2 tablespoons of melted butter and the reserved cheddar cheese. Sprinkle this on top of the casserole. This creates a crunchy, golden topping.
Place the dish in your preheated oven. Bake for 30-35 minutes, until the topping turns golden brown. The casserole should be set in the middle. Let it cool for about 5 minutes before serving. Enjoy the creamy, cheesy goodness!
Tips & Tricks
Enhancing Flavor Profiles
To boost the taste of your creamed corn casserole, use fresh herbs. Chives add a nice touch. You can also try adding a pinch of smoked paprika. This gives it a warm, smoky flavor. Mixing in some diced jalapeños can add a spicy kick. If you love cheese, consider using a mix of cheeses. Gouda or Monterey Jack will give a rich taste.
Avoiding Common Mistakes
The most common mistake is overmixing. When you combine the corn and cream cheese mixtures, mix gently. This keeps the casserole creamy. Another mistake is not preheating the oven. Always ensure your oven is hot. This helps your casserole bake evenly. Finally, do not skip the breadcrumbs. They create a crunchy topping that contrasts well with the creamy filling.
Making it Healthier
You can make this dish healthier in a few ways. First, swap heavy cream for low-fat milk or almond milk. This will cut calories but keep it creamy. Use reduced-fat cheese for less fat. Adding vegetables like spinach or zucchini boosts nutrition and flavor. Finally, cut down on sugar by using a natural sweetener like honey.
Pro Tips
- Use Fresh Corn: If possible, use fresh corn for the best flavor and sweetness. If using frozen corn, thaw it beforehand for even cooking.
- Customize Your Cheese: Feel free to experiment with different cheese varieties like Monterey Jack or Pepper Jack for a unique twist on flavor.
- Check for Doneness: Make sure to check the center of the casserole with a toothpick; it should come out clean when the casserole is fully cooked.
- Make Ahead: You can prepare the casserole a day in advance and store it in the refrigerator. Just add a few extra minutes to the baking time.

Variations
Adding Vegetables for Extra Nutrition
You can boost the nutrition of your creamed corn casserole by adding veggies. Some great choices include chopped bell peppers, spinach, or zucchini. These vegetables not only add vitamins but also give your dish a colorful look. Aim for about one cup of chopped veggies. Stir them in with the corn base for even cooking. This small change makes your meal healthier.
Gluten-Free Options
If you need a gluten-free version, there are simple swaps. Use gluten-free breadcrumbs for the topping. You can also choose a gluten-free flour blend in place of regular flour if needed. Check that your cream and cheese are also gluten-free. This way, everyone can enjoy the dish without worry.
Flavor Variations with Spices
Changing spices can give your casserole a new twist. Try adding a pinch of smoked paprika for a deep flavor. You could also mix in some cumin for a warm touch. If you like heat, a dash of cayenne pepper works well. Just remember to start small and adjust to your taste. Each spice can create a unique dish that keeps things interesting!
Storage Info
Best Way to Store Leftovers
To keep your creamed corn casserole fresh, let it cool first. Once cooled, place the casserole in an airtight container. Make sure to seal it well to prevent air from getting in. You can store it in the fridge for up to three days. If you want to enjoy it later, freezing is a great option.
Reheating Instructions
When you’re ready to enjoy your leftovers, preheat your oven to 350°F (175°C). Place the casserole in an oven-safe dish. Cover it with foil to retain moisture while reheating. Heat for about 20 to 25 minutes or until it is warm throughout. If you prefer a crispy topping, remove the foil during the last 5 minutes of heating.
Freezing the Casserole
If you want to freeze the casserole, do so before baking. Prepare it up to the point of adding the topping. Cover the dish tightly with plastic wrap and foil. It can last in the freezer for up to three months. When you’re ready to bake it, thaw it overnight in the fridge. Then bake at 350°F (175°C) for 40 to 45 minutes, or until bubbly and golden.
FAQs
Can I make Creamed Corn Casserole ahead of time?
Yes, you can make this dish ahead. Prepare it fully, then cover and refrigerate it. Bake it the next day. Just add a few extra minutes to the baking time. This makes serving easy when you have guests.
What can I serve with Creamed Corn Casserole?
This casserole pairs well with many dishes. Try serving it with grilled chicken or pork. It also complements a fresh salad or roasted vegetables. These sides balance the creamy texture and rich flavor.
Can I use canned corn instead of fresh or frozen?
Absolutely! Canned corn works great in this recipe. Drain and rinse the corn before adding it. This helps reduce excess salt and preserves the dish’s taste. You can save time with canned corn too.
How can I make this recipe vegetarian?
Making it vegetarian is simple. Just leave out any meat or animal products. You can use vegetable broth instead of chicken broth. This keeps the flavors rich and satisfying without meat.
What is the key to a creamy texture?
The key to a creamy texture lies in the mixture of ingredients. Use heavy cream and cream cheese for richness. Mix them well with the eggs. This creates a smooth base that bakes into a creamy delight.
This blog post shared key ingredients for a great creamed corn casserole. I provided step-by-step instructions to guide you through the cooking process. We discussed tips for flavor, avoiding mistakes, and making the dish healthier. You learned about variations to suit your taste and how to store leftovers for later.
Embrace the recipe, get creative, and enjoy every bite! Cooking should be fun and tasty. Now, enjoy your delicious creamed corn casserol
Creamy Corn Delight Casserole
Ingredients
- 2 cups fresh or frozen corn kernels
- 1 cup heavy cream
- 1 cup milk
- 0.5 cup sharp cheddar cheese, shredded
- 0.5 cup cream cheese, softened
- 2 large eggs
- 0.25 cup granulated sugar
- 1 teaspoon baking powder
- 0.5 teaspoon garlic powder
- 0.5 teaspoon onion powder
- Salt and pepper to taste
- 0.5 cup breadcrumbs
- 2 tablespoons melted butter
- Fresh chives, finely chopped (for garnish, optional)
Instructions
- Preheat your oven to 350°F (175°C).
- In a large mixing bowl, add the corn kernels, heavy cream, and milk. Stir well.
- In another bowl, whip the softened cream cheese until smooth. Add the eggs, sugar, baking powder, garlic powder, onion powder, and a pinch of salt and pepper. Beat until fully combined.
- Gently fold the cream cheese mixture into the corn base.
- Lightly fold in the shredded cheddar cheese, reserving a small portion for topping.
- Pour the mixture into a greased 9x9-inch baking dish, spreading it evenly.
- In a separate bowl, mix the breadcrumbs with melted butter and reserved cheddar cheese.
- Sprinkle the breadcrumb mixture over the casserole.
- Bake for 30-35 minutes, until the topping is golden brown and the casserole is set.
- Allow to cool for about 5 minutes and garnish with chopped fresh chives if desired.
![To make Blueberry Lemon Breakfast Quinoa, you will need the following ingredients: - 1 cup quinoa, thoroughly rinsed - 2 cups almond milk (or your preferred milk) - 1 cup fresh blueberries (or frozen if fresh are not available) - Zest of 1 lemon - Juice of 1 large lemon - 2 tablespoons pure maple syrup (or honey for sweetness) - 1 teaspoon pure vanilla extract - 1/2 teaspoon ground cinnamon - A pinch of salt - Optional toppings: sliced almonds, extra blueberries, or a generous dollop of Greek yogurt Choose bright blueberries with no wrinkles. Look for firm berries, as they taste best. For lemons, pick ones that feel heavy. They should have a smooth, shiny skin. This shows they are juicy. When choosing quinoa, look for a grain that is clean and free of debris. If you need a non-dairy milk, try oat milk or coconut milk. Both have nice flavors. For sweeteners, you can use agave syrup or brown sugar. Adjust the amount to your taste. If you want to skip the sweetener, ripe bananas work great too. You can mash them and mix them in! Start by rinsing 1 cup of quinoa under cold water. This helps remove any bitter taste. Use a fine mesh sieve for best results. This step is key for a great flavor. Next, gather a medium saucepan. Add the rinsed quinoa to the saucepan. Pour in 2 cups of almond milk and a pinch of salt. This combination makes the quinoa creamy and rich. Place the saucepan over medium heat. Bring the mixture to a gentle boil. Watch it carefully; it can boil over quickly. Once it boils, reduce the heat to low. Cover the saucepan with a lid. Let it simmer for about 15 minutes. The quinoa will absorb most of the liquid during this time. When the quinoa is tender, remove it from heat. Allow it to sit for 5 more minutes. This helps steam the quinoa and makes it fluffy. After 5 minutes, uncover the saucepan. Use a fork to fluff the quinoa gently. This step adds air and lightness. Now, it’s time to mix in the flavors. Add the lemon zest and juice. Pour in 2 tablespoons of maple syrup, 1 teaspoon of vanilla extract, and 1/2 teaspoon of cinnamon. Stir well to combine everything. Finally, fold in the blueberries gently. Reserve some blueberries for garnishing if you like. Serve warm in bowls, and enjoy your Blueberry Lemon Breakfast Quinoa! For the full recipe, check out the details above. To get the best quinoa texture, rinse it well before cooking. This removes the bitter coating called saponin. Use two cups of liquid for every cup of quinoa. This ratio helps the quinoa absorb enough moisture. Cook it on low heat after boiling. Let it simmer for about 15 minutes. After that, let it steam for 5 more minutes. This step makes the quinoa fluffy and light. Fluff it gently with a fork at the end. This adds air and prevents clumping. Adding lemon zest brings a bright flavor. You can also try a pinch of nutmeg for warmth. Cinnamon adds a lovely spice that pairs well with blueberries. If you want more sweetness, add a little more maple syrup. For a kick, a dash of ginger powder can elevate the taste. Don’t hesitate to experiment with these flavors. Each adds its unique touch to your breakfast. This recipe serves four people. Each person gets a warm bowl full of deliciousness. For presentation, use colorful bowls that catch the eye. Top with fresh blueberries and sliced almonds. A dollop of Greek yogurt adds creaminess and visual appeal. You can also drizzle extra maple syrup for shine. Garnish with lemon wedges and mint for a refreshing look. This makes breakfast not only tasty but also beautiful. {{image_4}} You can mix in other fruits to change the flavor. Try strawberries, raspberries, or bananas. Each fruit adds its own taste. For a tropical twist, add diced mango or pineapple. These fruits work well with the lemon and blueberry. You can even use dried fruits like cranberries or apricots for a chewy texture. Just remember to adjust the sweetener if needed. Adding nuts or seeds makes the dish crunchy. Try sliced almonds, walnuts, or pecans. They add a nice contrast to the soft quinoa. You can also use seeds like chia or flaxseeds. These seeds give extra fiber and healthy fats. Toss them in right before serving for a fresh crunch. This recipe is already vegan if you use plant-based milk. To ensure it’s gluten-free, check the quinoa package. Some brands process quinoa with gluten grains. Always read labels closely. You can substitute maple syrup with agave nectar for a different sweet flavor. This breakfast fits many dietary needs, making it a great choice for everyone. For the Full Recipe, refer to earlier sections. To keep your Blueberry Lemon Breakfast Quinoa fresh, store it in an airtight container. Let the quinoa cool to room temperature before sealing it. This helps prevent moisture build-up. Place it in the fridge if you plan to eat it within a few days. When you’re ready to enjoy your quinoa again, reheat it on the stove or in the microwave. If using the stove, add a splash of almond milk to keep it moist. Stir often over low heat until warmed through. In the microwave, heat it in short bursts, stirring in between, to avoid hot spots. Your quinoa can last up to five days in the fridge. For meal prep, consider making a larger batch. You can portion it out for quick breakfasts. Store portions in single-serving containers for easy grab-and-go meals. This way, you always have a tasty and healthy breakfast on hand. For the full recipe, check out the [Full Recipe]. Yes, quinoa is a very healthy choice for breakfast. It has lots of protein and fiber. This helps keep you full longer. Quinoa also has vitamins and minerals like magnesium and iron. These nutrients are great for your body. Eating quinoa can boost your energy and help you stay focused all morning. Yes, you can use frozen blueberries. They work well in your breakfast quinoa. Frozen blueberries are picked at their peak ripeness, so they still have great flavor. Just add them straight to your cooked quinoa. There is no need to thaw them first. This makes preparation easier and faster. You can easily prepare this dish ahead of time. Cook the quinoa and mix in the other ingredients. Let it cool and then store it in an airtight container. Keep it in the fridge for up to four days. When you are ready to eat, just reheat it in the microwave. You may want to add a splash of milk to keep it creamy. For the full recipe, check out the details above. In this blog post, I covered the key ingredients for making Blueberry Lemon Breakfast Quinoa. You learned how to select fresh items and swap non-dairy options. I guided you through easy preparation and cooking steps for perfect quinoa. Remember the tips to enhance flavor with spices and zest. Explore variations by adding your favorite fruits and toppings. Lastly, I shared storage tips for leftovers to keep your meals fresh. Now you can enjoy a healthy, delicious breakfast with ease.](https://dishtreats.com/wp-content/uploads/2025/07/a7a4f1ef-75d1-48e3-91fc-d5884226b8fe-768x768.webp)

![- 1 cup uncooked jasmine rice - 1 pound shrimp, peeled and deveined - 2 tablespoons vegetable oil - 3 tablespoons soy sauce - 1 tablespoon sesame oil - Salt and pepper, to taste - 1 cup mixed vegetables - 2 cloves garlic, minced - Fresh green onions, for garnish When I make Easy Shrimp Fried Rice, I always start with the main ingredients. The jasmine rice gives a lovely aroma and texture. For the shrimp, I prefer fresh, peeled, and deveined ones. They cook quickly and taste great. Seasonings are key to this dish. Soy sauce adds umami, while sesame oil gives a nutty flavor. Always remember to season with salt and pepper to bring out the taste. I love adding optional ingredients for extra flavor and color. Mixed veggies like peas and carrots add a nice crunch. Minced garlic gives it a punch, and fresh green onions on top make it look beautiful. For the full recipe, check out the details. Enjoy cooking! - First, rinse 1 cup of jasmine rice under cold water. Use your hands to stir the rice as you rinse. This helps remove excess starch. Keep rinsing until the water runs clear. Drain the rice well. - Next, take a medium saucepan. Add the rinsed rice along with 2 cups of water or low-sodium chicken broth. Bring it to a boil over high heat. Once it boils, lower the heat. Cover the pot with a lid and let it simmer for 15 minutes. The rice will absorb the liquid and become tender. When done, fluff the rice with a fork and set it aside to cool. - Now, heat 2 tablespoons of vegetable oil in a large skillet or wok over medium-high heat. Add 2 cloves of minced garlic and 1 small finely chopped onion. Sauté them for 2-3 minutes. The garlic should smell nice, and the onion will turn clear. - Then, add 1 pound of peeled and deveined shrimp to the skillet. Spread them out evenly. Cook for 2-3 minutes, until the shrimp turn pink and opaque. Once cooked, take them out and set them aside on a plate. - In the same skillet, toss in 1 cup of mixed vegetables. Stir-fry them for 2-3 minutes. They should soften but stay colorful. - Next, push the cooked vegetables to one side of the skillet. Pour in 2 large lightly beaten eggs on the other side. Scramble them until fully cooked and a bit golden. - Now, add the cooled jasmine rice to the skillet. Mix it in with the scrambled eggs and vegetables. Gently fold in the cooked shrimp, ensuring everything combines well. - Drizzle 3 tablespoons of soy sauce and 1 tablespoon of sesame oil over the rice mixture. Stir everything well. Season with salt and freshly ground black pepper to taste. Cook for another 2-3 minutes to let the flavors mix. - Finally, take the skillet off the heat. Garnish with sliced green onions for a fresh touch before serving. This is how you create a delicious shrimp fried rice. For the full recipe, check the section above! - Rinse rice for fluffiness: Rinsing jasmine rice helps remove excess starch. This keeps the rice from becoming sticky. Rinse it until the water runs clear. - Avoid overcooking shrimp: Cook shrimp until they turn pink and opaque. Overcooked shrimp can become rubbery. Remove them from heat as soon as they are done. - Use low-sodium soy sauce: This allows you to control salt levels. It makes your fried rice taste good without too much sodium. - Add extra vegetables for nutrition: Toss in broccoli, peas, or bell peppers. This boosts fiber and vitamins, making your meal healthier. - Recommended garnishes: Fresh green onions add color and taste. You can also sprinkle sesame seeds for a fun crunch. - Pairing options for a complete meal: Serve with a side of steamed veggies or a light salad. This makes your meal balanced and tasty. If you want to dive deeper into the recipe, check out the Full Recipe. {{image_4}} You can easily switch out shrimp in this dish. Try using chicken or tofu instead. Both options work great. For chicken, use bite-sized pieces and cook until golden. For tofu, press it to remove water and then cube it. Sauté until crispy. These changes keep the meal tasty and fun! If you want a vegetarian dish, just leave out the shrimp. Increase the number of vegetables instead. You can add more peas, carrots, bell peppers, or even broccoli. This makes the dish colorful and healthy. Plus, you still get a yummy meal that fills you up! Want to make your fried rice pop with flavor? Add spices like chili or ginger. These spices add heat and depth. You can also mix in some citrus zest, like lemon or lime. This adds a fresh, bright taste that enhances the dish. These little changes make a big difference! Check out the Full Recipe for more ideas. To store shrimp fried rice, let it cool first. Place it in an airtight container. This keeps the rice fresh and prevents it from drying out. You can refrigerate it for up to three days. When you want to eat it, check for any off smells or changes in texture. If you want to freeze shrimp fried rice, portion it into small containers. Make sure to leave some space at the top for expansion. This dish can last in the freezer for about one month. When ready to eat, thaw it in the fridge overnight for best results. For reheating, the stovetop is ideal. Add a splash of water or broth to keep it moist. Heat over medium heat, stirring often. You can also use the microwave. Heat in 30-second intervals, stirring in between. This way, your shrimp fried rice will taste fresh and full of flavor. For more cooking tips, you can check the [Full Recipe]. To boost flavor, use fresh ingredients. Fresh garlic, ginger, and green onions add depth. Try adding a splash of fish sauce for umami. A sprinkle of lime juice brightens the dish. For heat, add chili flakes or sriracha. Lastly, use low-sodium soy sauce to control saltiness. These tips help create a tasty, vibrant meal. Yes, you can prepare shrimp fried rice ahead of time. Cook the rice and shrimp, then store them separately. Keep everything in airtight containers in your fridge. When ready to eat, combine and reheat in a skillet. Add a splash of water or broth to keep it moist. This method ensures your dish stays fresh and delicious. You can use many veggies to add color and crunch. Consider bell peppers, broccoli, or snap peas. Zucchini and mushrooms also work well. Toss in some corn for sweetness or spinach for extra greens. Feel free to mix and match based on your taste. This allows for fun, creative variations. Yes, shrimp fried rice can be gluten-free. Use tamari instead of soy sauce. Check labels on other sauces to ensure they are gluten-free. Most vegetables are naturally gluten-free too. By choosing the right ingredients, you can enjoy this dish without worry. It makes for a tasty option for everyone! You learned how to make shrimp fried rice from scratch. We covered the key ingredients, step-by-step cooking instructions, and helpful tips. You can easily customize this dish with different proteins and veggies. Remember to store leftovers properly for future meals. Enjoying this dish should be fun and easy. With these steps, you can impress your family and friends. Happy cooking!](https://dishtreats.com/wp-content/uploads/2025/06/9ac088a4-5695-4856-8853-65ac7e0439f3-768x768.webp)