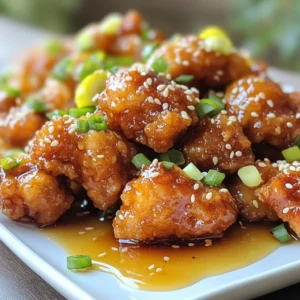
Crispy Honey Chicken Simple and Tasty Recipe Guide


Are you ready to enjoy a meal that’s both crispy and sweet? This Crispy Honey Chicken recipe is simple and packed with flavor. I’ll guide you step-by-step, from marinating the chicken to making the perfect honey sauce. Whether you’re a kitchen newbie or a seasoned cook, you’ll find tips and tricks to nail this dish. Let’s dive into this tasty journey!
Why I Love This Recipe
- Flavor Explosion: This recipe combines the sweetness of honey with savory soy sauce, creating a perfect balance that makes every bite irresistible.
- Crispy Texture: The combination of flour and cornstarch in the coating results in a wonderfully crispy exterior that contrasts beautifully with the tender chicken inside.
- Easy to Make: With simple ingredients and straightforward steps, this recipe is perfect for both novice cooks and experienced chefs looking for a quick meal.
- Customizable: You can easily adjust the sweetness or add spices to the honey sauce, making it a versatile dish that can cater to your personal taste preferences.
Ingredients
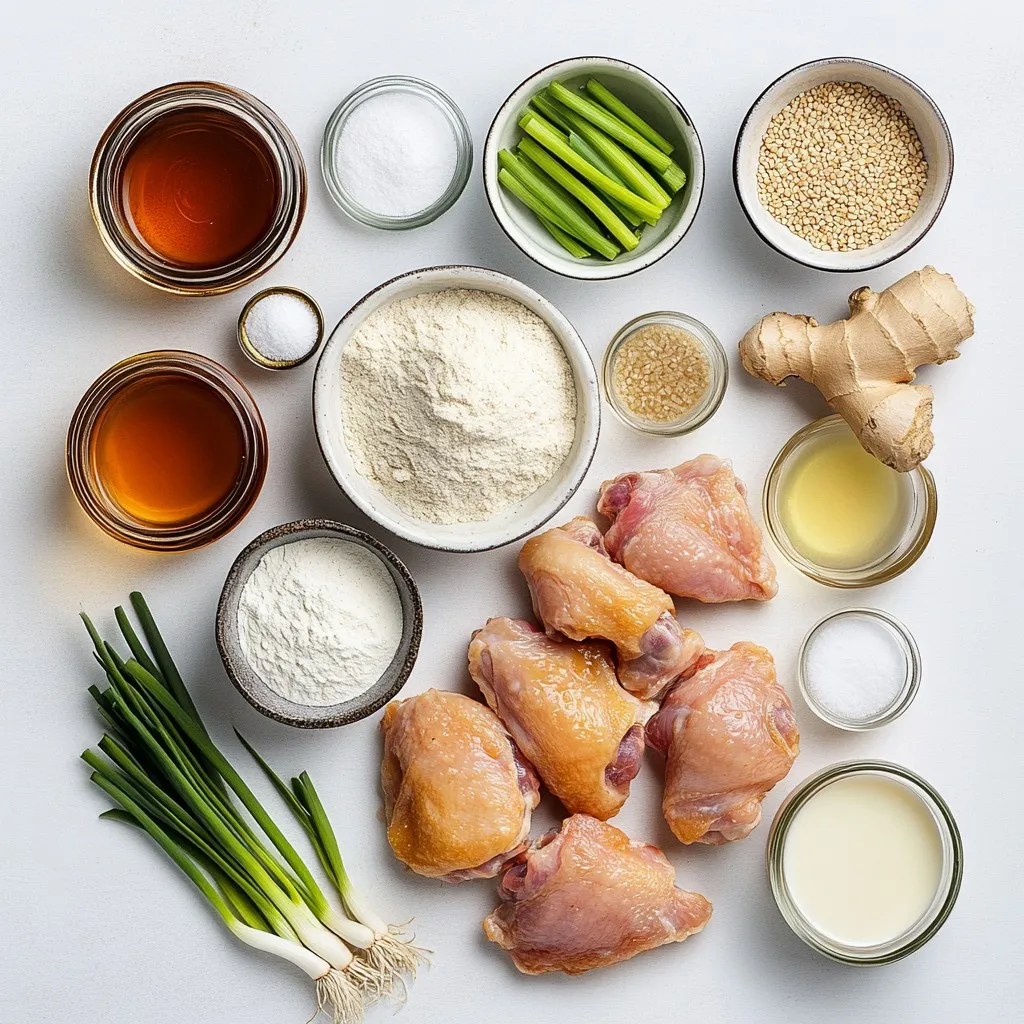
Main Ingredients for Crispy Honey Chicken
- 1 lb boneless, skinless chicken thighs, cut into bite-sized pieces
- 1 cup all-purpose flour
- 1/2 cup cornstarch
- 1 teaspoon baking powder
- 1 teaspoon garlic powder
- 1 teaspoon onion powder
- 1 teaspoon salt
- 1/2 teaspoon black pepper
- 1/2 teaspoon paprika
- 1 cup buttermilk
- 1 cup honey
- 2 tablespoons low-sodium soy sauce
- 1 tablespoon rice vinegar
- 2 tablespoons sesame oil
- 1 tablespoon fresh ginger, minced
- 2 green onions, sliced (for garnish)
- Sesame seeds (for garnish)
Common Substitutes
If you don’t have buttermilk, use regular milk with a splash of vinegar. You can mix one cup of milk and one tablespoon of vinegar and let it sit for five minutes. This creates a similar flavor. For cornstarch, use arrowroot powder or potato starch. Both work well for a crispy texture. If you want a gluten-free option, try using almond flour instead of all-purpose flour.
Recommended Garnishes
Garnish your crispy honey chicken with sliced green onions for a fresh kick. Sesame seeds add a nice crunch and visual appeal. You can also serve it over jasmine rice or next to a veggie stir-fry for a colorful plate. These garnishes enhance both flavor and presentation, making your dish even more enjoyable.
Step-by-Step Instructions
Marinating the Chicken
Start by mixing buttermilk, minced ginger, and a pinch of salt in a large bowl. Add the chicken pieces to the bowl. Make sure they are fully covered by the marinade. Cover the bowl and place it in the fridge for at least 30 minutes. This step helps make the chicken tender and flavorful.
Preparing the Coating
In another bowl, combine the all-purpose flour, cornstarch, baking powder, garlic powder, onion powder, salt, black pepper, and paprika. Whisk these together until they blend well. Set this mixture aside for later.
Frying the Chicken
Heat oil in a large skillet or wok. You want about 2 inches of oil. Get the oil hot, around 350°F (175°C). Carefully add small batches of chicken to the oil. Fry them for 5-7 minutes until they are golden brown and crispy. Use a slotted spoon to remove the chicken and place it on paper towels to drain any extra oil.
Making the Honey Sauce
In a small saucepan, combine honey, low-sodium soy sauce, rice vinegar, and sesame oil. Heat this over low heat while stirring gently. This should take about 5 minutes until everything is warm and mixed well.
Tossing and Serving
In a large bowl, add the crispy chicken. Pour the warm honey sauce over the chicken. Toss them together gently to coat each piece in the sticky sauce. Transfer the honey chicken to a serving platter. Garnish with sliced green onions and a sprinkle of sesame seeds for added crunch and color.
Tips & Tricks
Achieving the Perfect Crispy Texture
To get that crunchy bite, use cornstarch in your coating. It makes the chicken extra crispy. Mix it with flour and other seasonings for the best results. Remember to shake off excess flour to avoid clumping. This helps keep your chicken light and crispy. Fry the chicken in hot oil, about 350°F (175°C). This high heat seals the coating quickly and keeps it crispy.
Ensuring Flavorful Marinade
A good marinade makes all the difference. For this recipe, use buttermilk and minced ginger. The buttermilk tenderizes the chicken, while ginger adds a fresh taste. Let your chicken soak for at least 30 minutes. This gives the flavors time to soak in. If you have more time, marinate it longer for richer taste.
Serving Suggestions and Pairings
Crispy honey chicken pairs well with many sides. Serve it over steamed jasmine rice for a complete meal. You can also add a colorful vegetable stir-fry. For a fun touch, sprinkle extra green onions and sesame seeds on top. This adds flavor and makes your dish look vibrant.
Pro Tips
- Marination Magic: Allowing the chicken to marinate for at least 30 minutes helps to tenderize the meat and infuse it with flavor. For even better results, consider marinating overnight in the refrigerator.
- Perfect Coating: To achieve an ultra-crispy texture, ensure the chicken pieces are coated evenly and shake off any excess flour mixture before frying. This prevents clumping and promotes even cooking.
- Oil Temperature: Maintaining the oil at a consistent temperature of 350°F (175°C) is crucial for achieving crispy chicken. Use a thermometer to check the oil temperature, and avoid overcrowding the pan, which can lower the oil’s temperature.
- Serving Suggestions: For a complete meal, serve the crispy honey chicken over steamed jasmine rice or alongside a colorful vegetable stir-fry. Garnish generously with green onions and sesame seeds for a beautiful presentation.

Variations
Spicy Honey Chicken
You can spice things up by adding heat. Mix in some red pepper flakes or cayenne pepper. Start with half a teaspoon and taste as you go. You can also use a spicy honey if you find it. This gives the dish a nice kick while balancing the sweetness. Your guests will love this fiery twist on the classic.
Baked Honey Chicken Option
If you want a healthier option, try baking instead of frying. Preheat your oven to 400°F (200°C). Place the coated chicken pieces on a baking sheet lined with parchment paper. Spray them lightly with cooking spray for crispness. Bake for 20-25 minutes, flipping halfway through. This method keeps the flavor while cutting down on oil.
Addition of Vegetables
Add some colors and textures by mixing in vegetables. Bell peppers, broccoli, and snap peas cook well with the chicken. Toss the veggies in the honey sauce along with the chicken. This makes a complete meal that looks great and tastes even better. It’s a fun way to sneak in some nutrition.
Storage Info
Storing Leftovers
To store leftover crispy honey chicken, let it cool first. Place it in an airtight container. You can keep it in the fridge for up to three days. Make sure to separate any sauce to keep the chicken crispy. If you mix it with the sauce, it may lose its crunch.
Reheating Tips
When you are ready to eat, reheat the chicken carefully. Use an oven to keep it crispy. Preheat the oven to 375°F (190°C). Place the chicken on a baking sheet. Heat for about 10-15 minutes until warm. You can also use an air fryer for a quick reheat. It will help restore the crunch.
Freezing Guidelines
If you want to freeze crispy honey chicken, do it right after cooking. Let it cool completely. Place it in a freezer-safe bag or container. Remove as much air as possible. You can freeze it for up to three months. To enjoy later, thaw in the fridge overnight. Then reheat as mentioned before.
FAQs
What is the best chicken for crispy honey chicken?
The best chicken for crispy honey chicken is boneless, skinless chicken thighs. They stay juicy and tender. You can also use chicken breasts, but thighs give better flavor. Cut the chicken into bite-sized pieces for even cooking.
Can I make crispy honey chicken ahead of time?
Yes, you can make crispy honey chicken ahead of time. Prepare the chicken and the honey sauce. Store them separately in the fridge. When you’re ready, just fry the chicken and toss it in the sauce. It will still taste fresh and delicious.
How can I make the honey sauce thicker?
To make the honey sauce thicker, add a cornstarch slurry. Mix one tablespoon of cornstarch with two tablespoons of water. Stir this mixture into the sauce while it heats. This will give you a nice, thick coating for the chicken.
What can I serve with crispy honey chicken?
Crispy honey chicken pairs well with several sides. Here are some great options:
- Fluffy steamed jasmine rice
- Vegetable stir-fry
- Fried rice
- Asian-style slaw
- Fresh salad with light dressing
These sides complement the sweet and savory flavor of the chicken perfectly.
Crispy honey chicken combines the best flavors and textures. We discussed key ingredients and how to prepare them perfectly. The marinating and frying steps are vital for that crispiness. Don’t forget tips for adding spice or veggies! You can store your leftovers easily and even reheat them without losing quality. Enjoy this dish with friends or family, and make it your own with variations. Cooking can be fun, so keep experimentin
Crispy Honey Chicken
Ingredients
- 1 lb boneless, skinless chicken thighs, cut into bite-sized pieces
- 1 cup all-purpose flour
- 0.5 cup cornstarch
- 1 teaspoon baking powder
- 1 teaspoon garlic powder
- 1 teaspoon onion powder
- 1 teaspoon salt
- 0.5 teaspoon black pepper
- 0.5 teaspoon paprika
- 1 cup buttermilk
- 1 cup honey
- 2 tablespoons low-sodium soy sauce
- 1 tablespoon rice vinegar
- 2 tablespoons sesame oil
- 1 tablespoon fresh ginger, minced
- 2 green onions sliced (for garnish)
- 1 tablespoon sesame seeds (for garnish)
Instructions
- In a large mixing bowl, combine the buttermilk, minced ginger, and a pinch of salt. Add the chicken pieces to the bowl, ensuring they are fully submerged in the marinade. Cover and refrigerate for at least 30 minutes.
- In a separate bowl, mix together the all-purpose flour, cornstarch, baking powder, garlic powder, onion powder, salt, black pepper, and paprika. Whisk until all ingredients are well blended and set aside.
- Once the marinating time is complete, take the marinated chicken out of the refrigerator. Working in small batches, lift the chicken pieces from the buttermilk and dredge them in the flour mixture. Shake off any excess coating.
- In a large, deep skillet or wok, pour in enough vegetable oil to reach about 2 inches deep. Heat the oil over medium-high heat until it reaches approximately 350°F (175°C). Carefully fry the coated chicken pieces in batches for about 5-7 minutes, or until they turn golden brown and crispy. Use a slotted spoon to transfer the fried chicken to a plate lined with paper towels to drain excess oil.
- In a small saucepan, combine the honey, low-sodium soy sauce, rice vinegar, and sesame oil. Heat over low heat, stirring gently until the mixture is warmed through and well combined, which should take about 5 minutes.
- In a large mixing bowl, add the crispy chicken pieces and pour the warm honey sauce over them. Toss gently but thoroughly until all the chicken is well coated in the sticky sauce.
- Transfer the honey chicken to a large serving platter. Garnish with sliced green onions and a sprinkle of sesame seeds.
![- 1 large head of cauliflower, trimmed and cut into bite-sized florets - 1 cup shredded sharp cheddar cheese, divided - 1 cup cream cheese, softened to room temperature - 1 cup milk, preferably whole - 1/2 cup grated Parmesan cheese - 1 cup breadcrumbs (whole wheat or panko for extra crunch) - 2 garlic cloves, finely minced - 1 teaspoon onion powder - Salt and freshly cracked black pepper to taste - 2 tablespoons extra virgin olive oil - Fresh parsley, finely chopped (for garnish) - For cheese lovers, try gouda or mozzarella for a different taste. - If you want a dairy-free version, use cashew cream and dairy-free cheese. - Whole grain breadcrumbs work well. For gluten-free, use crushed nuts or gluten-free crumbs. This cheesy cauliflower casserole is perfect for a cozy meal. The rich flavors come from simple ingredients, making it easy to enjoy. You can find the full recipe above to guide you through the cooking process. First, set your oven to 375°F (190°C). Preheating is key. It ensures even cooking and helps achieve a golden crust. If you skip this step, your casserole may not cook right. Next, you will blanch the cauliflower. Fill a large pot with water and add a pinch of salt. Once it boils, gently add the cauliflower florets. Blanch them for about 5 minutes. They should be tender but still crunchy. Drain and let them cool. Keeping that crunch is important for the final dish. Now, let’s make the cheese mixture. In a big bowl, mix softened cream cheese with milk until smooth. Then add minced garlic and onion powder. Finally, fold in half of the shredded cheddar cheese. You want it creamy and well-blended. This mixture adds great flavor. Next, fold the blanched cauliflower into the cheese mixture. Make sure each floret gets coated well. This is where you can add salt and freshly cracked black pepper. Taste it to ensure it’s seasoned just right. Take a 9x13 inch casserole dish and grease it with olive oil or cooking spray. Pour the creamy cauliflower mixture into the dish. Spread it out evenly. This helps every bite to be delicious. Finally, bake your casserole. Place it in the oven for 25-30 minutes. Look for a golden brown top and bubbly cheese. When it’s done, let it cool for about 5 minutes before serving. This helps the flavors settle and makes it easier to serve. For the full recipe, check out the details above. To get creamy cauliflower, use softened cream cheese and whole milk. This mix gives a rich feel. Blanch the cauliflower just right, so it stays firm. If you want a crispy topping, use panko breadcrumbs. They add extra crunch and texture. Mixing the breadcrumbs with a bit of olive oil helps them brown. Try adding fresh herbs like thyme or rosemary for extra flavor. A pinch of smoked paprika can bring a nice twist too. If you like heat, consider some chili flakes. Always taste your mix before baking. Adjust salt and pepper to your liking. This will make sure every bite is just right. For a fun touch, serve the casserole in individual ramekins. This makes each serving special. You can also top each ramekin with fresh parsley for color. Using a sprinkle of extra Parmesan adds a nice look and taste. Remember, we eat with our eyes first. A pretty dish makes it more inviting! {{image_4}} To make a low-carb version, use cauliflower rice instead of whole florets. This change will keep the dish light and reduce carbs. You can also add other veggies like broccoli or spinach. These will boost the flavor and nutrition. For a vegan option, swap dairy cheese with dairy-free cheese alternatives. Look for brands made from nuts or soy that melt well. You can also use plant-based cream options like coconut cream or cashew cream. This keeps the creamy texture without dairy. If you like heat, add chili flakes or jalapeños. These will give your casserole a nice kick. You may also explore global twists. Try Mediterranean flavors with olives and feta cheese, or go for Mexican flavors by adding black beans and corn. Each twist makes this dish exciting! For the full recipe, check out the [Full Recipe]. To store leftovers, use an airtight container. Make sure to cool the casserole first. Place it in the fridge. It will stay fresh for about 3 to 5 days. Always check for signs of spoilage before eating. For reheating, the oven is best for keeping the texture. Preheat your oven to 350°F (175°C). Place the casserole in a baking dish. Cover it with foil to avoid drying out. Heat for about 20 minutes or until warm. Limit reheating to just once to keep it tasty. To freeze, let the casserole cool completely. Cut it into portions for easy use. Wrap each piece well in plastic wrap. Then place them in a freezer-safe bag. It can last up to 3 months. For thawing, place it in the fridge overnight for best results. This helps keep the quality. To make this cheesy cauliflower casserole, follow these easy steps: 1. Preheat the oven: Set it to 375°F (190°C). 2. Blanch the cauliflower: Boil water with salt, then add cauliflower florets for about 5 minutes. Drain and let cool. 3. Prepare the cheese mixture: In a bowl, mix cream cheese and milk until smooth. Add minced garlic, onion powder, and half the cheddar cheese. 4. Combine with cauliflower: Fold the blanched cauliflower into the cheese mixture. Season with salt and pepper. 5. Fill the casserole dish: Grease a 9x13 inch dish and pour the mixture in. 6. Prepare the topping: Combine breadcrumbs, Parmesan, remaining cheddar, and olive oil. Sprinkle on top. 7. Bake: Cook in the oven for 25-30 minutes until golden brown. 8. Cool and garnish: Let it cool for a few minutes and add parsley on top. You can find the full recipe above for more details. Yes, you can make this casserole ahead of time. Prepare it up to the baking step. Cover it and place it in the fridge for up to 24 hours. When ready to serve, bake it at 375°F (190°C) for about 30-35 minutes. You may need to add a few extra minutes if it’s cold from the fridge. This casserole pairs well with many dishes. Here are some great options: - Grilled chicken or fish for protein. - A fresh green salad for crunch. - Roasted vegetables for added nutrition. - Garlic bread for a comforting touch. These sides will balance the rich flavors of the casserole. Yes, it is perfect for meal prep. Store leftovers in airtight containers in the fridge for up to 4 days. Reheat in the microwave or oven. For best results, use the oven to keep the topping crispy. Cauliflower is a powerhouse of nutrients. Here are some key benefits: - Low in calories: This makes it great for weight management. - High in fiber: Promotes good digestion and keeps you full. - Rich in vitamins: Especially vitamin C and K, which support health. - Antioxidants: Help protect your body from damage. Including cauliflower in your diet can boost overall health while enjoying delicious meals. This cheesy cauliflower casserole is a blend of flavor and ease. We covered the key ingredients, preparation steps, and variations to make it your own. From storing leftovers to serving suggestions, this dish fits many needs. Whether you prefer it low-carb, vegan, or with a spicy kick, there's a version for everyone. Enjoy creating your own twist on this delightful dish. Cooking should be fun and tasty!](https://dishtreats.com/wp-content/uploads/2025/07/466b6563-f7cf-4c28-8259-a68bc212ec4f-768x768.webp)