Strawberry Shortcake Trifle Delightful and Easy Treat


Looking for a simple and delicious dessert that will wow your guests? The Strawberry Shortcake Trifle is just that! Layers of fresh strawberries, creamy whipped cream, and soft sponge cake create a treat everyone loves. In this post, I’ll guide you through easy steps to make this delightful dessert. Whether you’re a baking novice or a pro, this trifle will impress at any gathering. Let’s dive in and create some sweet magic!
Why I Love This Recipe
- Freshness of Strawberries: The combination of fresh strawberries with sugar creates a delightful burst of flavor that perfectly balances sweetness and acidity.
- Layered Texture: The layering of sponge cake, pudding, and whipped cream provides a variety of textures, making each bite exciting and satisfying.
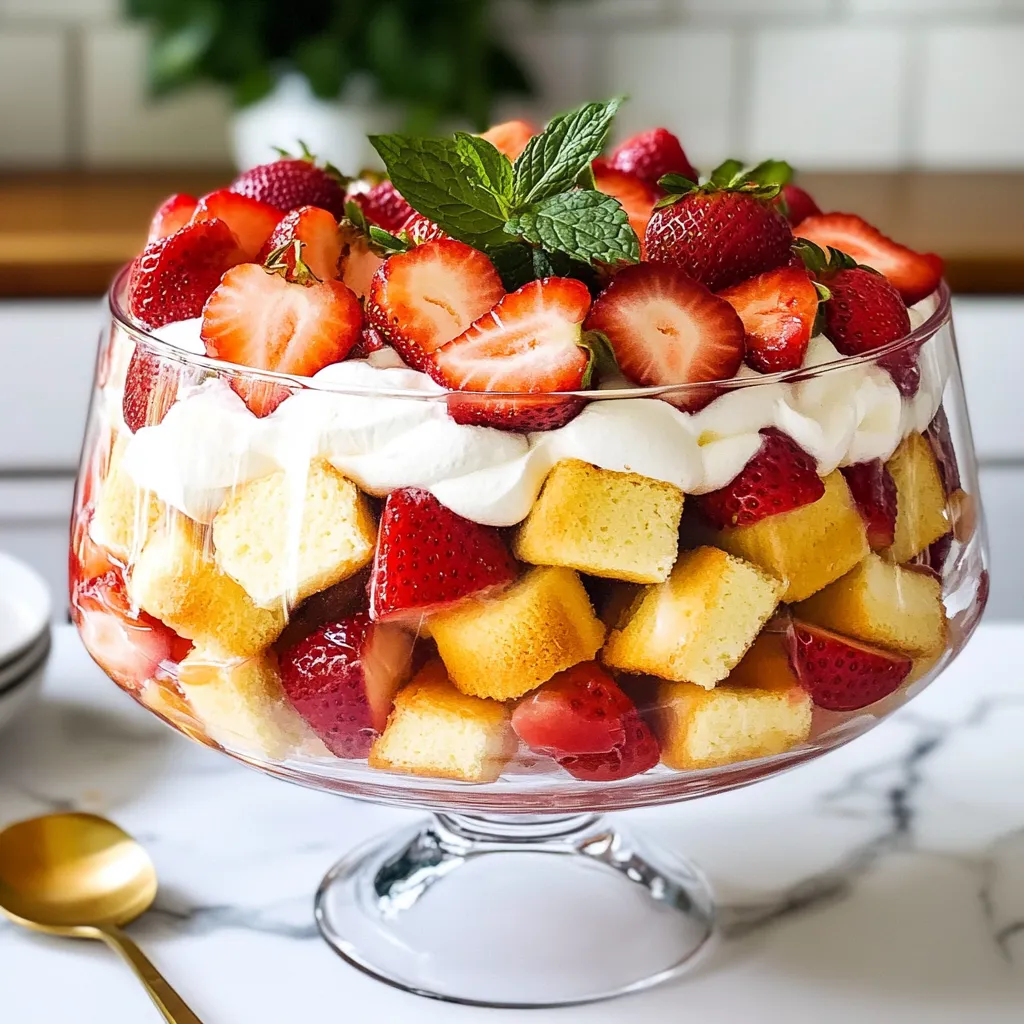
- Visual Appeal: The colorful layers of strawberries, cream, and cake make this trifle not just delicious but also a stunning centerpiece for any gathering.
- Easy to Assemble: This recipe is simple to put together, allowing you to spend more time enjoying the company of friends and family rather than in the kitchen.
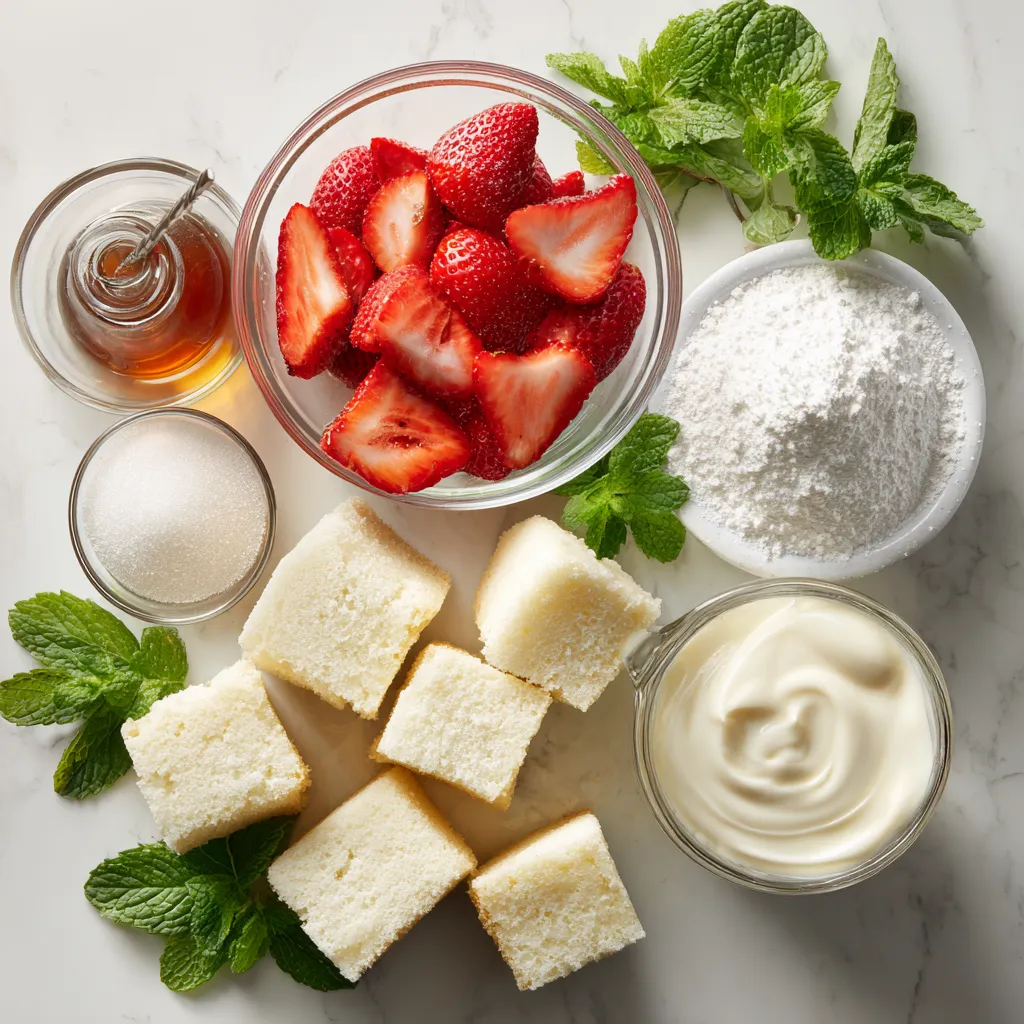
Ingredients
Fresh Strawberries
Fresh strawberries are the star of this dish. You need 2 cups of hulled and sliced strawberries. Choose ripe, juicy strawberries for the best flavor. Their sweetness and color add a bright touch.
Sugar
You will need 1/4 cup of granulated sugar. Sugar helps to sweeten the strawberries. It also draws out their juices, making a delicious syrup.
Vanilla Extract
Use 1 teaspoon of vanilla extract. This adds a warm and rich flavor to both the strawberries and the whipped cream. It enhances the dessert’s overall taste.
Heavy Whipping Cream
You will need 1 cup of heavy whipping cream. This cream whips up fluffy and light. It forms the delightful topping for your trifle.
Powdered Sugar
Add 1/4 cup of powdered sugar to your whipped cream. This sugar dissolves quickly and adds sweetness. It helps achieve that perfect whipped cream texture.
Sponge Cake
Use one store-bought or homemade sponge cake. An 8-inch round cake works well. Cut it into 1-inch cubes for easy layering.
Vanilla Pudding
You will need 1 cup of vanilla pudding. This can be store-bought or homemade. The creamy texture adds richness and complements the other layers.
Optional Garnish
For a lovely finish, consider using fresh mint leaves or extra sliced strawberries. This garnish adds color and a fresh touch to your trifle.
Step-by-Step Instructions
Preparing the Strawberries
First, wash your fresh strawberries. Remove the green tops and slice them. Place the sliced strawberries in a bowl. Add 1/4 cup of granulated sugar and 1 teaspoon of vanilla extract. Stir the mix gently. Let it sit for 15 minutes. This lets the strawberries become juicy and sweet.
Making the Whipped Cream
Grab a clean mixing bowl. Pour in 1 cup of heavy whipping cream. Use an electric mixer to whip it. Beat it until it starts to thicken. Slowly add 1/4 cup of powdered sugar and another teaspoon of vanilla extract. Keep mixing until soft peaks form. This whipped cream will be light and fluffy.
Cutting the Sponge Cake
Take your sponge cake and place it on a cutting board. Use a sharp knife to cut it into 1-inch cubes. Make sure the pieces are small enough for easy layering.
Layering the Trifle
Choose a large trifle dish or individual cups. Start with a layer of sponge cake cubes at the bottom. Then add a layer of the sweet, juicy strawberries, including their juices. Next, spoon in a layer of vanilla pudding. Top it off with a layer of your fluffy whipped cream. Repeat these layers until you fill the dish. Always finish with whipped cream on top for a nice look.
Final Presentation
For a pretty touch, add sliced strawberries and mint leaves on top. Chill your trifle in the fridge for at least 1 hour. This helps the flavors mix together. Serve it in clear bowls to show off the beautiful layers. Enjoy your delicious strawberry shortcake trifle!
Tips & Tricks
How to Achieve Perfect Whipped Cream
To make the best whipped cream, start with cold cream. Use heavy whipping cream for a thick texture. I like to chill my mixing bowl too. This helps the cream whip up faster. Whip the cream on medium speed. Slowly add the powdered sugar and vanilla extract. Stop when you see soft peaks. This means it is light and fluffy. Don’t over-whip, or it will turn into butter.
Choosing the Best Sponge Cake
You can use store-bought or homemade sponge cake. If you buy it, look for a light and airy texture. A good sponge cake should not be too dense. You can also make your own. Just follow a simple sponge cake recipe. Cut the cake into 1-inch cubes for easy layering. This size helps each bite mix well with the other flavors.
Preparing Ahead of Time
You can prep many parts of this trifle ahead of time. Slice the strawberries and mix them with sugar the night before. Store them in the fridge to let the flavors blend. You can also make the whipped cream a few hours in advance. Just keep it in the fridge until you are ready to serve. This way, you save time when it’s time to layer your trifle.
Presentation Tips
A clear glass bowl or cup works best for serving. This shows off the beautiful layers of your trifle. When you garnish, add fresh mint leaves and extra strawberries on top. This adds color and makes it look fancy. Layer the ingredients carefully so each layer is visible. People love to see what’s inside before they taste it!
Pro Tips
- Use Ripened Strawberries: Choose strawberries that are perfectly ripe for the best flavor. Look for bright red berries with a sweet aroma for the most delicious results.
- Make Whipped Cream Ahead: You can prepare the whipped cream in advance and store it in the refrigerator. This will save you time when assembling your trifle.
- Layer Creatively: Feel free to experiment with additional layers such as crushed cookies or chocolate shavings to add texture and flavor to your trifle.
- Chill Before Serving: Allow the trifle to chill for at least an hour before serving. This helps the flavors meld and makes it easier to scoop out perfect portions.
Variations
Adding Different Fruits
You can switch up the fruit in your trifle. Try raspberries, blueberries, or peaches. Each fruit brings a new taste. Layering mixed berries adds a fun twist. You can even use tropical fruits like mango. They create a vibrant look and a fresh flavor.
Using Flavored Pudding
Instead of vanilla pudding, you can use chocolate or lemon pudding. Chocolate pudding pairs well with strawberries. Lemon pudding adds a zesty kick. Each choice changes the taste of the trifle. Experimenting with different flavors makes each dessert unique.
Alternative Cake Options
Sponge cake is great, but you can use other cakes too. Angel food cake adds a light touch. Pound cake brings a richer flavor. For a fun twist, use brownies for a chocolatey base. Each cake brings its own charm to the trifle.
Gluten-Free Adaptations
If you need a gluten-free option, choose gluten-free cake. Many stores sell gluten-free sponge cakes. You can also make your own using almond flour or coconut flour. Ensure all other ingredients are gluten-free. This way, everyone can enjoy the trifle without worry.
Storage Info
Refrigeration Guidelines
You can keep your trifle in the fridge. Cover it tightly with plastic wrap or a lid. This helps keep it fresh. The trifle will stay good for about 2-3 days. The flavors blend well, making it even tastier.
Freezing Recommendations
I do not recommend freezing the trifle. The whipped cream and pudding do not freeze well. They can become watery and lose their nice texture. If you want to freeze, consider storing the layers separately. This way, you can enjoy them fresh later.
Best Practices for Freshness
To keep your trifle fresh, store it in a cool part of the fridge. Avoid placing it near the door, where temps can change. If you add mint or strawberries as a garnish, add them just before serving. This keeps them looking bright and fresh.
FAQs
How long can I make the trifle ahead of serving?
You can make the trifle up to one day before you serve it. This helps the flavors mix well. Just cover it tightly with plastic wrap and chill it in the fridge.
Can I use frozen strawberries?
Yes, you can use frozen strawberries! Just thaw them first and drain any extra juice. Frozen berries work well but may not be as firm as fresh ones.
What can I substitute for heavy cream?
If you need a substitute for heavy cream, use coconut cream or whipped topping. Both give a nice texture and taste in the trifle.
How to make it dairy-free?
To make this trifle dairy-free, use coconut cream instead of heavy cream. Also, choose dairy-free pudding and cake.
Can I layer the ingredients differently?
Absolutely! Feel free to change the order of layers. You can start with pudding or even add nuts for crunch.
What’s the best way to serve leftovers?
Store leftovers in an airtight container in the fridge. Enjoy them within two days for the best taste and texture.
This blog post covered how to make a delightful trifle. We discussed essential ingredients like fresh strawberries, whipped cream, and sponge cake. You learned step-by-step instructions to prepare and layer the trifle beautifully. We also shared tips for perfecting whipped cream and options for variations. Proper storage keeps your dessert fresh for longer.
Enjoy experimenting with flavors and techniques. Creating your trifle can be fun and rewarding. Get started and impress your family and friends with this tasty trea

Strawberry Shortcake Trifle Delight
Ingredients
- 2 cups fresh strawberries, hulled and sliced
- 1/4 cup granulated sugar
- 1 teaspoon vanilla extract
- 1 cup heavy whipping cream
- 1/4 cup powdered sugar
- 1 teaspoon vanilla extract (for whipped cream)
- 1 whole sponge cake (approximately 8-inch round)
- 1 cup vanilla pudding
- to taste fresh mint leaves for garnish (optional)
Instructions
- In a mixing bowl, combine the sliced strawberries with the granulated sugar and 1 teaspoon of vanilla extract. Gently stir the mixture to ensure the strawberries are coated in sugar. Allow it to sit for about 15 minutes, letting the strawberries macerate and release their delicious juices.
- In a clean mixing bowl, use an electric mixer to whip the heavy cream until it begins to thicken. Gradually add in the powdered sugar and the remaining teaspoon of vanilla extract, continuing to whip until soft peaks form.
- Cut the sponge cake into approximately 1-inch cubes, ensuring they are bite-sized for easy layering.
- In a large trifle dish (or individual serving glasses), start layering your ingredients thoughtfully: First, place a layer of sponge cake cubes at the bottom. Next, spoon on a layer of the macerated strawberries, including some of their flavorful juices. Follow this with a generous layer of vanilla pudding. Finally, add a layer of your freshly whipped cream.
- Repeat these layers until you reach the top of your dish, ensuring that your final layer is a luscious mound of whipped cream for a stunning finish.
- For a decorative touch, garnish the top with additional sliced strawberries and sprigs of fresh mint, if desired.
- Chill the assembled trifle in the refrigerator for at least 1 hour before serving, allowing the flavors to meld beautifully.