
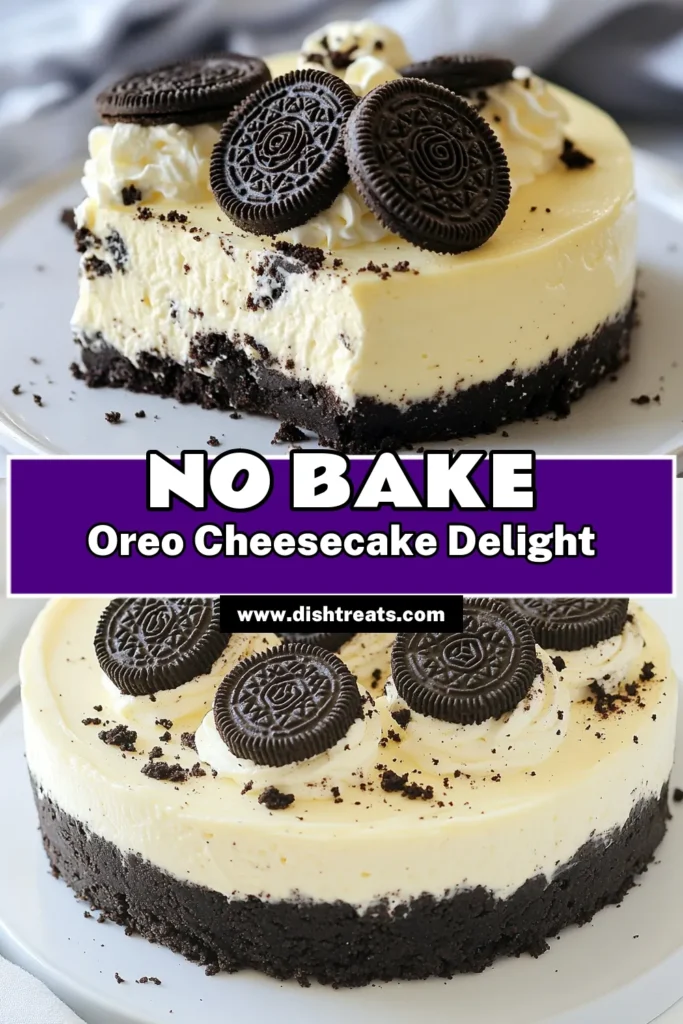
No Bake Oreo Cheesecake Delightful and Simple Treat
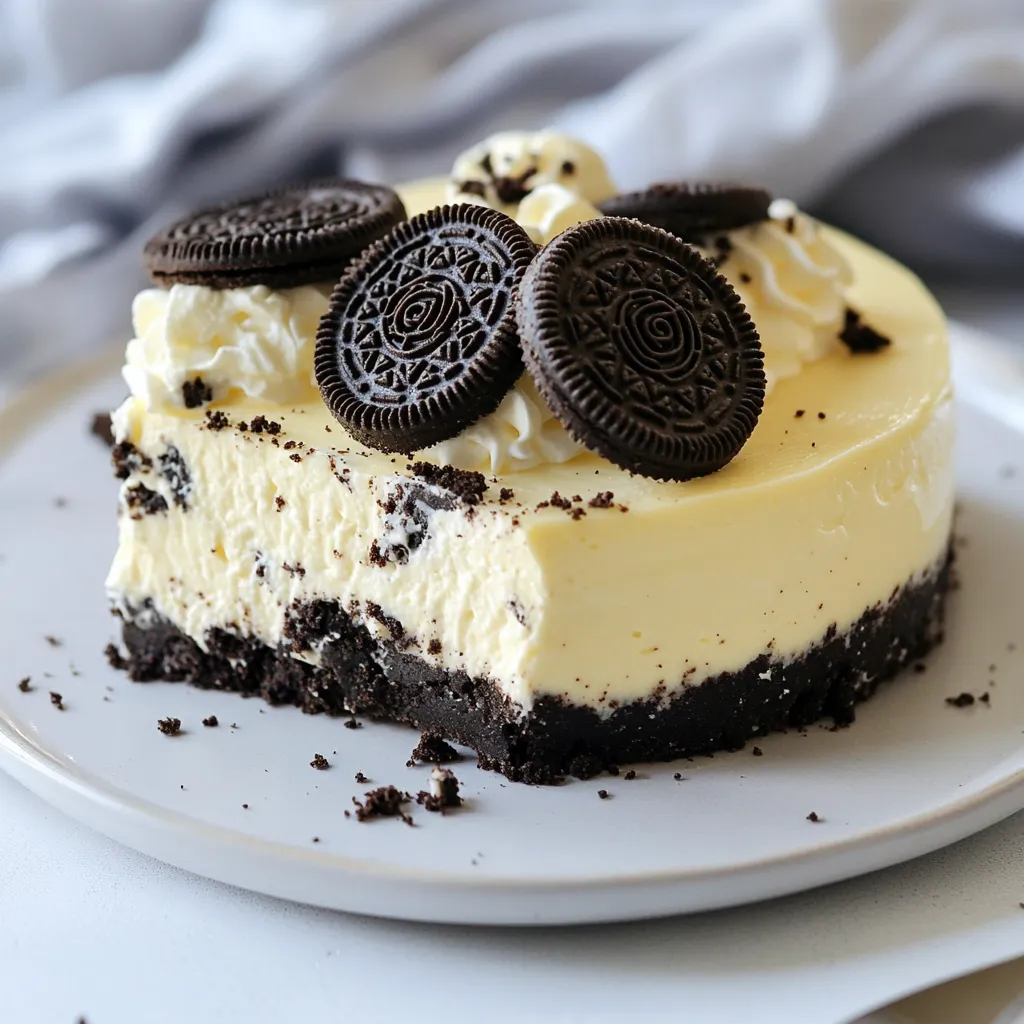
If you’re craving a sweet treat that’s easy to make, you’ve come to the right place! Our No Bake Oreo Cheesecake is a delightful dessert that requires no baking, just some simple mixing and chilling. Packed with creamy goodness and Oreo flavor, this cheesecake will impress your friends and family. Ready to create a dessert that’s quick, fun, and oh-so-delicious? Let’s dive into the recipe and bring this treat to life!
Why I Love This Recipe
- Effortless Preparation: This cheesecake requires no baking, making it a perfect choice for a quick and easy dessert that anyone can master.
- Decadent Flavor: The combination of rich cream cheese and chocolatey Oreo cookies creates a deliciously indulgent treat that chocolate lovers will adore.
- Customizable: You can easily modify this recipe by adding your favorite toppings, like whipped cream or chocolate sauce, to suit your taste.
- Perfect for Any Occasion: This no-bake cheesecake is ideal for celebrations, gatherings, or simply as a delightful end to a weeknight meal.
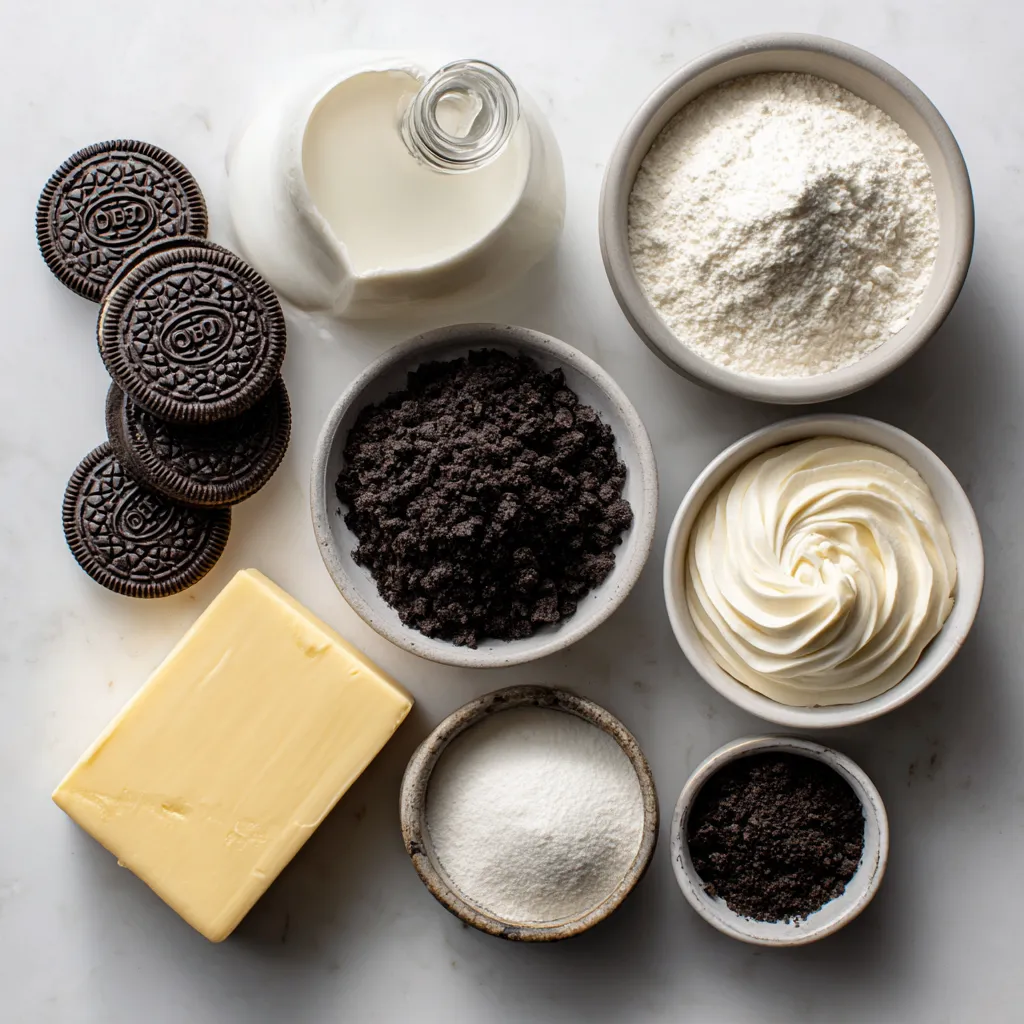
Ingredients
Main Ingredients for No Bake Oreo Cheesecake
- 24 Oreo cookies
- 1/2 cup unsalted butter
- 16 oz cream cheese
- 1/2 cup powdered sugar
- 1 teaspoon pure vanilla extract
- 2 cups heavy whipping cream
- 1/4 cup Oreo cookie crumbs
I love using these simple ingredients to create a rich and creamy dessert. The Oreo cookies give the crust and filling a wonderful flavor. First, we use 24 Oreo cookies. These will make a delicious, crunchy base. The butter holds the crumbs together. Melt 1/2 cup of unsalted butter before mixing it with the cookie crumbs.
Next, for the filling, we need 16 oz of cream cheese. Make sure it is softened. This helps it blend well. We add 1/2 cup of powdered sugar for sweetness. A teaspoon of pure vanilla extract adds a lovely aroma.
To make the cheesecake fluffy, we whip 2 cups of heavy whipping cream. This gives the dessert a light texture. Finally, we fold in 1/4 cup of Oreo cookie crumbs into the filling for extra flavor.
These ingredients come together to create a delightful treat that everyone will love!
Step-by-Step Instructions
Preparing the Oreo Crust
1. Crushing the Oreo cookies: Start by placing 24 Oreo cookies into a food processor. Pulse until they become fine crumbs. This step ensures a smooth crust.
2. Mixing with melted butter: In a large mixing bowl, combine the cookie crumbs with 1/2 cup of melted unsalted butter. Stir until the mixture looks like wet sand.
3. Pressing into the springform pan: Firmly press the Oreo mixture into the bottom of a 9-inch springform pan. Use the back of a measuring cup to make it even. Place the pan in the fridge while you prepare the filling.
Making the Cheesecake Filling
1. Beating cream cheese until smooth: In a large bowl, beat 16 oz of softened cream cheese with an electric mixer. Mix until smooth, about 2-3 minutes.
2. Incorporating powdered sugar and vanilla: Gradually add 1/2 cup of powdered sugar and 1 teaspoon of pure vanilla extract. Continue mixing until fully blended and no lumps remain.
3. Whipping the heavy cream: In a separate chilled bowl, pour in 2 cups of heavy whipping cream. Whip it with an electric mixer until stiff peaks form, which usually takes around 3-5 minutes.
Mixing and Refrigerating
1. Folding whipped cream into mixture: Carefully fold the whipped cream into the cream cheese mixture. Use a spatula and be gentle to keep the whipped cream light and airy.
2. Adding Oreo cookie crumbs: Gently fold in 1/4 cup of Oreo cookie crumbs. This adds flavor and texture to the filling.
3. Filling the crust with cheesecake mixture: Pour the creamy cheesecake filling over the chilled Oreo crust. Use a spatula to smooth the top evenly.
4. Chilling the cheesecake: Cover the cheesecake with plastic wrap or a lid. Return it to the fridge and let it chill for at least 4 hours, or overnight for the best results.
Tips & Tricks
Achieving the Perfect Consistency
Softening cream cheese is key to a smooth filling. Take it out of the fridge first. Let it sit for about 30 minutes. This makes mixing much easier.
When you whip cream, aim for stiff peaks. Use a chilled bowl and beaters. This helps the cream whip faster. It takes about 3-5 minutes. Stiff peaks give the cheesecake a light, airy feel.
Enhancing Flavor and Presentation
Always choose high-quality ingredients. Great Oreos make a big difference. Use pure vanilla extract instead of imitation. Fresh ingredients really enhance the taste.
For a stunning look, add visual garnishes. You can top slices with whipped cream. A sprinkle of crushed Oreos or chocolate sauce adds flair. These little touches impress everyone.
Avoiding Common Pitfalls
To keep the crust from getting soggy, press it firmly. Make sure the Oreo mixture is well-combined with butter. Chill the crust while you make the filling.
When slicing, use a warm knife for clean cuts. Dip the knife in warm water, then dry it. This helps each slice look perfect. Enjoy your beautiful, tasty cheesecake!
Pro Tips
- Chill Your Tools: Before whipping the cream, chill your mixing bowl and beaters in the freezer for about 10 minutes. This helps the cream whip up faster and achieve a fluffier texture.
- Room Temperature Cream Cheese: Make sure your cream cheese is softened to room temperature. This will ensure a smoother filling without lumps, making it easier to incorporate with the whipped cream.
- Customizable Toppings: Feel free to get creative with toppings! Consider drizzling caramel or chocolate sauce, adding fresh berries, or even a sprinkle of sea salt for a delicious contrast.
- Overnight Chill: For the best flavor and texture, allow the cheesecake to chill overnight. This gives it time to set properly and enhances the overall taste.

Variations
Flavor Additions
You can spice up your no bake Oreo cheesecake in fun ways. Try mixing in chocolate or peanut butter for a rich twist. For chocolate, add melted chocolate or cocoa powder to the cream cheese mix. For peanut butter, fold in a smooth peanut butter before adding the whipped cream. Both flavors add creamy richness that is hard to resist!
You can also use fruit purées or extracts for a fresh taste. Adding strawberry or raspberry purée can brighten the cheesecake. Just mix it in gently with the cream cheese. You can use a few drops of almond or lemon extract for a unique flavor. The possibilities are endless!
Dietary Substitutes
If you need gluten-free options, choose gluten-free Oreo cookies. Many brands offer these, so you can still enjoy this treat. Just follow the same steps with the gluten-free cookies for the crust.
For vegan adaptations, use vegan cream cheese and coconut cream instead of heavy cream. This gives a creamy texture without dairy. Make sure to select vegan cookies for the crust. This way, everyone can enjoy a slice!
Alternate Garnishes
Garnishing your cheesecake can make it extra special. You can use different cookie toppings like crushed graham crackers or chocolate cookies. Each offers a unique crunch and flavor.
You can also drizzle chocolate or caramel sauce over the slices. This adds sweetness and a beautiful look to your dish. A sprinkle of crushed Oreos or a dollop of whipped cream can finish it off perfectly. These small touches make your cheesecake stand out!
Storage Info
Storing Leftovers
To store your cheesecake in the fridge, cover it well. Use plastic wrap or a lid. You want to keep the air out to avoid drying. If you have extra slices, place them in an airtight container. This keeps them fresh for later enjoyment.
You can also freeze your cheesecake. Wrap it tightly in plastic wrap and then foil. This helps prevent freezer burn. It lasts about three months in the freezer. When you’re ready to eat it, just thaw it in the fridge overnight.
Shelf Life
Your no-bake Oreo cheesecake lasts about 4 to 5 days in the fridge. Keep an eye on it to ensure it stays fresh. If it starts to smell off or changes color, it’s time to toss it. Mold is another sign it’s no longer good. Always trust your senses when deciding if it’s safe to eat.
Re-serving Tips
To defrost your frozen cheesecake, move it to the fridge. Let it sit there for several hours or overnight. This keeps it creamy and prevents it from getting watery.
When serving, enjoy it chilled. It tastes best cold. If you want, let it sit at room temperature for a few minutes before slicing. This makes cutting easier and keeps the texture just right.
FAQs
Can I use other cookies for the crust?
Yes, you can use other cookies. Graham crackers work great for a milder taste. Chocolate digestives add a rich flavor. Choose cookies that crush easily and complement the filling. Just keep the texture in mind.
How long does it take to set?
Chill the cheesecake for at least 4 hours. For best results, let it sit overnight. This helps it firm up and enhances the flavors. A longer chill time makes a big difference in taste and texture.
Can I make this cheesecake ahead of time?
Absolutely! This cheesecake is perfect for advance prep. You can make it up to two days ahead. Store it in the fridge, covered well. This way, you can enjoy it fresh without stress on serving day.
This no-bake Oreo cheesecake is simple and fun to make. You only need a few ingredients like Oreo cookies, cream cheese, and heavy cream. Following the steps carefully helps you get a smooth filling and a tasty crust. Remember, use fresh ingredients and take your time when mixing. Variations let you get creative too. Whether you try different flavors or adapt for dietary needs, the options are endless. Enjoy making this delicious dessert. It’s sure to impress and satisfy everyon

Dreamy No Bake Oreo Cheesecake
Ingredients
- 24 cookies Oreo cookies (plus extra for garnish)
- 0.5 cup unsalted butter, melted
- 16 oz cream cheese, softened to room temperature
- 0.5 cup powdered sugar
- 1 teaspoon pure vanilla extract
- 2 cups heavy whipping cream
- 0.25 cup Oreo cookie crumbs (from crushed cookies)
Instructions
- Prepare the Crust: Begin by placing all 24 Oreo cookies into a food processor. Pulse until they turn into fine crumbs. In a mixing bowl, combine these crumbs with the melted butter, stirring until they are fully integrated and resemble wet sand.
- Form the Base: Firmly press the Oreo mixture into the bottom of a 9-inch springform pan to create a uniform and compact base. For a smoother finish, use the back of a measuring cup to press down evenly. Once done, place the pan in the refrigerator while you prepare the cheesecake filling.
- Make the Filling: In a large mixing bowl, use an electric mixer to beat the softened cream cheese until it reaches a creamy, smooth consistency. This should take about 2-3 minutes.
- Add Sweetness: Gradually sprinkle the powdered sugar into the bowl while mixing, followed by the vanilla extract. Continue to beat the mixture until the sugar is fully incorporated and no lumps remain.
- Whip the Cream: In a separate chilled bowl, pour in the heavy whipping cream. Use an electric mixer to whip it until stiff peaks form, which usually takes about 3-5 minutes. This will give your cheesecake a light and airy texture.
- Combine: Carefully fold the whipped cream into the cream cheese mixture using a spatula. Ensure you are gentle to avoid deflating the whipped cream; continue folding until no visible streaks remain.
- Add Oreos: Gently fold in the 1/4 cup of Oreo crumbs. Ensure that they are evenly distributed throughout the filling, adding to the overall flavor and texture.
- Fill the Crust: Pour the creamy cheesecake filling over the chilled Oreo crust, using a spatula to smooth the top evenly.
- Chill: Cover the cheesecakes with plastic wrap or a lid and return it to the refrigerator. Let it chill for at least 4 hours, but overnight is recommended for the best texture and firmness.
- Serve: After the cheesecake has set, carefully release the sides of the springform pan. Garnish the top with additional crushed Oreo cookies or whole cookies as desired. Slice into portions and enjoy your delicious creation!
. - Preheat to 350°F (175°C). - Prepare muffin tin by lining with muffin liners or greasing it lightly. - In a medium bowl, combine: - 1 cup rolled oats - 1 cup whole wheat flour - 1 teaspoon baking powder - 1/2 teaspoon baking soda - 1/2 teaspoon salt - Whisk these until they mix well. Set the bowl aside for now. - In a large bowl, add: - 2 ripe bananas, mashed until smooth - 1/2 cup honey or maple syrup - 1/4 cup unsweetened applesauce - 2 large eggs - 1 teaspoon pure vanilla extract - Use a whisk to blend these ingredients. Make sure it is smooth and creamy. - Gradually add the dry mix to the wet mix. - Stir gently until just combined. It’s okay if a few lumps remain. - Carefully fold in: - 1 cup fresh or frozen cherries, pitted and chopped - Optional: 1/2 cup chopped walnuts or pecans - Ensure they are spread out in the batter without overmixing. - Spoon the batter into the muffin cups. Fill each about two-thirds full. - Place the muffin tin in the oven and bake for 18-20 minutes. - Check for doneness with a toothpick. It should come out clean. - Once done, let them cool for about 5 minutes in the tin. - After that, move them to a cooling rack. For the full recipe, refer to the main section. Enjoy your tasty Cherry Banana Oat Muffins! To get the best texture in your muffins, avoid overmixing. When you combine wet and dry ingredients, stir gently. You want some lumps in the batter. Overmixing can lead to tough muffins. Using ripe bananas is important too. The sweeter and softer they are, the better your muffins will taste. Look for bananas with brown spots; those are perfect for baking. To test for doneness, use a toothpick. Insert it into the center of a muffin. If it comes out clean, the muffins are ready. If it has batter on it, bake for a few more minutes. If you live at a high altitude, you may need to adjust the bake time. Muffins may bake faster, so keep an eye on them. Serve your muffins warm for the best flavor. A light dusting of powdered sugar makes them look nice. You can also add fresh mint leaves for a pop of color. These muffins pair well with your favorite tea or coffee. Enjoy them as a snack or breakfast treat! For the full recipe, check out the details above. {{image_4}} You can easily change the flavor of these muffins. Adding spices like cinnamon or nutmeg gives them a warm touch. Just sprinkle in about a teaspoon of cinnamon for a cozy flavor. Nutmeg is great too, but use less, about 1/4 teaspoon. You can also try different fruits. Swap cherries for blueberries or apples. Each fruit gives a new taste and keeps things fun. If you want a vegan option, you can replace the eggs. Use flax eggs instead. Mix 1 tablespoon of ground flaxseed with 2.5 tablespoons of water. Let it sit for 5 minutes. For a low-sugar option, cut the honey or maple syrup in half. You can also use a sugar substitute like stevia. This way, you still enjoy the muffins without too much sugar. You can change the size of your muffins. Make mini muffins by using a mini muffin tin. Fill each cup halfway and bake for about 10-12 minutes. If you prefer standard-sized muffins, stick to the original recipe. Just remember, baking time changes with size. Keep an eye on them to avoid overbaking. For the full recipe, check out the details above. To keep your Cherry Banana Oat Muffins fresh, store them in an airtight container. This way, they stay moist and tasty. You can keep them at room temperature for up to three days. If you live in a warm area, use the fridge. Muffins can last about a week in the refrigerator. Just be aware that cold storage may change their texture slightly. If you want to save muffins for later, freezing is the best option. To freeze, allow the muffins to cool completely. Then, wrap each one in plastic wrap. Place them in a freezer-safe bag or container. They can stay frozen for up to three months. When you want to eat them, take a muffin out and thaw it in the fridge overnight. For the best texture, you can also microwave the muffin for about 20 seconds after thawing. To enjoy your muffins warm, use the oven or microwave. For the oven, preheat to 350°F (175°C). Place the muffin on a baking sheet and heat for about 5 to 10 minutes. This warms them through and helps regain moisture. If you use the microwave, heat for about 10 to 15 seconds. Just be careful not to overheat, as this can make them dry. Warm muffins taste best and are a perfect treat! Yes, you can use frozen cherries. They will soften during baking. This may change the texture a bit. The flavor will still be great. Just make sure to chop them before adding to the mix. If you use frozen cherries, you do not need to thaw them first. To ripen bananas fast, place them in a paper bag. This traps the ethylene gas they emit. You can also add an apple to the bag for even faster results. If you are in a hurry, you can bake bananas at 300°F (150°C) for about 15-20 minutes. This will soften them quickly. If you want to swap honey, maple syrup is a great choice. Agave nectar or brown sugar also works well. Each option will give a different taste, but they will all be sweet. Use the same amount as honey in the recipe. Each muffin has about 140 calories. This can change based on your ingredients. If you use nuts or different sweeteners, check those values. These muffins are a tasty, healthy treat you can enjoy without guilt. When stored well, these muffins last about 3 days at room temperature. Keep them in an airtight container to maintain freshness. You can store them in the fridge for up to a week. For longer storage, freeze them for up to 3 months. Just thaw them before enjoying! You now have a simple yet tasty recipe for cherry banana oat muffins. You learned about ingredients, from oats to cherries, and how to mix them. We covered important tips for getting the right texture and bake time. You also have ideas for variations and storage. These muffins are a great snack or breakfast option. Enjoy making them your way!](https://dishtreats.com/wp-content/uploads/2025/07/f958d702-06c5-46b3-af8d-5861eadc8c12-768x768.webp)
![To make these tasty peanut butter banana oat bars, you'll need a few simple items. Here’s your shopping list: - 2 ripe bananas, well mashed - 1 cup peanut butter (smooth or crunchy) - 1/2 cup honey or maple syrup - 2 cups rolled oats - 1/2 teaspoon ground cinnamon - 1/4 teaspoon salt - Optional ingredients for enhancement: - 1/2 cup dark chocolate chips - 1/4 cup chopped nuts These ingredients come together to create a sweet, hearty snack. The ripe bananas add natural sweetness and moisture. The peanut butter gives a rich, creamy texture. Oats provide a filling base that keeps you energized. You can choose honey or maple syrup for sweetness. The cinnamon adds warmth and flavor, while salt enhances all the tastes. If you want to make them extra special, add dark chocolate chips or nuts for crunch. You can find the full recipe at the end of this guide. Enjoy gathering your ingredients and preparing for a delicious treat! - Preheat your oven to 350°F (175°C). - Line an 8x8 inch baking pan with parchment paper. - Combine bananas and peanut butter in a large mixing bowl. - Incorporate honey or maple syrup into the mixture. - Mix in oats, cinnamon, and salt. - Add dark chocolate chips and nuts if desired. - Spread the mixture into the prepared pan. - Bake for 20-25 minutes until golden brown. - Allow the bars to cool in the pan before transferring to a wire rack. - Cut into squares or rectangles. These simple steps lead you to a tasty treat. Follow the [Full Recipe] for more details. Enjoy your healthy snack! To make the best peanut butter banana oat bars, use overripe bananas. They add natural sweetness and moisture. Mix your ingredients well to get an even consistency. If you don’t mix well, some bites may taste different. Make your bars look great! Dust them with a sprinkle of cinnamon. You can also drizzle some extra peanut butter on top. This small touch adds flavor and makes them look appealing. Serve them on a decorative plate for a nice touch. A beautiful plate can make your snack feel special. Don’t be afraid to get creative! You can try adding spices like nutmeg or vanilla extract. These spices can bring out new flavors in your bars. Just a pinch can change your whole snack experience. Have fun experimenting to find your favorite taste! For the full recipe, check out the section above. {{image_4}} If you want a nut-free option, you can swap the peanut butter. Use sunflower seed butter or almond butter. Both options give a great taste. Sunflower seed butter adds a nice, nutty flavor without nuts. Almond butter gives a creamy texture that works well too. This change makes the bars safe for kids with nut allergies. For a gluten-free version, choose certified gluten-free rolled oats. Regular oats can often have gluten. Using gluten-free oats ensures everyone can enjoy these bars. They still taste delicious and keep all the good flavors. You won’t lose any texture or taste with this swap. To change the flavor, add dried fruits like cranberries or raisins. These fruits bring a sweet and chewy contrast to the bars. You can also mix in some chopped nuts for extra crunch. Feel free to get creative and use your favorite dried fruits. This way, you can make each batch of bars unique and exciting. Try these variations to find your favorite way to enjoy these tasty Peanut Butter Banana Oat Bars. If you want the full recipe, check out the section above. Store your peanut butter banana oat bars in an airtight container. This keeps them fresh at room temperature. If you want to keep them longer, put them in the fridge. They will stay good for about a week. If you want to save some bars for later, wrap them tightly in plastic wrap. Then, cover them with foil to prevent freezer burn. You can freeze them for up to three months. Just thaw them in the fridge when you're ready to enjoy. When you're ready to eat a bar, warm it in the microwave. A few seconds will give it a soft texture. This small step makes a big difference in taste and enjoyment. Yes, you can make these bars vegan. Just swap honey for maple syrup. Also, check that your chocolate chips are dairy-free. Look for golden brown edges and a set center. This means they are ready to come out. If you need a substitute, applesauce works well. It adds moisture and sweetness to the bars. When stored properly, these bars last up to a week in the fridge. You can freeze them for longer storage, too. Peanut butter banana oat bars are easy and tasty. You start by mixing ripe bananas, peanut butter, and oats. Then, you bake them until golden brown. Remember to cool and slice before serving. You can store them at room temp or freeze for later. Try adding dried fruits or other nut butters for more fun. With these simple steps, you can enjoy healthy snacks for days! Enjoy experimenting with your own versions!](https://dishtreats.com/wp-content/uploads/2025/06/65bd505b-0ff3-4866-91fc-ab6a46460c2c-768x768.webp)
 recipe. You learned how to make tasty air fryer apple chips. We covered the ingredients, equipment, and easy steps. I shared tips for the best crispiness and flavor. You can even try sugar-free options or new spices. Store your chips right for lasting crunch. These apple chips are a fun and healthy snack. I hope you enjoy making them as much as I do! Now go ahead and create your own delicious batch.](https://dishtreats.com/wp-content/uploads/2025/08/8a2bfbc3-9f97-452b-a25b-2e6f6cce62ce-768x768.webp)