
Buttery Herb Chicken Drumsticks Flavorful Delight
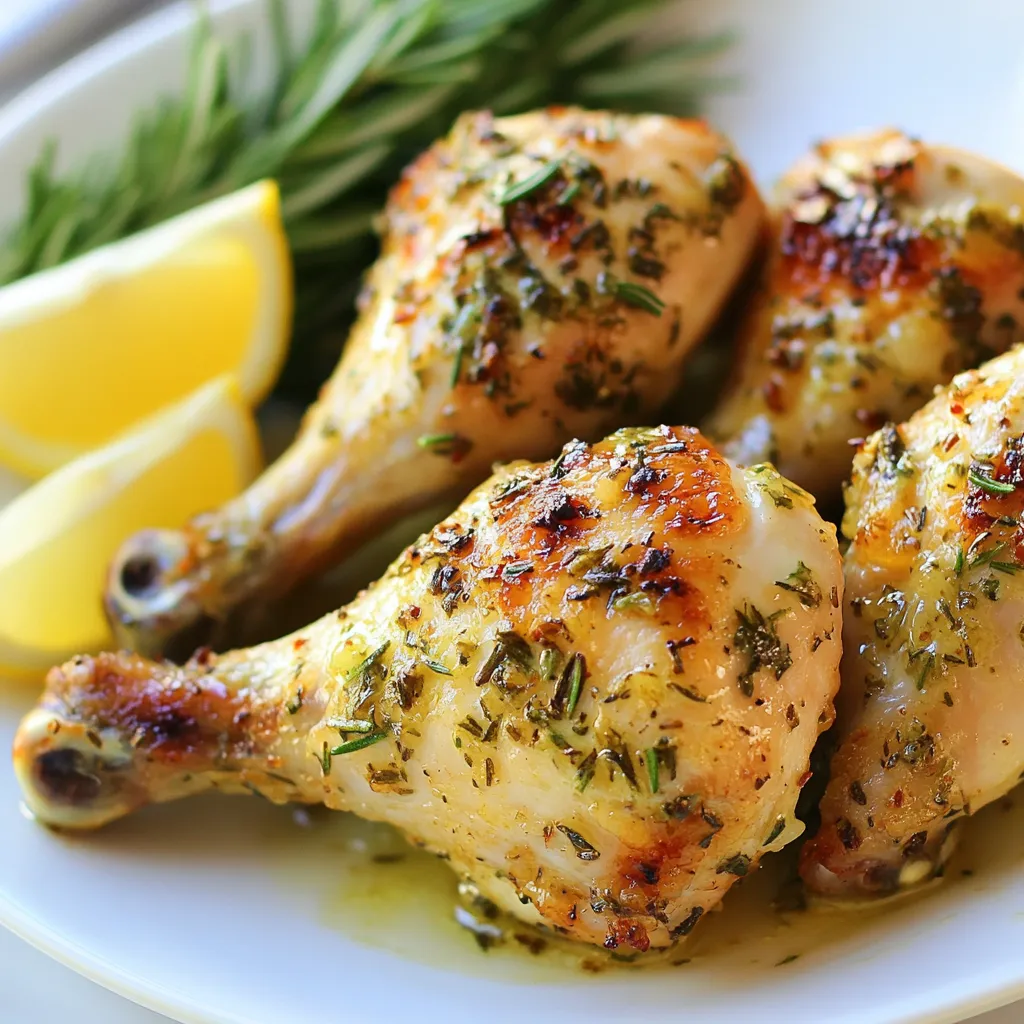

Are you ready to elevate your dinner game? My Buttery Herb Chicken Drumsticks are a flavorful delight that will impress everyone at your table. With juicy meat and a rich herb blend, this dish is perfect for any occasion. Follow my simple steps and create a mouthwatering meal that’s easy to prepare and hard to resist. Let’s dive into the tasty details and make your next meal unforgettable!
Why I Love This Recipe
- Simple Preparation: The recipe requires minimal ingredients and steps, making it perfect for a quick weeknight dinner.
- Flavorful Experience: The combination of buttery herbs and spices creates a rich and savory flavor that satisfies the taste buds.
- Crispy Skin Delight: Baking the drumsticks at a high temperature ensures a deliciously crispy skin that everyone loves.
- Versatile Serving: These drumsticks can be served with various sides or as part of a picnic spread, making them a versatile dish for any occasion.
Ingredients
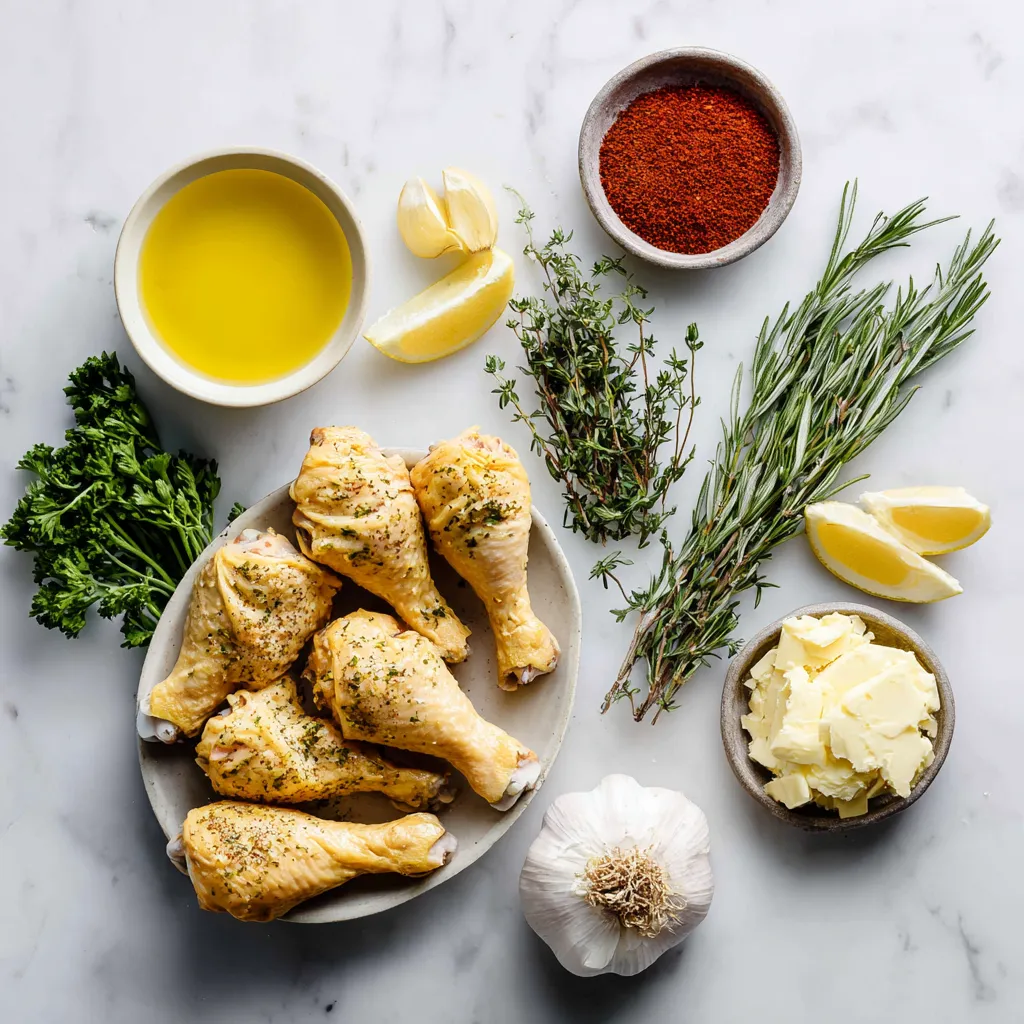
Main Ingredients
- 8 chicken drumsticks
- 1/2 cup unsalted butter, melted
- 2 tablespoons extra virgin olive oil
- 1 tablespoon fresh rosemary, finely chopped
- 1 tablespoon fresh thyme, finely chopped
- 1 tablespoon fresh parsley, finely chopped
The heart of this dish is the chicken drumsticks. They are juicy and tender when cooked well. The butter adds rich creaminess. Olive oil helps make the skin crisp. Fresh herbs bring bright flavors that lift the dish. Rosemary, thyme, and parsley work perfectly together.
Seasoning and Flavor Enhancers
- 4 cloves of garlic, finely minced
- 1 teaspoon paprika (smoked paprika for extra flavor recommended)
- Sea salt and freshly cracked black pepper, to taste
Garlic adds a strong and savory taste. Paprika adds a subtle smokiness. Salt and pepper are essential to enhance all the flavors. Together, these seasonings create a tasty balance that makes everyone want more.
Serving Suggestions
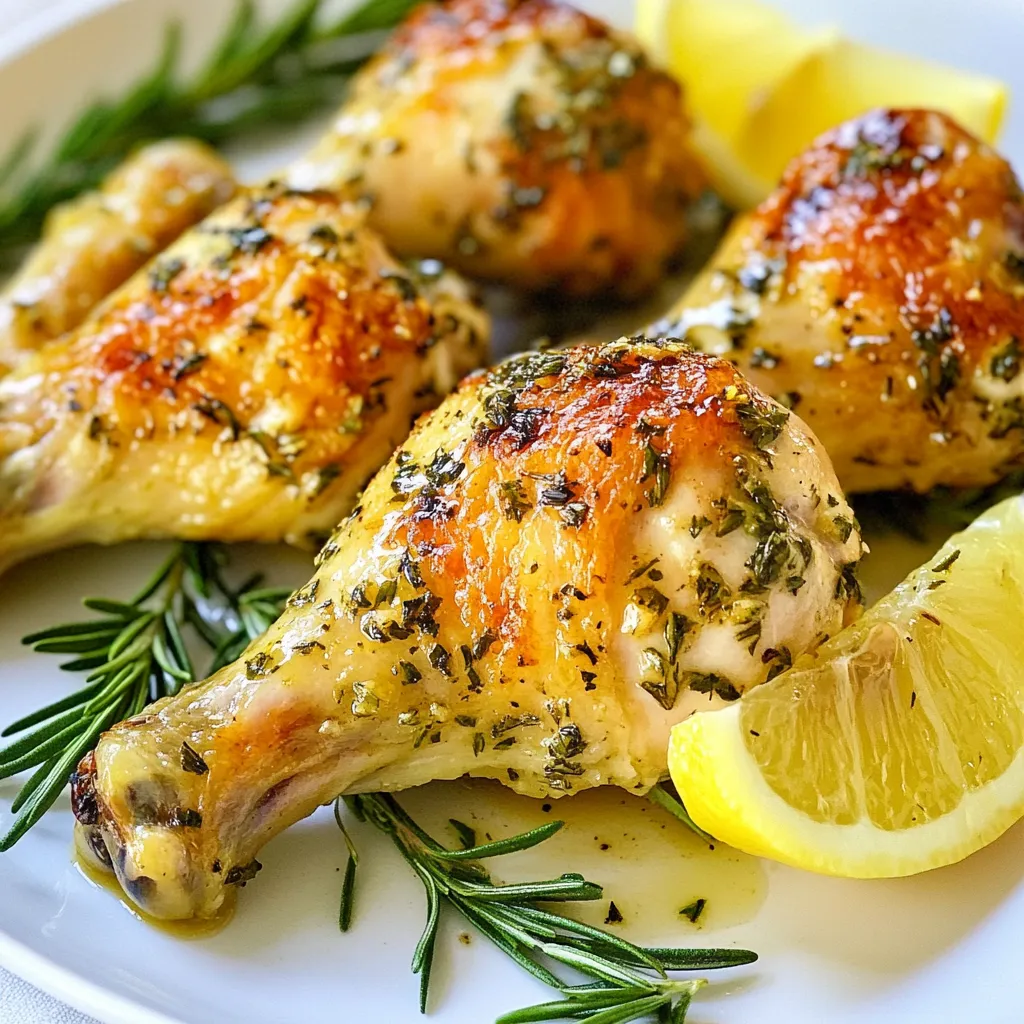
- Fresh lemon wedges
- Additional garnish ideas
Serving the drumsticks with lemon wedges brings a nice zesty touch. A squeeze of lemon brightens the dish and adds freshness. You can also garnish with extra herbs for color. A rustic wooden board makes for a lovely presentation. Your guests will be impressed!
Step-by-Step Instructions
Preparation Steps
- Preheat your oven to 425°F (220°C). This hot oven helps get the skin crispy.
- Line a baking sheet with aluminum foil or parchment paper. This makes cleanup easy.
Mixing the Herb Mixture
- In a large bowl, pour in the melted butter and olive oil.
- Add minced garlic, chopped rosemary, thyme, parsley, paprika, sea salt, and black pepper.
- Mix everything well. Use a whisk or spoon until all the herbs and spices blend into a fragrant mixture.
- Toss the chicken drumsticks in the bowl. Make sure each drumstick gets a nice coating of that buttery herb mix.
Baking the Drumsticks
- Arrange the coated drumsticks on the baking sheet. Give them space so they can cook evenly.
- Place the baking sheet in the oven and bake for 35-40 minutes.
- Flip the drumsticks halfway through cooking. This helps them brown nicely on all sides.
- They are ready when they turn golden brown and reach 165°F (75°C) inside.
- After baking, let them rest for about 5 minutes. This helps keep them juicy.
- Serve warm with fresh lemon wedges. A squeeze of lemon adds a nice touch!
Tips & Tricks
Ensuring Perfectly Cooked Drumsticks
The best way to know when chicken is done is by checking its internal temperature. You want your drumsticks to reach 165°F (75°C). This ensures they are safe to eat and juicy.
Resting time is also key. After cooking, let the drumsticks rest for about 5 minutes. This helps keep the juices inside, making each bite tasty.
Enhancing Flavor Profiles
If you want to switch up the herbs, try using dill, basil, or even tarragon. Each herb brings a unique taste to your dish.
You can also explore other seasoning ideas. Try adding a pinch of cayenne for some heat or a bit of honey for sweetness. Both can add exciting layers to the flavor.
Presentation Ideas
For serving, arrange the drumsticks on a rustic wooden board or a nice platter. This makes your meal look inviting and special.
Garnish with extra fresh herbs for color. A few lemon wedges add a bright touch and help with flavor. You can even place sprigs of rosemary around to enhance the aroma before your first bite.
Pro Tips
- Use Room Temperature Chicken: Allow your chicken drumsticks to sit at room temperature for about 30 minutes before cooking. This helps them cook more evenly and results in juicier meat.
- Marinate for Extra Flavor: If time permits, marinate the drumsticks in the buttery herb mixture for a few hours or overnight in the refrigerator. This allows the flavors to penetrate the meat more deeply.
- Check for Crispiness: For extra crispy skin, broil the drumsticks for the last 2-3 minutes of cooking. Keep a close eye to prevent burning!
- Experiment with Herbs: Feel free to mix and match the herbs based on your preference. Oregano, basil, or even a pinch of chili flakes can add a unique twist to the flavor profile.
Variations
Different Cooking Methods
You can cook buttery herb chicken drumsticks in various ways. Each method gives a unique taste and texture.
- Grilling options: Grilling drumsticks adds a smoky flavor. Preheat your grill to medium heat. Brush the drumsticks with the herb mixture. Cook for about 30 minutes, turning often, until they reach 165°F.
- Air frying alternatives: Air frying makes the skin crispy. Set your air fryer to 400°F. Place the coated drumsticks in the basket in a single layer. Cook for 25-30 minutes, flipping halfway through.
Flavor Infusions
You can spice up your buttery herb chicken drumsticks easily.
- Adding spice variations: For a kick, add cayenne pepper to the herb mix. Start with a half teaspoon and adjust to your taste. This gives a nice heat without overpowering the dish.
- Ingredients for a sweet glaze: Mix honey or maple syrup into the herb mixture for a sweet touch. This balances the savory flavors and adds a lovely shine to the chicken.
Dietary Modifications
You can adjust the recipe to fit different dietary needs.
- Making it gluten-free: This recipe is already gluten-free. Just be sure your paprika and other seasonings are labeled gluten-free.
- Adjusting for low-fat preferences: Use less butter or substitute with olive oil. You can also remove the skin from the drumsticks to cut down on fat while still keeping it tasty.
Storage Info
Storing Leftovers
To keep your buttery herb chicken drumsticks fresh, follow these steps:
- Refrigeration: Allow the drumsticks to cool completely. Place them in an airtight container. Store in the fridge for up to 3 days.
- Freezing: If you want to keep them longer, wrap each drumstick in plastic wrap. Then, place them in a freezer bag. They can last up to 3 months in the freezer.
Reheating Tips
When it’s time to enjoy your leftovers, here’s how to do it right:
- Oven Method: Preheat your oven to 350°F (175°C). Place the drumsticks on a baking sheet. Heat for about 15-20 minutes until warm.
- Microwave Method: Use a microwave-safe dish. Cover the drumsticks with a damp paper towel. Heat in 30-second intervals until warm. This helps keep them tender.
Shelf Life
How long can you keep those tasty drumsticks?
- Refrigerated: They last for about 3 days in the fridge.
- Frozen: When frozen, they stay good for about 3 months.
Watch out for these signs of spoilage:
- Smell: If they smell off, it’s best to toss them.
- Texture: If they feel slimy, do not eat them.
- Color: If the color changes significantly, it’s time to let go.
FAQs
How do you make chicken drumsticks crispy?
To make chicken drumsticks crispy, start with high heat. Preheat your oven to 425°F (220°C). Use a mix of melted butter and olive oil for coating. This helps the skin crisp up. Space the drumsticks apart on the baking sheet. This allows hot air to circulate around them. Flip the drumsticks halfway through cooking. This ensures even browning. The skin will turn golden and crunchy.
Can I marinate the drumsticks overnight?
Yes, you can marinate the drumsticks overnight. This step enhances the flavors greatly. Combine the melted butter, oil, garlic, and herbs. Coat the drumsticks in this mix. Place them in a sealed bag or bowl. Refrigerate them overnight. The longer they soak, the more flavor they absorb. Just remember to let them come to room temperature before baking.
What are the best side dishes to serve with buttery herb chicken drumsticks?
Great side dishes complement buttery herb chicken drumsticks. Consider these options:
- Roasted vegetables like carrots or Brussels sprouts
- Creamy mashed potatoes for a classic feel
- A fresh garden salad for a light touch
- Garlic bread to soak up the buttery sauce
- Steamed rice or quinoa for a hearty addition
These sides balance the dish well and create a complete meal.
In this post, we covered how to make tasty chicken drumsticks with simple steps. We looked at key ingredients like fresh herbs, garlic, and butter. You learned how to prepare, season, and bake them perfectly. We also shared helpful tips for variations and storing leftovers. Cooking should be fun and easy. Now, you can impress your friends and family with your dish. Keep experimenting with flavors and enjoy every bit
Buttery Herb Chicken Drumsticks
Ingredients
- 8 pieces chicken drumsticks
- 0.5 cup unsalted butter, melted
- 2 tablespoons extra virgin olive oil
- 4 cloves garlic, finely minced
- 1 tablespoon fresh rosemary, finely chopped
- 1 tablespoon fresh thyme, finely chopped
- 1 tablespoon fresh parsley, finely chopped
- 1 teaspoon paprika
- to taste sea salt
- to taste freshly cracked black pepper
- as needed fresh lemon wedges, for serving
Instructions
- Preheat your oven to 425°F (220°C) and line a baking sheet with aluminum foil or parchment paper.
- In a large mixing bowl, pour in the melted butter and olive oil. Add the minced garlic, finely chopped rosemary, thyme, parsley, paprika, sea salt, and freshly cracked black pepper. Mix until well combined.
- Add the chicken drumsticks into the bowl, ensuring all pieces receive a generous coating of the buttery herb mixture. Toss thoroughly.
- Arrange the coated drumsticks on your prepared baking sheet, making sure they are evenly spaced apart.
- Place the baking sheet in the preheated oven and bake for 35-40 minutes, flipping halfway through the baking time.
- Once done, remove the drumsticks from the oven and let them rest for about 5 minutes.
- Serve the drumsticks warm, accompanied by fresh lemon wedges.
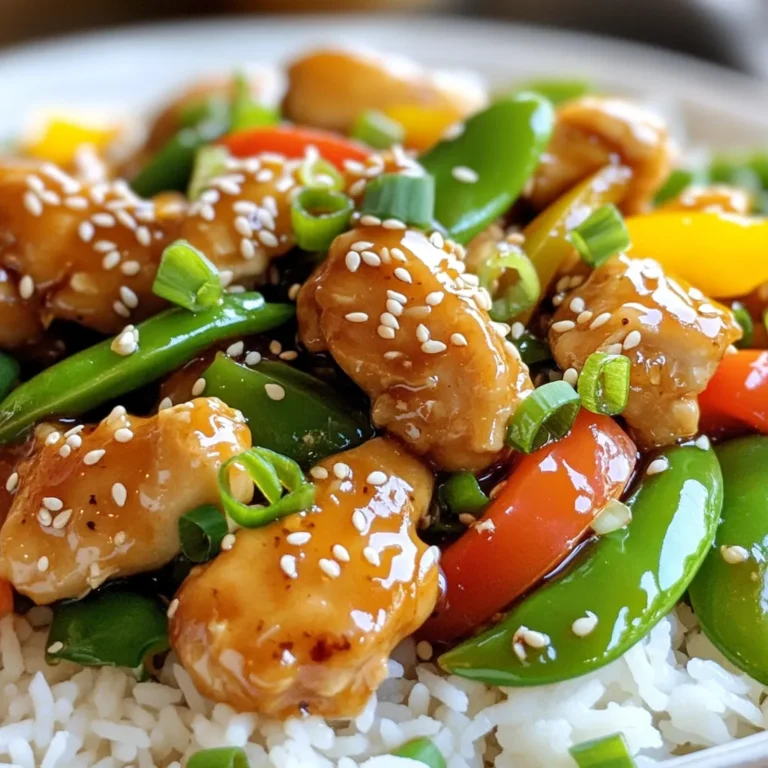
![To make this dish, you need a few key items. These ingredients work together for great flavor. Here’s what you will need: - 4 chicken thighs, bone-in and skin-on - 1/4 cup honey - 1/4 cup low-sodium soy sauce - 4 cloves garlic, finely minced - 1 tablespoon fresh ginger, grated - 1 teaspoon sesame oil - 1 tablespoon olive oil - Salt and freshly ground black pepper to taste While the main ingredients shine, you can add optional items for extra flavor. Try using these to enhance your dish: - A splash of rice vinegar for acidity - A pinch of red pepper flakes for heat - Fresh herbs like cilantro or parsley for freshness Presentation matters when serving food! Beautiful garnishes make a dish pop. Here’s what to top your chicken with: - 2 green onions, finely sliced - Sesame seeds for a crunchy finish First, grab a medium mixing bowl. Add 1/4 cup honey, 1/4 cup low-sodium soy sauce, 4 minced garlic cloves, 1 tablespoon of grated ginger, and 1 teaspoon of sesame oil. Whisk them together until mixed well. This sweet and savory blend will become your marinade and glaze. It infuses the chicken thighs with tasty flavor. Next, season the chicken thighs. Use salt and freshly ground black pepper on both sides. Heat 1 tablespoon of olive oil in a large skillet over medium-high heat. Once hot, place the chicken thighs skin-side down. Let them sear for about 6-8 minutes. You want that skin golden brown and crispy. This step adds great texture and taste. After searing, flip the chicken thighs. Pour the honey garlic mixture over them. Let it simmer gently, coating the chicken in flavor. Cover the skillet and reduce the heat. Cook for 15-20 minutes until the chicken reaches 165°F (75°C) inside. When the chicken is ready, remove the lid. Turn the heat back up to medium-high. Let the sauce simmer for 5 minutes, stirring often. This will thicken the sauce, helping it stick to the chicken. Once thickened, take the skillet off the heat. Allow the chicken to rest for a few minutes. This lets the juices settle, keeping the meat tender. Serve the chicken on a platter, drizzling the sauce over the top. Add a sprinkle of sliced green onions and sesame seeds for a bright finish. Enjoy your Honey Garlic Chicken Thighs! For the full recipe, refer to [Full Recipe]. To get crispy skin, start with bone-in, skin-on chicken thighs. Pat the skin dry with paper towels. This step removes moisture and helps the skin crisp up nicely. Heat olive oil in a hot skillet before adding the chicken. Sear it skin-side down for 6-8 minutes. Resist the urge to move the chicken too much. Let it cook undisturbed for a golden crust. For tender chicken, season it well with salt and pepper. This enhances flavor and locks in moisture. When cooking, keep an eye on the internal temperature. Aim for 165°F (75°C) to ensure it’s fully cooked. Let the chicken rest after cooking. This lets the juices settle back in, making each bite juicy and satisfying. Honey garlic chicken pairs well with several sides. Try serving it with steamed rice for a classic combo. The rice soaks up the tasty sauce. You can also serve it with a fresh green salad. The crunch of the veggies complements the soft chicken perfectly. Roasted vegetables add color and flavor, making for a well-rounded meal. For the full recipe, check out [Full Recipe]. {{image_4}} You can change the taste of honey garlic chicken thighs by swapping some ingredients. For a fruitier twist, try using maple syrup instead of honey. This will give your dish a rich, deep flavor. You can also replace soy sauce with coconut aminos for a gluten-free option. If you like citrus, add some fresh orange juice to the marinade. It brightens the flavor and adds a zesty note. While chicken thighs are juicy, you can use other cuts too. Chicken breasts work well if you prefer leaner meat. Just remember, they may dry out faster, so watch the cooking time. Drumsticks are another tasty option. They are fun to eat and stay moist during cooking. Whichever cut you choose, make sure it is about the same size for even cooking. Want some heat? It's easy to spice things up! Add red pepper flakes or sriracha to the marinade for a kick. You can also use fresh jalapeños or chili paste for a bolder flavor. Adjust the amount based on your heat tolerance. If you love spicy food, this will make your honey garlic chicken thighs truly exciting. For the full recipe, check out the [Full Recipe]. Store your honey garlic chicken thighs in an airtight container. Make sure to let them cool to room temperature first. They will stay fresh in the fridge for up to 3 days. This keeps the flavors intact and ensures the chicken remains juicy. To reheat, place the chicken thighs in a skillet over low heat. Cover the skillet to keep moisture in. Heat until warmed through, about 5-10 minutes. You can also microwave them, but cover the dish to prevent drying out. You can freeze the chicken thighs for later use. Wrap each thigh in plastic wrap, then place them in a freezer bag. They will last for about 2-3 months in the freezer. Thaw them in the fridge overnight before reheating. This method keeps the chicken tasty and tender. For the full recipe, refer to the section above. You should cook chicken thighs for about 20-25 minutes. Start by searing them for 6-8 minutes on the skin side. Then, flip them over and pour the sauce on top. Cover the skillet and let them simmer for 15-20 minutes. This method helps keep the meat juicy and full of flavor. Yes, you can use boneless chicken thighs. They will cook faster than bone-in thighs. Sear them for about 5-7 minutes on each side. Make sure to check their internal temperature. It should reach 165°F (75°C) to be safe to eat. The best way to check if the chicken is done is with a meat thermometer. Insert it into the thickest part of the thigh. When it reads 165°F (75°C), the chicken is ready. You can also cut into the meat. If the juices run clear, it’s cooked. To adjust the sweetness, add more honey for a sweeter taste. If you want it less sweet, add more soy sauce or a splash of vinegar. Taste the sauce as you go. This way, you can find the perfect balance for your dish. For the full recipe, please check the [Full Recipe]. Honey garlic chicken thighs are simple and tasty. We covered the key ingredients and optional marinades. You learned how to prepare the marinade and cook the chicken. I shared tips for crispy skin, tender meat, and delicious sides. We also explored variations and storage tips to keep your meals fresh. When you try this recipe, it will impress your family and friends. Enjoy the rich flavors and make it your own!](https://dishtreats.com/wp-content/uploads/2025/06/32d13aa5-8be9-48e3-be5a-1699ade8ce81-768x768.webp)

![To make spicy chickpea tacos, you need some key items. Here is what you will need: - 1 can (15 oz) chickpeas, thoroughly drained and rinsed - 2 tablespoons extra virgin olive oil - 1 teaspoon ground chili powder - 1 teaspoon ground cumin - 1/2 teaspoon smoked paprika - 1/4 teaspoon cayenne pepper - Sea salt and freshly cracked black pepper to taste - 8 small corn or flour tortillas - 1 ripe avocado, sliced into thin pieces - 1 cup finely shredded purple cabbage - Fresh cilantro leaves for garnish - Lime wedges for serving These ingredients create a tasty and spicy base for your tacos. The spices bring warmth and depth, while the chickpeas offer a great source of protein and fiber. You can add some unique touches to your tacos. Here are some ideas: - Diced tomatoes for freshness - Sliced jalapeños for extra heat - A dollop of sour cream or yogurt for creaminess - Shredded cheese for richness - Corn or black beans for more texture Feel free to mix and match these extras. They can elevate your tacos to a whole new level. Chickpeas are not just tasty; they are also very healthy. Here are some benefits: - High in protein, which helps build muscle - Rich in fiber, aiding in digestion - Contain vitamins and minerals like iron and magnesium - Low in fat, making them a great choice for heart health Including chickpeas in your diet can support your overall health. They are a smart ingredient in any meal. For the full recipe, check the [Full Recipe]. Start by opening a can of chickpeas. Drain and rinse them well. In a bowl, use a fork or potato masher to gently mash the chickpeas. Leave some chunks for texture. You want them slightly broken but not a paste. This will help them stay firm while cooking. Heat 2 tablespoons of extra virgin olive oil in a skillet over medium heat. Once the oil shimmers, add the mashed chickpeas. Sprinkle in the spices: 1 teaspoon of chili powder, 1 teaspoon of cumin, 1/2 teaspoon of smoked paprika, and 1/4 teaspoon of cayenne pepper. Add sea salt and black pepper to taste. Stir well to coat all the chickpeas. Cook for about 5 to 7 minutes. This will make the spices fragrant and the chickpeas slightly crispy. While the chickpeas cook, warm the tortillas in another skillet for about 30 seconds on each side. You can also heat them in the oven. Once the chickpeas are ready, spoon a generous amount onto each tortilla. Top with sliced avocado, shredded purple cabbage, and fresh cilantro. Serve with lime wedges on the side. This adds a zesty touch just before eating. For the full recipe, check out the complete guide! To make your spicy chickpea tacos pop, use a mix of spices. I love pairing chili powder with cumin for a warm base. Adding smoked paprika brings a nice depth. If you want more heat, cayenne pepper is the way to go. You can also try adding garlic powder or onion powder for extra flavor. Experiment until you find your favorite blend. Warming your tortillas is key to a great taco. You can heat them in a skillet, about 30 seconds on each side. This keeps them soft and pliable. Alternatively, stack them, wrap in foil, and warm in the oven. If you prefer a crispy texture, try frying them lightly in oil. Just be careful not to overcook them! Serving matters! Place your tacos on a large platter. Add lime wedges and fresh cilantro for color. You can even include cherry tomatoes or sliced radishes for a vibrant touch. This not only looks great but also invites your guests to dig in. For a fun twist, serve with a side of salsa or guacamole to enhance the flavor. Enjoy the Full Recipe for more tips! {{image_4}} You can turn your spicy chickpea tacos into a taco bowl. Start with a base of rice or quinoa. Then, add your chickpea mixture on top. Pile on shredded cabbage, avocado, and cilantro. This bowl offers a fun twist on the classic taco. You could also add salsa or hot sauce for extra flavor. Feel free to mix in different proteins or veggies. You can add cooked chicken, beef, or shrimp if you want. For a veggie boost, try bell peppers, corn, or zucchini. These options add variety and nutrition to your meal. You can also swap chickpeas for black beans or lentils for a new taste. Making this dish gluten-free is easy. Just use corn tortillas instead of flour ones. They are tasty and safe for those with gluten issues. This recipe is already vegan, so you can enjoy it as is. To enhance flavors, add avocado or a vegan sour cream. These small changes can make a big difference in taste and texture. For the full recipe, check out the earlier sections. To store leftover chickpeas, place them in a clean, airtight container. Make sure the lid seals tightly. You can keep them in the fridge for up to three days. If you want to store them for longer, freeze the chickpeas. They will last for about three months in the freezer. Just remember to label your container with the date. This helps you keep track of freshness. Reheating your tacos is easy! You can microwave them for about 30 seconds. Make sure to cover them with a damp paper towel. This keeps the tortillas soft. If you prefer a crispier taco, reheat them in a skillet. Heat the skillet on medium and warm each taco for about one minute on each side. This way, you keep that delicious crunch! For storing your ingredients, glass containers are best. They are safe, durable, and help keep food fresh. You can also use plastic containers, but make sure they are BPA-free. Small jars work well for spices and herbs. Label each container so you can find what you need quickly. Keep everything in a cool, dry place for the best results. For a full recipe, check the Spicy Chickpea Tacos section. You can make chickpea tacos spicier by adding more cayenne pepper. Start with 1/2 teaspoon and adjust to your heat level. You can also use hot sauce for an extra kick. Another idea is to add chopped jalapeños or serrano peppers. These fresh peppers bring heat and flavor. If you love smoky flavors, try adding chipotle powder. This will give your tacos a nice depth. Yes, you can prepare chickpea tacos in advance. I suggest cooking the chickpeas and storing them in an airtight container. Keep the tortillas and toppings separate until ready to serve. This way, everything stays fresh. You can store the chickpea mixture in the fridge for up to three days. Just reheat it before serving. Fresh toppings like avocado and cilantro should be added last. Spicy chickpea tacos pair well with many sides. You could serve them with rice or quinoa for a filling meal. A fresh salad adds brightness and crunch. Try a simple cabbage slaw or a corn salad. You might also enjoy salsa or guacamole on the side. For drinks, consider a refreshing limeade or a cold beer. This will balance the spice and add flavor. For the full recipe, check out the detailed instructions above. In this post, we covered how to make spicy chickpea tacos. We explored essential ingredients and their health benefits. You learned step-by-step instructions for preparing and cooking chickpeas, assembling tacos, and customizing them. We shared tips for seasoning, tortilla methods, and serving ideas. Variations included taco bowls and gluten-free options. Finally, we discussed how to store leftovers effectively. These tacos are fun, tasty, and good for you. Ready to enjoy your homemade spicy chickpea tacos?](https://dishtreats.com/wp-content/uploads/2025/06/78aca89b-dca0-4457-a4a9-555278ab1264-768x768.webp)