
Teriyaki Salmon Rice Bowls Healthy and Flavorful Meal
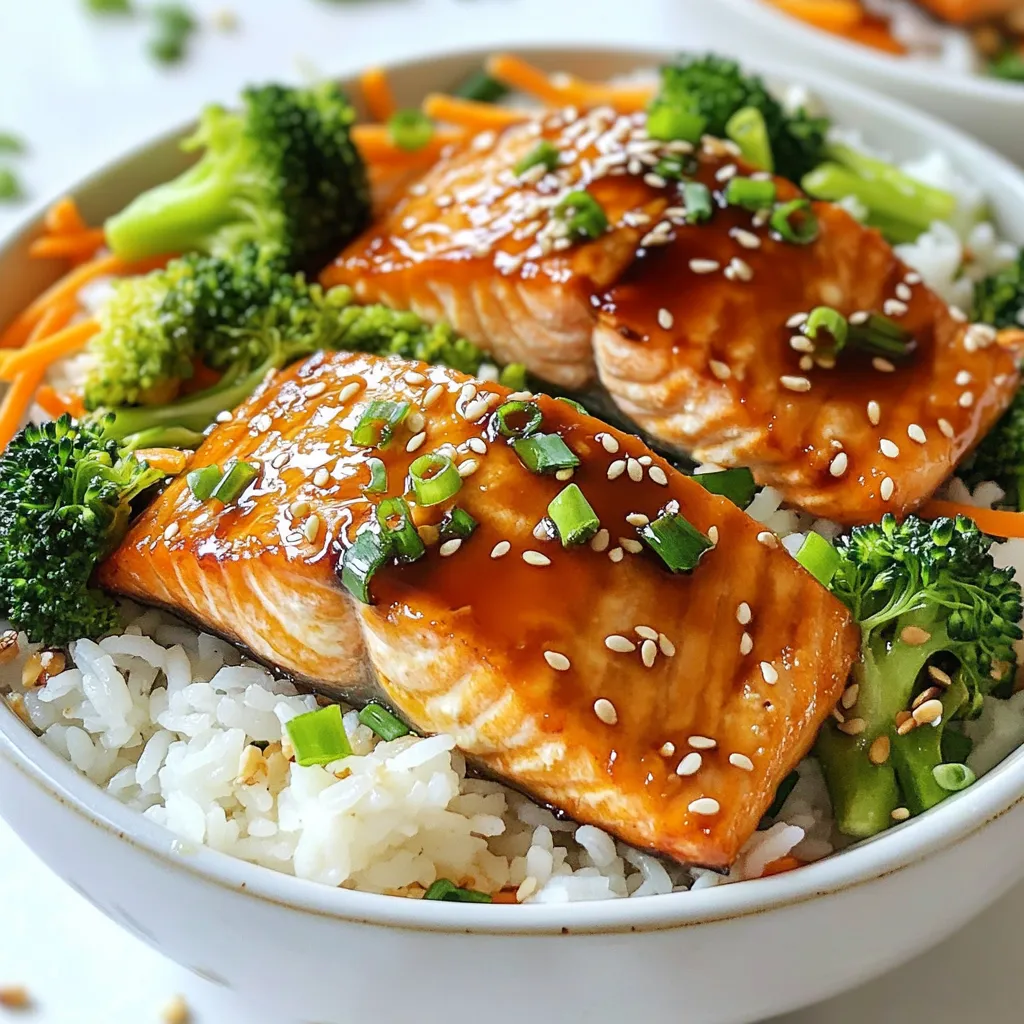

Looking for a healthy and tasty meal? Teriyaki Salmon Rice Bowls are your answer! This dish combines tender salmon with fluffy jasmine rice and a sweet-savory teriyaki sauce. It’s easy to make and packed with nutrients. Whether you’re cooking for yourself or a crowd, this recipe will impress. Ready to dive in? Let’s get cooking!
Why I Love This Recipe
- Quick and Easy: This recipe comes together in just 40 minutes, making it perfect for a weeknight dinner without sacrificing flavor.
- Healthy Ingredients: Loaded with nutritious veggies and omega-3-rich salmon, this bowl is a wholesome meal option that supports a balanced diet.
- Customizable: You can easily switch up the vegetables or add extra toppings to suit your taste, making it versatile for any palate.
- Deliciously Savory: The homemade teriyaki sauce adds a rich, sweet, and savory flavor that perfectly complements the salmon and veggies.
Ingredients
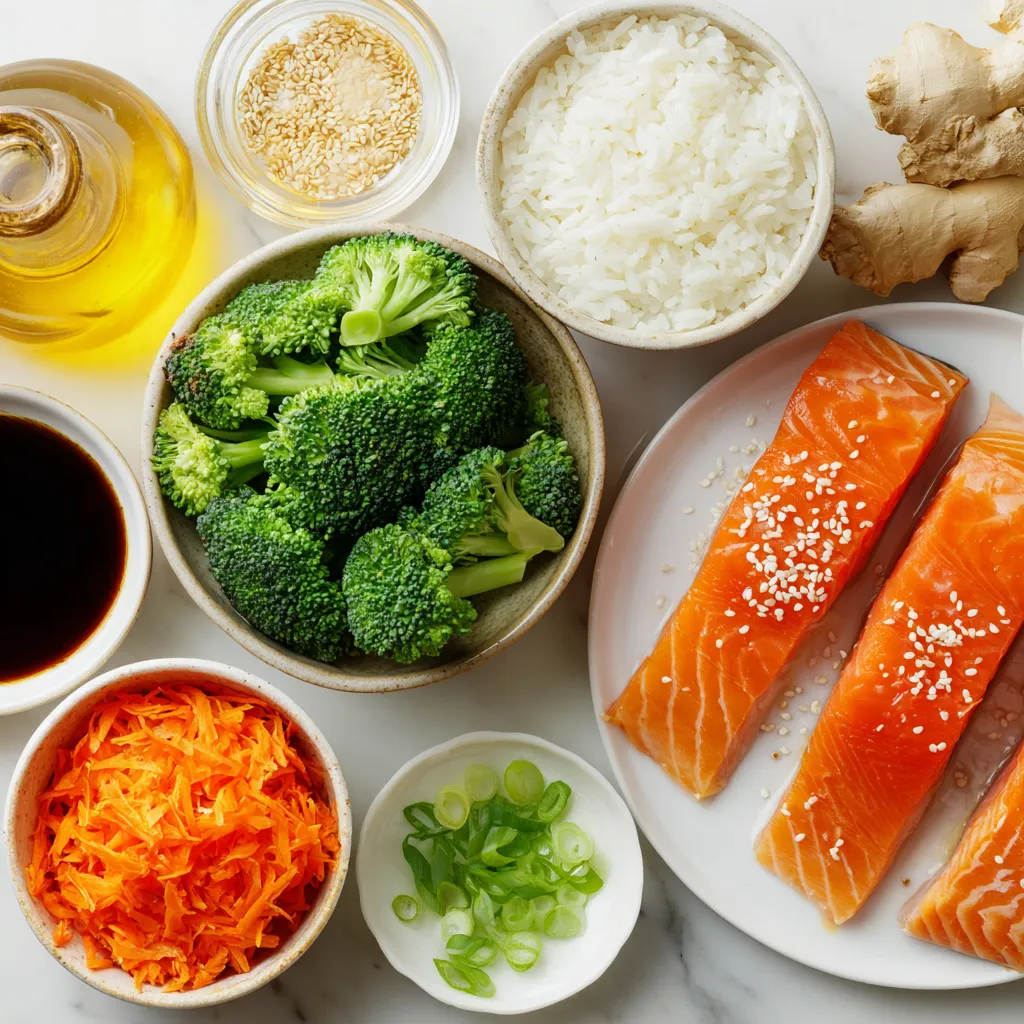
Main Ingredients for Teriyaki Salmon Rice Bowls
- 2 salmon fillets (approximately 6 oz each)
- 1 cup jasmine rice
- 2 cups water or low-sodium broth
- 1/4 cup low-sodium soy sauce
- 2 tablespoons honey or maple syrup
- 1 tablespoon rice vinegar
- 1 teaspoon sesame oil
- 1 tablespoon fresh ginger, finely minced
- 2 cloves garlic, finely minced
- 1 tablespoon cornstarch (optional)
- 1 cup broccoli florets, steamed
- 1 cup shredded carrots
- 2 green onions, thinly sliced
- Sesame seeds, for garnish
Optional Ingredients for Additions or Substitutions
You can add other vegetables like bell peppers or snap peas for more color. If you want more protein, try chicken or tofu. For a different flavor, use teriyaki sauce from a bottle. You can also switch jasmine rice for brown rice or quinoa.
Nutritional Information Breakdown
This dish is packed with nutrients. Salmon offers healthy fats and protein. The veggies provide fiber and vitamins. Jasmine rice gives a nice energy boost. Each bowl has about 450 calories, 25g protein, and 15g healthy fats. This meal is balanced and good for you!
Step-by-Step Instructions
How to Prepare the Jasmine Rice
Start by rinsing the jasmine rice. Use cold water and rinse until the water runs clear. This helps remove extra starch and keeps the rice fluffy. In a medium pot, mix the rinsed rice with 2 cups of water or low-sodium broth. Bring this to a rolling boil. When it’s boiling, turn the heat down low, cover the pot, and let it simmer for 15 minutes. The liquid should absorb well. After cooking, let the rice sit for another 5 minutes with the lid on. Finally, fluff the rice gently with a fork before serving.
Making the Teriyaki Sauce from Scratch
To make the teriyaki sauce, grab a small saucepan. Whisk together 1/4 cup of low-sodium soy sauce, 2 tablespoons of honey or maple syrup, 1 tablespoon of rice vinegar, and 1 teaspoon of sesame oil. Add 1 tablespoon of minced ginger and 2 cloves of minced garlic. Place the saucepan on medium heat and let it come to a gentle simmer. If you want a thicker sauce, mix 1 tablespoon of cornstarch with 1 tablespoon of water in a bowl. Stir this slurry into the sauce. Keep cooking and stirring until it thickens, then remove it from the heat.
Cooking the Salmon to Perfection
Heat a non-stick skillet over medium-high heat. Once it’s hot, place the salmon fillets skin-side down in the skillet. Let them cook undisturbed for about 4 to 5 minutes. The skin should get crispy and brown. Carefully flip the fillets with a spatula and cook for another 3 to 4 minutes. Cook until the salmon is done to your liking. In the last minute, drizzle half of the teriyaki sauce over the salmon for extra flavor.
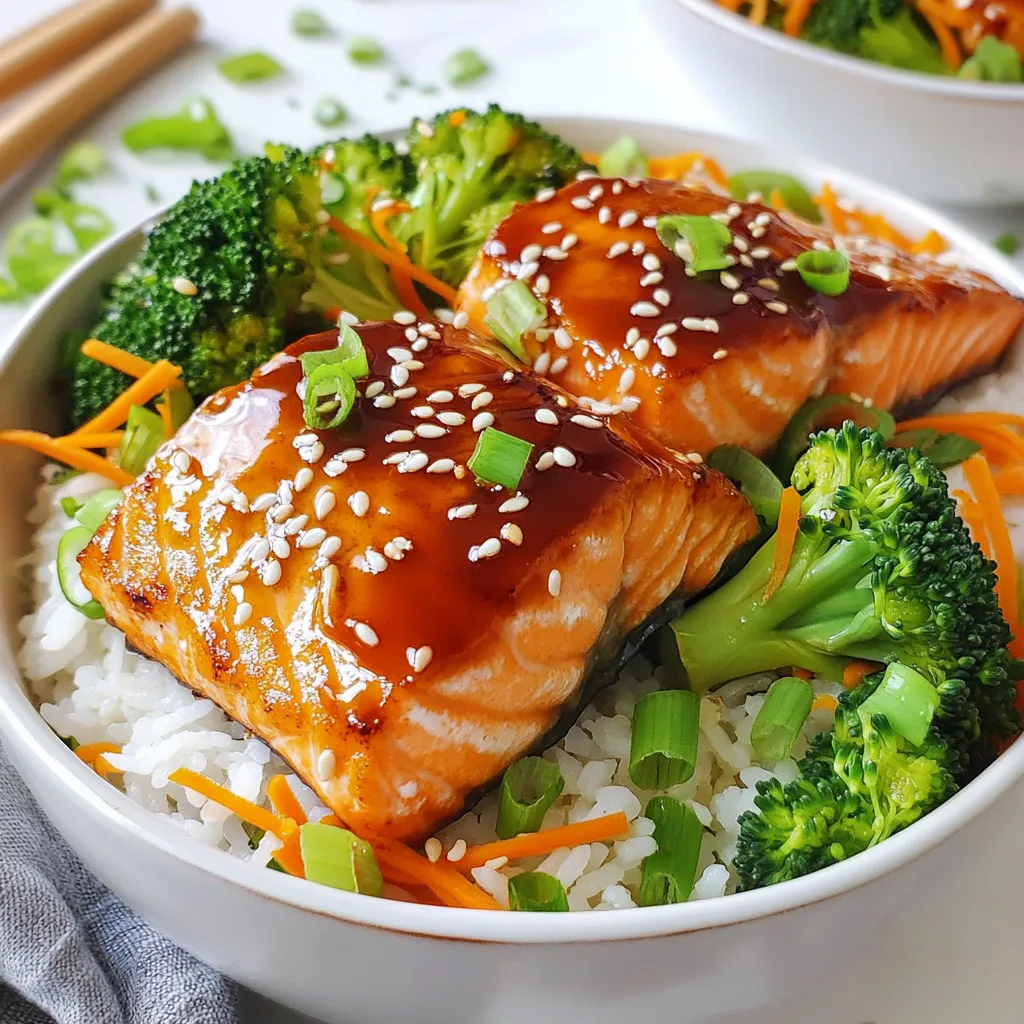
Assembly of the Rice Bowls
Now it’s time to put everything together. In individual serving bowls, add a generous portion of fluffy jasmine rice. Top the rice with steamed broccoli florets and shredded carrots. Place a salmon fillet on top of the veggies. Drizzle the remaining teriyaki sauce over each bowl. Make sure to coat the salmon and veggies well. Finish by adding freshly sliced green onions and a sprinkle of sesame seeds for that perfect crunch. Serve the bowls warm for the best taste.
Tips & Tricks
Best Practices for Cooking Salmon
To cook salmon well, start with fresh fillets. Pat them dry with a paper towel. This helps the skin crisp up. Use medium-high heat in a non-stick skillet. Place the salmon skin-side down and don’t move it. Cook for 4-5 minutes until crispy. Then flip it carefully with a spatula. Cook for another 3-4 minutes. The salmon should be opaque and flake easily.
How to Achieve a Perfectly Thick Teriyaki Sauce
For a thick teriyaki sauce, mix the ingredients well. Use low-sodium soy sauce, honey, rice vinegar, and sesame oil. Add minced ginger and garlic for great taste. Heat this mixture in a saucepan. If you want thickness, use cornstarch. Mix cornstarch with water in a bowl. Stir this into the sauce while it simmers. Keep stirring until it thickens to your liking.
Serving Suggestions for Added Flavor
To make your rice bowls pop, add colorful veggies. Steamed broccoli and shredded carrots are great choices. You can also add bell peppers or snap peas. For extra flavor, drizzle more teriyaki sauce on top. Garnish with green onions and sesame seeds. This adds crunch and makes your dish look beautiful. Serve the bowls warm for the best taste.
Pro Tips
- Fresh Ingredients: Use fresh salmon and vegetables for the best flavor and texture in your teriyaki bowls.
- Rice Cooking Method: Rinsing the jasmine rice until the water runs clear helps achieve fluffy rice by removing excess starch.
- Perfect Salmon: For crispy skin, ensure the skillet is hot before adding the salmon, and avoid moving it around while cooking.
- Customizable Veggies: Feel free to add or substitute other vegetables like bell peppers or snap peas to suit your taste.
Variations
Different Protein Options (e.g., chicken, tofu)
You can swap salmon for chicken or tofu. If using chicken, cook it until it’s no longer pink. Tofu is great too and adds a nice texture. Just press the tofu to remove extra water. Then, cut it into cubes and pan-fry until golden. Both options taste great with the teriyaki sauce.
Substituting Different Vegetables
Mix up your veggies for a new taste! Try bell peppers, snap peas, or zucchini. Just chop them up and steam or stir-fry until tender. You can also use spinach or bok choy for a fresh twist. Each veggie brings its own flavor and color to your bowl.
Alternative Sauces for a Twist
Want to change the sauce? Try a spicy sriracha sauce for heat or a sweet chili sauce for sweetness. You can also make a citrus sauce with orange juice and zest. Each sauce gives a unique flavor that keeps your meal exciting. Don’t be afraid to experiment!
Storage Info
How to Store Leftover Teriyaki Salmon Rice Bowls
To keep your Teriyaki Salmon Rice Bowls fresh, store them in an airtight container. Make sure the salmon, rice, and veggies cool down before sealing. This step helps prevent sogginess. You can keep the leftovers in the fridge for up to three days. If you want to enjoy them later, consider dividing the bowls into single servings for easy access.
Reheating Methods for Optimal Flavor
When it’s time to eat your leftovers, you can reheat them in several ways. The microwave works well for quick reheating. Place the bowl in the microwave and cover it loosely with a paper towel. Heat for one to two minutes, checking to ensure it’s hot throughout. For a crispier salmon, use a skillet. Heat a small amount of oil over medium heat and warm the salmon for about three minutes on each side. This method keeps the skin crispy.
Meal Prep Tips for Easy Weeknight Dinners
Meal prep makes weeknight dinners a breeze. Start by cooking a larger batch of jasmine rice and teriyaki sauce. You can also bake multiple salmon fillets at once. Divide the rice, salmon, and veggies into containers. Store everything separately if you want to keep the textures fresh. Each night, you can quickly assemble your bowl. This way, you’ll enjoy a healthy, homemade meal without the fuss.
FAQs
How long should I cook salmon for perfect doneness?
Cook salmon for about 4-5 minutes on the skin side. Then, flip it and cook for another 3-4 minutes. This should give you a nice, flaky texture. For medium doneness, aim for an internal temperature of 125°F. If you prefer it well-done, go for 145°F. Remember, salmon continues to cook off the heat.
Can I freeze Teriyaki Salmon Rice Bowls?
Yes, you can freeze Teriyaki Salmon Rice Bowls. However, I recommend freezing the salmon and rice separately from the veggies and sauce. This way, the texture stays great when you reheat. Use airtight containers or freezer bags to keep everything fresh. Thaw overnight in the fridge before reheating.
What is the best rice to use for this dish?
Jasmine rice is the best choice for Teriyaki Salmon Rice Bowls. It has a lovely aroma and a slightly sticky texture that pairs well with the salmon and sauce. If you want a healthier option, brown rice or cauliflower rice works too. Both add a nice nutty flavor.
Can I make this recipe gluten-free?
Yes, you can make this recipe gluten-free. Simply swap the low-sodium soy sauce with gluten-free tamari or coconut aminos. These alternatives provide a similar taste without gluten. Ensure all other ingredients, like broth, are also gluten-free. This way, you can enjoy the same great flavors safely.
In this post, we explored how to make teriyaki salmon rice bowls. We covered main and optional ingredients, cooking steps, and helpful tips. You learned about protein options, sauce variations, and storage methods.
Remember, cooking is fun and can be brave. Try new flavors and be creative. Enjoy your cooking journey and share your delicious rice bowls. Taste brings joy, so keep experimenting in the kitche

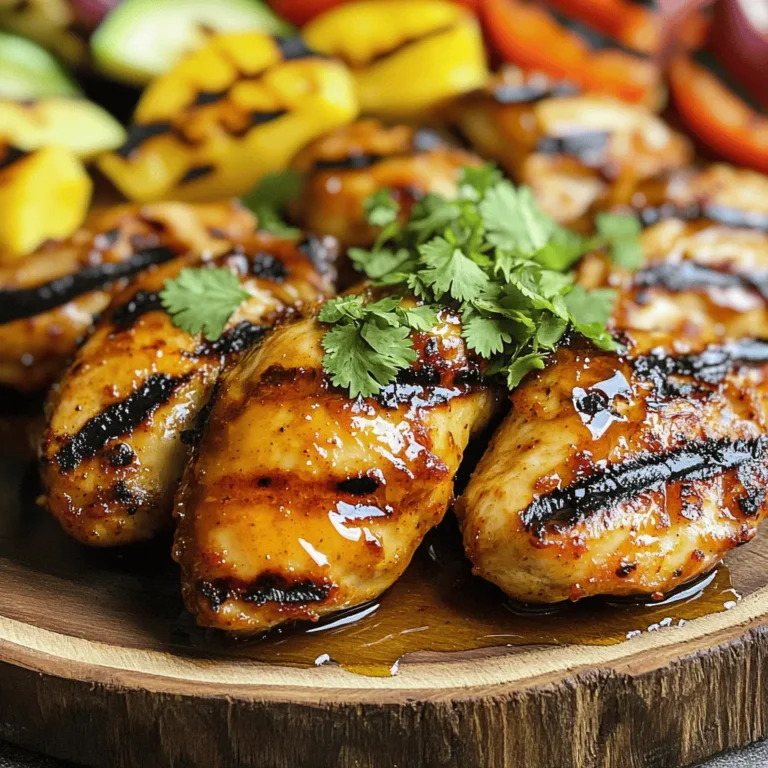

![- 4 bone-in, skin-on chicken thighs - 1/4 cup honey - 4 cloves garlic, finely minced - 2 tablespoons soy sauce - 1 tablespoon apple cider vinegar - 1 tablespoon extra virgin olive oil - 1 teaspoon freshly grated ginger - 1/2 teaspoon ground black pepper - Salt, to taste - Chopped green onions and toasted sesame seeds For this recipe, I focus on fresh ingredients. The chicken thighs give a rich flavor. Honey and garlic bring sweetness and zest. Soy sauce adds depth, while apple cider vinegar provides a nice tang. Extra virgin olive oil keeps everything moist and tasty. I love the hint of ginger in this dish. It adds a warm note that enhances the glaze. The black pepper gives a slight kick, balancing the sweetness. For the finishing touch, green onions and sesame seeds add color and crunch. These ingredients work together to create a delightful meal. You can find the full recipe for Honey Garlic Glazed Chicken Thighs at the end of this article. Enjoy cooking! In a medium bowl, whisk together the honey, minced garlic, soy sauce, apple cider vinegar, olive oil, grated ginger, black pepper, and a pinch of salt. Make sure the mixture is smooth and well-blended. This marinade is the key to great flavor. Next, place the chicken thighs in a large zip-lock bag or a shallow dish. Pour the marinade over the chicken. Ensure each piece is well coated. Seal the bag or cover the dish tightly. Refrigerate for at least 1 hour, though overnight is best for deep flavor. Preheat your oven to 400°F (200°C). This heat ensures a crispy skin. Remove the chicken from the marinade, saving some for later. Place the chicken skin-side up on a baking tray lined with parchment paper. Bake for 30-35 minutes. The chicken is ready when its internal temperature hits 165°F (74°C) and the skin is golden and crispy. To get that perfect crispy skin, you need to start with dry chicken. Pat the chicken thighs dry with paper towels. This helps remove excess moisture. Also, make sure your oven is hot before baking. Preheat it to 400°F (200°C). Place the chicken skin-side up on a lined baking tray. This position allows the skin to crisp up nicely. Finally, don't cover the chicken while it bakes. This keeps the skin exposed to the heat for better crispiness. Marinating time is key for flavor. I recommend at least one hour for good taste. If you have time, let the chicken marinate overnight. This allows the flavors to soak in deeply. Use a zip-lock bag for easy marinating. Just remember to seal it well, so the marinade doesn’t leak. A longer marinating time helps tenderize the meat, making it juicy and flavorful. For the glaze, you want a syrupy texture. After baking, take the leftover marinade and heat it in a saucepan. Simmer it over medium heat for about 5-7 minutes. Stir it occasionally to prevent sticking. The goal is to reduce the liquid until it thickens. This will create a lovely glaze that clings to the chicken. If it’s too thick, add a splash of water to loosen it. {{image_4}} You can easily boost flavor with fresh herbs. Use rosemary, thyme, or parsley. Chop them finely and mix them into the marinade. This adds a vibrant taste that pairs well with the honey and garlic. Fresh herbs also add a nice pop of color to your dish. Just remember to adjust the amount based on your taste. For a kick, add red pepper flakes into your marinade. Start with a pinch and taste as you go. This small change can take your dish from sweet to spicy. The heat balances well with the honey's sweetness. Serve with a side of cooling yogurt or sour cream to tame the spice. It creates a fun contrast. Grilling gives this dish a smoky flavor that is hard to beat. Before grilling, marinate the chicken as usual. Preheat your grill to medium heat. Cook the thighs skin-side down for the first few minutes. Flip them for an even char. Use the reserved marinade to baste while grilling. This method ensures a tasty glaze that sticks to the chicken. Enjoy the delicious, crispy skin with that smoky flavor! For the complete recipe, check the [Full Recipe]. To keep your honey garlic glazed chicken thighs fresh, store them promptly. Place the cooled chicken in an airtight container. This will help keep the flavors intact. Be sure to eat the leftovers within three to four days for the best taste and safety. To freeze your chicken thighs, first let them cool completely. Wrap each thigh tightly in plastic wrap, then place them in a freezer-safe bag. This method helps avoid freezer burn. You can keep them frozen for up to three months. When ready to eat, thaw the chicken in the fridge overnight for best results. To reheat chicken thighs, use the oven to keep them juicy. Preheat your oven to 350°F (175°C). Place the chicken on a baking sheet and cover it with foil. This will trap steam and keep the meat moist. Heat for about 15 to 20 minutes, or until the chicken is warm. Enjoy the great taste all over again! For more details, check the Full Recipe. For the best flavor, you should marinate chicken thighs for at least 1 hour. But if you can, marinate them overnight. This allows the flavors to soak deep into the meat. A longer marination time helps the chicken become tender and full of taste. Yes, you can use other cuts of chicken. Chicken breasts work well, but they may dry out faster. If you prefer, you can also use bone-in chicken legs. These alternatives will still absorb the honey garlic flavor, making your dish just as tasty. You can pair this dish with many sides. Here are some great options: - Steamed rice or jasmine rice - Roasted vegetables, like broccoli or carrots - A fresh garden salad with a light vinaigrette - Mashed potatoes for a creamy side - Quinoa for a healthy grain option These sides will complement the savory taste of the chicken and make your meal more satisfying. For the full recipe, check out the [Full Recipe] section. This blog post covered how to make delicious Honey Garlic Glazed Chicken Thighs. You learned about the key ingredients, step-by-step cooking methods, and helpful tips for the best results. We also explored tasty variations and safe storage advice. Enjoying this dish can add flavor to your meals. Whether you choose to grill it or try a spicy twist, these chicken thighs will impress. Keep experimenting, and make this recipe your own!](https://dishtreats.com/wp-content/uploads/2025/07/b9cba3e0-ee7f-4dbf-9eac-9b8411a1c4fd-768x768.webp)