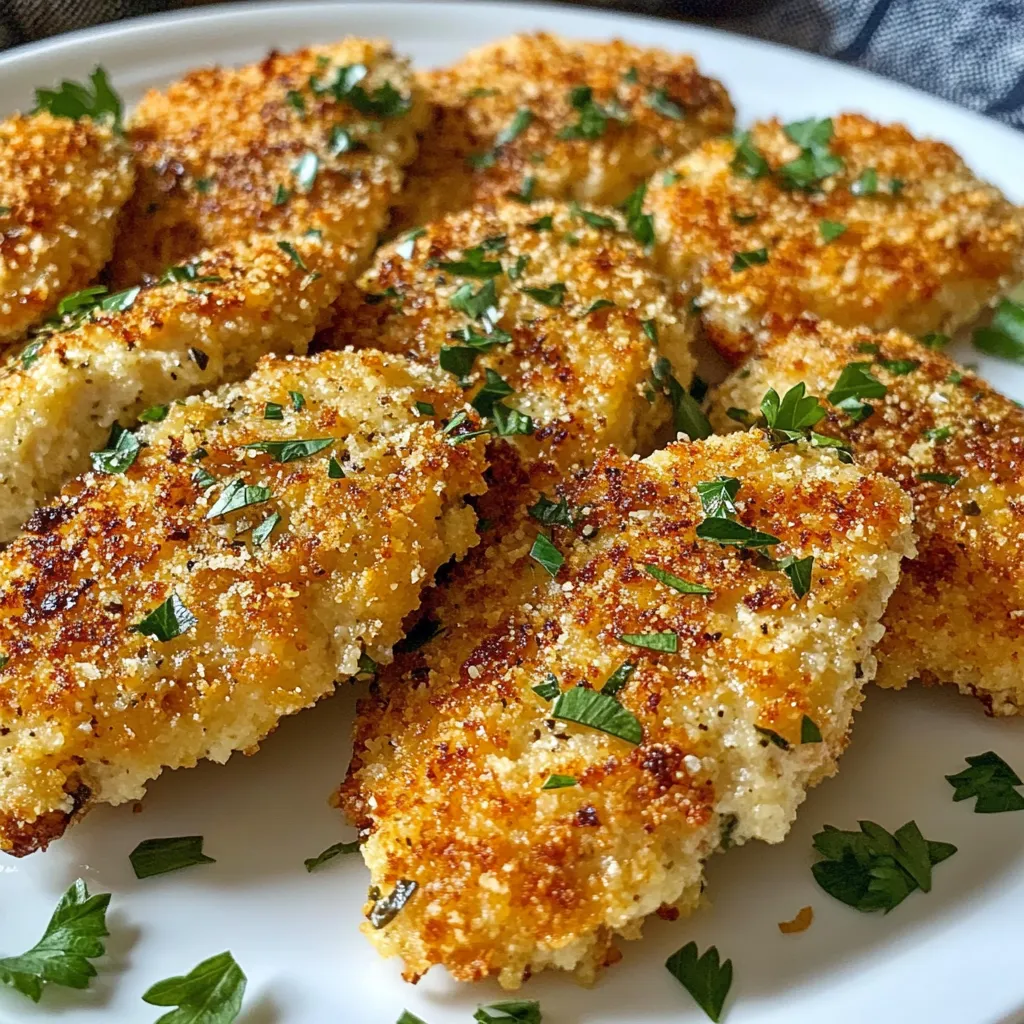
Parmesan Herb Turkey Cutlets Crispy and Flavorful Dish
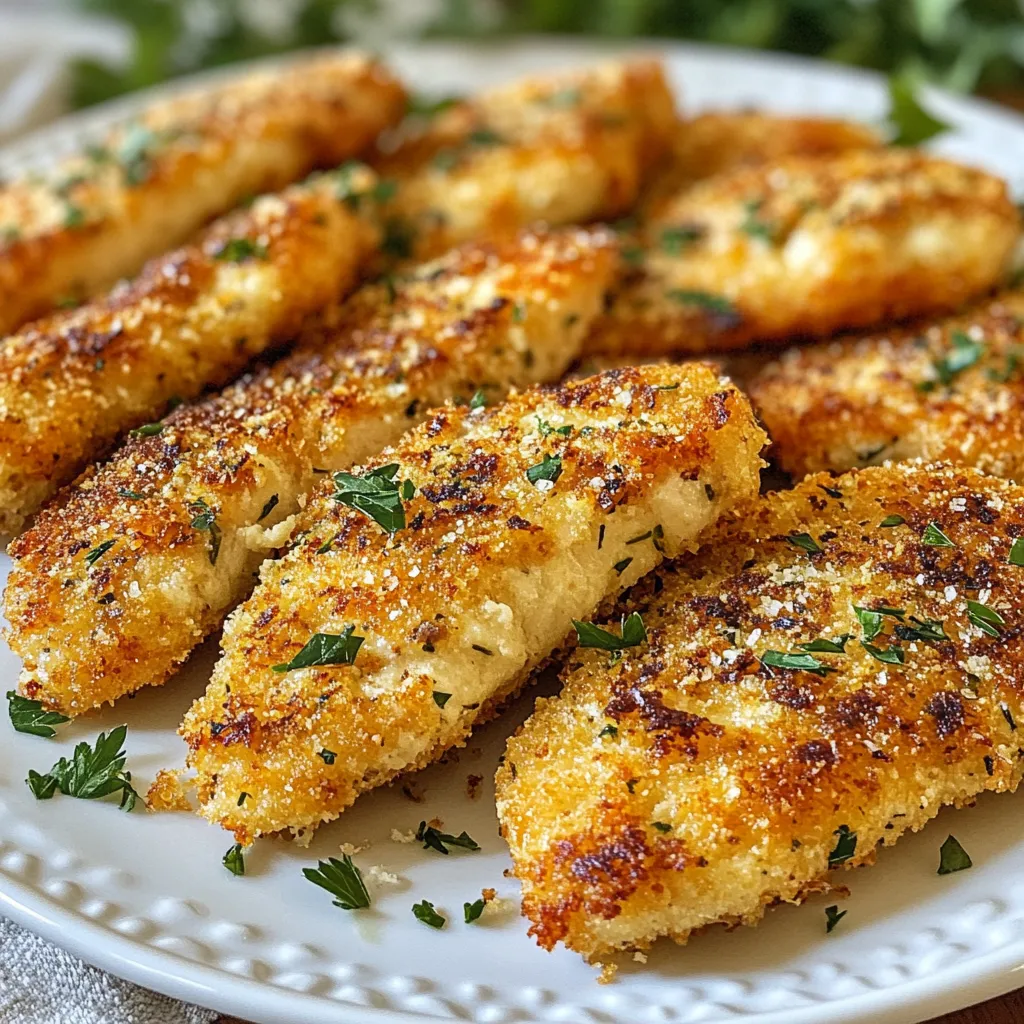

Are you ready to elevate your dinner game? Parmesan Herb Turkey Cutlets are your ticket to a crispy, flavorful dish that everyone’s going to rave about! With simple ingredients and an easy step-by-step guide, you can whip up this delicious meal in no time. Perfect for busy weeknights or special occasions, these cutlets are sure to impress. Let me show you how to make them perfectly every time!
Why I Love This Recipe
- Crispy Texture: The use of panko breadcrumbs adds an incredible crunch, making each bite satisfying.
- Flavorful Coating: The combination of Parmesan cheese and Italian herbs creates a rich and savory flavor that complements the turkey perfectly.
- Quick Cooking: This recipe is fast to prepare and cook, making it an ideal choice for busy weeknights.
- Versatile Dish: These turkey cutlets can be served with a variety of sides, from salads to pasta, allowing for endless meal possibilities.
Ingredients
List of Ingredients
- 1 lb turkey cutlets
- 1 cup breadcrumbs (preferably panko)
- 1/2 cup grated Parmesan cheese
- 1 tablespoon dried Italian herbs
- 2 cloves garlic, finely minced
- 1/2 teaspoon salt
- 1/4 teaspoon freshly ground black pepper
- 2 large eggs
- 2 tablespoons milk
- 3 tablespoons extra-virgin olive oil
- Fresh parsley for garnish
To make Parmesan Herb Turkey Cutlets, you need a mix of simple ingredients. I like to use panko breadcrumbs for a crunchier texture. The grated Parmesan cheese adds a rich flavor. Dried Italian herbs give the dish a nice aroma. I use minced garlic for extra taste.
Make sure to season with salt and black pepper to balance the flavors. The eggs and milk help the breadcrumbs stick. For cooking, I rely on extra-virgin olive oil, which gives a lovely taste. Lastly, fresh parsley adds color and freshness to your dish.
When gathering these ingredients, think about quality. Fresh Parmesan and good olive oil can make a big difference. Enjoy preparing this dish with these lovely ingredients!

Step-by-Step Instructions
Prepping the Oven and Baking Sheet
- Preheat the oven to 400°F (200°C).
- Line a baking sheet with parchment paper.
The first step is simple. Preheating your oven gets it ready for cooking. Lining the baking sheet helps with easy cleanup. You want to make sure nothing sticks.
Preparing the Coating Mixture
- Combine breadcrumbs, Parmesan, herbs, garlic, salt, and pepper in a bowl.
Now, let’s make the coating. In a bowl, mix the panko breadcrumbs, grated Parmesan, dried herbs, minced garlic, salt, and pepper. This mixture will give the turkey a tasty crust. Make sure you mix it well so every bite is flavorful.
Creating the Egg Mixture
- Whisk together eggs and milk until frothy.
In another bowl, whisk together the eggs and milk. You want it frothy. This egg mix helps the breadcrumbs stick to the turkey. It’s an important step for a good coating.
Coating the Turkey Cutlets
- Dip cutlets in egg mixture and coat with breadcrumb mixture.
Take each turkey cutlet and dip it in the egg mixture. Make sure it is fully coated, then let the extra drip off. Next, press it into the breadcrumb mixture. Use your fingers to make sure it sticks well. This step is key for a crunchy texture.
Cooking the Cutlets
- Pan-fry in olive oil until golden brown, then bake in the oven.
Heat the olive oil in a large skillet over medium heat. Add the coated turkey cutlets. Don’t crowd the pan; this helps them brown evenly. Cook each cutlet for about 3-4 minutes on each side until they look golden brown. Once done, transfer them to the baking sheet and bake for 10-12 minutes. This ensures they cook through and reach a safe temperature of 165°F (74°C).
Final Touches
- Let cutlets rest and garnish before serving.
After baking, remove the cutlets from the oven. Let them rest for a couple of minutes. This helps keep them juicy. Before serving, sprinkle some chopped fresh parsley on top for color and taste. The dish is now ready, and it looks amazing!
Tips & Tricks
Achieving Perfect Crispiness
- Use panko breadcrumbs for extra crunch
- Don’t overcrowd the pan while frying
Using panko breadcrumbs gives your turkey cutlets a great crunch. They absorb less oil than regular breadcrumbs. This keeps the cutlets crispy and light. When frying, make sure to leave space in the pan. If you add too many cutlets at once, they will steam instead of fry. Frying in batches makes sure each cutlet gets the heat it needs.
Flavor Enhancements
- Experiment with additional herbs or spices
- Use freshly grated Parmesan for richer flavor
You can add your favorite herbs or spices to the breadcrumb mix. Try rosemary, paprika, or chili flakes for a kick. Freshly grated Parmesan adds a great depth of flavor. It melts better than the pre-grated kind and sticks well to the cutlets. This makes every bite taste fresh and savory.
Presentation Ideas
- Serve with lemon wedges and extra Parmesan
- Use fresh parsley for garnish and color contrast
For a beautiful presentation, arrange the cutlets on a platter. Add lemon wedges for a pop of color. The lemon also adds a zesty flavor that complements the dish. A sprinkle of extra Parmesan on top looks nice and tastes great. Finally, add some fresh parsley as a garnish. It not only looks pretty but also adds a fresh taste.
Pro Tips
- Choose the Right Breadcrumbs: Using panko breadcrumbs will give your turkey cutlets an extra crunch, making them more enjoyable.
- Don’t Skip the Resting Step: Allowing the cutlets to rest after baking helps retain their juices, resulting in a more flavorful and moist dish.
- Experiment with Herbs: Feel free to mix different dried herbs or add fresh herbs to the breadcrumb mixture for a unique flavor profile.
- Use a Meat Thermometer: To ensure your turkey is cooked perfectly, use a meat thermometer to check that the internal temperature reaches 165°F (74°C).
Variations
Substituting Proteins
You can swap turkey cutlets for chicken or pork cutlets. Both options work well. Chicken cutlets will have a mild flavor, just like turkey. Pork cutlets add a bit more richness. The cooking method stays the same. Just remember to adjust cooking times for thicker cuts.
Gluten-Free Alternatives
If you need a gluten-free option, use gluten-free breadcrumbs. They offer a nice crunch and work well with the same spices. Many brands are available at stores or online. Just check the labels to ensure they fit your diet. This change keeps the dish tasty for everyone.
Flavor Variations
You can easily change the flavor of your cutlets. Add zest from lemon or lime to the breadcrumb mix. This brightens the dish and adds freshness. You can also mix in sun-dried tomatoes or spinach. These ingredients add color and extra nutrients. Just chop them finely and blend them into the breadcrumbs. Experimenting with flavors makes this dish fun and unique.
Storage Info
Refrigerating Leftovers
To store cooked turkey cutlets, place them in a shallow container. Cover the container tightly with a lid or plastic wrap. This keeps the cutlets fresh and prevents them from drying out. You can safely refrigerate them for up to three days. When you’re ready to enjoy them again, remove the cutlets from the fridge about 30 minutes before reheating. This helps them heat evenly.
Freezing Instructions
If you want to freeze your turkey cutlets, first let them cool completely. Wrap each cutlet in plastic wrap, then place them in a freezer bag. Remove as much air as possible from the bag to avoid freezer burn. You can freeze uncooked or cooked cutlets. Uncooked cutlets can last up to three months in the freezer. Cooked cutlets are best eaten within two months for the best taste.
Reheating Guidelines
To reheat your turkey cutlets, the oven is your best friend. Preheat your oven to 350°F (175°C). Place the cutlets on a baking sheet lined with parchment paper. Heat them for about 10 to 15 minutes, or until they reach an internal temperature of 165°F (74°C). This method keeps them crispy. If you’re short on time, you can also use a microwave. Just be sure to cover the cutlets to keep them moist, but know that they may not stay as crispy.
FAQs
How do you know when turkey cutlets are cooked?
The best way to check if turkey cutlets are cooked is by measuring the internal temperature. Use a meat thermometer and look for 165°F (74°C). This ensures the turkey is safe to eat. If you don’t have a thermometer, cut into the thickest part; the meat should be white, not pink.
Can I make Parmesan Herb Turkey Cutlets ahead of time?
Yes, you can prepare these cutlets ahead of time! You can coat them with breadcrumbs and store them in the fridge for a few hours. This makes cooking easier when you’re ready to eat. You can also freeze uncooked cutlets for up to three months. Just thaw them in the fridge before cooking.
What to serve with turkey cutlets?
These cutlets pair well with many sides. You can serve them with:
- Mashed potatoes
- Steamed green beans
- A fresh garden salad
- Roasted vegetables
- Rice pilaf
Each side adds its own flavor, making the meal more exciting.
How long will leftovers last in the fridge?
Leftovers can last in the fridge for about 3 to 4 days. Store them in an airtight container to keep them fresh. If you want them to last longer, consider freezing them. Just remember to thaw and reheat them properly.
Can I bake the cutlets instead of frying?
Yes, you can bake the cutlets for a healthier option! Preheat your oven to 400°F (200°C). After frying the cutlets until golden, place them on a baking sheet and bake for 10 to 12 minutes. This helps them stay juicy while reducing the oil used.
This blog gave you a clear guide to making delicious Parmesan Herb Turkey Cutlets. You learned about the key ingredients, step-by-step cooking instructions, and helpful tips for the best flavor and texture. Remember you can customize the recipe with different proteins or spices. Store any leftovers correctly for future meals. Enjoy sharing your tasty cutlets with friends and family, and don’t be afraid to experiment with your own twists. Happy cookin

Parmesan Herb Turkey Cutlets
Ingredients
- 1 lb turkey cutlets
- 1 cup breadcrumbs (preferably panko for extra crunch)
- 1/2 cup grated Parmesan cheese
- 1 tablespoon dried Italian herbs (a mix of oregano, basil, and thyme)
- 2 cloves garlic, finely minced
- 1/2 teaspoon salt
- 1/4 teaspoon freshly ground black pepper
- 2 large eggs
- 2 tablespoons milk
- 3 tablespoons extra-virgin olive oil
- to taste fresh parsley, chopped (for a vibrant garnish)
Instructions
- Begin by preheating your oven to 400°F (200°C). Prepare a baking sheet by lining it with parchment paper to prevent sticking.
- In a shallow bowl, thoroughly combine the breadcrumbs, grated Parmesan cheese, dried Italian herbs, minced garlic, salt, and black pepper. This will create a flavorful coating for the turkey.
- In a separate bowl, whisk the eggs and milk together until fully blended and frothy. This mixture will help the breadcrumb coating adhere to the cutlets.
- Take each turkey cutlet and dip it into the egg mixture, ensuring that it is completely coated, then allow any excess to drip off back into the bowl.
- Immediately follow by pressing the cutlet into the breadcrumb mixture. Use your fingers to gently press down to ensure the breadcrumbs stick well to the turkey.
- In a large skillet, heat the olive oil over medium heat. When hot, carefully add the coated turkey cutlets in batches, ensuring not to overcrowd the pan. Cook each side for approximately 3-4 minutes or until they achieve a beautiful golden-brown color.
- Once browned, transfer the cutlets onto the prepared baking sheet. Place them in the preheated oven and continue baking for an additional 10-12 minutes, until the internal temperature of the turkey registers 165°F (74°C) for safe consumption.
- After baking, remove the turkey cutlets from the oven and allow them to rest for a couple of minutes to retain their juices.
- Before serving, sprinkle chopped fresh parsley over the cutlets for a pop of color and flavor.