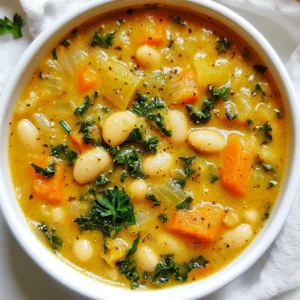
Creamy Garlic White Bean Stew Hearty Dinner Delight


Are you ready for a warm and filling meal? This Creamy Garlic White Bean Stew is your answer! Packed with rich flavor and nutrients, it’s perfect for any dinner table. In this post, I’ll guide you through each step, from simple ingredients to cooking tips. Whether you’re a busy parent or a novice cook, you’ll whip up this hearty delight in no time. Let’s get started!
Why I Love This Recipe
- Comforting and Creamy: This stew is the perfect blend of creamy coconut milk and hearty white beans, making it an ideal comfort food for chilly evenings.
- Nutritious Ingredients: Packed with vegetables and beans, this recipe is not only delicious but also loaded with nutrients that support a healthy diet.
- Quick and Easy: With just 10 minutes of prep and 40 minutes total cooking time, it’s a simple recipe that fits perfectly into a busy schedule.
- Versatile and Adaptable: You can easily customize this stew by adding your favorite vegetables or spices, making it a flexible dish for any palate.
Ingredients
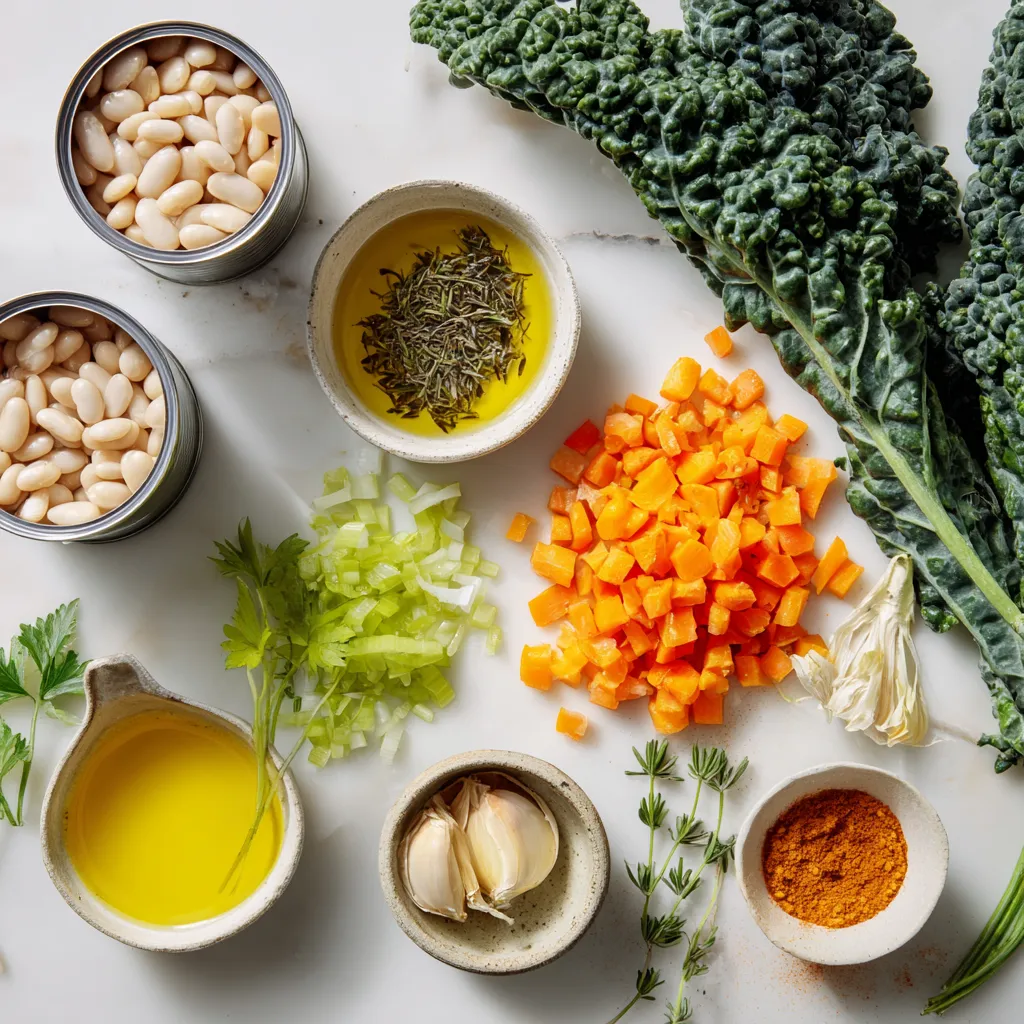
List of Ingredients
- 2 cans (15 oz each) white beans (cannellini or great northern), drained and rinsed
- 4 cups vegetable broth
- 1 medium onion, finely chopped
- 4 cloves garlic, minced
- 2 medium carrots, diced
- 2 celery stalks, diced
- 1 cup kale, roughly chopped
- 1 cup coconut milk (preferably full-fat for extra creaminess)
- 2 tablespoons olive oil
- 1 teaspoon dried thyme
- 1 teaspoon smoked paprika
- Salt and freshly ground black pepper to taste
- Fresh parsley, finely chopped (for garnish)
Optional Additions
You can make your stew even better! Try adding:
- A squeeze of lemon juice for brightness
- Chopped spinach for extra greens
- Sliced mushrooms for a meaty texture
- A pinch of red pepper flakes for spice
Health Benefits of Key Ingredients
This stew is not just tasty; it’s healthy too! Here’s how:
- White Beans: They are full of protein and fiber. They help keep you full.
- Kale: This leafy green is rich in vitamins A, C, and K. It supports your immune system.
- Olive Oil: A heart-healthy fat that adds flavor. It’s good for your heart.
- Garlic: Known for its immune-boosting properties. It has many health benefits.
- Coconut Milk: Provides healthy fats and a creamy texture. It helps make the stew rich and satisfying.
This creamy garlic white bean stew is not just a meal; it’s a warm hug in a bowl! Enjoy the flavors and the health benefits in every spoonful.
Step-by-Step Instructions
Sautéing the Vegetables
Start by heating the olive oil in a large pot over medium heat. You want the oil to shimmer. Once it’s ready, add the finely chopped onion, diced carrots, and diced celery. Sauté these veggies for about 5 to 6 minutes. You want the onions to turn translucent and the veggies to soften. This step builds a great base for your stew.
Adding Garlic and Spices
Next, stir in the minced garlic. Cook it for 1 to 2 minutes. Keep stirring so the garlic becomes fragrant but does not burn. After that, add the drained white beans, vegetable broth, dried thyme, and smoked paprika to the pot. Stir everything well to mix. This is where the magic begins!
Simmering the Stew
Now, bring the mixture to a gentle simmer. Reduce the heat to low and let it simmer for about 15 to 20 minutes. This time allows the flavors to blend nicely. After the simmering, add the chopped kale and pour in the coconut milk. Simmer for another 5 to 10 minutes until the kale wilts and the stew becomes creamy. Adjust the taste with salt and black pepper before serving.
Tips & Tricks
Best Practices for Creaminess
To achieve the perfect creamy texture in your stew, always use full-fat coconut milk. This adds richness and smoothness. You can blend part of the white beans for an even creamier base. Just reserve a cup of beans, blend them with some broth, and stir them back in. This makes the stew thick and luscious.
Enhancing the Flavor
To boost the flavor, add fresh herbs like thyme or rosemary. Fresh herbs can brighten up the dish. A squeeze of lemon juice right before serving adds a tasty zing. Always taste as you cook, adjusting salt and pepper for your perfect balance. Smoked paprika adds a lovely depth. You can even try a splash of soy sauce for an umami kick.
Cooking Variations for Different Diets
For vegan or gluten-free diets, this stew is already a great choice. If you want more protein, add tofu or tempeh. For a heartier meal, serve it over brown rice or quinoa. If you like spice, add red pepper flakes or diced jalapeños. These options let you customize the stew to fit your needs while keeping it delicious and satisfying.
Pro Tips
- Perfect Bean Choice: Use a mix of cannellini and great northern beans for a more complex texture and flavor in your stew.
- Enhance the Creaminess: For an extra creamy texture, blend a portion of the beans with the coconut milk before adding it to the stew.
- Season Gradually: Taste and adjust seasoning throughout the cooking process to ensure the flavors develop harmoniously.
- Add a Kick: If you like heat, consider adding a pinch of red pepper flakes or a dash of hot sauce to the stew for an extra layer of flavor.

Variations
Vegetarian and Vegan Options
This creamy garlic white bean stew is already vegetarian. To make it vegan, just use vegetable broth and coconut milk, which it already calls for. You can add more veggies like bell peppers or zucchini. They will add flavor and color. If you want to add some herbs, try fresh basil or oregano for a fresh twist.
Adding Protein Sources
If you want more protein, consider adding cooked quinoa or lentils. Both options blend well with the stew and keep it hearty. You can also add tofu for a protein boost. Just make sure to sauté the tofu until it’s golden. This will give it a nice texture and flavor.
Spice Level Adjustments
If you love heat, kick up the spice! Add crushed red pepper flakes or diced jalapeños. Start with a small amount and taste as you go. This way, you can control the heat. For a smoky flavor, a bit more smoked paprika works great. You can even add a splash of hot sauce at the end if you want an extra kick.
Storage Info
Refrigerating Leftovers
After enjoying your creamy garlic white bean stew, let it cool. Place the stew in an airtight container. It keeps well in the fridge for up to four days. This makes it easy to have a quick meal later. When you want to eat it, just take it out and enjoy!
Freezing the Stew
If you want to save the stew for later, freezing is a great option. Pour the cooled stew into freezer-safe bags or containers. Leave some space at the top for expansion. It can last in the freezer for up to three months. When you’re ready for a warm meal, just thaw it in the fridge overnight.
Reheating Instructions
To reheat, you can use the stove or microwave. For the stove, pour the stew into a pot. Heat on low, stirring often until it’s hot. If you’re using a microwave, place the stew in a microwave-safe bowl. Heat on high for 1-2 minutes. Stir halfway to ensure even heating. Enjoy it hot and fresh, just like the first time!
FAQs
Can I use dried beans instead of canned?
Yes, you can use dried beans. Start by soaking them overnight. After soaking, cook them until soft. This may take about 1-2 hours. Once cooked, drain and rinse before using. You will need about 1.5 cups of cooked beans for this stew.
What can I serve with Creamy Garlic White Bean Stew?
This stew pairs well with many dishes. You can serve it with crusty bread for dipping. A fresh salad adds a nice crunch. Rice or quinoa can also make it a more filling meal. If you want a side, roasted veggies work great too.
How to make the stew spicier?
To spice up your stew, add a pinch of cayenne pepper. You can also use red pepper flakes for heat. If you like fresh flavors, try adding chopped jalapeños. Just remember to start small. You can always add more spice as it cooks.
This blog post covered how to make a creamy garlic white bean stew. We explored the key ingredients and their health benefits. I shared step-by-step instructions, tips for creaminess, and ways to add flavor. You learned about variations for different diets and how to store leftovers.
In closing, this stew is easy and delicious. You can adjust it to fit your taste and needs. Enjoy making it your ow
Creamy Garlic White Bean Stew
Ingredients
- 2 cans white beans (such as cannellini or great northern), drained and rinsed
- 4 cups vegetable broth
- 1 medium onion, finely chopped
- 4 cloves garlic, minced
- 2 medium carrots, diced
- 2 stalks celery, diced
- 1 cup kale, roughly chopped
- 1 cup coconut milk (preferably full-fat)
- 2 tablespoons olive oil
- 1 teaspoon dried thyme
- 1 teaspoon smoked paprika
- to taste salt and freshly ground black pepper
- for garnish fresh parsley, finely chopped
Instructions
- In a large pot, heat the olive oil over medium heat. Once the oil is shimmering, add the finely chopped onion, diced carrots, and diced celery. Sauté the mixture for about 5-6 minutes or until the onions become translucent and the vegetables begin to soften.
- Stir in the minced garlic and continue to cook for an additional 1-2 minutes, stirring frequently, until the garlic is fragrant but not burnt.
- Add the drained white beans, vegetable broth, dried thyme, and smoked paprika to the pot. Stir well to combine all the ingredients and bring the mixture to a gentle simmer.
- Reduce the heat to low, allowing the stew to simmer for 15-20 minutes. This will enable the flavors to meld beautifully.
- After the simmering time, stir in the chopped kale and pour in the coconut milk. Let it simmer for an additional 5-10 minutes, stirring occasionally, until the kale is wilted and the stew reaches a creamy consistency.
- Adjust the flavor by seasoning with salt and freshly ground black pepper to taste.
- Serve the stew hot, garnished with a sprinkle of freshly chopped parsley for a pop of color and freshness.

![- 1 lb boneless, skinless chicken thighs, diced into bite-sized pieces - 1 tablespoon olive oil - 1 teaspoon chili powder - 1 teaspoon ground cumin - 1 teaspoon smoked paprika - Salt and pepper, to taste - 1 cup brown rice (or 1 cup cauliflower rice) - 2 cups chicken broth (or vegetable broth) - 1 can black beans, drained and rinsed - 1 cup corn kernels - Juice of 1 lime - 1 ripe avocado, diced - 1 cup cherry tomatoes, halved - 1 cup shredded cheese (such as cheddar) - ½ cup sour cream (or Greek yogurt) - Fresh cilantro, chopped - Sliced jalapeños (optional) - Large skillet - Medium-sized pot - Cooking utensils (spoon, spatula) - Measuring cups and spoons - Serving bowls These ingredients come together to create a tasty meal. The chicken thighs give great flavor. You can use brown rice for a healthy base or cauliflower rice for a low-carb choice. Black beans and corn add fiber and sweetness. For toppings, fresh veggies like avocado and tomatoes brighten the dish. Cheese and sour cream bring richness. You will love how customizable these bowls are! The kitchen tools are simple, making this fun and easy to prepare. Check out the Full Recipe for all the delicious details! To make brown rice, start with a medium pot. Bring chicken broth to a boil. Once boiling, add the rice. Lower the heat, cover, and let it simmer for 30-35 minutes. This method ensures the rice becomes fluffy and tender. If you prefer a low-carb option, use cauliflower rice. Heat a skillet with a splash of water. Sauté the cauliflower rice for 5 minutes until it’s tender. This quick cook keeps it fresh and light. For the chicken, heat olive oil in a large skillet over medium heat. Add diced chicken thighs once the oil is hot. Season the chicken with chili powder, cumin, smoked paprika, salt, and pepper. Cook for 8-10 minutes, stirring often. This helps the chicken cook evenly and become golden brown. The spices create a warm flavor that elevates the dish. After the chicken is cooked, add the rinsed black beans and corn to the skillet. Mix everything well and cook for another 3-4 minutes. This step ensures all ingredients are heated through and flavors blend nicely. Stir gently to keep the chicken tender. Once done, you can move on to building your loaded chicken burrito bowls. Enjoy creating a meal that looks as good as it tastes! Achieving the Perfect Texture To get juicy chicken, use boneless, skinless thighs. They stay moist and tender. Cut them into bite-sized pieces for even cooking. Heat a skillet over medium heat before adding the chicken. This helps lock in the juices and gives a nice sear. Preventing Dry Chicken Don’t overcook the chicken. Cook it until it's no longer pink, about 8-10 minutes. Keep stirring to avoid burning. If you find your chicken is dry, try adding a splash of broth or water. This will help rehydrate the meat. Suggested Toppings You can personalize your burrito bowls with fun toppings. Try adding diced avocados, cherry tomatoes, or shredded cheese. Fresh herbs like cilantro add a burst of flavor. For a kick, use sliced jalapeños or a drizzle of hot sauce. Dietary Modifications Make your burrito bowls fit your diet. If you're vegetarian, swap chicken for black beans or grilled veggies. For a low-carb option, use cauliflower rice instead of brown rice. You can also replace sour cream with Greek yogurt for a healthier choice. Spice Variations Want to spice things up? Add cayenne pepper or crushed red pepper flakes to the chicken. You can also try different spices like oregano or taco seasoning to change the flavor profile. Marinades for Chicken A good marinade can add great taste. Use lime juice, garlic, and cumin for a zesty kick. Marinate the chicken for at least 30 minutes before cooking. This will infuse the chicken with flavor and keep it tender. For the full recipe, check out the section above. {{image_4}} You can easily swap out the chicken. Use firm tofu or tempeh instead. These alternatives add great texture and protein. For a heartier option, try chickpeas or lentils. Both are tasty and filling. If you want a low-carb option, use cauliflower rice. It has fewer carbs and packs in nutrients. Cauliflower rice has a mild taste and absorbs flavors well. You can also add more veggies, like zucchini or bell peppers, for added crunch. You can adjust the spice level for your taste. For a spicy kick, add more chili powder or diced jalapeños. If you prefer mild flavors, skip the spicy ingredients. You can also play with international flavors. Try adding curry powder for an Indian twist or chipotle for a smoky flavor. Explore these variations to make the loaded chicken burrito bowls your own! For the complete recipe, check the [Full Recipe]. To keep your loaded chicken burrito bowls fresh, follow these tips: - Let the bowls cool down before storing. - Use airtight containers for storage. - Separate the toppings from the base for best flavor. For refrigeration: - Store leftovers in the fridge. - They last for up to 3 days. For freezing: - Portion out the chicken and rice mixture. - Use freezer-safe bags or containers. - They can last for up to 3 months. To reheat, you want to keep the flavors fresh. Here are some methods: - Use a microwave for quick heating. - Heat on medium for 2-3 minutes. - Stir halfway through to heat evenly. You can also use a skillet: - Warm it on medium heat. - Add a splash of broth for moisture. - Heat for about 5-7 minutes. Each component has its own shelf life: - Cooked chicken lasts 3 days in the fridge. - Cooked rice stays good for 4 days. - Black beans last up to 5 days. Watch for spoilage signs: - Look for any strange smells. - Check for mold or discoloration. - If it looks or smells off, throw it out. For more details, refer to the Full Recipe for loaded chicken burrito bowls. Yes, you can use different rice types. Here are some great substitutes for brown rice: - White rice: Cooks faster and has a different texture. - Quinoa: Adds protein and a nutty flavor. - Jasmine rice: Offers a fragrant touch to your bowls. - Cauliflower rice: A low-carb option that is light and healthy. If you crave heat, here are some tips to spice up your dish: - Add diced jalapeños to the chicken when cooking. - Use a spicy salsa or hot sauce as a topping. - Sprinkle crushed red pepper flakes into the chicken mix. - Swap chili powder for a hotter variety, like cayenne. If you need alternatives for sour cream, consider these options: - Greek yogurt: Creamy and packed with protein. - Cottage cheese: A lighter option that adds creaminess. - Avocado: Mash it for a rich and creamy topping. - Hummus: Adds flavor and creaminess with a unique twist. Yes, you can prep this dish in advance. Here’s how: - Cook the rice and chicken ahead of time. Store them separately in the fridge. - Prepare toppings like diced avocado and cheese. Keep them fresh in airtight containers. - Assemble the bowls just before serving for the best flavors and textures. - Reheat the chicken and rice gently to avoid drying them out. This article covered how to make delicious loaded chicken burrito bowls. We explored main ingredients, toppings, and kitchen tools needed. I shared step-by-step cooking tips for rice and chicken, followed by customization options to suit your taste. Storage info ensures you keep your leftovers fresh and safe. In closing, this dish is versatile and easy to make. Remember, you can adapt it to fit any diet. Enjoy creating your perfect burrito bowl!](https://dishtreats.com/wp-content/uploads/2025/06/cee601c9-6b34-4063-8b37-4b14688d7edb-768x768.webp)