Savory Shrimp Scampi Linguine Simple and Tasty Meal
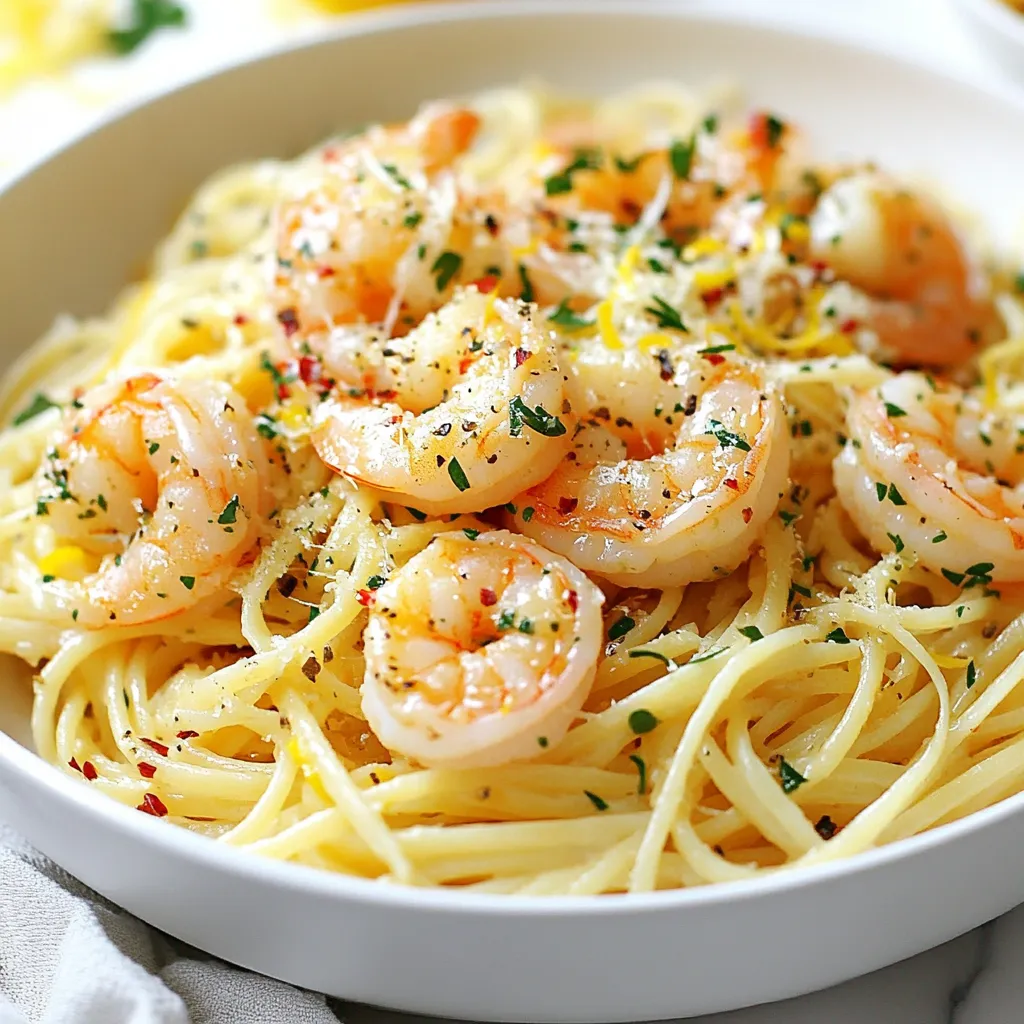
Looking for a quick meal that impresses? My Savory Shrimp Scampi Linguine is your answer! This tasty dish combines tender shrimp with zesty lemon and garlic. It’s easy to make and perfect for any occasion. Whether you’re cooking for family or welcoming friends, this dish promises to delight everyone’s palate. Get ready for a satisfying meal that you’ll want to make again and again! Let’s dive into the recipe!
Why I Love This Recipe
- Quick and Easy: This dish comes together in just 25 minutes, making it perfect for busy weeknights or last-minute dinner parties.
- Flavor Packed: The combination of garlic, butter, and fresh lemon creates a rich and vibrant sauce that elevates the shrimp and pasta to new heights.
- Customizable: Adjust the spice level with red pepper flakes or add your favorite veggies for a personal touch to the dish.
- Impressive Presentation: Serve it in shallow bowls with a sprinkle of parsley and a lemon wedge for a stunning and inviting meal.
Ingredients
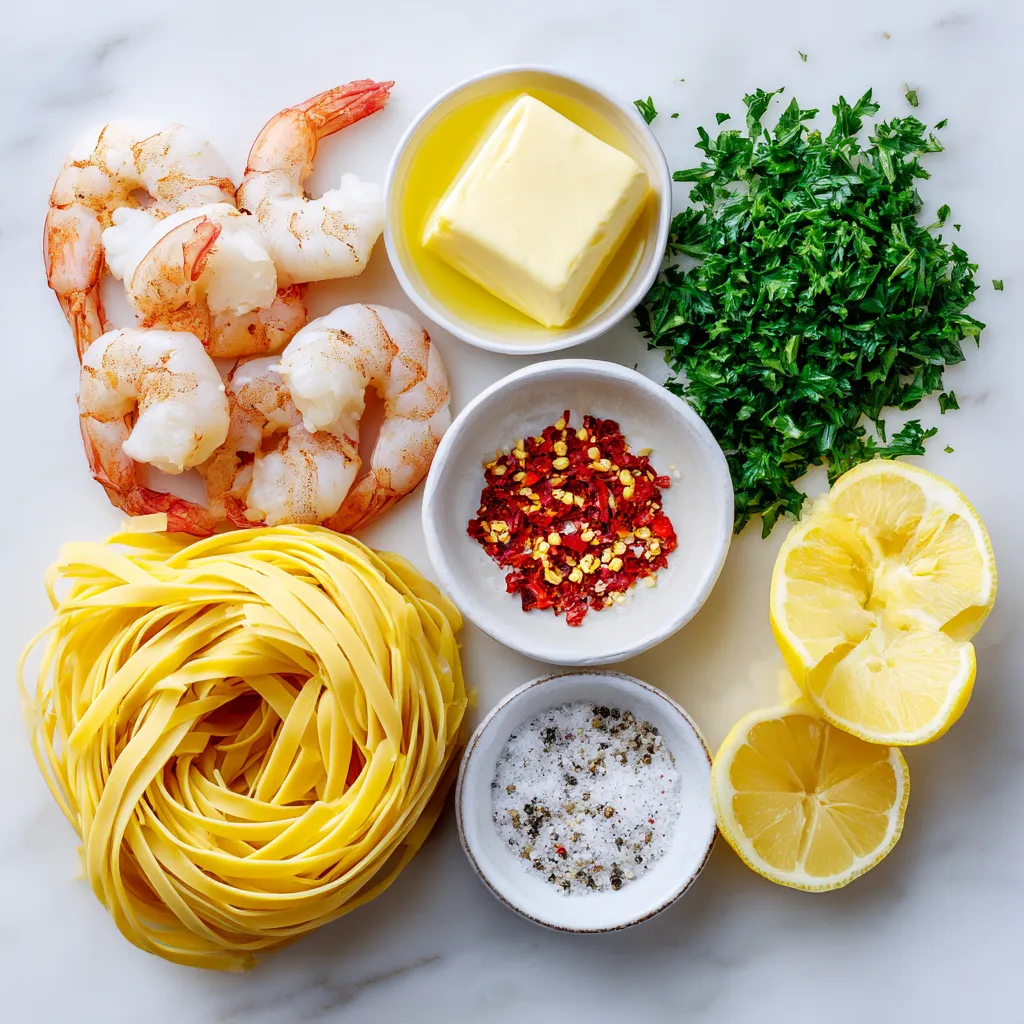
List of Ingredients
- 8 ounces linguine pasta
- 1 pound large shrimp, peeled and deveined
- 4 tablespoons unsalted butter
- 4 tablespoons extra virgin olive oil
- 4 cloves garlic, finely minced
- 1 teaspoon red pepper flakes
- Zest of 1 fresh lemon
- 2 tablespoons freshly squeezed lemon juice
- 1/4 cup fresh parsley, chopped
- Salt and freshly cracked black pepper to taste
- Freshly grated Parmesan cheese (optional)
Gather these ingredients before you start cooking. Fresh and quality items make a big difference. The shrimp should be large, firm, and pink. Look for the best pasta; I love using linguine for this dish. The garlic adds a lovely aroma. Don’t skip the lemon zest; it brightens the flavors. Keep your parsley fresh for garnish.
You can adjust the red pepper flakes to suit your taste. If you want it spicy, add more. If you prefer it mild, use less. The butter and olive oil blend well to create a rich sauce. Freshly grated Parmesan cheese is optional but adds a nice touch.
With these ingredients, you can create a dish that is both simple and tasty. Enjoy the process as you prepare this delightful meal!
Step-by-Step Instructions
Cooking the Linguine
1. Start by bringing a large pot of water to a boil. Add a generous amount of salt to the water. This adds flavor to the pasta.
2. Cook the linguine according to the package directions. Aim for al dente, which usually takes around 8-10 minutes.
3. Just before you drain the pasta, reserve 1/2 cup of the cooking water. This water helps adjust the sauce later. Then, drain the pasta and set it aside.
Preparing the Shrimp Scampi Sauce
1. In a large skillet, heat 4 tablespoons of butter and 4 tablespoons of olive oil over medium heat. Wait for the butter to melt completely and mix well with the oil.
2. Add 4 cloves of finely minced garlic and 1 teaspoon of red pepper flakes to the skillet. Sauté for about 1 minute until the garlic is fragrant but not brown.
3. Next, add 1 pound of large shrimp that are peeled and deveined. Season them well with salt and freshly cracked black pepper. Cook the shrimp for 2-3 minutes on each side. They should turn pink and opaque when done.
Combining Pasta and Sauce
1. After the shrimp is cooked, incorporate the zest of 1 lemon and 2 tablespoons of freshly squeezed lemon juice into the skillet. Stir well to mix the flavors.
2. Add the drained linguine directly to the skillet. Toss everything together to coat the pasta with the garlic shrimp sauce.
3. If the sauce seems too dry, slowly pour in the reserved pasta water a little at a time. Adjust until you reach your desired sauce consistency.
By following these steps, you’ll create a savory shrimp scampi linguine that is simple yet tasty.
Tips & Tricks
Perfecting the Shrimp Cook
To cook shrimp evenly, start with fresh, high-quality shrimp. Make sure they are peeled and deveined. This step helps them cook faster and ensures a better texture. Heat the butter and olive oil in a skillet over medium heat. Add the shrimp in a single layer, giving them space. This helps them cook evenly.
To know when shrimp is properly cooked, look for a pink color. They should be opaque and firm to the touch. This usually takes about 2-3 minutes on each side. If you overcook shrimp, they become rubbery. So, keep an eye on them!
Achieving Flavor Balance
Adjusting spice levels is easy with red pepper flakes. Start with a teaspoon, and taste the sauce. If you want more heat, add a bit more. Remember, you can always add more, but you can’t take it out!
Finding the right lemon balance is key. The zest adds a bright flavor. The juice gives a fresh, tangy taste. Start with two tablespoons of lemon juice and adjust based on your taste. Too much can overpower the dish.
Presentation Tips
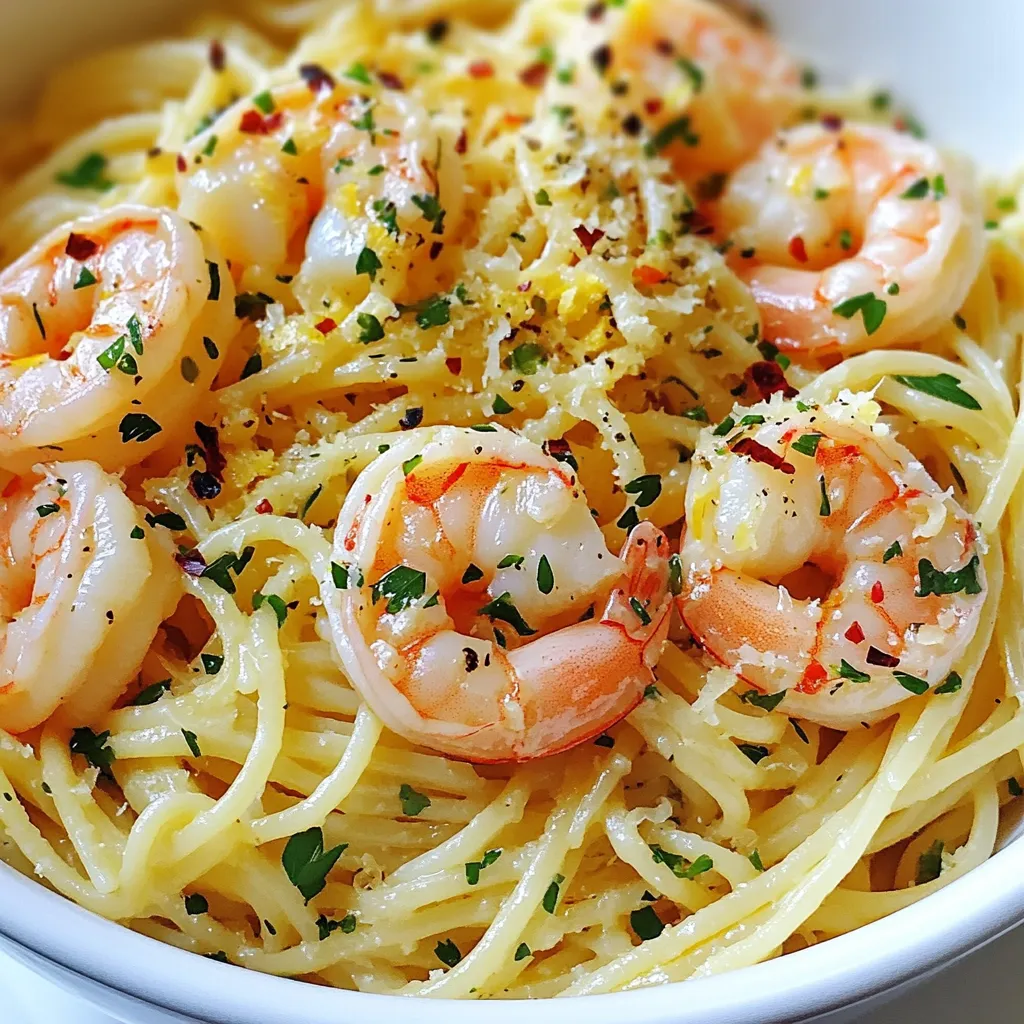
For a great presentation, serve the shrimp scampi linguine in shallow bowls. This makes it easy to see the colorful shrimp and herbs. A sprinkle of parsley on top adds a nice touch.
Garnish with a lemon wedge on the side. It looks nice and lets people add more lemon if they want. You can also add freshly grated Parmesan cheese for extra flavor. A beautiful dish makes eating more enjoyable!
Pro Tips
- Perfectly Cooked Shrimp: Ensure your shrimp are cooked just until they are pink and opaque. Overcooking can lead to rubbery shrimp, so watch them closely.
- Reserve Pasta Water: Always reserve some pasta cooking water before draining. It’s starchy and can help adjust the sauce’s consistency without adding extra oil.
- Fresh Ingredients Matter: Use fresh garlic and parsley for the best flavor. Fresh ingredients can elevate your dish and make it more vibrant.
- Adjust Spice to Taste: The red pepper flakes can be adjusted based on your spice preference. Start with a small amount and add more if you like it spicier.
Variations
Adding Vegetables
You can brighten your shrimp scampi linguine by adding vegetables. Seasonal veggies like zucchini, bell peppers, or asparagus work well. Simply chop them up and sauté them with garlic before adding the shrimp.
Spinach or tomatoes also enhance the dish. For spinach, toss it in just before you mix in the pasta. The heat will wilt it perfectly. For tomatoes, use cherry tomatoes. Cut them in half and add them at the same time as the shrimp. They’ll add a nice pop of color and flavor.
Alternative Proteins
If you want to change it up, swap shrimp for chicken or scallops. Chicken thighs work best. Cut them into bite-sized pieces and cook them until golden. This usually takes about 6-8 minutes.
Scallops are another tasty choice. Sear them for about 2-3 minutes on each side until they are opaque. Remember, cooking time can vary, so keep an eye on them.
Gluten-Free Option
For a gluten-free meal, use gluten-free linguine. Many brands taste great and cook up well. Just follow package instructions for cooking time.
You might need to adjust the sauce a bit. Gluten-free pasta can become mushy, so watch it closely. If it seems too dry, add a little extra olive oil or pasta water to keep it flavorful and moist.
Storage Info
How to Store Leftovers
To keep your shrimp scampi linguine fresh, follow these steps:
- Allow the dish to cool to room temperature.
- Place leftovers in an airtight container.
- Store in the fridge for up to three days.
Proper storage helps keep the flavors intact and the dish safe to eat. Avoid leaving it out at room temperature for more than two hours.
Reheating Instructions
When it’s time to enjoy your leftovers, here are the best ways to reheat:
- Use a skillet on low heat. Add a splash of water or oil to keep it moist.
- You can also microwave it in short bursts. Stir in between to heat evenly.
Be careful not to overcook the shrimp. They can turn rubbery if heated too long. Aim for just warming through.
Freezing Tips
Yes, you can freeze shrimp scampi linguine! Here’s how:
- Pack it in a freezer-safe container.
- Leave some space at the top for expansion.
To thaw, place it in the fridge overnight. For a quicker option, use the microwave on the defrost setting. Always reheat until it’s hot all the way through. This method helps keep the shrimp and pasta tasty.
FAQs
What can I serve with shrimp scampi linguine?
You can serve shrimp scampi linguine with a few tasty sides. Here are some ideas:
- Garlic bread: This adds a nice crunch.
- Steamed veggies: Broccoli or asparagus work well.
- Caesar salad: Crisp romaine with dressing brings freshness.
- Wine: A glass of white wine pairs nicely. Try Sauvignon Blanc or Pinot Grigio.
Can I make shrimp scampi linguine ahead of time?
Yes, you can prep shrimp scampi linguine ahead of time. Here’s how:
- Cook the pasta: You can cook it a few hours before. Just toss it with a bit of olive oil to keep it from sticking.
- Make the sauce: You can prepare the shrimp scampi sauce earlier too. Store it in the fridge.
- Reheat: When you’re ready to eat, heat the sauce and add the pasta. It takes just a few minutes.
How do I know when shrimp is done cooking?
Check the shrimp for these signs to know they are done:
- Color: Raw shrimp is gray. Cooked shrimp turns pink and opaque.
- Shape: Shrimp will curl slightly as they cook.
- Time: Cook shrimp for about 2-3 minutes per side.
These tips will help you cook shrimp perfectly every time.
This recipe for shrimp scampi linguine blends simple ingredients and techniques for a tasty dish. You learned how to cook linguine and prepare a flavorful shrimp sauce. I shared tips for perfect shrimp, flavor balance, and appealing presentation.
Remember, you can customize this dish by adding veggies or trying different proteins. Storing and reheating leftovers is easy if you follow my guidelines. Enjoy making this dish, and don’t be afraid to experiment with i
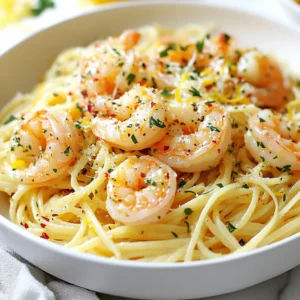
Garlic Butter Shrimp Scampi Linguine
Ingredients
- 8 ounces linguine pasta
- 1 pound large shrimp, peeled and deveined
- 4 tablespoons unsalted butter
- 4 tablespoons extra virgin olive oil
- 4 cloves garlic, finely minced
- 1 teaspoon red pepper flakes
- 1 unit zest of fresh lemon
- 2 tablespoons freshly squeezed lemon juice
- 1/4 cup fresh parsley, chopped
- to taste salt
- to taste freshly cracked black pepper
- for serving freshly grated Parmesan cheese (optional)
Instructions
- Start by bringing a large pot of salted water to a boil. Cook the linguine according to the package instructions until al dente, usually around 8-10 minutes. Just before draining, reserve 1/2 cup of the pasta cooking water, then drain the pasta and set it aside.
- In a large skillet, heat the butter and olive oil over medium heat. Allow the butter to melt completely and mix with the oil. Once combined, add the minced garlic and red pepper flakes. Sauté for approximately 1 minute or until the garlic becomes fragrant, taking care not to let it brown.
- Carefully add the shrimp to the skillet, and season them generously with salt and freshly cracked black pepper. Cook the shrimp for about 2-3 minutes on each side, flipping them when they turn pink and opaque (the shrimp should be fully cooked through).
- Next, incorporate the lemon zest and freshly squeezed lemon juice into the skillet, stirring everything together well to harmonize the flavors.
- Add the drained linguine directly into the skillet, tossing thoroughly to ensure the pasta is well coated with the garlic shrimp sauce. If you find the mixture is too dry, slowly pour in the reserved pasta water, a little at a time, until you achieve your preferred sauce consistency.
- Remove the skillet from heat and fold in the chopped parsley, allowing it to distribute evenly. Taste and adjust the seasoning with additional salt and pepper as necessary.
- Serve the dish immediately, garnishing with freshly grated Parmesan cheese if desired, for an extra touch of richness.



![To make this tasty dish, gather these simple ingredients: - 1 pound Brussels sprouts, trimmed and halved - 3 tablespoons extra virgin olive oil - 1/4 cup pure maple syrup - 2 tablespoons balsamic vinegar - 1 teaspoon Dijon mustard - 1/2 teaspoon fine sea salt - 1/4 teaspoon freshly ground black pepper - 1/4 cup pecans, roughly chopped for added crunch - 1/4 cup dried cranberries for a touch of sweetness - Fresh thyme leaves for an aromatic garnish (optional) You can easily adjust ingredient amounts based on what you need. Here are some quick conversions: - If you want to make more, use 2 pounds of sprouts and double the glaze. - For less, cut the amounts in half. This still keeps the taste great. - In a pinch, you can swap the pecans for walnuts or almonds. This dish not only tastes good but is also good for you. Here’s a quick look at what’s inside: - Calories: About 200 per serving - Fat: 12 grams (mostly healthy fats from olive oil and nuts) - Carbohydrates: 24 grams (includes natural sugars from maple syrup) - Fiber: 5 grams (great for digestion from Brussels sprouts) - Protein: 3 grams (from nuts and sprouts) This breakdown helps you see the benefits of each ingredient. Enjoy making this dish with fresh, seasonal produce for the best flavor and health benefits. For the complete recipe, check out the Full Recipe. Start by preheating your oven to 400°F (200°C). This step is key for getting perfect crispness. While the oven warms up, clear your kitchen counter. Gather all your tools and ingredients. Having everything ready makes cooking much easier. Take 1 pound of Brussels sprouts. Trim off the ends and cut them in half. Place the halved sprouts in a large mixing bowl. Add 3 tablespoons of extra virgin olive oil and 1/2 teaspoon of fine sea salt. Sprinkle in 1/4 teaspoon of freshly ground black pepper. Toss the sprouts until they are well coated. This ensures each sprout gets flavor. Spread the seasoned Brussels sprouts on a baking sheet. Make sure the cut sides face down. This helps them brown nicely. Place the baking sheet in your preheated oven. Roast for 20-25 minutes. They should be crispy and golden. While they roast, make the maple glaze. In a small saucepan, mix 1/4 cup of pure maple syrup, 2 tablespoons of balsamic vinegar, and 1 teaspoon of Dijon mustard. Heat over medium heat but do not let it boil. Once the sprouts are ready, drizzle the glaze over them. Toss gently to coat. Return the glazed sprouts to the oven for 5 more minutes. This step caramelizes the glaze, making it rich and tasty. After that, take them out and add 1/4 cup of roughly chopped pecans and 1/4 cup of dried cranberries. These add crunch and sweetness. If you want, garnish with fresh thyme leaves for even more flavor. For the full details, check the Full Recipe. When you pick Brussels sprouts, look for bright green ones. They should feel firm and heavy in your hand. Avoid any that have yellow leaves or feel soft. The size matters too; smaller sprouts are sweeter and more tender. If you can, buy them on the stalk. They stay fresh longer that way. Caramelization makes Brussels sprouts sweet and tasty. To get it right, roast them cut-side down. This lets them get nice and brown. Make sure they have space on the baking sheet. If they are too close together, they will steam instead of roast. Use high heat, about 400°F, for best results. Check them halfway through and give them a stir for even cooking. One big mistake is overcooking the sprouts. They should be tender but still have a bit of crunch. Avoid using too much glaze; it can make them soggy. Always glaze right after roasting, then caramelize them for just a few minutes. This step adds flavor without losing the sprout's crispness. Lastly, don’t skip the nuts and cranberries; they add great texture and taste. For the full recipe, check the [Full Recipe]. {{image_4}} You can change the taste of maple glazed Brussels sprouts by adding different nuts or seeds. Try walnuts for a rich flavor or sunflower seeds for a crunch. Almonds also work well; they add a nice texture and nutty taste. Each option gives a new twist to your dish. Just sprinkle them on top after roasting for the best crunch and flavor. If you need to adjust for dietary needs, it’s easy. Use agave syrup instead of maple syrup for a vegan option. For a nut-free dish, skip the pecans and use pumpkin seeds. You can also swap balsamic vinegar with apple cider vinegar for a light zing. These swaps keep the dish tasty while meeting your needs. Brussels sprouts shine in fall and winter, but you can adapt them year-round. In spring, add fresh herbs like basil or parsley for brightness. In summer, pair with grilled corn for a sweet twist. You can also mix in seasonal veggies like carrots or sweet potatoes for color and taste. This way, your dish stays fresh and exciting no matter the season. For the full recipe, check out the Maple Glazed Brussels Sprouts Delight. After enjoying your maple glazed Brussels sprouts, store leftovers right. Place them in an airtight container. They will stay fresh for about three days in the fridge. Keep them away from strong-smelling foods. This helps maintain their flavor. When you reheat, aim to keep the sprouts crispy. Use your oven for the best results. Preheat it to 350°F (175°C). Spread the sprouts on a baking sheet. Heat them for about 10-15 minutes. This method helps keep them crunchy and flavorful. You can also microwave them for quick reheating, but they may not stay as crispy. If you want to enjoy these sprouts later, freezing works too. First, let them cool completely. Spread them on a baking sheet in a single layer. Freeze until solid, then transfer to a zip-top bag. They can last up to three months in the freezer. When ready to eat, thaw them overnight in the fridge. Reheat using the oven for the best taste. Enjoy your tasty treat again! Yes, you can prepare these Brussels sprouts ahead of time. After roasting them, let them cool. Store them in an airtight container in the fridge. They stay fresh for up to three days. When you're ready to serve, just reheat them in the oven. This keeps them crispy and tasty. These Brussels sprouts pair well with many dishes. Serve them alongside roasted chicken or grilled salmon for a complete meal. They also shine as a side dish for holiday dinners. You can even enjoy them with a grain salad or pasta for a light lunch. The sweet glaze adds a nice touch to any plate. You can easily change the sweetness of the glaze. If you want it sweeter, add more maple syrup. Start with an extra tablespoon and taste as you go. For a less sweet glaze, reduce the maple syrup. You can add more balsamic vinegar to balance the flavor. Adjust it to match your taste! We explored how to make Maple Glazed Brussels Sprouts from start to finish. You learned about ingredients, cooking steps, and storage tips. I shared helpful tricks to avoid mistakes and ensure a tasty outcome. You can now customize your dish with variations and serve it with confidence. Remember, fresh ingredients and careful roasting lead to the best flavors. Enjoy making this dish and impress your family and friends. With practice, your skills will grow. Happy cooking!](https://dishtreats.com/wp-content/uploads/2025/07/6c550e47-e99c-4554-a6d4-422f3e5f831a-768x768.webp)

