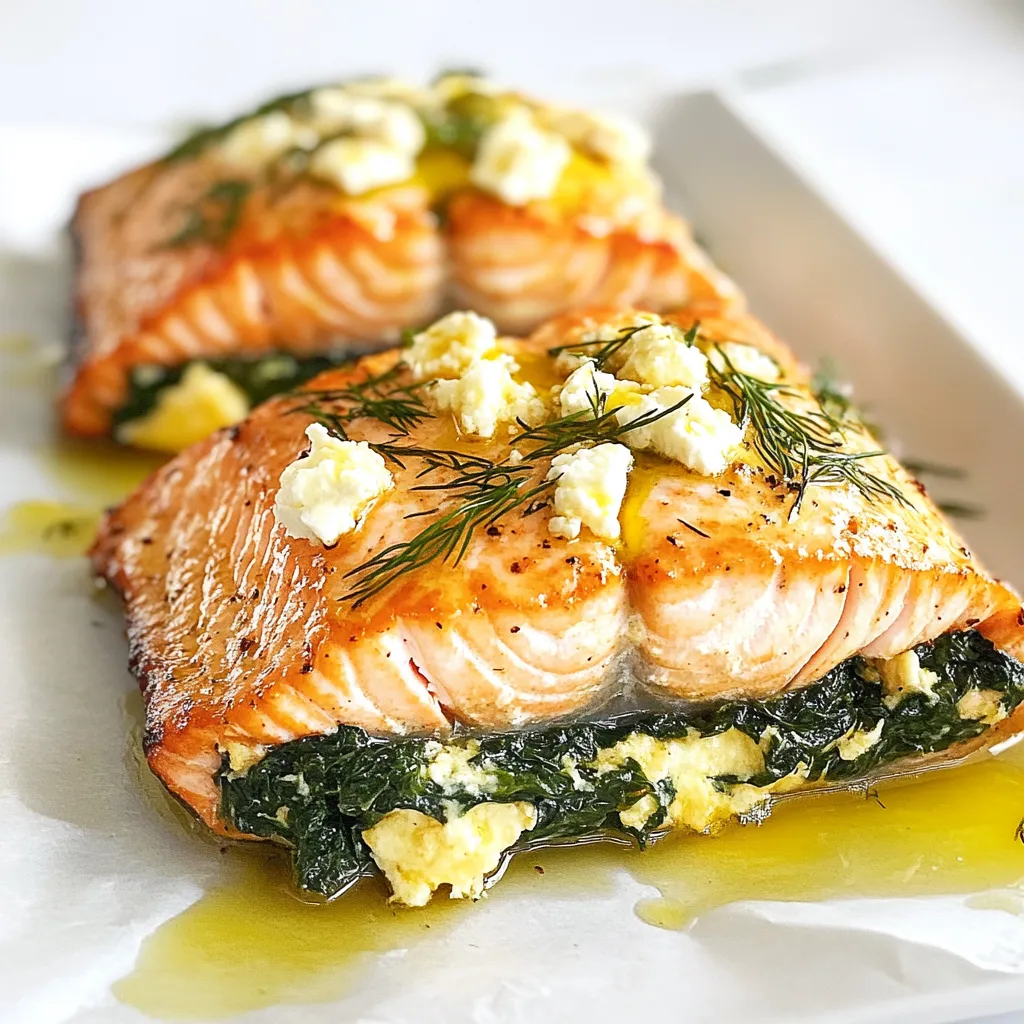
Spinach Feta Stuffed Salmon Delightfully Tasty Meal


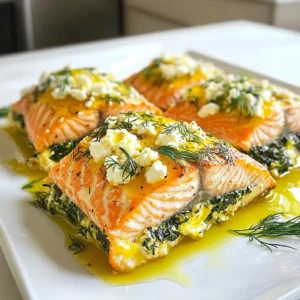
Get ready to elevate your dinner game with my Spinach Feta Stuffed Salmon. This dish combines fresh flavors, creamy feta, and vibrant spinach, all wrapped in tender salmon. Whether you’re cooking for family or impressing guests, this recipe is sure to delight. Join me as we dive into the simple ingredients, easy steps, and helpful tips to create a tasty, healthy meal that you’ll want to make again and again!
Why I Love This Recipe
- Delicious Flavor Combination: The savory blend of spinach and feta complements the rich taste of salmon perfectly, creating a mouthwatering dish.
- Easy to Prepare: This recipe requires minimal ingredients and straightforward steps, making it perfect for both novice and experienced cooks.
- Healthy and Nutritious: Packed with omega-3 fatty acids from salmon and vitamins from spinach, this dish is a healthy choice for any meal.
- Stunning Presentation: With its vibrant colors and elegant appearance, this stuffed salmon is sure to impress at any dinner party.
Ingredients
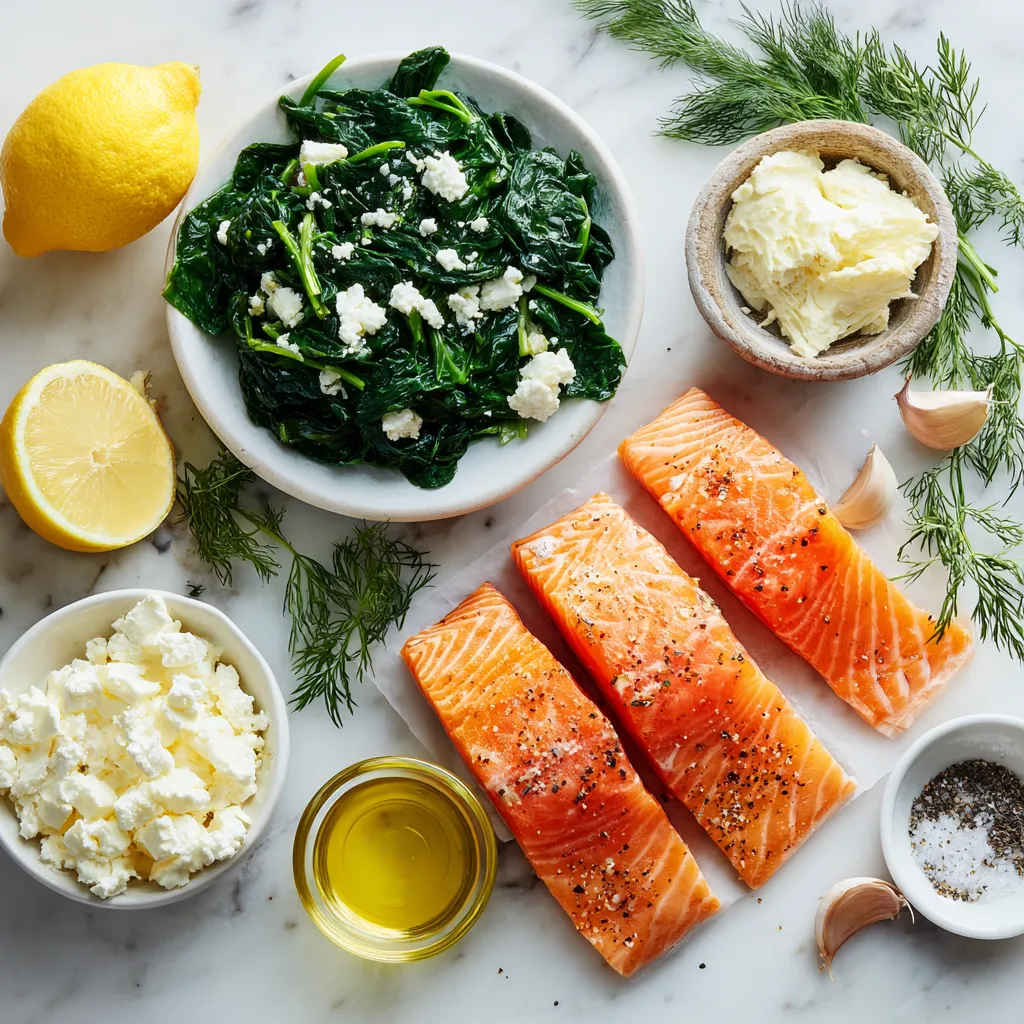
List of Ingredients
- 4 salmon fillets (approximately 6 oz each)
- 2 cups fresh spinach, roughly chopped
- 1 cup feta cheese, crumbled
- 2 cloves garlic, finely minced
- 1/4 cup cream cheese, softened to room temperature
- 1 tablespoon fresh lemon juice
- 1 tablespoon extra virgin olive oil
- Salt and freshly ground black pepper to taste
- Fresh dill or parsley for an optional garnish
Measurements & Substitutions
For this recipe, you can adjust the amount of spinach or cheese based on your taste. If you prefer, swap feta cheese with goat cheese for a different flavor. You can also use frozen spinach, but make sure to thaw and drain it well to avoid excess water. Instead of cream cheese, try ricotta for a lighter texture.
Nutritional Information
Each serving has about:
- Calories: 350
- Protein: 36g
- Carbohydrates: 4g
- Fat: 20g
- Fiber: 1g
- Sodium: 650mg
This dish is rich in protein and omega-3 fatty acids from the salmon. The spinach adds vitamins such as A and K, while feta contributes calcium. Enjoy this delightful meal knowing it’s both tasty and nutritious!
Step-by-Step Instructions
Preparation Steps
1. Start by preheating your oven to 375°F (190°C). This ensures even cooking for your salmon.
2. Next, heat a medium skillet over medium heat and add the olive oil.
3. Once the oil is hot, add the minced garlic and sauté it for about 1 minute. The garlic should smell great.
4. Now, add the roughly chopped spinach to the skillet. Cook it for 2-3 minutes until it wilts down.
5. Remove the skillet from heat and let the spinach cool for a bit.
6. In a mixing bowl, combine the wilted spinach, crumbled feta cheese, softened cream cheese, and fresh lemon juice.
7. Mix the ingredients well until they are creamy and fully combined.
Cooking Instructions
1. Take each salmon fillet and use a sharp knife to make a pocket. Slice horizontally, but don’t cut all the way through.
2. Season both the inside and outside of the salmon with salt and freshly ground black pepper. This adds nice flavor.
3. Stuff each salmon fillet with the creamy spinach and feta mixture. Press down gently to secure it inside.
4. Arrange the stuffed salmon fillets in a greased baking dish. Make sure they have space between them.
5. Place the dish in the oven and bake for 20-25 minutes. The salmon should flake easily with a fork when done.
6. For a golden top, turn on the broiler for 2-3 minutes. Watch carefully to avoid burning.
7. After baking, let the salmon rest for a couple of minutes. Garnish with fresh dill or parsley for extra flavor.
Tips for Checking Doneness
To check if your salmon is cooked, use a fork. Gently flake the thickest part. If it easily breaks apart, it is done. The salmon should look opaque and have a light pink color inside. Always trust your fork!
Tips & Tricks
Common Mistakes to Avoid
When making spinach feta stuffed salmon, a few mistakes can ruin your dish. Here are key points to watch for:
- Overstuffing: If you pack too much filling, the salmon may break.
- Skipping seasoning: Don’t forget to season both inside and outside of the salmon.
- Not checking doneness: Always check if the salmon flakes easily with a fork.
- Using cold ingredients: Room temperature cream cheese mixes better with other filling ingredients.
How to Make Ahead of Time
You can prepare this dish in advance to save time. Here’s how:
- Prep the filling: Make the spinach and feta mixture a day before. Store it in the fridge.
- Stuff the salmon: You can stuff the salmon fillets up to 4 hours ahead. Keep them covered in the fridge.
- Baking: When ready, just pop the stuffed salmon in the oven. Bake as instructed for fresh, hot meals.
Serving Suggestions
Serving matters almost as much as cooking. Here are some ideas to enhance your meal:
- Pair with sides: Serve salmon on a bed of zucchini noodles or alongside a garden salad.
- Add color: Use fresh herbs like dill or parsley as a garnish.
- Splash of lemon: Drizzle more lemon juice on top for a bright flavor.
- Wine pairing: A light white wine, like Sauvignon Blanc, complements the dish well.
Pro Tips
- Fresh Spinach is Key: Always opt for fresh spinach over frozen for a more vibrant flavor and better texture in your stuffing.
- Choose Quality Salmon: Look for wild-caught salmon if possible; it typically has a richer flavor and firmer texture than farmed varieties.
- Perfect Cooking Time: Avoid overcooking the salmon by checking for doneness a few minutes early; it should flake easily yet remain moist.
- Garnish for Presentation: Fresh herbs not only enhance flavor but also add a pop of color, making your dish visually appealing.
Variations
Different Cheese Options
You can switch up the cheese in this dish. Try goat cheese for a tangy twist. Cream cheese is a great base, but any cheese you enjoy will work. For a milder flavor, use ricotta. Each cheese adds a unique taste and texture.
Adding Proteins or Veggies
Want extra protein? Add cooked shrimp or crab meat to the filling. You can also toss in chopped sun-dried tomatoes or olives for more flavor. If you like crunch, add some chopped bell peppers or zucchini to the mix. These additions make the dish even more exciting.
Alternative Cooking Methods
You don’t have to bake the salmon if you prefer another method. Grilling adds a smoky flavor. Pan-searing gives a nice sear on the outside. You can even use an air fryer for a quicker, crispy result. Each method changes the taste but keeps it delicious. Choose what you like best!
Storage Info
Refrigeration Guidelines
You can store leftover stuffed salmon in the fridge. Place it in an airtight container. This keeps the salmon fresh and tasty for up to three days. Make sure to cool it to room temperature before sealing.
Freezing Instructions
To freeze the stuffed salmon, wrap each piece in plastic wrap. Then, place them in a freezer bag. This way, they can last for up to three months. Thaw the salmon in the fridge overnight before cooking.
Reheating Instructions
To reheat, preheat your oven to 350°F (175°C). Place the salmon in a baking dish. Cover it with foil to keep it moist. Heat for about 15-20 minutes, or until warmed through. You can also microwave it for 2-3 minutes, but this may dry it out. Enjoy your meal!
FAQs
What can I serve with Spinach Feta Stuffed Salmon?
You can pair this dish with many sides. Some good options are:
- Lightly sautéed zucchini noodles
- Fresh garden salad
- Quinoa or rice pilaf
- Roasted vegetables
These sides add color and flavor to your meal. They also balance the rich taste of the salmon. A splash of lemon juice on the side can brighten the dish.
Can I use frozen salmon for this recipe?
Yes, you can use frozen salmon. Just make sure to thaw it first. You can do this by leaving it in the fridge overnight. If you’re in a hurry, place it in cold water for about an hour. Once thawed, pat it dry before you stuff it. This helps the filling stick better.
How do I know when the salmon is fully cooked?
To check if the salmon is done, use a fork. Gently poke the thickest part of the fish. If it flakes easily, it is ready. The color should change from bright pink to a light, opaque hue. If you have a food thermometer, aim for an internal temperature of 145°F (63°C). This ensures the salmon is safe to eat and still juicy.
In this blog post, we covered all you need for making Spinach Feta Stuffed Salmon. We listed the main ingredients, measurements, and even nutritional facts. The step-by-step instructions help you prepare and cook perfectly. I shared tips to avoid common mistakes and variations to try. Finally, I added storage info and FAQs to clarify your doubts.
Cooking is fun, and this dish is simple. Enjoy the flavors and impress your famil
Savory Spinach & Feta Stuffed Salmon
Ingredients
- 4 fillets salmon (approximately 6 oz each)
- 2 cups fresh spinach, roughly chopped
- 1 cup feta cheese, crumbled
- 2 cloves garlic, finely minced
- 1 4 cup cream cheese, softened to room temperature
- 1 tablespoon fresh lemon juice
- 1 tablespoon extra virgin olive oil
- to taste salt
- to taste freshly ground black pepper
- for garnish fresh dill or parsley
Instructions
- Preheat your oven to 375°F (190°C) to ensure it's hot enough for even cooking.
- In a medium-sized skillet over medium heat, pour in the olive oil. Once heated, add the minced garlic and sauté for about 1 minute, until it becomes fragrant and slightly golden.
- Add the chopped spinach to the skillet, cooking until it wilts down, which will take about 2-3 minutes. Once wilted, remove the skillet from the heat and set aside to cool slightly.
- In a mixing bowl, combine the sautéed spinach, crumbled feta cheese, softened cream cheese, and fresh lemon juice. Stir thoroughly until all ingredients are well mixed and creamy.
- Using a sharp knife, carefully create a pocket in each salmon fillet by slicing horizontally through the thickest part, ensuring not to cut all the way through to the other side.
- Generously season both the inside and outside of each salmon fillet with salt and freshly ground black pepper for enhanced flavor.
- Stuff each salmon fillet with the creamy spinach and feta mixture, gently pressing down to secure it within the pocket created.
- Arrange the stuffed salmon fillets in a greased baking dish, ensuring they are not overcrowded for even cooking.
- Place the dish in the preheated oven and bake for 20-25 minutes or until the salmon is thoroughly cooked and flakes easily with a fork.
- For a beautifully golden top, switch on the broiler for an additional 2-3 minutes at the end of the baking time, keeping a close eye to avoid burning.
- Carefully remove the baking dish from the oven, let the salmon rest for a couple of minutes, then garnish with fresh dill or parsley if desired for that extra burst of flavor and color.