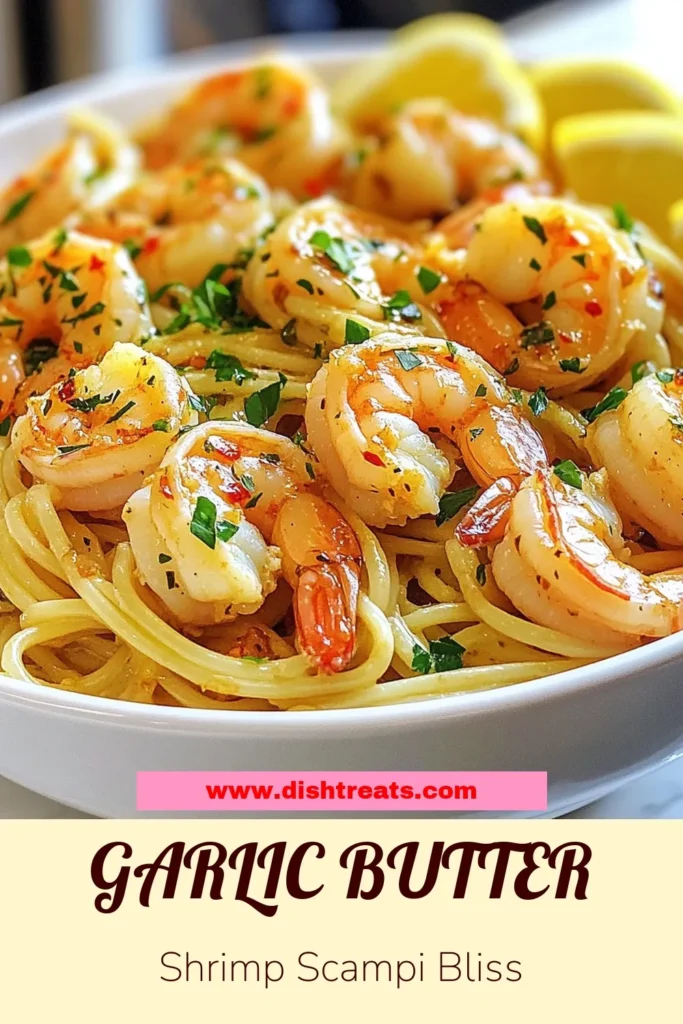
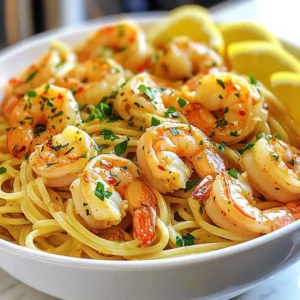
Garlic Butter Shrimp Scampi Easy and Flavorful Dish

Looking for a quick and tasty meal? This Garlic Butter Shrimp Scampi is perfect for you! With just a few simple ingredients, you can create a dish that bursts with flavor. In this post, I’ll guide you through each step, from cooking the pasta to seasoning the shrimp. Whether you’re a kitchen novice or a seasoned chef, you’ll find that making this dish is both easy and satisfying. Let’s dive in!
Why I Love This Recipe
- Quick and Easy: This recipe comes together in just 25 minutes, making it perfect for a weeknight dinner or a last-minute gathering.
- Flavor Packed: The combination of garlic, lemon, and red pepper flakes creates a vibrant and aromatic sauce that enhances the shrimp beautifully.
- Customizable: You can easily adjust the spice level or add vegetables like spinach or cherry tomatoes for added nutrition and flavor.
- Impressive Presentation: With its vibrant colors and elegant garnishes, this dish is sure to impress guests and family alike.
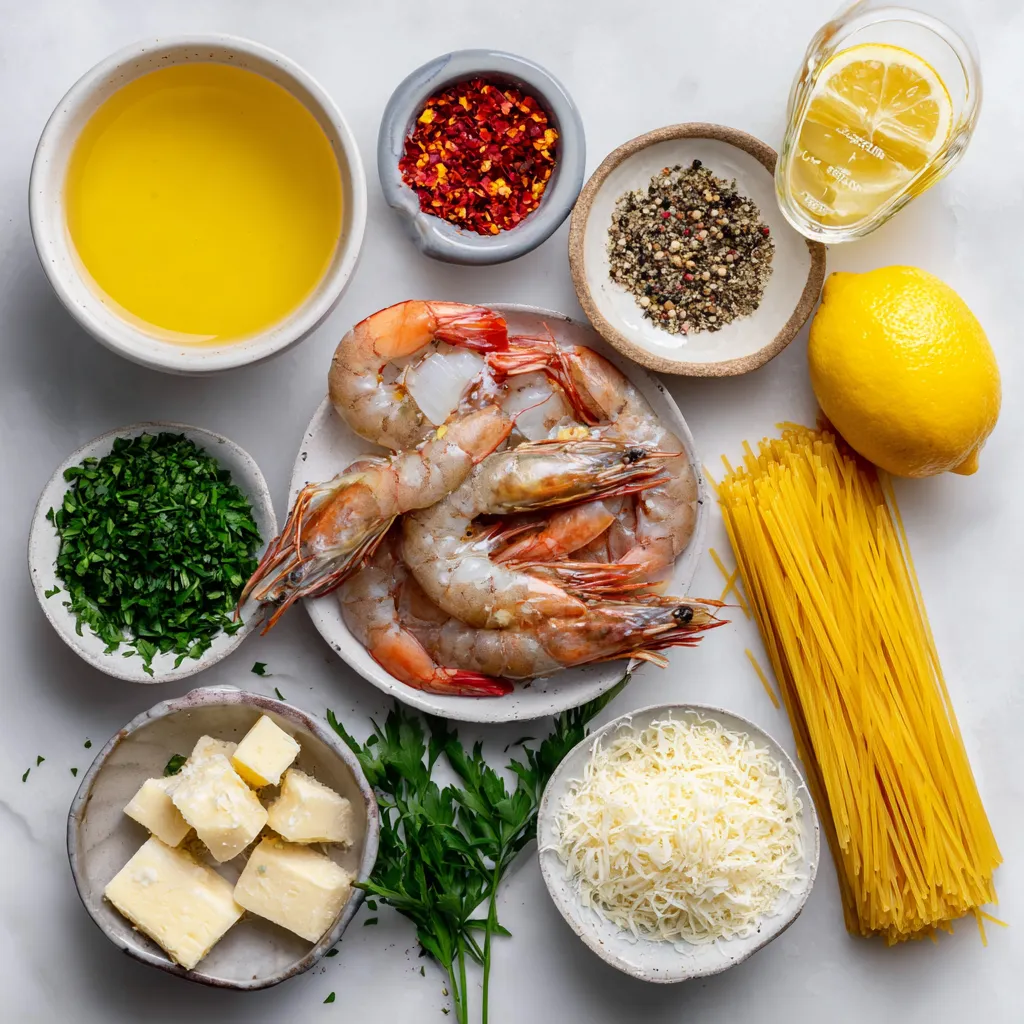
Ingredients
Main Ingredients
- 1 lb large shrimp, peeled and deveined
- 8 oz linguine or spaghetti
- 4 tablespoons unsalted butter
- 4 tablespoons extra virgin olive oil
- 5 cloves garlic, finely minced
Seasoning and Garnish
- 1 teaspoon red pepper flakes
- Zest and juice of 1 lemon
- Salt and freshly ground black pepper to taste
- Fresh parsley, chopped
Optional Ingredients
- 1/2 cup low-sodium chicken broth
- 1/4 cup grated Parmesan cheese
In this dish, I focus on fresh shrimp and simple pasta. The ingredients are key to a rich flavor. Large shrimp are best, as they soak up the garlic butter well. I prefer linguine or spaghetti, but any pasta works.
I love using unsalted butter and extra virgin olive oil together. They create a smooth, rich base. Garlic is essential here. It brings warmth and a punch of taste. You can adjust the red pepper flakes to fit your spice level. A bit of heat makes the dish lively.
Lemon adds brightness with its zest and juice. It cuts through the butter, making each bite pop. A sprinkle of fresh parsley gives color and freshness.
If you want to boost the dish, chicken broth adds depth. Parmesan cheese can enhance the creaminess too. These extras can elevate your meal from good to great!
Step-by-Step Instructions
Preparing the Pasta
To start, bring a large pot of water to a rolling boil. Add a generous amount of salt. This helps flavor the pasta. Next, add 8 oz of linguine or spaghetti. Cook according to the package instructions, usually about 8-10 minutes. You want it al dente. Once done, drain the pasta. Remember to save 1/2 cup of pasta water for later!
Sautéing the Garlic
In a large skillet, heat 2 tablespoons of unsalted butter with 2 tablespoons of extra virgin olive oil over medium heat. Once the butter melts, add 5 cloves of finely minced garlic and 1 teaspoon of red pepper flakes. Cook for 1-2 minutes. You want the garlic fragrant and lightly golden. Keep an eye on it, so it doesn’t burn.
Cooking the Shrimp
Now, add 1 lb of peeled and deveined shrimp to the skillet. Season the shrimp with salt and freshly cracked black pepper. Cook for 2-3 minutes on one side. When they turn pink, flip them over. Cook for another 2-3 minutes until they are fully opaque.
Making the Sauce
Next, pour in 1/2 cup of low-sodium chicken broth and the juice from one lemon. Use a wooden spoon to scrape up any tasty bits stuck to the bottom. Bring the mix to a gentle simmer. Let it cook for 2-3 minutes, so the flavors blend nicely.
Combining Everything
Lower the heat and add the remaining 2 tablespoons of butter, the drained pasta, and the lemon zest. Also, add the reserved pasta water. Toss everything with tongs until the pasta is coated in the sauce and warmed through.
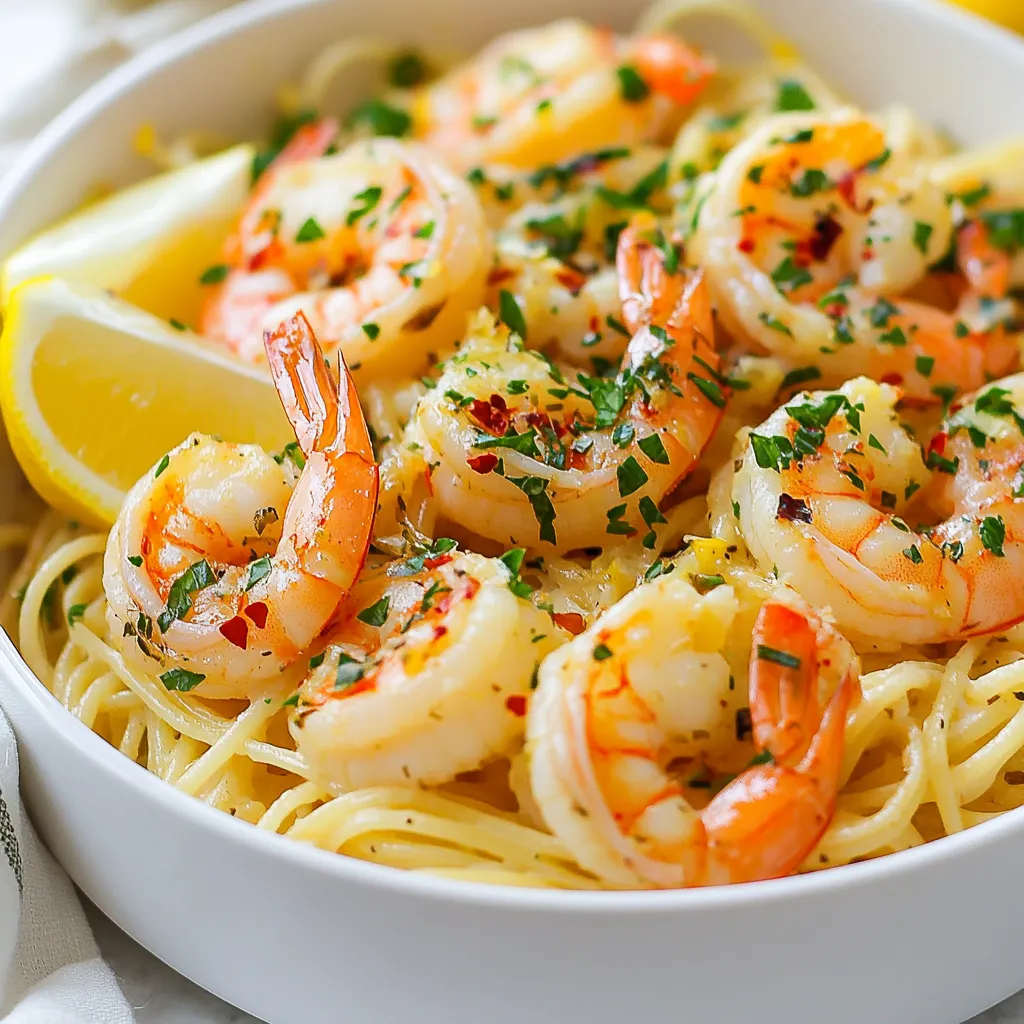
Serving the Dish
To serve, take the skillet off the heat. Garnish with chopped fresh parsley and optional grated Parmesan cheese. Serve in a large, shallow pasta bowl. For a nice look, arrange lemon wedges around the bowl and sprinkle extra parsley on top. Enjoy your meal!
Tips & Tricks
Customizing Spice Levels
To make your dish just right, adjust the red pepper flakes. Start with one teaspoon. If you like heat, add more. You can also choose different spices. Try smoked paprika for a deeper flavor, or lemon zest for a fresh twist.
Choosing the Right Shrimp
Fresh shrimp is best, but frozen works well too. Look for shrimp that is firm and smells clean. When choosing size, larger shrimp makes a better dish. They cook evenly and look great on the plate. Always buy shrimp that is peeled and deveined for ease.
Cooking Techniques
To avoid rubbery shrimp, don’t overcook them. Cook shrimp until they turn pink and opaque. This usually takes just 4-6 minutes. For perfect pasta, cook until al dente. Drain it, but save some pasta water. This water helps to create a smooth sauce.
Pro Tips
- Fresh Shrimp is Key: Always opt for fresh shrimp if possible, as they have a superior flavor and texture compared to frozen shrimp. If using frozen, make sure to thaw them completely before cooking.
- Don’t Overcook the Shrimp: Shrimp cooks quickly, usually taking only a few minutes. Overcooking can lead to a rubbery texture, so keep an eye on them and remove from heat once they turn pink and opaque.
- Adjust Spice to Taste: The red pepper flakes can be adjusted according to your spice preference. Start with a small amount and taste the dish as you go, adding more if you enjoy a spicier kick.
- Enhance with Fresh Herbs: While parsley is fantastic, consider adding fresh basil or chives for an extra layer of flavor. They complement the shrimp and lemon beautifully.
Variations
Ingredient Swaps
You can make this dish your own by swapping ingredients. For a low-carb option, try using zucchini noodles instead of pasta. Zucchini noodles are light and tasty. They soak up all the garlic butter sauce, making them a great choice.
If shrimp isn’t your thing, consider using scallops or chicken. Both options cook well and absorb flavor nicely. Scallops add a sweet touch, while chicken offers heartiness.
Flavor Enhancements
Adding white wine can deepen the flavor of the dish. Just a splash while cooking will do. You can also add lemon zest for a bright kick. This extra layer makes each bite more vibrant.
Try including cherry tomatoes or spinach for added color and nutrition. Cherry tomatoes burst with sweetness, while spinach wilts down nicely. Both add great texture and taste to the dish.
Alternative Cooking Methods
You can adapt your cooking style to suit your needs. A one-pan method is easy and quick. Just cook the pasta and shrimp together in the same skillet. This saves time and cuts down on dishes.
Grilling shrimp is another fun option. It gives the shrimp a smoky flavor that pairs well with garlic butter. Just be careful not to overcook them. Grilled shrimp can elevate the dish to a whole new level.
Storage Info
Storing Leftovers
To keep your garlic butter shrimp scampi fresh, store it properly. Place leftovers in an airtight container. Refrigerate them within two hours of cooking. This keeps the shrimp safe to eat. The scampi will last for 3 to 4 days in the fridge. If you want to save it longer, you can freeze it. Use a freezer-safe container and seal it well. The scampi can last up to 2 months in the freezer.
Reheating Instructions
Reheating scampi needs care to keep it tasty. The best method is on the stove. Heat a skillet over medium-low heat. Add a splash of chicken broth to keep it from drying out. Stir gently until heated through. You can also use the microwave. Place scampi in a microwave-safe dish. Cover it loosely and heat in short bursts, stirring in between. Be careful not to overcook the shrimp, as it can turn rubbery.
Shelf Life
Leftover garlic butter shrimp scampi lasts well when stored right. In the fridge, enjoy it for 3 to 4 days. If frozen, eat it within 2 months for the best taste. Look for signs of spoilage, like an off smell or slimy texture. If you see these signs, it’s best to throw it away. Always trust your senses to keep your meals safe!
FAQs
What is the best type of shrimp for scampi?
I recommend using large shrimp. They cook evenly and look great on the plate. Look for shrimp that are fresh or frozen and peeled. You can choose wild-caught for better flavor. If you prefer a sweeter taste, go for Gulf shrimp.
Can I make garlic butter shrimp scampi ahead of time?
Yes, you can prep scampi in advance. Cook the shrimp and sauce, then cool them down. Store in an airtight container in the fridge for up to two days. When ready to eat, just reheat gently. Cook the pasta fresh for the best taste.
Is garlic butter shrimp scampi gluten-free?
Yes, it can be gluten-free! Just swap regular pasta for gluten-free pasta. Always check labels to ensure no hidden gluten in ingredients. The rest of the dish is naturally gluten-free, so you can enjoy it worry-free.
Can I use olive oil instead of butter?
You can use olive oil in place of butter. It adds a nice flavor but is less rich. Using half butter and half olive oil gives a good balance. Experiment to find what you like best!
This blog post covered everything you need to know for a great shrimp scampi. We discussed main ingredients, how to prepare and cook, and tips for perfecting your dish. Remember, you can customize flavor and make substitutions too. Don’t forget to store any leftovers properly. With this knowledge, you can enjoy a tasty meal that impresses. Try making this dish soon and share it with friends. Simple ingredients and steps lead to delicious results. Enjoy cookin
Garlic Butter Shrimp Scampi Delight
Ingredients
- 1 lb large shrimp, peeled and deveined
- 4 tablespoons unsalted butter
- 4 tablespoons extra virgin olive oil
- 5 cloves garlic, finely minced
- 1 teaspoon red pepper flakes
- 1 lemon zest and juice
- to taste salt and freshly ground black pepper
- for garnish fresh parsley, chopped
- 8 oz linguine or spaghetti
- 1 cup low-sodium chicken broth
- 1 4 cup grated Parmesan cheese (optional)
Instructions
- Bring a large pot of water to a rolling boil and generously season it with salt. Add the linguine or spaghetti and cook according to the package instructions, typically until al dente (about 8-10 minutes). Once cooked, drain the pasta and set aside, ensuring to reserve 1/2 cup of the pasta water for later use.
- In a spacious skillet heated over medium heat, combine 2 tablespoons of butter and 2 tablespoons of olive oil. Once the butter has melted, add in the minced garlic and red pepper flakes. Sauté for 1-2 minutes until the garlic is fragrant and lightly golden, carefully watching that it doesn’t burn.
- Introduce the peeled and deveined shrimp to the skillet. Season them generously with salt and freshly cracked black pepper. Allow the shrimp to cook for 2-3 minutes on one side until they turn a lovely pink hue, then flip them over and cook for an additional 2-3 minutes until they are fully cooked through and opaque.
- Carefully pour the chicken broth and the freshly squeezed lemon juice into the skillet, using a wooden spoon to scrape up any delicious bits stuck to the bottom of the pan. Bring the mixture to a gentle simmer and let it cook for approximately 2-3 minutes, allowing the flavors to meld.
- Lower the heat and add the remaining 2 tablespoons of butter, along with the drained pasta, lemon zest, and reserved pasta water. Toss everything together with a pair of tongs until the pasta is evenly coated in the luscious sauce and warmed through.
- Take the skillet off the heat and garnish the dish with the freshly chopped parsley and grated Parmesan cheese, if desired. Taste and adjust seasoning as necessary, adding more salt, pepper, or red pepper flakes according to your preference.

. You’ll find all the details to make this delicious dish! This blog covered how to make delicious Sweet Potato Black Bean Chili. We explored ingredients, cooking steps, and tips for the best flavor. You can easily change this recipe to fit your taste. Try different veggies or beans to create new dishes. Remember to store leftovers properly and heat them right for maximum flavor. Enjoy your cooking and share this hearty chili with family and friends. It’s tasty, healthy, and satisfying!](https://dishtreats.com/wp-content/uploads/2025/07/29cb1591-b5b7-4cc4-a611-b282edbacc0b-768x768.webp)