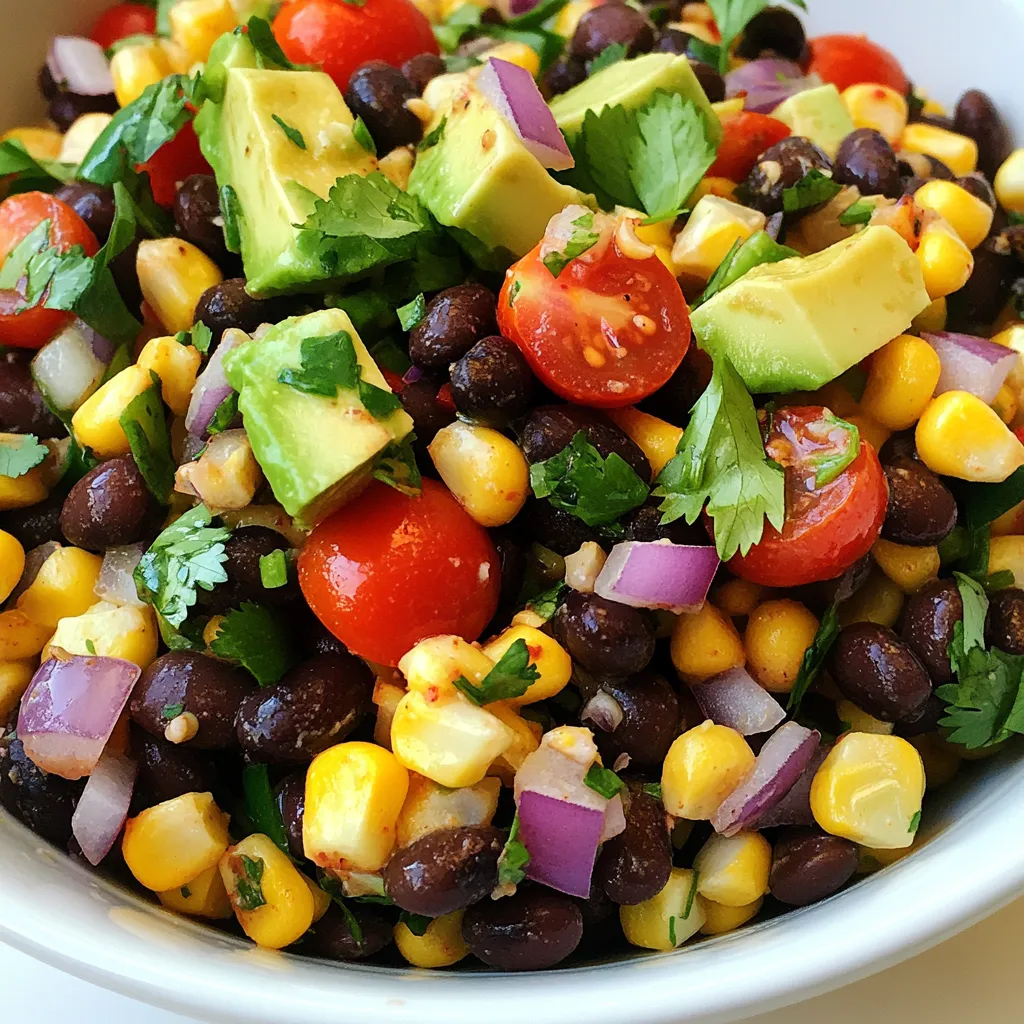
Fiesta Corn Black Bean Salad Flavorful Summer Dish
Looking for a bright and tasty dish to elevate your summer meals? My Fiesta Corn Black Bean Salad is the answer! Packed with fresh veggies and bold flavors, this salad is as easy to make as it is delicious. Whether you’re hosting a backyard barbecue or need a quick lunch, this vibrant salad satisfies and delights. Keep reading to discover the simple steps and tips to create this refreshing summer favorite!
Why I Love This Recipe
- Bright and Colorful: This salad is a feast for the eyes with its vibrant colors from fresh vegetables, making it as appealing to look at as it is to eat.
- Quick and Easy: With minimal prep time, this salad comes together in just 15 minutes, perfect for a quick lunch or a last-minute side dish.
- Nutritious and Satisfying: Packed with protein from black beans and healthy fats from avocado, it’s a nutritious choice that keeps you full and energized.
- Versatile Dish: This salad can be served on its own, as a side dish, or even as a filling for tacos, making it a versatile addition to any meal.
Ingredients
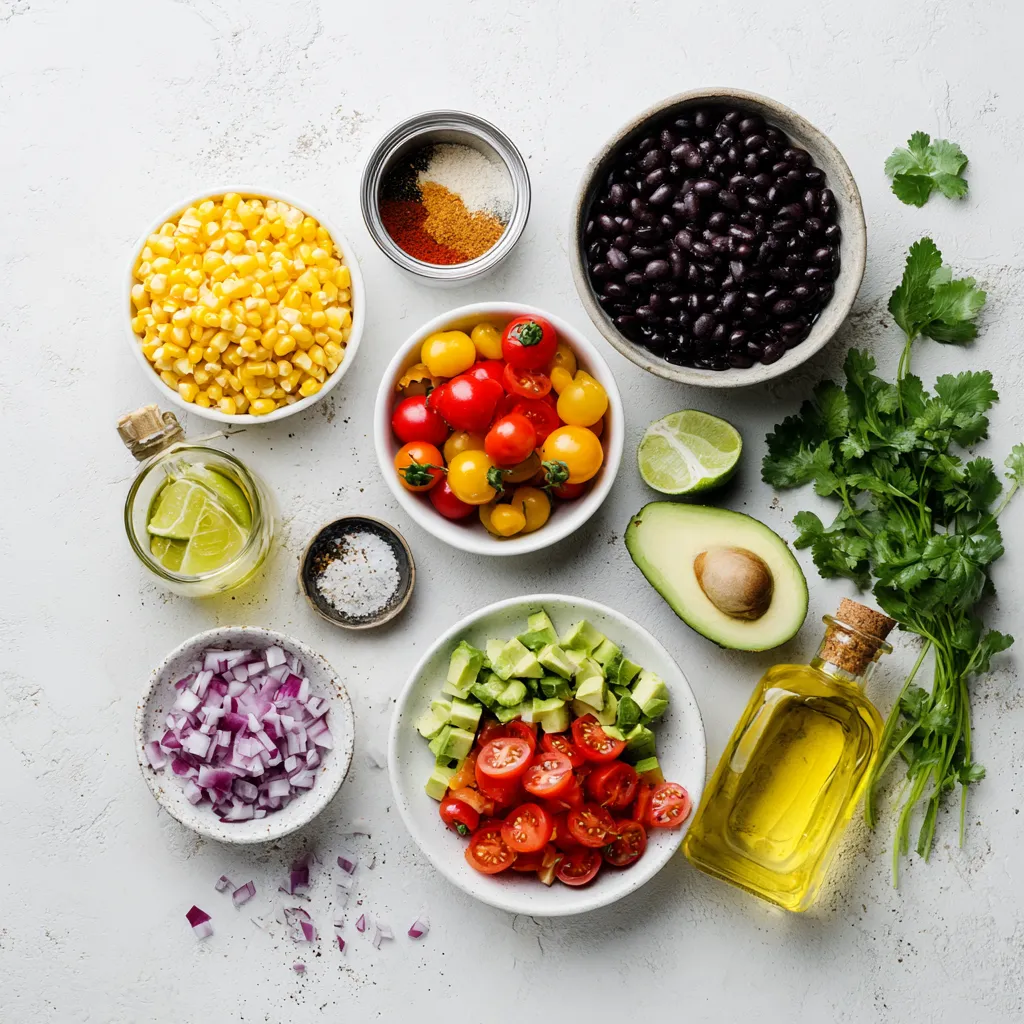
List of Main Ingredients
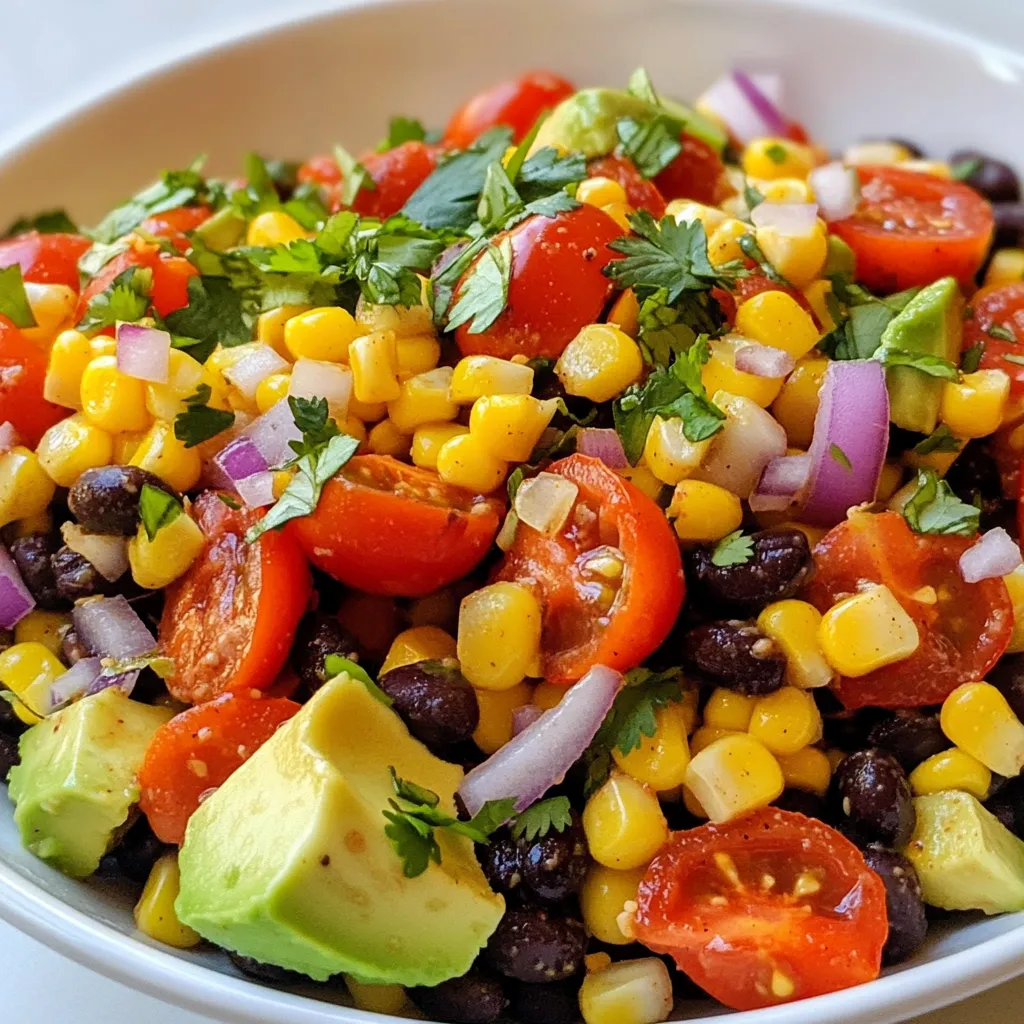
- 1 cup corn kernels (freshly cooked or frozen)
- 1 can (15 oz) black beans, thoroughly rinsed and drained
- 1 red bell pepper, finely diced
- 1 small red onion, finely chopped
- 1 cup cherry tomatoes, halved
- 1 ripe avocado, diced
- 2 tablespoons fresh cilantro, roughly chopped
To make this salad pop, I use fresh corn kernels. You can use frozen corn if you want. Both options work well. The black beans add protein and fiber. Rinsing them helps reduce sodium. The red bell pepper gives a sweet crunch. The red onion adds a nice bite. Cherry tomatoes add juicy bursts. Avocado brings creaminess and healthy fats. Finally, fresh cilantro adds a fragrant touch.
Essential Dressing Ingredients
- 2 tablespoons freshly squeezed lime juice
- 2 tablespoons extra virgin olive oil
- 1 teaspoon ground cumin
- 1 teaspoon chili powder
- Salt and freshly ground black pepper to taste
For the dressing, I always use freshly squeezed lime juice. It brightens the salad. The extra virgin olive oil adds richness. Ground cumin and chili powder bring warm notes. Finally, salt and black pepper enhance all the flavors.
Nutritional Information
- Calories per serving: Approximately 180
- Macronutrients breakdown: 7g protein, 10g fat, 18g carbohydrates
- Dietary considerations: This salad is vegan and gluten-free.
Each serving is about 180 calories. It provides a good mix of protein, fats, and carbs. The salad is vegan and gluten-free, making it great for many diets. Enjoy it as a light meal or a side dish.
Step-by-Step Instructions
Prepare the Corn
Cooking fresh corn is easy. Boil water in a pot. Add the corn and cook for 3-5 minutes. The corn should be tender. Then, drain and let it cool. If you use frozen corn, thaw it in warm water or microwave. Make sure it warms up evenly, then cool it down.
Combine Base Ingredients
In a large bowl, add the cooled corn. Next, add 1 can of rinsed black beans. Then, mix in the finely diced red bell pepper and chopped red onion. Use a spoon to stir gently. This keeps the ingredients mixed evenly without breaking them.
Add Remaining Ingredients
Now, it’s time for delicate ingredients. Gently add the halved cherry tomatoes and diced avocado. Be careful to keep the avocado pieces intact. This adds nice texture to your salad and looks great too.
Make the Dressing
In a small bowl, whisk together the dressing. Combine freshly squeezed lime juice, extra virgin olive oil, ground cumin, and chili powder. Don’t forget to add salt and black pepper. This mixture will give your salad a bright and tasty flavor.
Combine and Toss
Drizzle the dressing over the salad. Use a large spoon to toss everything gently. Make sure all ingredients are coated but avoid mashing the avocado. You want nice, chunky pieces for the best texture.
Finish with Cilantro
Finally, sprinkle roughly chopped cilantro over the salad. Give it one last gentle toss. This fresh herb adds a burst of flavor and bright color to your dish. Enjoy your Fiesta Corn Black Bean Salad!
Tips & Tricks
How to Perfect Your Salad
To make the best Fiesta Corn Black Bean Salad, start with ripe avocados. Look for avocados that give slightly when you press them. This shows they are ready to eat. If they feel hard, let them ripen at room temperature for a few days.
Adjust the seasonings to your taste. If you like more spice, add extra chili powder. If you want more tang, add more lime juice. Taste as you mix to find your perfect balance.
Presentation Ideas
Serving your salad in colorful bowls makes it more fun. Bright colors catch the eye and make your dish pop. You can also divide the salad into individual cups for a nice touch.
Garnish each serving with lime wedges. This not only adds color but also gives diners a chance to add more lime juice if they want.
Common Mistakes to Avoid
Be careful not to overcook the corn. Cook it just until tender, about 3-5 minutes. Overcooked corn can lose its sweet crunch.
Do not mash the avocado when mixing. Gently fold it in with the other ingredients. You want to keep those beautiful avocado pieces intact for a nice look and taste.
Pro Tips
- Use Fresh Ingredients: Whenever possible, opt for fresh corn and ripe avocados to enhance the flavor and texture of your salad.
- Chill Before Serving: Allow your salad to chill in the refrigerator for at least 30 minutes before serving. This allows the flavors to meld and intensify.
- Customize Your Spices: Feel free to adjust the amount of cumin and chili powder based on your spice preference. You can also add jalapeños for an extra kick!
- Perfect for Meal Prep: This salad holds up well in the fridge for a couple of days, making it a great option for meal prep or potlucks.
Variations
Ingredient Substitutions
You can switch out black beans for kidney beans. Kidney beans add a nice color and texture. If you want to change the flavor, try using pinto beans too. For bell peppers, use yellow or green ones. They add different flavors and look great in the salad.
Flavor Enhancements
For a kick, add jalapeños. They give the salad a nice heat. You can slice them thin or dice them small. If you love cheese, try adding feta or cotija. These cheeses melt slightly and add a creamy taste.
Seasonal Variations
In summer, add fresh corn or zucchini. In fall, diced butternut squash works well. You can also try fresh peas in spring. Always adapt based on what’s in season. This keeps your salad fresh and exciting.
Storage Info
How to Store Leftovers
To keep your Fiesta Corn Black Bean Salad fresh, store it in the fridge. Use an airtight container to prevent air from spoiling the salad. If you have a large batch, divide it into smaller portions. This makes it easy to grab a quick snack or side dish later.
Shelf Life
This salad stays fresh in the refrigerator for about 3 to 5 days. Check for signs of spoilage before eating. If the colors look dull or if there is a bad smell, it’s best to throw it away. Mold is another clear sign that the salad is no longer safe to eat.
Freezing Options
You can freeze Fiesta Corn Black Bean Salad, but it may lose some texture. If you want to freeze it, leave out the avocado and fresh cilantro. These ingredients don’t freeze well. Store the rest in a freezer-safe container. When you are ready to eat it, thaw in the fridge overnight before serving.
FAQs
Can I make this salad ahead of time?
Yes, you can make this salad ahead of time. To prep in advance, follow these tips:
- Chop Veggies: Dice the bell pepper and onion. Store them in an airtight container.
- Cook Corn: Prepare the corn and let it cool, then refrigerate.
- Mix Ingredients: Combine the corn, beans, and veggies. Add the dressing right before serving.
This keeps the salad fresh and crunchy.
What can I serve with Fiesta Corn Black Bean Salad?
This salad pairs well with many dishes. Here are some great options:
- Grilled Chicken: Juicy grilled chicken complements the salad’s flavors.
- Tacos: Serve with spicy tacos for a fun meal.
- Rice Dishes: Try it with rice or quinoa for a filling combo.
- Chips: Tortilla chips make a crunchy side.
Each of these options enhances your meal experience.
Can I use canned corn instead of fresh?
Yes, canned corn works well. Here’s a quick comparison:
- Flavor: Canned corn may taste less sweet than fresh.
- Texture: Fresh corn is crunchier. Canned corn is softer.
If you want a fresher taste, try fresh corn when possible.
How do I make this salad spicier?
To add heat to your salad, consider these tips:
- Jalapeños: Dice fresh jalapeños and mix them in.
- Hot Sauce: Drizzle your favorite hot sauce over the salad.
- Spicy Seasoning: Use cayenne pepper or chili flakes in the dressing.
Adjust the heat to your liking for a zesty kick.
Is this salad suitable for meal prep?
Yes, this salad is great for meal prep. Here’s how to store it:
- Containers: Use airtight containers to keep it fresh.
- Layering: Store dressing separately to avoid sogginess.
- Shelf Life: It lasts about 3 days in the fridge.
This makes it easy to enjoy healthy meals throughout the week.
In this post, we explored how to create a fresh and vibrant Fiesta Corn Black Bean Salad. We covered the key ingredients and the step-by-step process for assembly and dressing. I shared tips on perfecting your salad, avoiding common pitfalls, and enhancing flavors. Remember, this salad is not only delicious but also packed with nutrients. You can easily customize it based on your preferences or what’s in season. Enjoy your creation and the burst of flavors it brings to your tabl

Fiesta Corn Black Bean Salad
Ingredients
- 1 cup corn kernels (freshly cooked or frozen)
- 1 can (15 oz) black beans, thoroughly rinsed and drained
- 1 piece red bell pepper, finely diced
- 1 small red onion, finely chopped
- 1 cup cherry tomatoes, halved
- 1 piece ripe avocado, diced
- 2 tablespoons fresh cilantro, roughly chopped
- 2 tablespoons freshly squeezed lime juice
- 2 tablespoons extra virgin olive oil
- 1 teaspoon ground cumin
- 1 teaspoon chili powder
- to taste salt and freshly ground black pepper
Instructions
- Prepare the Corn: If using fresh corn, bring a pot of water to a boil. Add the corn and cook for 3-5 minutes until tender, then drain and let it cool. For frozen corn, simply thaw it in warm water or microwave until warmed throughout, then cool it down.
- Combine Base Ingredients: In a large mixing bowl, add the cooled corn kernels, rinsed black beans, finely diced red bell pepper, and chopped red onion. Stir gently to mix the ingredients evenly.
- Add Remaining Ingredients: Next, incorporate the halved cherry tomatoes and diced avocado into the bowl. Take care to preserve the shape of the avocado.
- Make the Dressing: In a smaller bowl, whisk together the freshly squeezed lime juice, extra virgin olive oil, ground cumin, chili powder, and a generous pinch each of salt and freshly ground black pepper. This will create a flavorful dressing that enhances the salad.
- Combine and Toss: Drizzle the dressing over the salad ingredients. Use a large spoon to gently toss everything together, ensuring all ingredients are coated without mashing the avocado pieces.
- Finish with Cilantro: Sprinkle the roughly chopped cilantro over the prepared salad. Give it one last gentle toss to evenly distribute the cilantro and add a pop of fresh flavor.