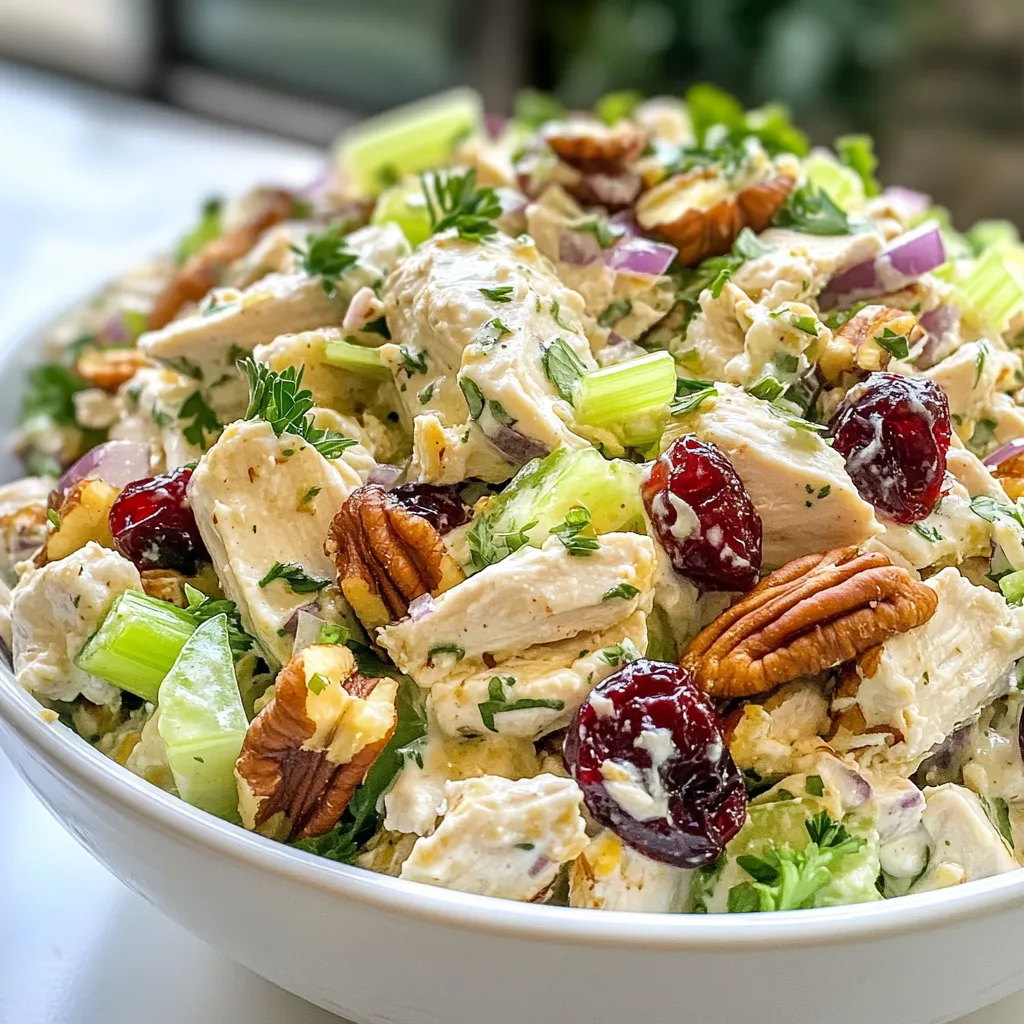
Cranberry Pecan Chicken Salad Fresh and Flavorful Recipe
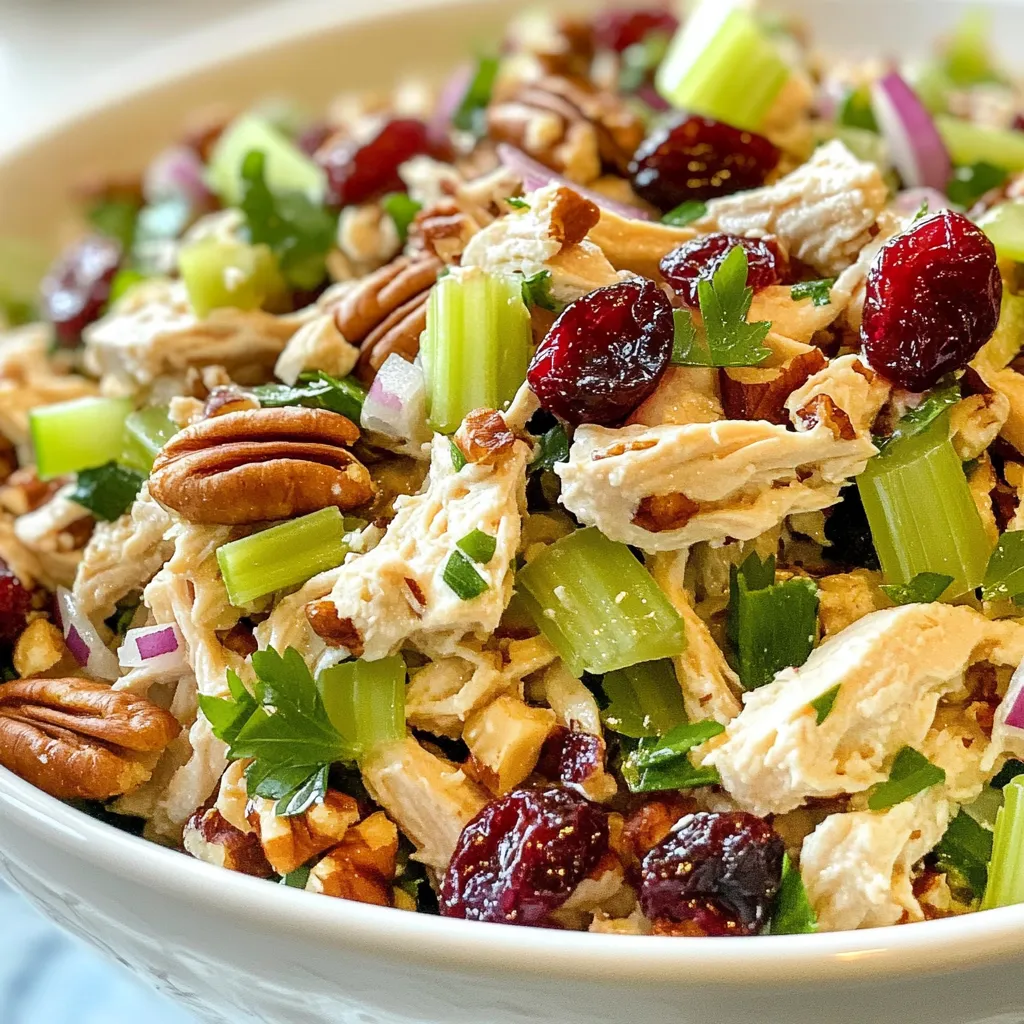
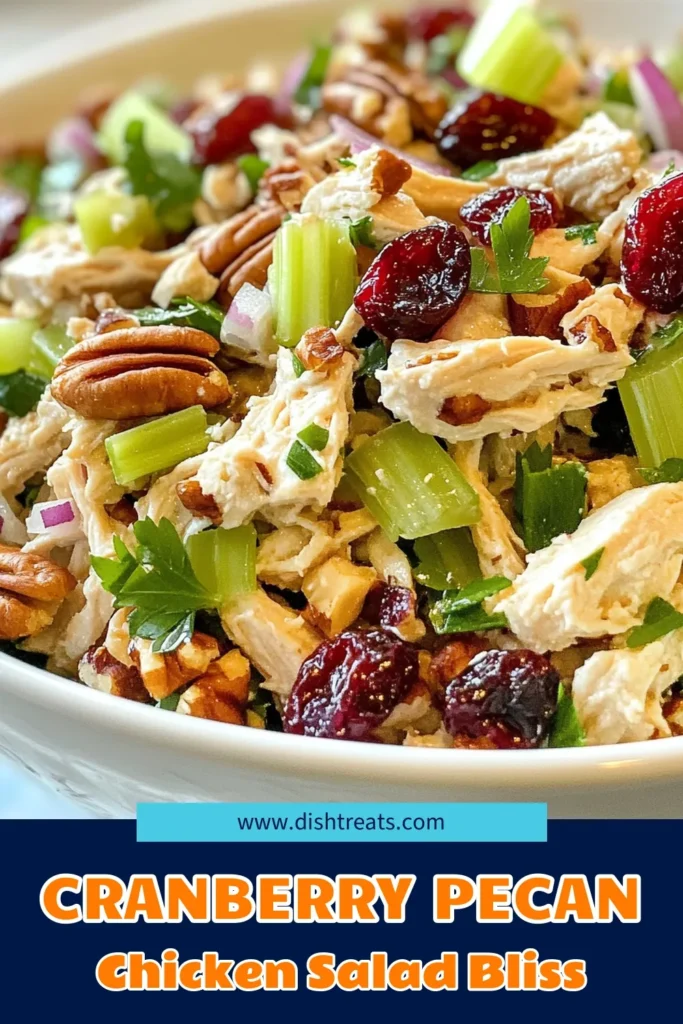
Looking for a fresh and tasty dish that’s easy to make? My Cranberry Pecan Chicken Salad is the perfect answer! This recipe blends juicy chicken, sweet cranberries, and crunchy pecans for a flavor explosion. Whether you want a quick lunch or a side dish, this salad ticks all the boxes. Ready to delight your taste buds? Let’s dive into the ingredients and make something delicious!
Why I Love This Recipe
- Delicious Flavor Combination: The sweet and tart cranberries paired with the crunchy pecans create a delightful contrast that elevates the chicken salad to a new level.
- Healthy Ingredients: This salad is packed with protein from the chicken and healthy fats from the pecans, making it a nutritious option for any meal.
- Easy to Prepare: With just a few simple steps, you can whip up this salad in no time, perfect for a quick lunch or dinner.
- Versatile Serving Options: Whether served on a bed of greens, in a sandwich, or on its own, this chicken salad can adapt to any dining situation.
Ingredients
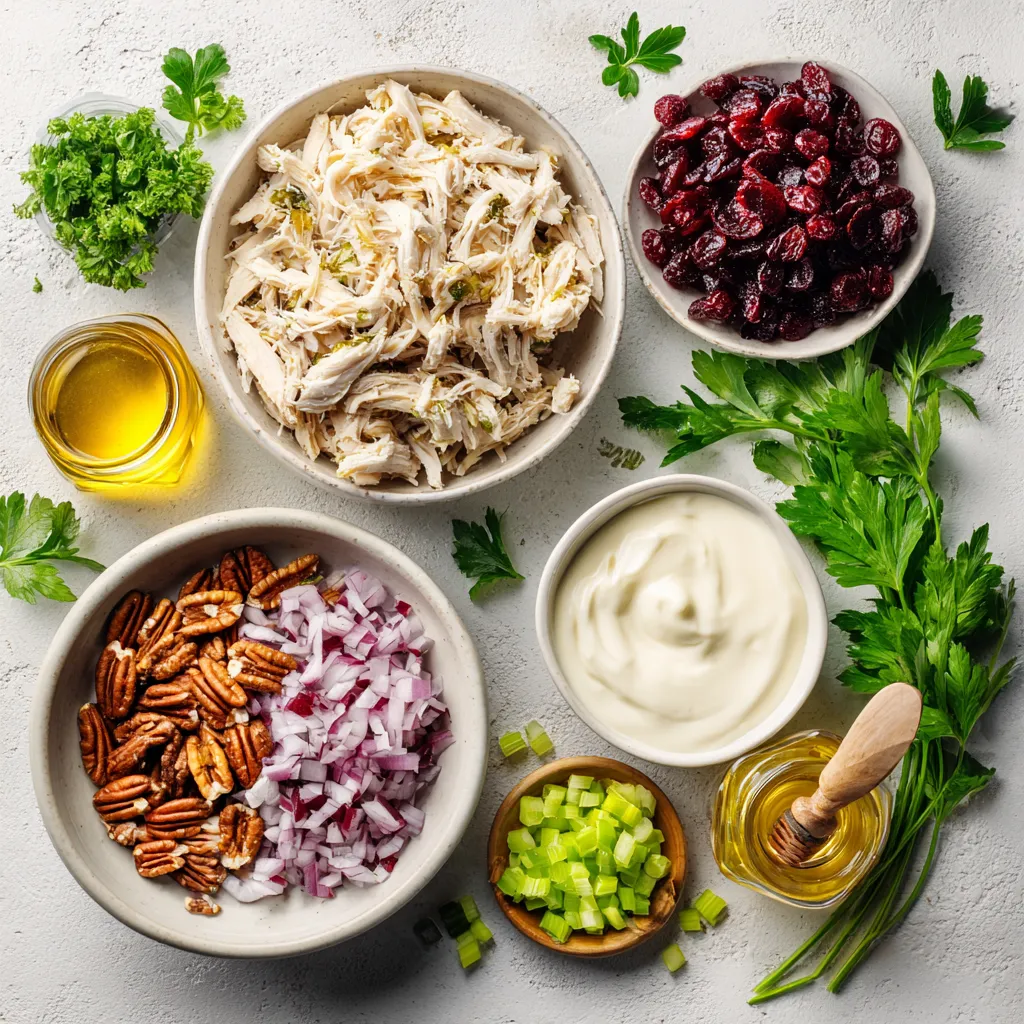
Complete List of Ingredients
- 2 cups cooked chicken breast, shredded or cubed
- 1/2 cup dried cranberries
- 1/2 cup pecans, coarsely chopped
- 1/4 cup celery, finely chopped
- 1/4 cup red onion, finely diced
- 3/4 cup plain Greek yogurt (or mayonnaise)
- 1 tablespoon Dijon mustard
- 1 tablespoon honey
- Salt and freshly ground black pepper
- Fresh parsley for garnish (optional)
To start, gather all your ingredients. I recommend using cooked chicken breast. You can shred it or cube it, based on your taste. Next, grab dried cranberries. They add a sweet twist. Then, use coarsely chopped pecans for that crunch. Celery brings in a nice crisp texture, and red onion adds a mild bite.
For the dressing, plain Greek yogurt works well. If you prefer it creamier, use mayonnaise instead. Dijon mustard gives it a tangy kick, while honey adds sweetness. Don’t forget salt and black pepper for flavor. Lastly, fresh parsley makes a lovely garnish, but it’s optional.
This mix of flavors and textures makes the salad fresh and satisfying.
Step-by-Step Instructions
Preparation Steps
- Mixing the Chicken and Vegetables
Start by grabbing a big bowl. Add 2 cups of cooked chicken. You can shred or cube it. Next, toss in 1/2 cup of dried cranberries. Follow that with 1/2 cup of chopped pecans. Then, add 1/4 cup of finely chopped celery and 1/4 cup of diced red onion. Mix everything well using a spatula. Make sure the chicken and veggies are evenly spread.
- Preparing the Dressing
In a smaller bowl, whisk together 3/4 cup of plain Greek yogurt. You can swap it for mayonnaise if you want creaminess. Add 1 tablespoon of Dijon mustard and 1 tablespoon of honey. Season the mixture with salt and pepper. Keep whisking until it’s smooth and blended.
- Combining the Chicken Mixture and Dressing
Drizzle the dressing over the chicken mix. Use the spatula to fold the chicken and dressing together. This step is important! Ensure all ingredients get coated. Taste it and add more salt or pepper if needed.
- Chilling and Serving the Salad
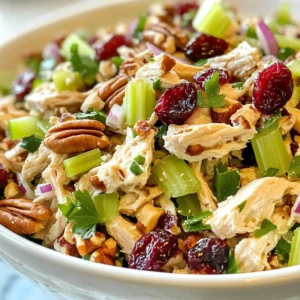
Cover the bowl with plastic wrap or a lid. Put it in the fridge for at least 30 minutes. This waiting time helps the flavors mix. When you’re ready to serve, gently toss the salad again. If you like, add some chopped parsley on top for color. Serve on mixed greens or in bowls for a nice touch.
Tips & Tricks
Perfecting Your Chicken Salad
Choosing the Right Chicken
Start with cooked chicken breast. You can use leftover chicken or rotisserie chicken. Shredding or cubing the chicken works great. The texture helps mix well with other ingredients.
Adjusting the Dressing Consistency
I prefer plain Greek yogurt for a healthy twist. If you want it creamier, add mayonnaise instead. Adjust the amount to your taste. If the dressing feels too thick, add a splash of water or lemon juice. This keeps it light and fresh.
Flavor Enhancements: Herbs and Spices
Herbs can elevate your salad. Fresh parsley adds color and taste. You might try dill or tarragon for a different flavor profile. A pinch of garlic powder or paprika can add warmth. Experiment with spices to find what you love!
Pro Tips
- Use Fresh Chicken: For the best flavor and texture, use freshly cooked chicken breast instead of pre-packaged or canned chicken.
- Customize Your Nuts: Feel free to substitute pecans with walnuts or almonds for a different flavor profile.
- Add a Zesty Twist: Incorporate a splash of lemon juice or apple cider vinegar to brighten the flavors of the salad.
- Make Ahead: This salad can be made a day in advance, allowing the flavors to deepen and develop for a delicious meal prep option.
Variations
Alternative Ingredients
- Substituting Greek Yogurt for Mayonnaise
You can swap Greek yogurt for mayonnaise. This change cuts fat and adds protein. Greek yogurt has a tangy taste that brightens the salad. It also keeps the dish creamy and delicious.
- Adding Fruits and Vegetables
You can mix in other fruits and veggies for more flavor. Chopped apples or grapes add sweetness. Bell peppers give a nice crunch. You can also try adding shredded carrots for color and texture.
- Nut-Free Options
If you need a nut-free version, leave out the pecans. You can replace them with sunflower seeds for crunch. This keeps the texture enjoyable while making it safe for those with nut allergies.
Feel free to play around with these options. Each variation makes this salad unique and tasty!
Storage Info
Storing Leftovers
Best Practices for Refrigeration
To keep your cranberry pecan chicken salad fresh, store it in an airtight container. This helps lock in flavor and keep out air. Make sure the salad is cool before sealing. Place it in the fridge right away. It will stay good for about 3 to 4 days.
Freezing Instructions
You can freeze this salad, but it may change the texture. For best results, freeze only the chicken part. Place it in a freezer-safe bag. Squeeze out any air and seal it well. Use it within 2 to 3 months for optimal taste. When ready to eat, thaw it in the fridge overnight.
Shelf Life and Signs of Spoilage
Check for spoilage before eating. Look for off smells or changes in color. If you see any mold or weird textures, it’s best to toss the salad. The dressing can separate after a few days, but a quick stir usually fixes it. Always trust your senses; they guide you well in the kitchen!
FAQs
Common Questions about Cranberry Pecan Chicken Salad
Can I use rotisserie chicken?
Yes, you can use rotisserie chicken. It saves time and adds great flavor. Just shred or chop it before mixing it with the other ingredients.
How long does the salad last in the fridge?
The salad lasts about 3 to 4 days in the fridge. Always store it in an airtight container to keep it fresh.
What can I serve with Cranberry Pecan Chicken Salad?
This salad pairs well with mixed greens, crackers, or bread. You can also enjoy it in a wrap or sandwich for a quick meal.
Can I make this salad ahead of time?
Yes, you can make it ahead. Just keep it in the fridge for at least 30 minutes before serving. The flavors will blend nicely.
Is this salad gluten-free?
Yes, this salad is gluten-free. Just check the labels on your ingredients to be sure they meet your needs.
This blog post covered all you need for a delicious Cranberry Pecan Chicken Salad. We started with the essential ingredients and moved to step-by-step instructions. You learned tips for perfecting your salad, explored variations, and found helpful storage info.
Remember, you can easily adjust the recipe for your taste. Enjoy this tasty dish at your next mea
Cranberry Pecan Chicken Salad
Ingredients
- 2 cups cooked chicken breast, shredded or cubed
- 0.5 cup dried cranberries
- 0.5 cup pecans, coarsely chopped
- 0.25 cup celery, finely chopped
- 0.25 cup red onion, finely diced
- 0.75 cup plain Greek yogurt (or mayonnaise for a creamier texture)
- 1 tablespoon Dijon mustard
- 1 tablespoon honey
- to taste Salt and freshly ground black pepper
- to taste Fresh parsley, chopped (for garnish, optional)
Instructions
- In a spacious mixing bowl, combine the shredded or cubed chicken with the dried cranberries, chopped pecans, finely chopped celery, and diced red onion. Use a spatula or wooden spoon to mix thoroughly, ensuring the ingredients are well distributed.
- In a separate, smaller bowl, whisk together the plain Greek yogurt (or mayonnaise), Dijon mustard, honey, and a generous pinch of salt and pepper. Mix until the dressing is smooth and completely blended.
- Drizzle the dressing over the chicken mixture. Gently fold the ingredients together with a spatula, ensuring that everything is evenly coated in the dressing. Taste and adjust the seasoning with more salt and pepper, if necessary.
- Cover the mixing bowl securely with plastic wrap or a lid. Refrigerate for a minimum of 30 minutes, allowing the flavors to meld and the salad to chill.
- Just before serving, give the salad another gentle toss to redistribute the dressing. If desired, sprinkle with freshly chopped parsley for an added burst of color and flavor.
![To make this tasty dish, gather these simple ingredients: - 1 pound Brussels sprouts, trimmed and halved - 3 tablespoons extra virgin olive oil - 1/4 cup pure maple syrup - 2 tablespoons balsamic vinegar - 1 teaspoon Dijon mustard - 1/2 teaspoon fine sea salt - 1/4 teaspoon freshly ground black pepper - 1/4 cup pecans, roughly chopped for added crunch - 1/4 cup dried cranberries for a touch of sweetness - Fresh thyme leaves for an aromatic garnish (optional) You can easily adjust ingredient amounts based on what you need. Here are some quick conversions: - If you want to make more, use 2 pounds of sprouts and double the glaze. - For less, cut the amounts in half. This still keeps the taste great. - In a pinch, you can swap the pecans for walnuts or almonds. This dish not only tastes good but is also good for you. Here’s a quick look at what’s inside: - Calories: About 200 per serving - Fat: 12 grams (mostly healthy fats from olive oil and nuts) - Carbohydrates: 24 grams (includes natural sugars from maple syrup) - Fiber: 5 grams (great for digestion from Brussels sprouts) - Protein: 3 grams (from nuts and sprouts) This breakdown helps you see the benefits of each ingredient. Enjoy making this dish with fresh, seasonal produce for the best flavor and health benefits. For the complete recipe, check out the Full Recipe. Start by preheating your oven to 400°F (200°C). This step is key for getting perfect crispness. While the oven warms up, clear your kitchen counter. Gather all your tools and ingredients. Having everything ready makes cooking much easier. Take 1 pound of Brussels sprouts. Trim off the ends and cut them in half. Place the halved sprouts in a large mixing bowl. Add 3 tablespoons of extra virgin olive oil and 1/2 teaspoon of fine sea salt. Sprinkle in 1/4 teaspoon of freshly ground black pepper. Toss the sprouts until they are well coated. This ensures each sprout gets flavor. Spread the seasoned Brussels sprouts on a baking sheet. Make sure the cut sides face down. This helps them brown nicely. Place the baking sheet in your preheated oven. Roast for 20-25 minutes. They should be crispy and golden. While they roast, make the maple glaze. In a small saucepan, mix 1/4 cup of pure maple syrup, 2 tablespoons of balsamic vinegar, and 1 teaspoon of Dijon mustard. Heat over medium heat but do not let it boil. Once the sprouts are ready, drizzle the glaze over them. Toss gently to coat. Return the glazed sprouts to the oven for 5 more minutes. This step caramelizes the glaze, making it rich and tasty. After that, take them out and add 1/4 cup of roughly chopped pecans and 1/4 cup of dried cranberries. These add crunch and sweetness. If you want, garnish with fresh thyme leaves for even more flavor. For the full details, check the Full Recipe. When you pick Brussels sprouts, look for bright green ones. They should feel firm and heavy in your hand. Avoid any that have yellow leaves or feel soft. The size matters too; smaller sprouts are sweeter and more tender. If you can, buy them on the stalk. They stay fresh longer that way. Caramelization makes Brussels sprouts sweet and tasty. To get it right, roast them cut-side down. This lets them get nice and brown. Make sure they have space on the baking sheet. If they are too close together, they will steam instead of roast. Use high heat, about 400°F, for best results. Check them halfway through and give them a stir for even cooking. One big mistake is overcooking the sprouts. They should be tender but still have a bit of crunch. Avoid using too much glaze; it can make them soggy. Always glaze right after roasting, then caramelize them for just a few minutes. This step adds flavor without losing the sprout's crispness. Lastly, don’t skip the nuts and cranberries; they add great texture and taste. For the full recipe, check the [Full Recipe]. {{image_4}} You can change the taste of maple glazed Brussels sprouts by adding different nuts or seeds. Try walnuts for a rich flavor or sunflower seeds for a crunch. Almonds also work well; they add a nice texture and nutty taste. Each option gives a new twist to your dish. Just sprinkle them on top after roasting for the best crunch and flavor. If you need to adjust for dietary needs, it’s easy. Use agave syrup instead of maple syrup for a vegan option. For a nut-free dish, skip the pecans and use pumpkin seeds. You can also swap balsamic vinegar with apple cider vinegar for a light zing. These swaps keep the dish tasty while meeting your needs. Brussels sprouts shine in fall and winter, but you can adapt them year-round. In spring, add fresh herbs like basil or parsley for brightness. In summer, pair with grilled corn for a sweet twist. You can also mix in seasonal veggies like carrots or sweet potatoes for color and taste. This way, your dish stays fresh and exciting no matter the season. For the full recipe, check out the Maple Glazed Brussels Sprouts Delight. After enjoying your maple glazed Brussels sprouts, store leftovers right. Place them in an airtight container. They will stay fresh for about three days in the fridge. Keep them away from strong-smelling foods. This helps maintain their flavor. When you reheat, aim to keep the sprouts crispy. Use your oven for the best results. Preheat it to 350°F (175°C). Spread the sprouts on a baking sheet. Heat them for about 10-15 minutes. This method helps keep them crunchy and flavorful. You can also microwave them for quick reheating, but they may not stay as crispy. If you want to enjoy these sprouts later, freezing works too. First, let them cool completely. Spread them on a baking sheet in a single layer. Freeze until solid, then transfer to a zip-top bag. They can last up to three months in the freezer. When ready to eat, thaw them overnight in the fridge. Reheat using the oven for the best taste. Enjoy your tasty treat again! Yes, you can prepare these Brussels sprouts ahead of time. After roasting them, let them cool. Store them in an airtight container in the fridge. They stay fresh for up to three days. When you're ready to serve, just reheat them in the oven. This keeps them crispy and tasty. These Brussels sprouts pair well with many dishes. Serve them alongside roasted chicken or grilled salmon for a complete meal. They also shine as a side dish for holiday dinners. You can even enjoy them with a grain salad or pasta for a light lunch. The sweet glaze adds a nice touch to any plate. You can easily change the sweetness of the glaze. If you want it sweeter, add more maple syrup. Start with an extra tablespoon and taste as you go. For a less sweet glaze, reduce the maple syrup. You can add more balsamic vinegar to balance the flavor. Adjust it to match your taste! We explored how to make Maple Glazed Brussels Sprouts from start to finish. You learned about ingredients, cooking steps, and storage tips. I shared helpful tricks to avoid mistakes and ensure a tasty outcome. You can now customize your dish with variations and serve it with confidence. Remember, fresh ingredients and careful roasting lead to the best flavors. Enjoy making this dish and impress your family and friends. With practice, your skills will grow. Happy cooking!](https://dishtreats.com/wp-content/uploads/2025/07/6c550e47-e99c-4554-a6d4-422f3e5f831a-768x768.webp)
![- 2 cups cooked chicken, shredded - 1 can (10 oz) red enchilada sauce - 1 can (15 oz) black beans, rinsed and drained - 1 cup corn kernels (fresh, frozen, or canned) - 1 small onion, finely chopped - 2 cloves garlic, minced - 2 cups shredded Mexican cheese blend - 8 small corn tortillas, cut into quarters - 1 teaspoon ground cumin - 1 teaspoon chili powder - ½ teaspoon salt - ¼ teaspoon black pepper - 1 cup sour cream (for serving) - Fresh cilantro, chopped (for garnish) When I make Chicken Enchilada Casserole, I love using fresh, simple ingredients. Each item adds flavor and texture. You can use rotisserie chicken for a quick option. It saves time and keeps the dish tasty. The red enchilada sauce gives it that signature kick. I prefer black beans for added protein. They blend well with the other flavors. Corn adds sweetness and a nice crunch. I often choose fresh corn when it's in season, but frozen works great too. Onions and garlic bring an aromatic base. They make the kitchen smell amazing while cooking. The cheese is essential. I like a Mexican cheese blend because it melts beautifully. Corn tortillas are the heart of this dish, creating layers of goodness. The spices, like cumin and chili powder, enhance the flavors without overwhelming them. Finally, a dollop of sour cream and fresh cilantro on top makes it perfect. This combination of ingredients creates a hearty meal your family will love. For the complete recipe, check the Full Recipe section. 1. Preheat the oven to 350°F (175°C). This helps cook the casserole just right. 2. In a large skillet, heat a little oil over medium heat. Add the chopped onion. Sauté for 3-4 minutes. Wait until the onion turns soft and clear. 3. Next, add minced garlic to the skillet. Cook for 1 more minute. This will fill your kitchen with a lovely smell. 4. Stir in the shredded chicken and red enchilada sauce. Add the rinsed black beans, corn, cumin, chili powder, salt, and pepper. Mix well and cook for 5-7 minutes. Make sure everything is hot and well combined. 1. Grease a 9x13 inch baking dish with a little oil or butter. This prevents sticking. 2. Take half of the tortilla quarters and place them at the bottom of the dish. Overlap them slightly to cover the bottom. 3. Spoon half of the chicken mixture over the tortillas. Spread it out evenly. Then, sprinkle 1 cup of shredded cheese on top. 4. Repeat with the remaining tortilla quarters and chicken mixture. Top with the rest of the cheese for a cheesy crust. 1. Cover the casserole tightly with aluminum foil. Bake for 20 minutes. This allows the flavors to mix well. 2. After 20 minutes, remove the foil. Bake uncovered for an extra 10-15 minutes. Wait until the cheese is bubbly and golden. 3. When done, take the casserole out of the oven. Let it cool for about 5 minutes before serving. This makes it easier to cut and serve. Enjoy this savory chicken enchilada casserole with your family! For the full recipe, check out the details above. - Use rotisserie chicken for time-saving: Rotisserie chicken is great for busy days. It saves time and adds flavor. Just shred it and mix it into your casserole. You get tasty results without a lot of work. - How to properly layer for even cooking: Start with tortilla quarters at the bottom. This helps soak up the sauce and keeps the bottom from getting soggy. Spread the chicken mixture evenly over the tortillas. Repeat this process. Finish with cheese on top for a bubbly crust. - Adjusting spice levels: If you like heat, add more chili powder or some diced jalapeños. For milder flavors, reduce the chili powder. Taste as you go to find your perfect balance. - Additional toppings and garnishes ideas: Try adding sliced avocado, diced tomatoes, or pickled red onions. These bright toppings add color and flavor. A sprinkle of fresh cilantro also makes your dish pop! - Best side dishes to serve with casserole: Serve with a simple green salad or Mexican rice. These sides add freshness and balance the rich casserole. You can also offer tortilla chips for crunch. - How to present for a family meal: Cut the casserole into squares for easy serving. Use a large spoon to add a dollop of sour cream on top. Finish with a sprinkle of cilantro for a beautiful presentation. Enjoy this meal around the table! {{image_4}} You can easily swap ingredients in your Chicken Enchilada Casserole. If you want a different meat, use turkey or beef instead of chicken. Both options taste great and keep the dish hearty. For a vegetarian version, try using black beans and colorful veggies like bell peppers or zucchini. These swaps keep the casserole flavorful and filling. If you need gluten-free options, use corn tortillas instead of flour ones. They work perfectly in this casserole and add a nice flavor. For those who want a dairy-free meal, look for plant-based cheese and sour cream. These substitutes will still give you the creamy texture you love without the dairy. To change the flavor profile, add some spice! For a Mexican-inspired twist, mix in jalapeños or your favorite salsa. This will add a kick and extra layers of flavor. If you prefer a Southwestern style, try adding more spices like smoked paprika or cayenne pepper. This will give the casserole a warm, smoky taste that everyone will enjoy. For the full recipe, check out [Full Recipe]. Store leftover Chicken Enchilada Casserole in an airtight container. This keeps it fresh. Make sure it cools down before sealing. It lasts about 3-4 days in the fridge. If you notice any odd smell or color, it's best to toss it. You can freeze the casserole both before and after baking. If you freeze it before baking, wrap it tightly in plastic wrap. Bake it straight from the freezer. This usually takes about 45-60 minutes at 350°F. If you freeze it after baking, let it cool first. Cover it with foil or plastic wrap. To reheat, bake at 350°F for about 30 minutes, or until hot. You can make this casserole ahead for busy weeknights. Simply prepare it a day in advance and store it in the fridge. Portion it into individual servings for quick meals. This way, you can just grab and heat it when needed. It makes weeknight dinners simple and stress-free. Can I make Chicken Enchilada Casserole in advance? Yes, you can make this dish ahead of time. Prepare it up to the baking step. Cover it and store it in the fridge. When ready, bake it straight from the fridge. This saves time on busy nights. What can I substitute for black beans? You can use pinto beans, kidney beans, or chickpeas. Each option adds a unique flavor. Just rinse and drain them before adding. How do I reheat leftovers without drying out the dish? To reheat, cover the casserole with foil. Heat it in a 350°F oven for about 20 minutes. This keeps it moist and warm. You can also microwave individual portions with a damp paper towel. What size baking dish should I use? I recommend a 9x13 inch baking dish. This size holds all the layers well. It helps the casserole cook evenly. How do I know when the casserole is completely done? The casserole is done when the cheese is golden and bubbly. Insert a knife in the center; it should be hot. The layers should look set and not runny. Can I adjust the spice level of the casserole? Yes, you can make it spicier or milder. Add more chili powder for heat. For milder flavor, reduce the spices or choose mild enchilada sauce. What are the best toppings to add for extra flavor? You can add sliced jalapeños, diced avocado, or fresh lime juice. Chopped green onions and extra cilantro also give a nice touch. These toppings enhance the dish's taste and look. This Chicken Enchilada Casserole is easy and fun to make, with great flavors. You learned about ingredients, step-by-step instructions, and tips for better cooking. Don’t forget to try different variations, depending on your taste or needs. Storing leftovers is simple, making this dish great for meal prep. This recipe is perfect for family meals or gatherings. Enjoy the warmth and comfort it brings to your table. Now, grab your ingredients and start cooking!](https://dishtreats.com/wp-content/uploads/2025/07/f6c231a9-1b86-4c94-be4f-d7e13d8c3061-768x768.webp)