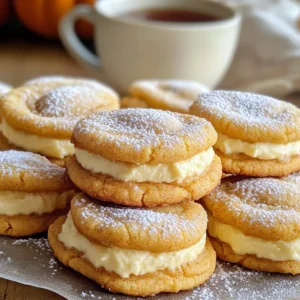
Pumpkin Spice Cheesecake Stuffed Cookies Delight

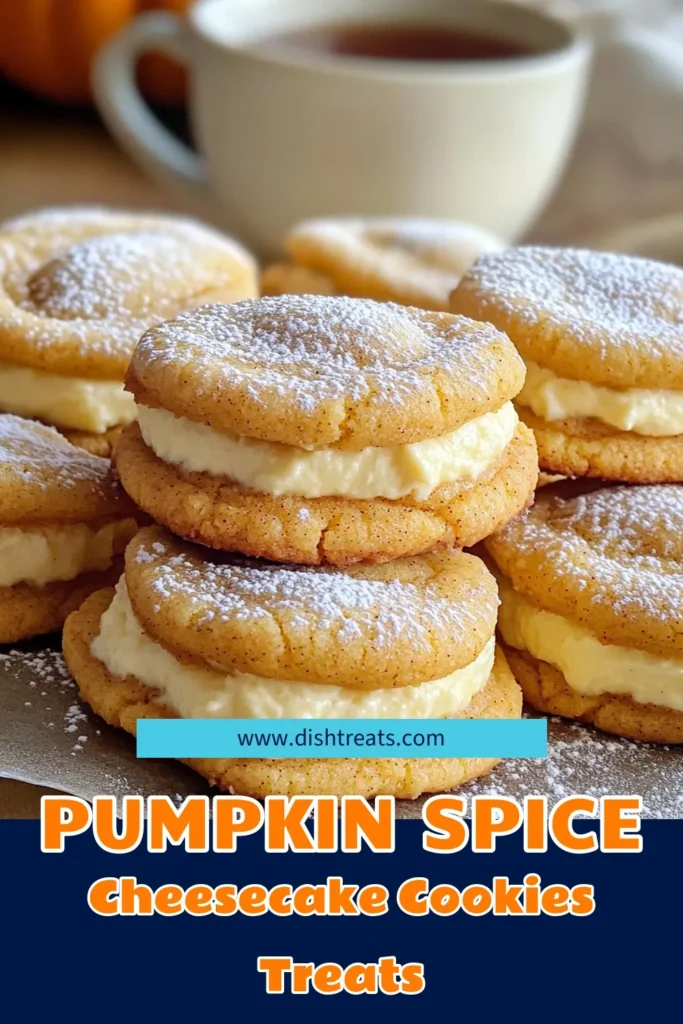
Get ready to indulge in the ultimate fall treat: Pumpkin Spice Cheesecake Stuffed Cookies! These cookies combine the rich flavors of pumpkin spice with a creamy cheesecake filling, creating a dessert that’s both comforting and delightful. In this post, I’ll share simple steps and tips to make these treats perfect for any occasion. Trust me, your taste buds will thank you once you take that first bite!
Ingredients
Essential Ingredients for Cookies
- 1 cup unsalted butter
- 1 cup packed brown sugar
- 1/2 cup granulated sugar
- 2 large eggs
- 1 teaspoon vanilla extract
Ingredients for Cheesecake Filling
- 1 cup pumpkin puree
- 8 ounces cream cheese
- 1/4 cup powdered sugar
- 1/2 teaspoon pumpkin spice
- 1/4 teaspoon vanilla extract
Dry Ingredients
- 3 cups all-purpose flour
- 1 teaspoon baking soda
- 1 teaspoon ground cinnamon
- 1 teaspoon ground nutmeg
- 1/2 teaspoon ground ginger
- 1/2 teaspoon salt
Each ingredient plays a role in making these cookies taste great. The butter gives a rich flavor and helps create a soft texture. Brown sugar adds moisture and depth, while granulated sugar balances the sweetness. The eggs help bind the dough and provide lift.
For the cheesecake filling, pumpkin puree brings seasonality and moisture. Cream cheese creates a smooth, tangy flavor that pairs perfectly with pumpkin. The powdered sugar sweetens the filling, while pumpkin spice gives that warm, cozy taste.
The dry ingredients mix the structure of the cookies. All-purpose flour provides the base, while baking soda helps them rise. Spices like cinnamon, nutmeg, and ginger add warmth and depth. Salt is key to enhancing all the flavors.
When you gather these ingredients, you set the stage for a delightful baking experience.
Step-by-Step Instructions
Preheat the Oven
First, set your oven to 350°F (175°C). This ensures that your cookies bake evenly. While the oven heats up, line two baking sheets with parchment paper. This helps to prevent the cookies from sticking.
Make the Cookie Dough
In a large bowl, cream together 1 cup of softened butter, 1 cup of packed brown sugar, and 1/2 cup of granulated sugar. Use an electric mixer for about 2-3 minutes. The mix should look light and fluffy. Next, beat in 2 large eggs, one at a time. Make sure each egg is mixed in fully before adding the next. Stir in 1 teaspoon of vanilla extract until it’s just combined.
Combine Dry Ingredients
In another bowl, whisk together 3 cups of all-purpose flour, 1 teaspoon of baking soda, 1 teaspoon of ground cinnamon, 1 teaspoon of ground nutmeg, 1/2 teaspoon of ground ginger, and 1/2 teaspoon of salt. Gradually add this dry mix into the wet ingredients. Stir gently until everything is blended into a smooth dough.
Prepare the Cheesecake Filling
In a separate bowl, beat together 8 ounces of softened cream cheese and 1/4 cup of powdered sugar. Then mix in 1 cup of pumpkin puree, 1/2 teaspoon of pumpkin spice, and 1/4 teaspoon of vanilla extract. Whisk until the mixture is creamy and free of lumps.
Assemble the Cookies
Take a tablespoon of cookie dough and flatten it into a disk. Spoon about a teaspoon of the cheesecake filling into the center of the disk. Carefully fold the edges over the filling. Pinch to seal it and roll it into a ball. Repeat this with the rest of the dough and filling.
Bake and Cool
Place the stuffed cookie balls on your prepared baking sheets. Space them about 2 inches apart. Bake in the oven for 12-15 minutes. The edges should look lightly golden, and the centers should be set. After baking, let the cookies cool on the baking sheets for 5 minutes. Then, move them to a wire rack to cool completely.
Tips & Tricks
Perfecting the Cookie Texture
To get the perfect cookie texture, start with soft butter. Softened butter mixes well with sugars. This helps create a fluffy base. Aim for a dough that feels smooth and slightly sticky but not too wet. If your dough is too dry, add a splash of milk. If it’s too wet, sprinkle in a little flour. Form the dough into balls gently. They should hold shape but not be hard.
Cream Cheese Filling Consistency
The cream cheese filling needs to be smooth. Start with softened cream cheese for easy mixing. Beat it well before adding other ingredients. Add pumpkin puree and powdered sugar gradually. Blend until there are no lumps. This ensures a creamy texture. If your filling is too thick, mix in a splash of milk. If it’s too runny, add a bit more powdered sugar.
Presentation Ideas
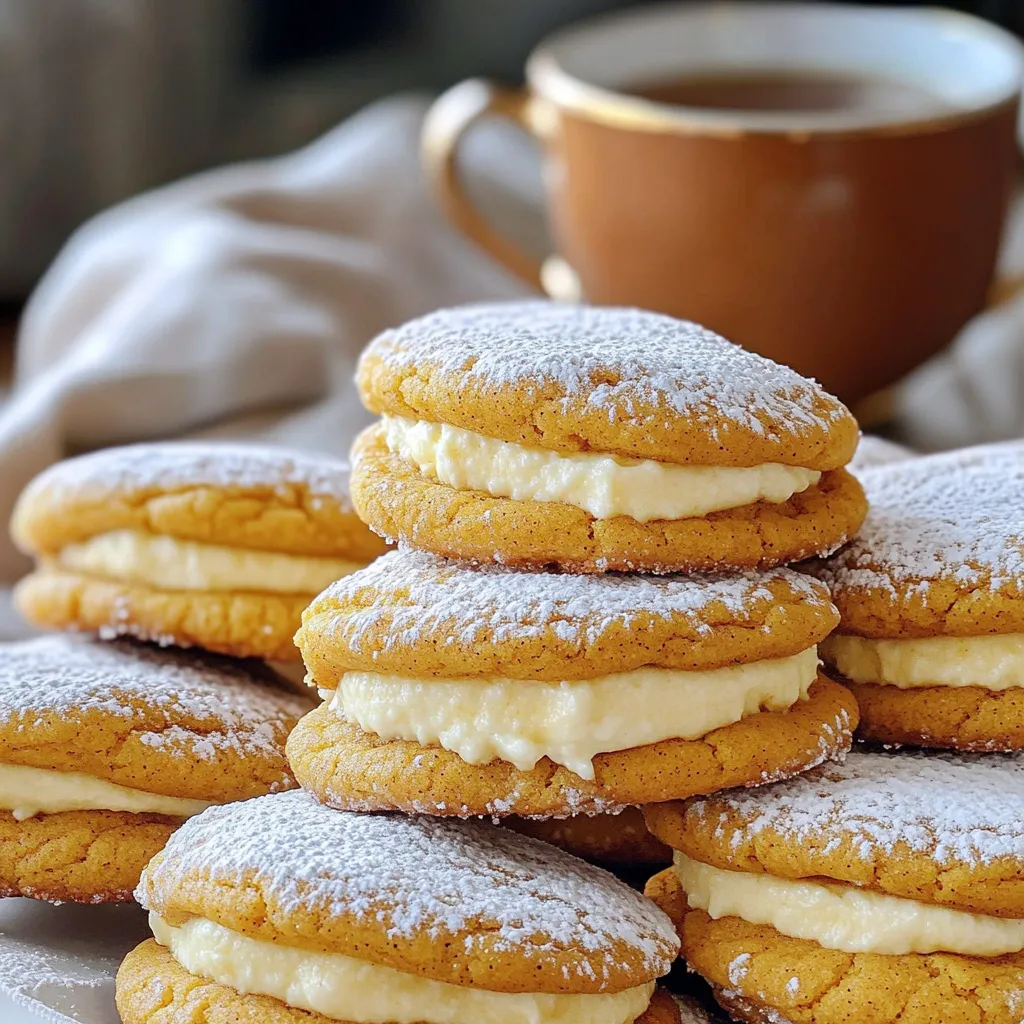
For a lovely presentation, dust the baked cookies with powdered sugar. This gives a nice contrast against the orange. Stack them on a pretty platter to make them look inviting. Serve with warm spiced tea or coffee. This adds a cozy touch that matches the flavors. You can also add a cinnamon stick as a garnish.
Variations
Alternative Fillings
You can swap the cream cheese filling with different flavors. Try using chocolate cream cheese for a rich twist. You can also experiment with vanilla or caramel cream cheese. Each option gives a new taste to the cookie. Mix and match to find your favorite.
Gluten-Free Option
If you need a gluten-free treat, use gluten-free flour. Many brands offer blends that work well in baking. Just make sure to check the package for the right measurements. This swap keeps the cookies tasty and safe for everyone.
Seasonal Additions
You can make the cookies even more fun with seasonal extras. Adding chocolate chips gives a sweet surprise. Nuts, like pecans or walnuts, add a nice crunch. Think about adding dried cranberries for a fruity touch. Each addition turns these cookies into a new delight!
Storage Info
Best Storage Practices
To keep your pumpkin spice cheesecake stuffed cookies fresh, store them in an airtight container. This helps keep moisture inside while keeping cookies soft. Place parchment paper between layers to avoid sticking. If you want to keep flavors strong, add a slice of bread in the container. The bread will absorb extra moisture and help keep the cookies soft.
Freezing Guidelines
You can freeze these cookies for longer storage. First, let the cookies cool completely. Then, place them in a single layer on a baking sheet. Freeze until firm, about 1-2 hours. After that, transfer the cookies to a freezer-safe bag or container. Make sure to label the bag with the date. You can freeze them for up to three months without losing flavor.
Reheating Instructions
To enjoy warm cookies, reheat them in the oven. Preheat the oven to 350°F (175°C). Place the cookies on a baking sheet and warm them for about 5-10 minutes. You can also use a microwave. Heat each cookie for about 10-15 seconds. This warms the filling and makes them soft again. Enjoy your cookies fresh and warm!
FAQs
Can I use pumpkin pie filling instead of puree?
No, you should not use pumpkin pie filling. Pumpkin pie filling has added spices and sugar. This can change the taste and texture of your cookies. Stick to pure pumpkin puree for the best results. It’s thick and has no added flavors. This gives your cookies a rich, pure pumpkin taste.
How do I prevent cookies from spreading too much?
To keep your cookies from spreading, chill the dough. After you make the dough, wrap it in plastic wrap. Place it in the fridge for at least 30 minutes. Chilled dough holds its shape better. Also, make sure your baking sheets are not too warm. This helps the cookies stay thick while baking.
What can I do if my dough is too sticky?
If your dough is sticky, add more flour. Start with a tablespoon at a time. Mix it in until the dough is easier to handle. You can also chill the dough for a while. This firms it up and makes it less sticky. Always remember to keep your hands floured when shaping the cookies.
You learned how to make delicious pumpkin cheesecake cookies. We covered all the essential ingredients and the steps needed for the best results. Remember to preheat your oven and mix your ingredients well. Don’t forget the tips for perfect texture and presentation! You can also try variations like gluten-free options or new fillings. With these ideas, you’ll create delightful treats that impress. Enjoy baking these cookies and sharing them with friends!