Pumpkin Cheesecake Smoothie Bowl Delightfully Creamy
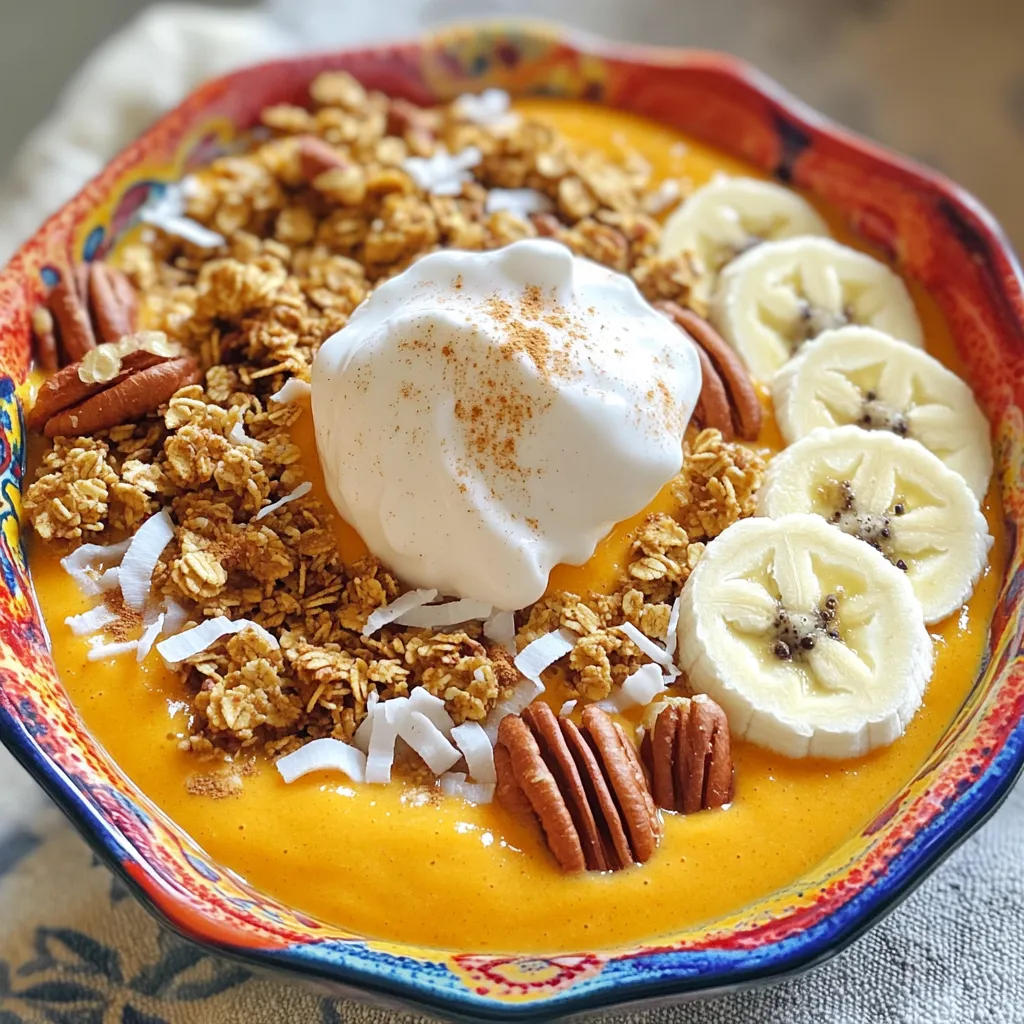
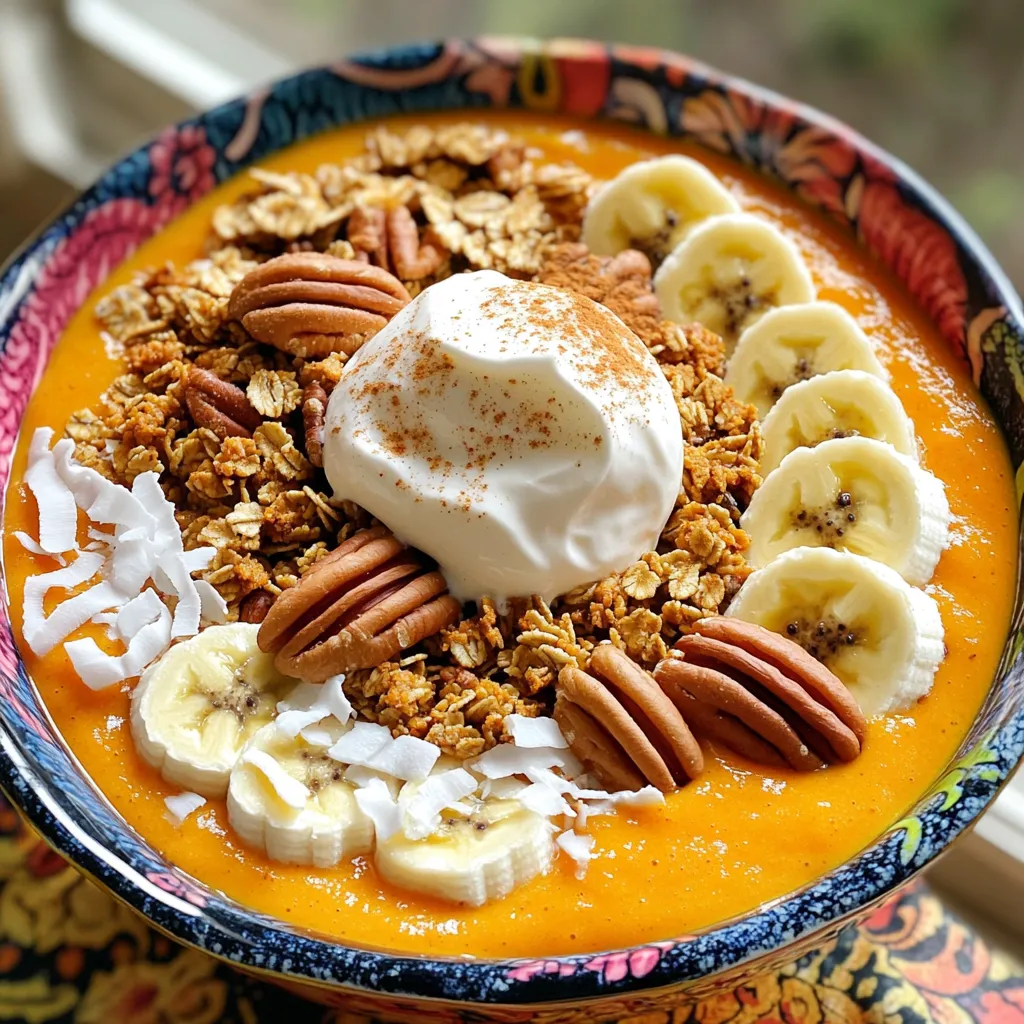
Fall flavors meet creamy goodness in this Pumpkin Cheesecake Smoothie Bowl. Packed with pumpkin puree, frozen banana, and Greek yogurt, this bowl is both nutritious and delicious. It’s the perfect breakfast treat that feels like dessert! Ready to whip up something delightful? Let’s explore the simple steps and tasty toppings to make your smoothie bowl a seasonal favorite. Dive in and enjoy every spoonful!
Ingredients
List of Main Ingredients
- 1 cup pumpkin puree
- 1 frozen banana
- 1/2 cup Greek yogurt
- 1/2 cup milk (your choice of dairy or non-dairy alternative)
- 2 tablespoons maple syrup (feel free to adjust for sweetness)
- 1 teaspoon vanilla extract
- 1 teaspoon pumpkin pie spice
- 1/4 teaspoon ground cinnamon
This pumpkin cheesecake smoothie bowl uses simple, wholesome ingredients. Pumpkin puree adds creaminess and flavor. The frozen banana gives the bowl a nice chill and sweetness. Greek yogurt boosts the protein and makes it rich. Milk, whether dairy or non-dairy, creates the perfect texture.
Maple syrup sweetens the blend. You can adjust the amount based on your taste. Vanilla extract adds a lovely aroma. Pumpkin pie spice and ground cinnamon bring warmth and depth to every bite. The mix of these ingredients creates a delightful and cozy flavor.
Optional Toppings
- Granola
- Chopped pecans
- Sliced fresh bananas
- Coconut flakes
- Whipped cream
Toppings make this smoothie bowl even more fun! Granola adds crunch and texture. Chopped pecans give a nice nutty flavor. Sliced bananas bring freshness and extra sweetness. Coconut flakes add a tropical touch. A dollop of whipped cream finishes it off, making it feel like a treat. You can choose your favorites or mix and match for variety.
Step-by-Step Instructions
Preparation Steps
- In a blender, combine these ingredients:
- 1 cup pumpkin puree
- 1 frozen banana
- 1/2 cup Greek yogurt
- 1/2 cup milk (your choice)
- 2 tablespoons maple syrup
- 1 teaspoon vanilla extract
- 1 teaspoon pumpkin pie spice
- 1/4 teaspoon ground cinnamon
Blend them all together until smooth and creamy. If it is too thick, add more milk to get the right texture.
Serving the Smoothie Bowl
Pour your blended mixture into a bowl. To make it look nice, use a spoon to create swirls on top.
Adding Toppings
Now comes the fun part! Top your smoothie bowl with:
- A generous handful of granola
- Chopped pecans
- Sliced fresh bananas
- Coconut flakes
Finish it all off with a delightful dollop of whipped cream. Enjoy the beautiful colors and flavors!
Tips & Tricks
Achieving the Perfect Consistency
To make your smoothie bowl creamy, you need the right mix. If it feels thick, add a splash of milk. This helps you reach a smooth texture. I often use dairy or almond milk for the best results.
Frozen bananas are magic here. They add creaminess and chill without ice. Just peel, slice, and freeze the banana ahead of time. This will make your smoothie bowl super delightful.
Presentation Ideas
First, serve your smoothie in a bright bowl. It makes the colors pop! Use a spoon to create a swirl on top. This adds a nice touch and makes it look fancy.
For garnishing, sprinkle pumpkin pie spice on top. It gives an extra flavor kick. You can also arrange toppings like granola and nuts in fun patterns. This makes every bite exciting.
Customization Options
You can adjust the sweetness to fit your taste. If you want it sweeter, add more maple syrup. Start with two tablespoons, then taste and add more if needed.
For toppings, feel free to mix things up. Try fresh berries for a fruity twist or swap pecans for almonds. You can even add a scoop of nut butter for extra richness. This keeps your smoothie bowl fresh and fun!
Variations
Flavor Combinations
You can make your pumpkin cheesecake smoothie bowl even better! Try adding chocolate or peanut butter. A spoonful of cocoa powder gives a rich taste. It blends well with the pumpkin. Peanut butter adds creaminess and a nutty flavor. It pairs nicely with the sweet notes.
You can also mix in other fruits. Consider using apples or pears for a fresh twist. They add a bright taste that complements pumpkin. You can even use berries for a tart kick. These fruits add color and texture to your bowl.
Dietary Adjustments
If you want a vegan option, swap Greek yogurt for coconut yogurt. Use almond, soy, or oat milk instead of dairy milk. These changes keep the bowl creamy and delicious.
For a low-sugar version, reduce or skip the maple syrup. Instead, try sweetening with ripe bananas or a few dates. They add natural sweetness without extra sugar.
Seasonal Twists
You can make your smoothie bowl festive for the holidays! Add cinnamon, nutmeg, or even a splash of eggnog. These flavors bring warmth and cheer to your dish.
In summer, switch out pumpkin for fresh peaches or mangoes. This change keeps things light and refreshing. You can enjoy a seasonal twist while keeping the creamy texture.
Storage Info
Refrigeration Guidelines
To keep your pumpkin cheesecake smoothie bowl fresh, store any leftovers in an airtight container. This helps prevent spoilage. You can refrigerate it for up to two days. If you notice any changes in smell or color, it’s best to toss it.
Freezing the Smoothie Bowl
If you want to save some for later, freezing works well. Pour the smoothie into freezer-safe containers. Leave some space at the top for expansion. You can freeze it for up to a month. When ready to enjoy, let it thaw overnight in the fridge. If you’re in a hurry, place it in warm water for a quick thaw.
Meal Prep Ideas
Make mornings easier by prepping ingredients in advance. You can mix the dry ingredients and store them in a jar. Slice the banana and keep it in the fridge. When you want a smoothie bowl, just blend everything together. This saves time and gets you a tasty breakfast fast!
FAQs
What is a Pumpkin Cheesecake Smoothie Bowl?
A Pumpkin Cheesecake Smoothie Bowl is a tasty treat. It blends pumpkin puree, banana, and yogurt into a creamy mix. The flavors are warm and sweet, thanks to maple syrup and pumpkin pie spice. This bowl feels like dessert but is healthy enough for breakfast. The toppings, like granola and pecans, add a nice crunch. Each spoonful tastes like fall, making it perfect for any pumpkin lover.
How can I make this smoothie bowl dairy-free?
You can easily make this smoothie bowl without dairy. Instead of Greek yogurt, use coconut yogurt or almond yogurt. For milk, try almond milk, oat milk, or coconut milk. These options keep the taste rich and creamy without dairy. You won’t miss the dairy at all!
Can I use fresh pumpkin instead of pureed?
Yes, you can use fresh pumpkin. First, cook the pumpkin until it’s soft. Cut it into pieces and steam or roast it. After cooking, scoop out the flesh and blend it until smooth. Fresh pumpkin may taste a bit different but will still be great. It adds a nice, fresh flavor to your smoothie bowl. Just make sure it’s very soft for the best texture.
This blog post covered the delicious pumpkin cheesecake smoothie bowl, from key ingredients to serving tips. You learned how to craft a smooth, tasty base and add fun toppings. Remember, you can customize it with different flavors or dietary adjustments. Enjoy this healthy treat any time of year. Prepare a batch for quick breakfasts or snacks. It’s a simple way to enjoy fall flavors all summer long. Happy blending!

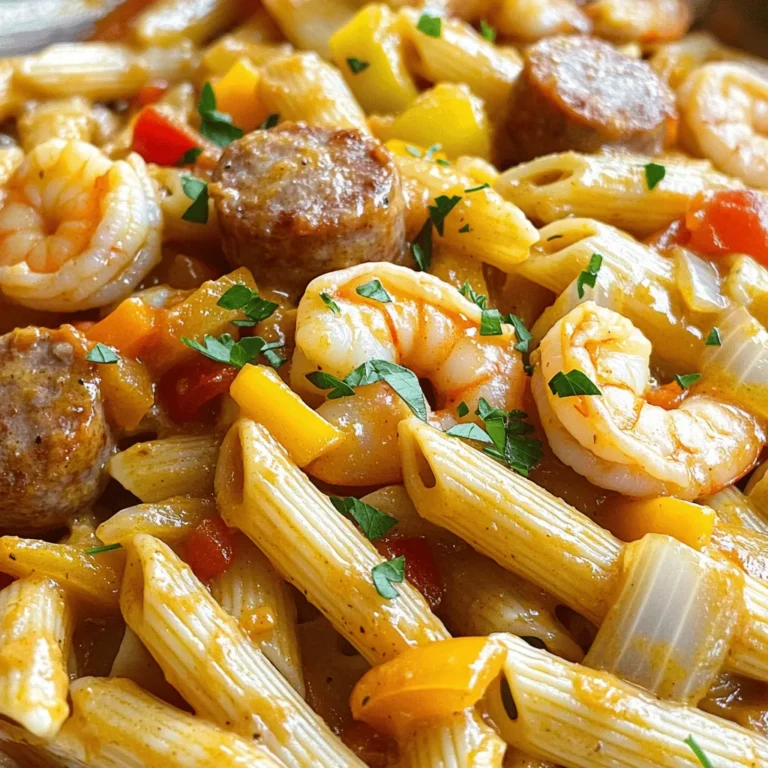
![- 12 oz (340g) penne pasta - 1 lb (450g) smoked sausage, sliced into rounds - 1 bell pepper, diced (choose your favorite color) - 1 medium onion, finely chopped - 3 cloves garlic, minced - 1 tablespoon Cajun seasoning - 1 teaspoon smoked paprika - 1/2 teaspoon cayenne pepper (adjust to your spice preference) - 2 cups low-sodium chicken broth - 1 cup heavy cream - Fresh parsley, chopped (for garnish) - Salt and freshly ground black pepper to taste When I make One Pot Cajun Sausage Pasta, I love how simple the ingredients are. You start with penne pasta, which cooks beautifully in the same pot. The smoked sausage gives it a rich flavor. Fresh veggies like bell pepper, onion, and garlic add color and crunch. For spices, Cajun seasoning gives that classic kick. A little smoked paprika adds depth, and cayenne pepper lets you control the heat. You can adjust it based on your taste. The chicken broth is key; it helps cook the pasta and keeps everything moist. When you add heavy cream, it makes the dish creamy and rich. Don’t forget the fresh parsley for a pop of color. A sprinkle of salt and pepper enhances all the flavors. You can find the full recipe with exact measurements and cooking steps. Enjoy making this easy and flavorful dish! 1. Heating the oil: Start by pouring two tablespoons of olive oil into a large pot. Heat it over medium heat until it shimmers. This takes about a minute. 2. Sautéing the sausage: Next, add one pound of sliced smoked sausage to the pot. Cook the sausage for about 4-5 minutes. Stir it until it turns brown and crispy. This adds great flavor. Then, remove the sausage from the pot and set it aside for later. 1. Cooking the bell pepper and onion: In the same pot, toss in one diced bell pepper and one finely chopped medium onion. Sauté these for about 3-4 minutes. You want them to soften and turn slightly translucent. 2. Adding garlic and spices: Now, add three minced garlic cloves. Cook for one more minute until it smells amazing. Then, stir in one tablespoon of Cajun seasoning, one teaspoon of smoked paprika, and half a teaspoon of cayenne pepper. Cook for another minute. This step brings out the flavors of the spices. 1. Combining ingredients in the pot: Carefully pour in two cups of low-sodium chicken broth. Use a wooden spoon to scrape any brown bits from the pot. Next, add 12 ounces of penne pasta and one can of undrained diced tomatoes. Mix everything well. 2. Simmering the mixture: Bring the mixture to a boil, then reduce the heat to low. Cover the pot and let it simmer for 12-15 minutes. Stir occasionally to keep the pasta from sticking. Cook until the pasta is tender and the liquid thickens. Now you can check the [Full Recipe] for additional details. To make sure your pasta does not stick, keep a close eye on the pot. Stir the pasta every few minutes while it cooks. This simple step prevents clumping and ensures even cooking. If you find your dish too thick, add a splash of chicken broth or water to loosen it up. For creaminess, adjust the amount of heavy cream to fit your taste. Start with one cup, then add more if you like it richer. Customizing the spice levels in your Cajun sausage pasta is easy. If you want more heat, add an extra pinch of cayenne pepper. You can also mix in some crushed red pepper flakes for a different kick. To add freshness, try throwing in herbs like thyme or oregano. These herbs bring depth to your dish and balance the spices well. Choosing the right pot is important for this dish. A large, deep pot works best since it holds all the ingredients and allows for easy stirring. I recommend using a heavy-bottomed pot to prevent burning. When sautéing, heat the oil until it shimmers, then add your sausage. This ensures a nice brown color and flavor. Always scrape the bottom of the pot to release any fond, which adds great taste to your sauce. {{image_4}} You can swap smoked sausage for different meats. Chicken or turkey sausage works well. They add less fat but keep great flavor. This dish still shines with these changes. For those with gluten issues, use gluten-free pasta. Options like brown rice pasta or chickpea pasta fit nicely. They change the texture but keep the taste. Want to change the spice? You can add more or less Cajun seasoning. If you like it mild, skip the cayenne pepper. For more heat, add a bit more. You can also add different vegetables. Spinach, zucchini, or mushrooms all mix well. They add color and nutrition, making the dish more exciting. Pair your pasta with sides for a well-rounded meal. A fresh salad adds crunch. Garlic bread brings warmth and comfort. For plating, serve in deep bowls. Garnish with fresh parsley for a pop of color. You can even sprinkle extra Cajun seasoning on top. This will enhance the flavors and make it look fancy. For the full recipe, check out One Pot Cajun Sausage Pasta. After you enjoy your One Pot Cajun Sausage Pasta, you may have leftovers. To store them, let the dish cool down first. Then, place it in an airtight container. This helps keep it fresh. You can keep it in the fridge for about 3 to 4 days. When you're ready to eat again, you can easily reheat it. Just place it in a pot over low heat, stirring often. You can also use the microwave. Heat it in short bursts, stirring in between, until it's warm. If you want to save the dish for longer, you can freeze it. First, let the pasta cool completely. Then, transfer it to a freezer-safe container. Make sure to leave some space at the top, as it may expand when frozen. You can freeze it for up to 3 months. To reheat from frozen, move it to the fridge overnight to thaw. Next, warm it in a pot or microwave until hot. You may need to add a splash of chicken broth or cream to keep it creamy. One Pot Cajun Sausage Pasta can last in the fridge for about 3 to 4 days. If you freeze it, aim to use it within 3 months for the best taste. Always check for signs of spoilage before eating. If you see any mold or if it smells off, it's best to throw it away. Remember, food safety is important for a delicious experience every time! Cajun seasoning is a blend of spices that gives dishes a bold flavor. It often includes paprika, garlic powder, onion powder, black pepper, cayenne pepper, and oregano. You can easily make it at home by mixing the following: - 1 tablespoon paprika - 1 teaspoon garlic powder - 1 teaspoon onion powder - 1 teaspoon black pepper - 1 teaspoon cayenne pepper - 1 teaspoon dried oregano - 1 teaspoon thyme Combine these in a bowl, and you have your own Cajun seasoning! This mix adds warmth and depth to your One Pot Cajun Sausage Pasta. Yes, you can easily make this dish vegetarian. Instead of sausage, you can use these options: - Plant-based sausage - Grilled mushrooms - Chopped tempeh These substitutes give a hearty texture. For protein, consider adding: - Chickpeas - Lentils - Tofu These choices keep the dish filling and nutritious while focusing on flavors. To amp up the heat in your pasta, you can adjust the spice levels. Here’s how: - Increase the cayenne pepper in the recipe. - Add crushed red pepper flakes while cooking. For more heat during cooking, try adding fresh chopped jalapeños or hot sauce. Just remember, start with a little and taste as you go! You want to enjoy the flavors without overwhelming your palate. This recipe is simple and delicious. We covered the best ingredients needed, such as penne pasta, smoked sausage, and fresh veggies. I shared tips for perfecting texture and flavor, plus ways to change things up. You can store leftovers easily and even freeze the dish for later. With this guide, cooking is quick and fun. So grab your ingredients and start creating a tasty meal today. Enjoy the process and make it your own!](https://dishtreats.com/wp-content/uploads/2025/06/1c4c8226-f553-4583-9158-57397e0bfaf8-768x768.webp)
