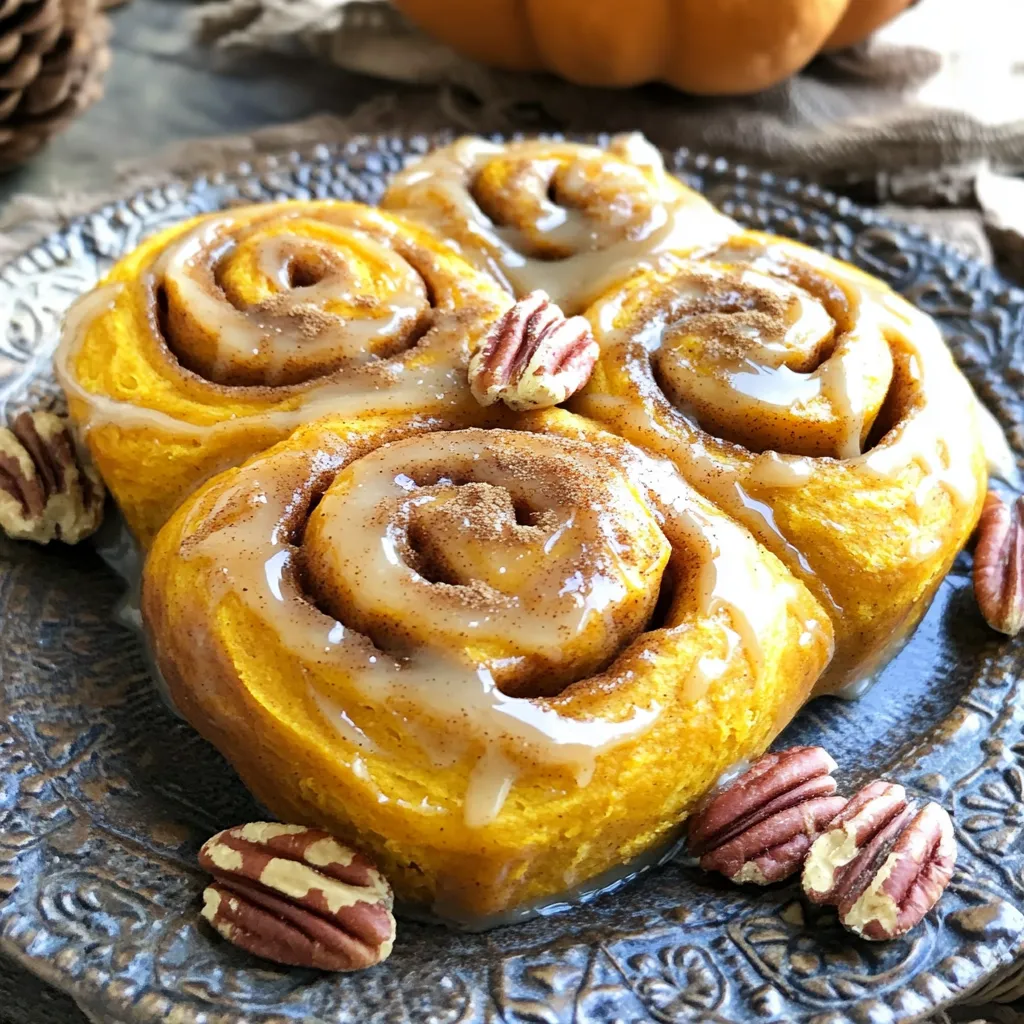
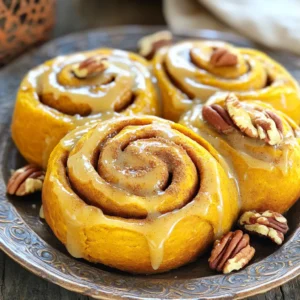
Pumpkin Cinnamon Rolls with Brown Butter Bliss
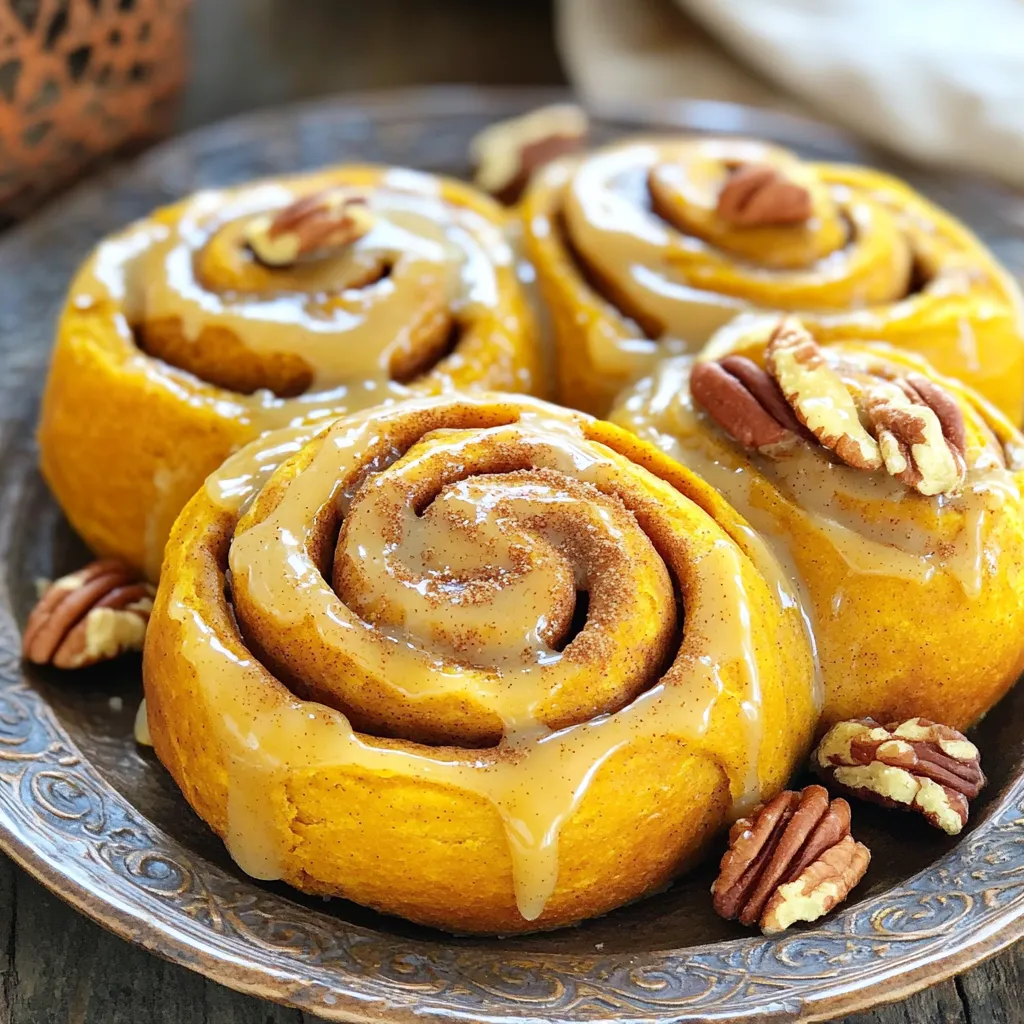
Get ready to indulge in the ultimate fall treat: Pumpkin Cinnamon Rolls with Brown Butter Bliss. These soft, warm rolls are filled with rich, flavorful spices and topped with a heavenly brown butter glaze. Whether you’re hosting a holiday brunch or just treating yourself, you won’t want to miss this recipe. Join me as I guide you through each step to create these mouthwatering rolls that are sure to impress!
Ingredients
Main Ingredients for the Dough
- 1 cup pumpkin puree
- 1/2 cup milk, warmed to about 110°F (43°C)
- 1/4 cup granulated sugar
- 1/4 teaspoon sea salt
- 1 teaspoon ground cinnamon
- 1 teaspoon ground nutmeg
- 1/4 teaspoon ground allspice
- 1 packet (2 1/4 teaspoons) instant yeast
- 3 tablespoons unsalted butter, melted
- 3 cups all-purpose flour, plus extra for dusting
To start, the dough needs a solid base. Pumpkin puree adds moisture and flavor. Milk activates the yeast and gives softness. Sugar helps the yeast grow and adds sweetness. The sea salt balances the flavors. The spices, like cinnamon, nutmeg, and allspice, bring warmth and depth to the rolls. Instant yeast makes the process quicker, so we can enjoy these treats sooner. Melted butter adds richness to the dough, making it tender.
Ingredients for the Filling
- 1/4 cup packed brown sugar
- 2 tablespoons ground cinnamon
- 1/4 cup unsalted butter, softened
The filling is where the magic happens. Brown sugar adds a deep sweetness that pairs well with pumpkin. Ground cinnamon brings that classic spice flavor that we all love. Softened butter allows the sugar and cinnamon to mix easily, creating a sweet layer that melts into the dough.
Glaze Ingredients
- 1 cup powdered sugar
- 1/4 cup brown butter
For the glaze, powdered sugar creates a smooth texture that melts into the rolls. Brown butter adds a nutty flavor that elevates the sweetness. It’s a dreamy finish that makes these rolls extra special. The glaze should be drizzled on while the rolls are warm, ensuring it seeps into every bite.
Step-by-Step Instructions
Preparing the Dough
Activating yeast
To start, take a large bowl. Add warm milk and granulated sugar. Sprinkle in the instant yeast. Let it sit for about five minutes. You want it to bubble and foam. This shows the yeast is alive and ready to work.
Mixing dough ingredients
Next, stir in the pumpkin puree and melted butter. Add the sea salt, cinnamon, nutmeg, and allspice. Mix well. Gradually add two cups of flour. Keep stirring until combined.
Kneading and rising
Now, sprinkle some flour on your counter. Turn the dough out and knead it for five to seven minutes. Aim for a smooth and elastic texture. Shape it into a ball and place it in a greased bowl. Cover it with a towel. Let it rise in a warm place for about one hour. It should double in size.
Making the Filling and Assembling Rolls
Preparing the filling
While the dough rises, prepare the filling. Take the softened butter and spread it on the rolled-out dough. Mix brown sugar and cinnamon together. Sprinkle this mixture evenly over the butter.
Rolling and cutting the dough
Roll the dough tightly from one long edge. Keep it even as you roll. Use a sharp knife or dental floss to slice the log into twelve equal rolls.
Second rise
Place the rolls in a greased baking dish. Cover them with a towel again. Let them rise for another thirty minutes.
Baking and Glazing
Preheating the oven
While the rolls rise, preheat your oven to 350°F (175°C). This will help them bake evenly.
Baking duration and signs of doneness
Bake the rolls for twenty-five to thirty minutes. Look for a golden brown color on top. They should feel firm when touched.
Glazing the warm rolls
After baking, prepare the glaze. Mix powdered sugar with the brown butter until smooth. Drizzle this glaze over the warm rolls. Enjoy the blend of flavors and the warm, gooey texture!
Tips & Tricks
Achieving Perfect Texture
To get soft, fluffy rolls, start with a dough that is not too sticky. If your dough feels overly wet, add a little more flour, one tablespoon at a time. This keeps your dough manageable.
When kneading, use your palms to push the dough away. Fold it back, then turn it. Knead for about 5-7 minutes. The dough should feel smooth and elastic when you’re done. This step is key for the best texture.
Enhancing Flavor
Fresh spices can make a big difference. Use ground cinnamon, nutmeg, and allspice. They add warm, rich notes that brighten your rolls. Fresh spices have more flavor than old ones.
Brown butter is another secret weapon. It adds a deep, nutty taste. To make it, melt unsalted butter in a pan over medium heat. Watch it closely until it turns golden brown and smells nutty. This step takes about 5-7 minutes. Let it cool slightly before using it in your glaze.
Presentation Ideas
Serving these rolls warm is a must. Place them on a decorative platter for a beautiful display. Drizzle with extra brown butter glaze for a tempting look.
For garnishing, add a light dusting of cinnamon on top. You can also scatter toasted pecan halves or walnuts around the rolls. This adds a lovely crunch and makes your dish even more inviting.
Variations
Flavor Modifications
You can make pumpkin cinnamon rolls even more fun! Here are some great ideas:
- Adding Nuts or Chocolate Chips: Chopped pecans or walnuts add a nice crunch. Mix them into the filling or sprinkle them on top. You can also add chocolate chips for a sweet twist. They melt inside the rolls, making every bite a treat.
- Pumpkin Spice Variations: If you love pumpkin spice, feel free to add more! Increase the cinnamon, nutmeg, and allspice. This will enhance the warm flavors. You can also try adding ginger or cloves for a different taste.
Dietary Adjustments
You can easily adapt these rolls for different diets. Here’s how:
- Gluten-Free Alternatives: If you need a gluten-free option, use a gluten-free flour blend. Make sure it has a binding agent like xanthan gum. This helps the rolls stay soft and fluffy.
- Vegan Version of Cinnamon Rolls: For a vegan take, swap the milk for almond or oat milk. Use coconut oil instead of butter. A flaxseed mixture can replace the egg. This keeps the rolls moist and fluffy without any animal products.
Seasonal Adaptations
You can change the flavors for each season. Here are some fun ideas:
- Using Different Spices for the Holidays: For Christmas, try using peppermint extract. You can also add cardamom for a festive touch. In the fall, try adding more nutmeg or even a dash of ginger.
- Incorporating Fruit Fillings: You can add fresh fruit to the rolls. Sliced apples or pears taste great with pumpkin. They add a juicy burst of flavor. You can also use dried fruits like cranberries for a chewy texture.
These variations let you customize your pumpkin cinnamon rolls. You can make them your own!
Storage Info
Storing Leftover Rolls
To keep your pumpkin cinnamon rolls fresh, store them at room temperature. Place them in an airtight container. If your kitchen is warm, you can store them in the fridge. This helps them last longer but may dry them out. To avoid this, wrap them in plastic wrap before placing them in the fridge.
Reheating Guidelines
When reheating, aim to keep the rolls soft. You can use the microwave for quick reheating. Wrap each roll in a damp paper towel and heat for about 10-15 seconds. For the oven, preheat to 350°F (175°C) and warm for about 5-10 minutes. If you want to freeze them, wrap each roll tightly in plastic wrap, then foil. They can stay in the freezer for up to three months. To thaw, place them in the fridge overnight.
How Long They Last
These rolls can last about 2-3 days at room temperature. If stored in the fridge, they can last up to a week. Watch for any signs of spoilage. If you see mold or if they smell off, it’s best to toss them. Enjoy them fresh for the best taste!
FAQs
Can I use fresh pumpkin instead of canned?
Yes, you can use fresh pumpkin. Just cook, cool, and puree it. This adds a fresh taste. Make sure it’s smooth and not watery. Excess water can change the dough’s texture.
What can I substitute for brown butter?
If you don’t have brown butter, use regular melted butter. You can also use coconut oil for a dairy-free option. The flavor will change, but your rolls will still be tasty.
How do I know when my dough has risen enough?
Your dough is ready when it has doubled in size. You can test it by gently pressing a finger into the dough. If the indentation stays, it has risen enough.
Can I make these cinnamon rolls ahead of time?
Yes, you can prepare the rolls the night before. After shaping, place them in the fridge. In the morning, let them rise at room temp before baking. This saves time and adds flavor.
How do I fix dry or overly wet dough?
If your dough is too dry, add a bit of warm milk. If it’s too wet, sprinkle in more flour a little at a time. Knead it well after each addition until you reach a soft texture.
In this blog post, we explored how to make delicious pumpkin cinnamon rolls. We covered the key ingredients, including dough, filling, and glaze. You learned the step-by-step process, from preparing the dough to glazing the rolls. We shared tips for perfect texture and flavor, and even offered variations for different diets and seasons. Keeping leftovers fresh is simple, too. With these clear instructions, you can create warm, tasty rolls any time. Enjoy this treat, and impress your friends and family with your baking skills!
 for Garlic Butter Lemon Salmon Foil Packs. In this article, you learned how to make Garlic Butter Lemon Salmon Foil Packs. We covered the main ingredients, step-by-step cooking instructions, and helpful tips to ensure success. You can also explore flavor variations and storage options for leftovers. This dish is simple yet delicious, making it perfect for dinner. With these techniques, you can impress friends and family with your cooking. Enjoy your meal and feel proud of your kitchen skills!](https://dishtreats.com/wp-content/uploads/2025/07/636e4153-d701-4cda-a9a1-5094e2b11f0e-768x768.webp)