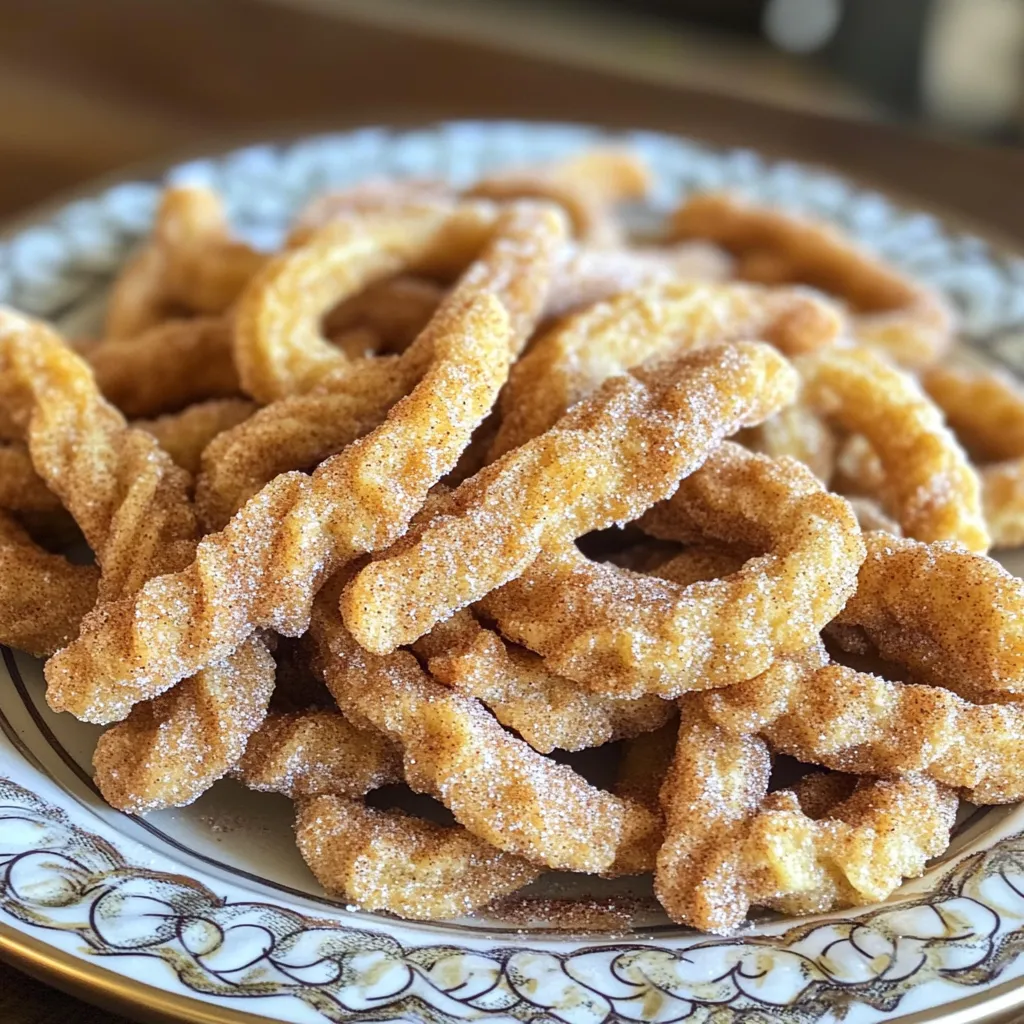
Oven-Baked Cinnamon Sugar Churro Cookies Delight
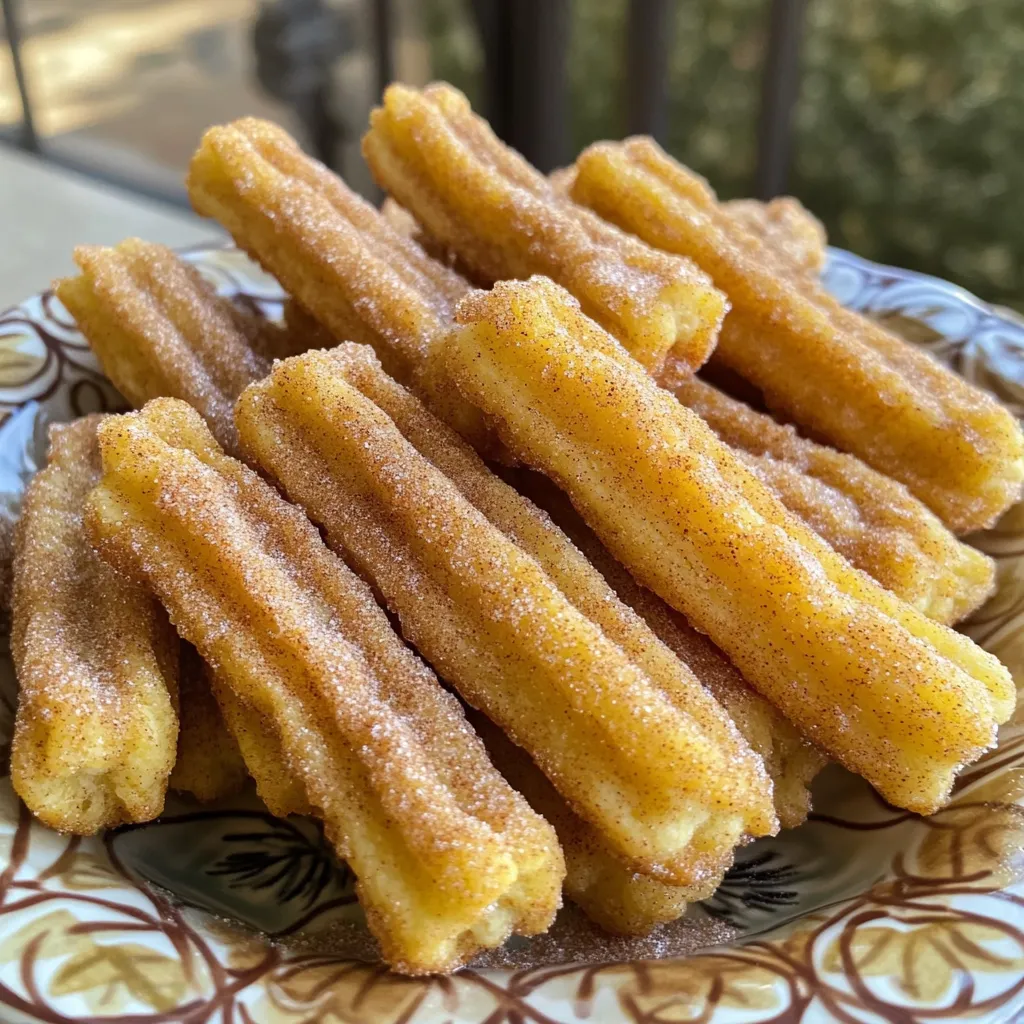
Get ready to indulge in a sweet, cinnamon-sugar treat that’s easy to make! In this blog, I’ll show you how to whip up Oven-Baked Cinnamon Sugar Churro Cookies that will delight your taste buds. With simple ingredients and straightforward steps, you’ll have a batch of warm, soft cookies in no time. Let’s dive into this deliciousness and transform your kitchen into a mini bakery!
Ingredients
List of Required Ingredients
To make these tasty churro cookies, gather these items:
- 1 cup all-purpose flour
- 1/2 cup unsalted butter, melted
- 1/2 cup granulated sugar
- 1 large egg, at room temperature
- 1 teaspoon pure vanilla extract
- 1/2 teaspoon baking powder
- 1/4 teaspoon fine sea salt
- 1 tablespoon ground cinnamon
- For Topping:
- 1/4 cup granulated sugar
- 1 tablespoon ground cinnamon
Ingredient Substitutions
If you need to swap some ingredients, here are some options:
- Use whole wheat flour for a nuttier taste.
- Margarine or coconut oil can replace unsalted butter.
- You can use brown sugar instead of granulated sugar for a deeper flavor.
- A flaxseed egg (1 tablespoon ground flaxseed mixed with 2.5 tablespoons water) works for a vegan option.
- Vanilla extract can be left out or replaced with almond extract for a different twist.
Measuring Tips for Accurate Baking
Measuring correctly makes a big difference. Here are some tips:
- Use a dry measuring cup for flour and sugar. Scoop the flour gently and level it off with a knife.
- For sticky items like melted butter, use a liquid measuring cup.
- If you use brown sugar, pack it firmly into the cup to get the right amount.
- Always check your oven temperature with an oven thermometer for accuracy.
These small details help you make the best churro cookies every time!
Step-by-Step Instructions
Prepping the Oven and Baking Sheet
First, heat your oven to 350°F (175°C). This step is key for even baking. Next, take a baking sheet and line it with parchment paper. This helps cookies not stick and makes cleanup easy.
Mixing Dry Ingredients
Now, grab a medium bowl. In it, mix together 1 cup of all-purpose flour, ½ teaspoon of baking powder, and ¼ teaspoon of fine sea salt. Use a whisk to combine them well. Set this bowl aside for later.
Preparing the Dough
In a larger bowl, combine ½ cup of melted unsalted butter with ½ cup of granulated sugar. Whisk or beat them until smooth and creamy. Then, add in 1 large egg and 1 teaspoon of pure vanilla extract. Mix until the batter is fluffy.
Next, slowly add the dry mixture to the wet mixture. Use a spatula or wooden spoon to fold it in gently. Stop mixing when a soft dough forms. This dough should not be overworked.
Portioning and Baking the Cookies
Now it’s time to portion the dough. Use a tablespoon or cookie scoop to drop dough balls onto the prepared baking sheet. Make sure to leave about 2 inches between each cookie. They will spread while baking.
Bake the cookies in your preheated oven for 10 to 12 minutes. You want the edges to be lightly golden. The centers should feel set yet soft.
Coating with Cinnamon Sugar
While your cookies bake, mix ¼ cup of granulated sugar with 1 tablespoon of ground cinnamon in a small bowl. Stir until they blend well.
Once the cookies finish baking, let them cool on the sheet for 2 to 3 minutes. Then, roll each warm cookie in the cinnamon-sugar mix. Make sure they are coated fully for that classic churro taste.
Tips & Tricks
Achieving Perfect Texture
To get the best texture, use room temperature ingredients. This helps the butter mix well with sugar and creates a smooth dough. Be careful not to overmix when you blend the wet and dry ingredients. Overmixing can make your cookies tough. You want a soft and slightly sticky dough. This dough will bake up into a chewy cookie that has a nice crunch on the outside.
Common Mistakes to Avoid
One common mistake is not measuring flour correctly. Too much flour can make cookies dry. Always spoon flour into your measuring cup, then level it off with a knife. Another mistake is baking too long. Keep an eye on them! They should be lightly golden but still soft in the middle. If they look too brown, they might be overbaked.
Enhancements for Extra Flavor
Want to add more flavor? Mix in chocolate chips or chopped nuts for a twist. You can also try adding a pinch of nutmeg for a warm spice kick. If you love vanilla, add an extra splash of vanilla extract to the dough. For a fun touch, drizzle melted chocolate on top after they cool. These small changes can make your churro cookies even more special!
Variations
Gluten-Free Version
You can easily make these churro cookies gluten-free. Use a gluten-free flour blend instead of all-purpose flour. Look for blends that include xanthan gum to help the cookies hold together. Follow the same steps in the recipe. Your cookies will still taste amazing!
Chocolate-Chip Churro Cookies
If you love chocolate, try adding mini chocolate chips to the dough. Just mix in half a cup when you combine the wet and dry ingredients. The chocolate adds a rich flavor and pairs well with the cinnamon sugar topping.
Different Toppings and Flavor Combinations
Feel free to get creative with toppings! Instead of just cinnamon sugar, try drizzling melted chocolate over the cookies. You can also sprinkle chopped nuts for a crunchy texture. For a twist, add a pinch of nutmeg or cardamom to the dough. Each variation offers a unique taste experience, so enjoy experimenting!
Storage Info
Best Ways to Store Cookies
To keep your churro cookies fresh, place them in an airtight container. You can stack them, but use parchment paper between layers to prevent sticking. Keep the container in a cool, dry place. This method helps keep the cookies soft and tasty.
How Long Do They Last?
When stored properly, these cookies last about one week at room temperature. If you want to keep them longer, consider freezing them. The cookies may lose some of their freshness after a week but will still taste good.
Freezing Instructions
To freeze your churro cookies, let them cool completely first. Place them in a single layer on a baking sheet. Freeze them for about an hour. Once frozen, transfer the cookies to a freezer-safe bag or container. They can last up to three months in the freezer. When you’re ready to enjoy, thaw them at room temperature. Reheat them briefly in the oven for that fresh-baked taste!
FAQs
Can I use a different type of flour?
Yes, you can use gluten-free flour or almond flour. Each will change the taste a bit. Gluten-free flour works well, but it might need extra moisture. Almond flour adds a nutty flavor. Just remember, the texture may vary.
What do I do if my dough is too sticky?
If your dough is too sticky, add a little more flour. Sprinkle in one tablespoon at a time. Mix gently after each addition. Don’t add too much flour, or your cookies will be tough. Aim for a soft but manageable dough.
How do I know when the cookies are done?
Check the edges of the cookies. If they are lightly golden, they are done. The centers should feel soft but not wet. If they look set, take them out. Remember, they will firm up as they cool.
Can I make these cookies ahead of time?
Yes, you can make the dough ahead of time. Chill it in the fridge for up to 2 days. This helps the flavors blend. When you are ready, scoop and bake. You can also bake them ahead and store them.
What’s the best way to reheat leftover cookies?
To reheat cookies, place them in the microwave for 10-15 seconds. This will warm them up nicely. You can also use an oven at 350°F for a few minutes. Both methods keep them soft and tasty.
In this post, we covered the key ingredients for tasty cookies and how to measure them. I shared a step-by-step guide to help you bake delicious treats. We also explored tips for perfect texture, common mistakes, and flavor variations.
Remember, storing your cookies well keeps them fresh longer. Try these tips and enjoy your cookie-baking journey. You can create your own treats, and with practice, you’ll get even better!


![To make these Air Fryer Parmesan Zucchini Fries, you need just a few simple items. Gather these ingredients: - 2 medium zucchinis, sliced into thin fries - 1 cup breadcrumbs (recommended: panko) - 1/2 cup grated Parmesan cheese - 1 teaspoon garlic powder - 1 teaspoon Italian seasoning - 1/2 teaspoon salt - 1/4 teaspoon black pepper - 2 large eggs, beaten - Olive oil spray Each ingredient plays a key role. The zucchinis provide a fresh base. Panko breadcrumbs add great crunch. Parmesan cheese gives a rich, cheesy flavor. Garlic powder and Italian seasoning make your fries tasty. Salt and pepper enhance all the flavors. Eggs act as glue for the coating. The olive oil spray keeps everything crisp. When selecting zucchinis, choose firm ones with smooth skin. They should feel heavy for their size. This tells you they are fresh. The breadcrumbs should be light and airy, perfect for frying. If you're feeling adventurous, try different herbs or cheeses! For the full recipe, check out this [Full Recipe]. 1. Preheat your air fryer to 400°F (200°C). This step is key for a crispy finish. 2. Wash and dry the zucchinis. Clean veggies are a must for great taste. 3. Cut the zucchinis into 1/4 inch thick fries. Make sure they are even for uniform cooking. 1. In a medium bowl, combine breadcrumbs, Parmesan cheese, garlic powder, Italian seasoning, salt, and black pepper. This mix gives the fries a tasty crust. 2. In a separate bowl, beat the eggs until smooth. This egg wash will help the coating stick well. 1. Dip each zucchini fry in the beaten eggs. Let any extra egg drip back into the bowl. 2. Roll the zucchini in the breadcrumb mixture. Press gently to coat all sides evenly. This ensures every bite is full of flavor. 1. Lightly spray the air fryer basket with olive oil. This helps prevent sticking. 2. Arrange the coated zucchini fries in a single layer in the basket. Avoid crowding to keep them crispy. 3. Mist the tops of the fries with olive oil spray. This adds a lovely golden color. 4. Cook for 10-12 minutes, flipping halfway. This makes sure each side cooks evenly. Once you follow these steps, you will have crispy and tasty Air Fryer Parmesan Zucchini Fries. For the complete recipe, refer to the section above. Enjoy! To keep your zucchini fries crispy, avoid overcrowding the air fryer basket. When fries sit too close, they steam instead of crisp. It’s best to cook in batches if needed. Also, mist the tops of fries lightly with olive oil. This simple step helps them brown nicely. Want to spice things up? Consider adding cayenne pepper for heat. A little goes a long way! You can also play around with different herbs or seasonings. Try adding smoked paprika or fresh thyme for a unique twist. Each option can add depth to the flavor. Pair your zucchini fries with great dipping sauces. I love zesty marinara or creamy ranch. They add a fun taste contrast. For serving, arrange the fries in a single layer on a platter. Garnish with fresh herbs or a sprinkle of more Parmesan cheese for a lovely touch. Add a small bowl of sauce in the center for a delightful display. For the complete recipe, check out the Full Recipe section. {{image_4}} You can switch up the coating for your zucchini fries. Using gluten-free breadcrumbs works great if you need a gluten-free option. They still get nice and crispy. You can also try different cheeses like mozzarella or cheddar. Each cheese brings a unique flavor that can enhance your fries. Don't stop at zucchini! You can add other veggies like eggplant or carrots. Cut them into fries, just like the zucchini. This makes your dish colorful and fun. You might also mix in spices like paprika or cumin. These spices bring extra warmth and flavor to your fries. You can cook zucchini fries in different ways. The air fryer gives you crispy results in less time. Baking in the oven is another option. It takes longer but still tastes great. Stovetop frying is also a choice. You’ll need more oil, but the flavor is rich and satisfying. Each method has its perks, so feel free to experiment! To store Air Fryer Parmesan Zucchini Fries in the fridge, let them cool first. Place the fries in an airtight container. This keeps them fresh for up to three days. I recommend using glass containers, as they seal well and prevent moisture. If you want to save your fries for longer, freeze them. Lay the cooked fries on a baking sheet in a single layer. Freeze for about an hour. Once frozen, transfer them to a freezer bag. This method stops them from sticking together. They can last in the freezer for about two months. To reheat, place the frozen fries in the air fryer. Set it to 400°F (200°C) and cook for about 8-10 minutes. This will help keep them crispy. You can also reheat them in an oven for a similar effect. Air Fryer Parmesan Zucchini Fries stay fresh in the fridge for about 3 to 4 days. To store, place them in an airtight container. For longer storage, freeze them. They can last up to 2 months in the freezer. To freeze, lay them flat on a baking sheet first, then transfer them to a freezer bag. This helps keep them from sticking together. Yes, you can prepare these fries ahead of time. Slice the zucchinis and coat them in the breadcrumb mixture. Keep them in the fridge for up to 24 hours. When you're ready, air fry them directly from the fridge. If you freeze them, let them thaw in the fridge overnight before cooking. This helps them cook evenly and stay crispy. These zucchini fries taste great with many dishes. Serve them with a tangy marinara sauce or creamy ranch dressing for dipping. They also pair well with grilled chicken or fish. For a fun twist, try serving them alongside a fresh salad or as a side to tacos. Their crunch adds a nice texture contrast to softer dishes. Absolutely! You can use yellow squash instead of green zucchini. They have a similar taste and texture. If you have gifted zucchinis from friends or family, feel free to use those too. Just make sure they are firm and fresh for the best results. This recipe is very flexible and lets you enjoy various types of squash. In this post, I shared a simple recipe for Air Fryer Parmesan Zucchini Fries. You learned the ingredients, step-by-step instructions, and useful tips for crispiness. Experiment with flavors or make different versions to keep it fresh. Remember to store leftovers properly for later enjoyment. This dish is easy to make and pairs well with various dips. Enjoy your healthy snack, and have fun trying out new ideas!](https://dishtreats.com/wp-content/uploads/2025/06/3cf59b94-4108-4e4b-8eff-d7b1557676e8-768x768.webp)