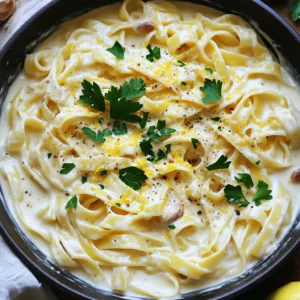
One-Pot Creamy Roasted Garlic Alfredo Pasta Delight
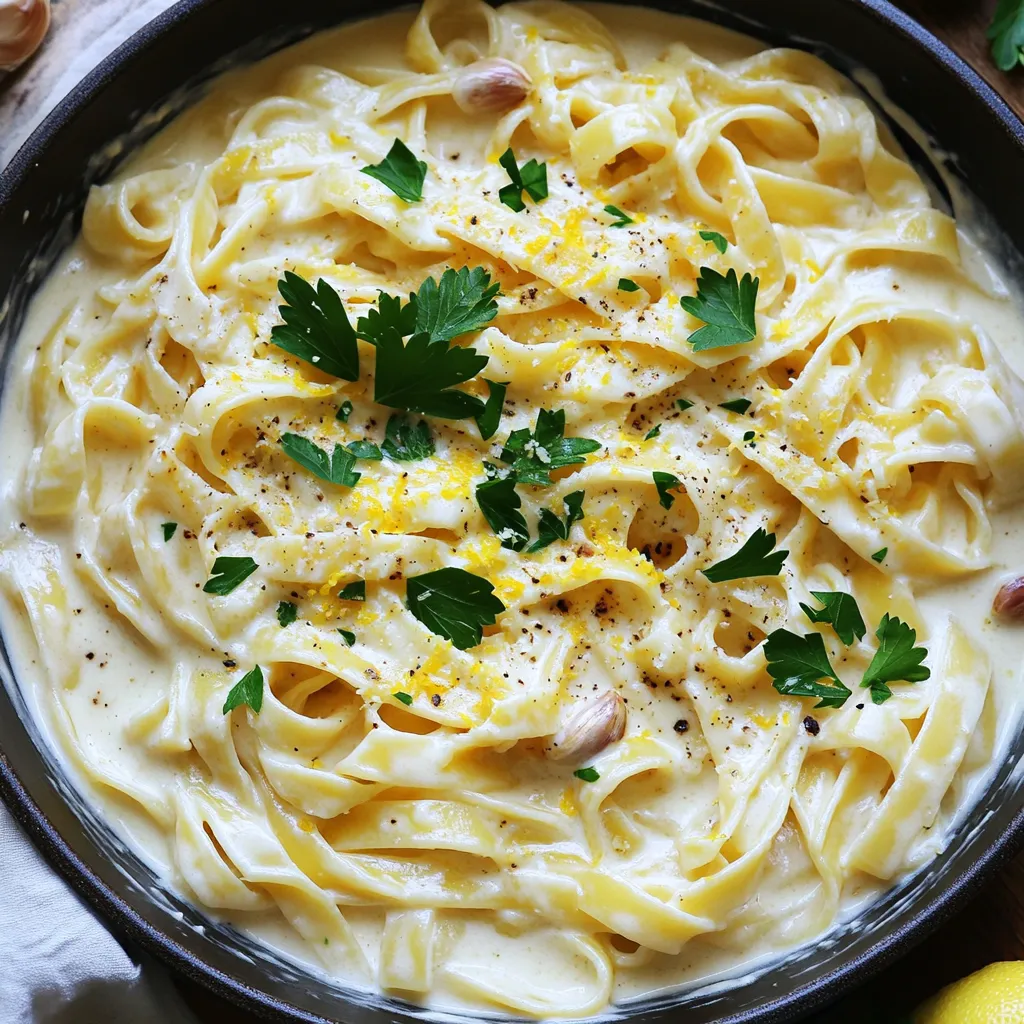
Craving a creamy pasta dish that’s simple and packed with flavor? You’re in the right spot! My One-Pot Creamy Roasted Garlic Alfredo Pasta Delight is perfect for a cozy night in or impressing guests. This easy recipe combines rich roasted garlic, rich cream, and tangy Parmesan for a dish you’ll want to make again and again. Let’s dive into the ingredients and get cooking!
Ingredients
List of Ingredients
- 12 oz fettuccine pasta
- 1 bulb of garlic
- 2 tablespoons olive oil
- 3 cups vegetable broth
- 1 cup heavy cream
- 1 cup grated Parmesan cheese
- Salt and black pepper to taste
- Fresh parsley, chopped (for garnish)
- 1 teaspoon Italian seasoning
- Zest of 1 lemon (optional for brightness)
For this One-Pot Creamy Roasted Garlic Alfredo Pasta, you need simple ingredients. Each one plays a key role in making the dish flavorful and creamy.
First, you have fettuccine pasta. It gives a nice, thick bite to the dish. Then, the bulb of garlic brings a rich, sweet flavor. Roasting the garlic changes its taste and makes it soft. The olive oil adds a nice, smooth texture.
Next, the vegetable broth acts as our cooking liquid. It is a great way to add flavor without using meat. Heavy cream makes the sauce rich and creamy, while the grated Parmesan cheese adds a salty, cheesy kick. Salt and black pepper make sure to season the dish just right.
Don’t forget the fresh parsley for a pop of color! The Italian seasoning gives the dish a nice herb flavor. Lastly, the lemon zest is optional but adds a bright touch.
Each ingredient works together to create a dish that is not only tasty but also easy to make in one pot. Enjoy gathering these ingredients to start your cooking adventure!
Step-by-Step Instructions
Roasting the Garlic
- Preheat your oven to 400°F (200°C).
- Slice the top off the bulb of garlic.
- Drizzle 1 tablespoon of olive oil over the bulb.
- Wrap the garlic tightly in aluminum foil.
- Roast for 30 to 35 minutes until the cloves are soft.
Roasting garlic makes it sweet and rich. The warm smell fills your kitchen. You want it soft and caramelized for great flavor.
Preparing the Sauce Base
- In a large pot, heat 1 tablespoon of olive oil over medium heat.
- Add 3 cups of vegetable broth and 1 cup of heavy cream.
- Mix in 1 teaspoon of Italian seasoning.
- Stir well and bring to a gentle simmer.
This sauce base is key for a creamy texture. The broth adds depth, while the cream makes it rich.
Cooking the Pasta
- Add 12 oz of fettuccine pasta to the sauce.
- Stir to make sure the pasta is well mixed.
- Cook for 10 to 12 minutes, stirring often, until al dente.
Cooking the pasta in the sauce lets it absorb the flavors. Al dente means it has a slight bite, which is perfect for this dish.
Preparing the Roasted Garlic
- Remove the roasted garlic from the oven.
- Let it cool for a few minutes.
- Squeeze the soft garlic cloves into a bowl.
- Use a fork to mash the cloves until smooth.
Mashing the garlic gives it a creamy consistency. This adds a wonderful sweetness to the dish.
Combining Ingredients
- Lower the heat to low after cooking the pasta.
- Stir in 1 cup of grated Parmesan cheese and the mashed garlic.
- Mix until the cheese melts and the sauce is creamy.
- Taste and season with salt, black pepper, and lemon zest as desired.
Combining all these ingredients makes the dish sing! The cheese adds a salty kick, while the garlic brings warmth.
Thicken and Serve
- Remove the pot from the heat.
- Let the sauce thicken for a couple of minutes.
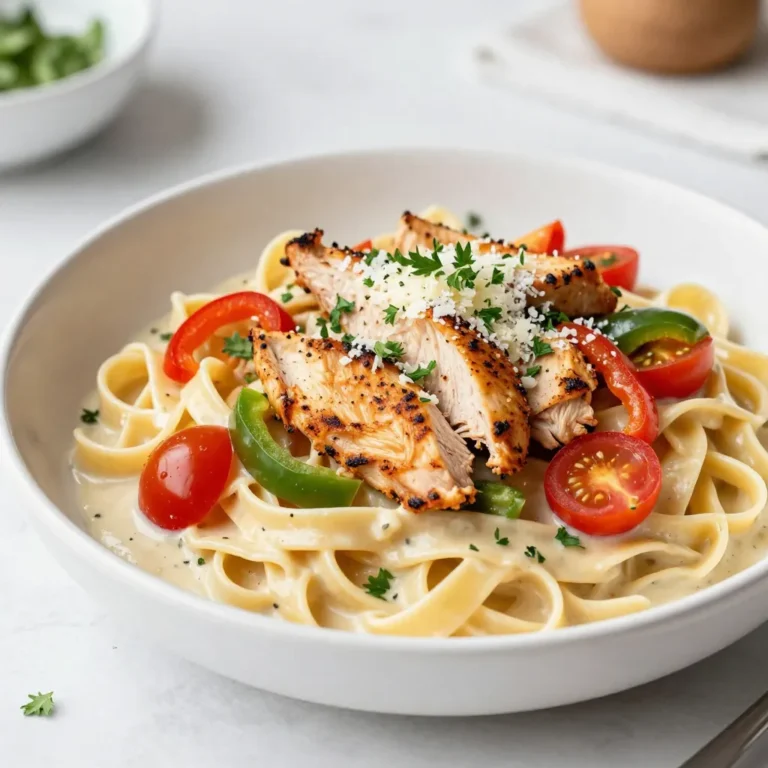
- Serve hot, garnished with fresh parsley and extra Parmesan.
This final step makes the pasta even creamier. The garnish adds a pop of color and freshness. Enjoy your delicious creation!
Tips & Tricks
Tips for Perfecting the Alfredo Sauce
- To make sure your sauce is creamy, use heavy cream.
- Stir the sauce well as you add the cheese to melt it fully.
- Taste your sauce before serving. Add salt and pepper as needed.
Cooking Pasta to Perfection
- Cook the pasta until it is al dente. This means it should be firm but not hard.
- Stir the pasta often while it cooks. This helps it cook evenly and prevents sticking.
Quick Substitutions
- You can swap fettuccine for any long pasta like spaghetti or linguine.
- For a dairy-free option, use coconut milk or a nut-based cream. It adds a nice flavor!

Variations
Adding Protein
You can easily boost your One-Pot Creamy Roasted Garlic Alfredo Pasta with some protein.
- Grilled chicken or shrimp: Adding grilled chicken or shrimp gives a nice flavor and texture. Simply grill your choice, cut it into pieces, and stir it in when you mix in the cheese and garlic.
- Vegetarian protein options: If you prefer a meatless dish, try adding chickpeas or lentils. They pack protein and blend well with the creamy sauce.
Vegetable Add-ins
Adding vegetables makes the dish more colorful and healthy.
- Spinach, mushrooms, or peas: Spinach wilts nicely and adds a fresh taste. Mushrooms bring a savory depth. Peas add little bursts of sweetness. Toss any of these in with the pasta near the end of cooking.
- Seasonal vegetable suggestions: Use seasonal favorites like zucchini in summer or butternut squash in fall. These can enhance the dish and make it even more delicious.
Flavor Enhancements
You can elevate the flavors of your pasta with some simple enhancements.
- Extra herbs and spices: Fresh basil or thyme can add a lovely aroma. A pinch of red pepper flakes can give it a nice kick.
- Lemon or truffle oil options: A splash of lemon juice brightens the dish and balances the cream. Truffle oil adds a rich, earthy flavor. Just a drizzle makes a big difference!
Storage Info
Best Practices for Storing Leftovers
To keep your One-Pot Creamy Roasted Garlic Alfredo Pasta fresh, cool it first. Once it cools, place it in an airtight container. This helps seal in the flavor and keeps out air. Store it in the fridge for up to three days. If you want to save it longer, freezing is a great option.
Reheating Tips
When it’s time to enjoy the leftovers, the best way to reheat is gently. You can use the stove or microwave. If using the stove, add a splash of vegetable broth or cream to the pot. Stir often over low heat. This helps keep the sauce creamy and prevents it from drying out. If using the microwave, heat in short bursts. Stir between each burst to ensure even heating.
Freezing Instructions
To freeze your pasta, start by letting it cool completely. Then, portion it into smaller containers. This makes it easier to thaw just what you need. Seal the containers tightly and label them with the date. You can freeze it for up to three months. When ready to eat, thaw it overnight in the fridge and reheat as mentioned above.
FAQs
Can I use other types of pasta?
Yes, you can use different types of pasta. I often use penne or rotini. Just adjust the cooking time as needed based on the pasta shape. Make sure it cooks until al dente. This helps the sauce stick better.
How do I know when the garlic is roasted?
The garlic is ready when it feels soft to the touch. You can also smell its sweet aroma. If it looks golden brown, that’s a good sign! Let it cool before you mash it.
Is there a vegan version of this recipe?
Absolutely! For a vegan version, swap heavy cream with coconut milk or cashew cream. Use vegan cheese or nutritional yeast in place of Parmesan. This keeps the dish creamy and tasty.
How long does the pasta keep in the fridge?
The pasta stays good for about 3 to 5 days in the fridge. Store it in an airtight container. Before serving, reheat gently on the stove or in the microwave.
Can I make this dish ahead of time?
Yes, you can prepare this dish ahead of time. Just make the pasta and sauce, then store them separately. When ready to serve, reheat and mix them together. This way, you preserve the creamy texture.
This blog post guides you through making a delicious fettuccine Alfredo. You learned essential ingredients and easy steps for roasting garlic, crafting the sauce, and cooking pasta. I shared tips for perfect texture, flavor variations, and storage advice. Take this knowledge and create a tasty meal that satisfies. With practice, this dish can become a favorite in your kitchen. Enjoy the cooking journey!


 and [Tzatziki Recipe 2](#). Serve gyros with crispy fries or a fresh Greek salad. You can also add pickled vegetables for extra crunch. A glass of refreshing lemonade pairs well too. In this post, we explored making Greek Chicken Gyros. We looked at key ingredients like chicken thighs and fresh toppings. Following easy steps, you learned how to marinate and cook chicken perfectly. We shared tips for grilling and serving for the best taste. You can even try different proteins or vegetarian options. Now, you’re ready to make delicious gyros. Enjoy sharing this tasty dish with others!](https://dishtreats.com/wp-content/uploads/2025/07/f3d3865c-0788-4b9a-9d14-bf25eefe6fbb-768x768.webp)