
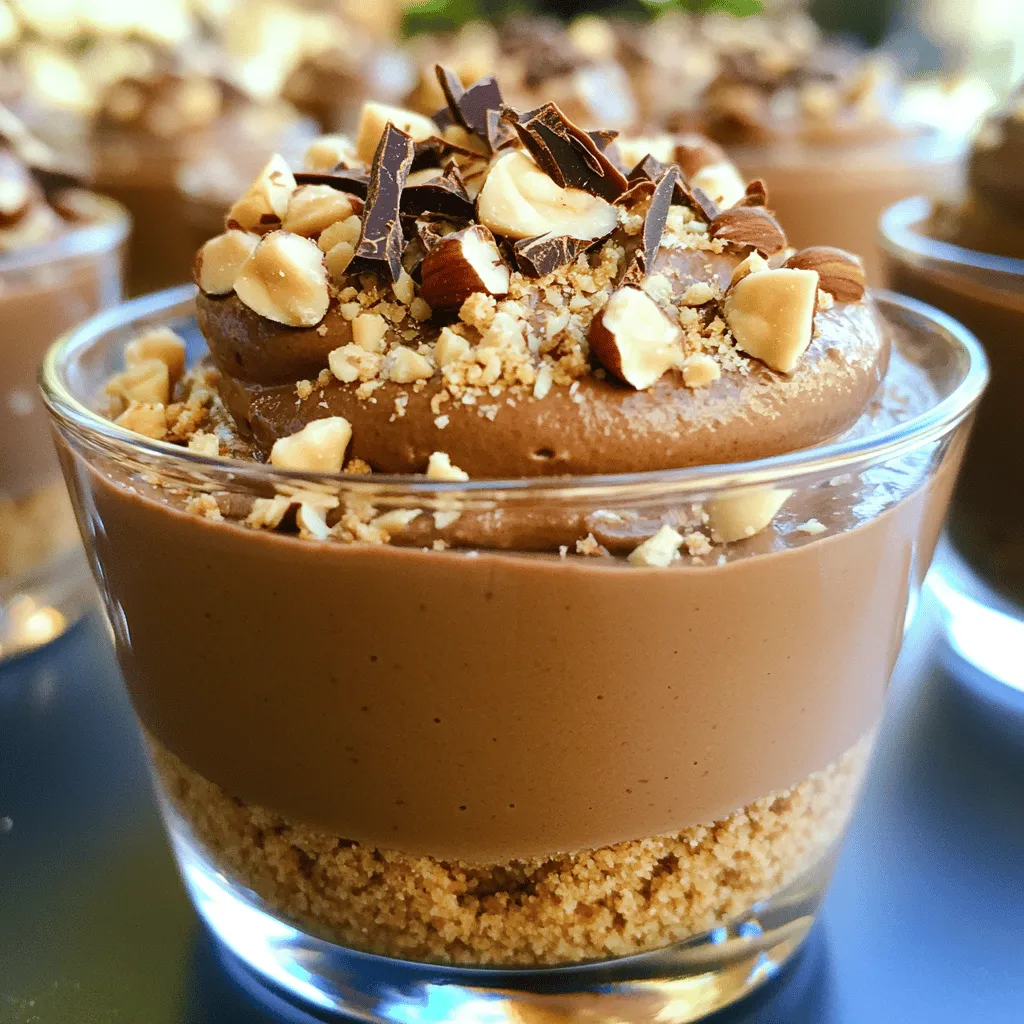
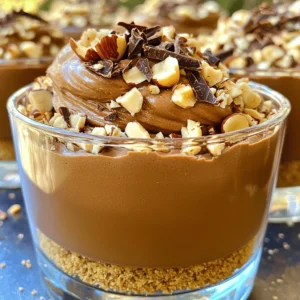
No Bake Chocolate Hazelnut Mousse Cups Delightful Treat

Indulge your sweet tooth with my No Bake Chocolate Hazelnut Mousse Cups! This easy treat combines rich chocolate and creamy hazelnut flavors without the fuss of baking. Perfect for anyone craving a delicious dessert, these mousse cups are simple to whip up and look stunning on any table. Join me as I share my favorite ingredients, foolproof steps, and top tips for making this delightful dessert!
Ingredients
List of Ingredients with Measurements
- 1 cup heavy whipping cream
- 1 cup chocolate hazelnut spread (e.g., Nutella)
- 1 teaspoon pure vanilla extract
- 1 tablespoon powdered sugar
- 1/2 cup crushed hazelnuts (plus extra for garnish)
- 1 cup graham cracker crumbs
- 4 tablespoons unsalted butter, melted
- 1 oz dark chocolate, finely grated (for garnish)
Substitutions for Key Ingredients
If you want a lighter mousse, use light cream instead of heavy cream. For a nut-free option, try sunbutter or a seed spread in place of hazelnut spread. You can also swap crushed almonds or walnuts for hazelnuts if you prefer a different nut flavor. Instead of graham crackers, use crushed cookies or gluten-free crumbs for a twist.
Notes on Ingredient Quality
Using high-quality chocolate hazelnut spread makes the mousse rich and tasty. Choose a spread with real hazelnuts for the best flavor. Fresh heavy cream whips better, so buy it close to your cooking day. When picking hazelnuts, look for whole, unroasted nuts for crunch. The darker the chocolate you use for garnish, the richer the taste.
Step-by-Step Instructions
Detailed Preparation Steps
First, you need to make the base for the mousse cups. In a medium bowl, mix together 1 cup of graham cracker crumbs and 4 tablespoons of melted unsalted butter. Stir it until it looks like wet sand. Next, take 6 to 8 small cups and divide the mixture evenly among them. Press it down firmly to create a solid base. Place the cups in the fridge to chill while you prepare the mousse.
For the mousse, grab a large mixing bowl. Beat 1 cup of heavy whipping cream using a mixer. Do this on medium-high speed for about 2-3 minutes, or until you see soft peaks. In another bowl, mix 1 cup of chocolate hazelnut spread, 1 teaspoon of pure vanilla extract, and 1 tablespoon of powdered sugar. Stir this mixture until it is smooth.
Now, gently fold the whipped cream into the chocolate hazelnut mix using a spatula. Be careful not to lose the airiness of the whipped cream. Once combined, add in 1/2 cup of crushed hazelnuts and fold them in for added texture. Finally, spoon or pipe the mousse into your chilled cups over the graham cracker base. Smooth the tops with a spatula for a nice finish.
Let the mousse cups set in the fridge for at least 2 hours. Before serving, sprinkle crushed hazelnuts and grated dark chocolate on top for a lovely touch.
Tips for Whipping Cream
To whip cream perfectly, use a cold bowl and cold beaters. This helps the cream whip faster and gets more volume. Start at a low speed, then increase to medium-high. Watch closely as soft peaks form. Stop mixing when the cream looks fluffy and holds its shape. Over-mixing can turn the cream into butter, so be careful!
Tips for Layering Mousse
When layering your mousse, take your time. Start with a smooth layer of mousse over the graham cracker base. Use a piping bag for more control if you want neat layers. Tap the cups gently on the counter to remove air bubbles. This gives a nice, even look. Remember to add your toppings just before serving to keep them fresh and crunchy.
Tips & Tricks
How to Achieve the Perfect Mousse Texture
To get a great mousse texture, whip the cream well. You want soft peaks that hold shape. Use a clean bowl and cold beaters for best results. Mix the chocolate hazelnut spread with vanilla and sugar until smooth. Fold in the whipped cream gently. This keeps the mousse light and fluffy. Avoid stirring too hard; you don’t want to lose air. Finally, let the mousse chill for at least two hours. This helps it set perfectly.
Serving Tips for Presentation
Make your mousse cups look fancy with simple touches. Use clear cups to show off those pretty layers. Just before serving, sprinkle crushed hazelnuts on top. Add a bit of grated dark chocolate for a nice finish. You can also place a dollop of whipped cream on each cup. For an extra special touch, serve them on a decorative platter. This makes your dessert stand out at any gathering.
Recommended Tools and Equipment
You will need a few tools to make this dessert easier. A medium mixing bowl works well for the graham cracker base. A large mixing bowl is best for the mousse. Use a handheld mixer or stand mixer to whip the cream. A spatula is great for folding the mixtures together. You’ll also need measuring cups and spoons for accuracy. Lastly, having small serving cups makes for easy presentation. These tools will help you create the best no-bake mousse cups.
Variations
Favorite Flavor Twists
You can add new flavors to your mousse cups. A splash of coffee gives a rich taste. Just mix in one tablespoon of brewed coffee into the chocolate hazelnut spread. If you love fruit, add mashed bananas or pureed strawberries. These flavors make the mousse bright and fresh. You can also try a touch of orange zest for a citrus kick that pairs well with chocolate.
Dietary Adjustments
For those needing gluten-free options, use gluten-free graham crackers. You can find many brands that offer tasty alternatives. Also, check your chocolate hazelnut spread for gluten-free labels. If you want a dairy-free version, swap heavy cream with coconut cream. The mousse will still be creamy and rich. Just chill the coconut cream before whipping it for the best texture.
Different Types of Bases
You can switch up the base of your mousse cups, too. Instead of graham crackers, try crushed Oreos for a chocolatey twist. You could also use shortbread cookies for a buttery flavor. For a nutty base, ground almonds or hazelnuts work great. Just mix them with melted butter, and you have a delicious base that adds more flavor to your cups.
Storage Info
Best Practices for Refrigerating Mousse Cups
To keep your mousse cups fresh, store them in the fridge. Use an airtight container to protect them from odors and moisture. If you have a lot, cover each cup with plastic wrap. This helps keep their texture and flavor intact. Place them on a flat surface to avoid spills. Chill them for at least two hours before serving.
How Long Mousse Cups Last in the Fridge
No bake chocolate hazelnut mousse cups last about three days in the fridge. After this time, the mousse may lose its creamy texture. The graham cracker base can also get soggy. To enjoy the best taste and texture, eat them within this time frame. Always check for any signs of spoilage before enjoying.
Freezing Instructions
You can freeze mousse cups, but it’s best to do this without the toppings. Place the cups in the freezer for up to one month. When ready to eat, move them to the fridge overnight. This helps them thaw slowly and keeps their texture smooth. Avoid refreezing once thawed, as it can ruin the mousse.
FAQs
Can I make this dessert ahead of time?
Yes, you can prepare these mousse cups a day in advance. Just store them in the fridge. By letting them sit overnight, the flavors meld nicely. This also helps the mousse set perfectly.
How do I prevent the mousse from becoming runny?
To keep your mousse thick, use heavy whipping cream. Make sure to whip it until soft peaks form. When mixing, fold gently to keep air in. This keeps it light and fluffy.
What can I substitute for hazelnuts?
If you can’t find hazelnuts, try walnuts or almonds. Both offer a nice crunch and flavor. You can also use a nut-free chocolate spread if needed. For a twist, consider adding crushed cookies for texture.
This blog post covered how to make delicious mousse. I shared the best ingredients and important measurements. You learned about key substitutions and tips for high-quality ingredients. I explained step-by-step instructions for preparing the mousse and gave tips to get the right texture. Different flavors and dietary options let you be creative. Storage tips help keep your mousse fresh longer.
Making mousse can be fun and rewarding. Enjoy your sweet creations!
![- 1 cup plain Greek yogurt - 1/4 cup creamy mayonnaise - 1 tablespoon freshly squeezed lemon juice - 1 teaspoon garlic powder - 1 teaspoon onion powder - 1 teaspoon dried dill weed - 1 teaspoon dried parsley - 1/2 teaspoon sea salt - 1/4 teaspoon freshly ground black pepper - 1/4 teaspoon smoked paprika - Assorted fresh vegetables (carrots, celery, bell peppers, cucumber) To make a delicious Creamy Greek Yogurt Ranch Dip, you need a few simple ingredients. Start with the main trio: Greek yogurt, creamy mayonnaise, and lemon juice. The yogurt gives the dip its rich and tangy base. The mayonnaise adds a smooth, creamy texture, while the lemon juice brightens the flavors. Next, you’ll want to gather your seasonings. Garlic powder and onion powder add a savory punch. Dried dill weed and parsley bring in that classic ranch flavor. Salt, black pepper, and smoked paprika round out the taste, adding depth and a hint of spice. Finally, think about what to dip. Fresh veggies like carrots, celery, bell peppers, and cucumber work perfectly. They add crunch and freshness, creating a balanced snack. For the full recipe, check out the details above. First, grab a medium-sized mixing bowl. In this bowl, add 1 cup of plain Greek yogurt and 1/4 cup of creamy mayonnaise. These two ingredients create a rich base for our dip. Use a whisk or spatula to blend them well until smooth. It should look creamy and inviting. Next, squeeze in 1 tablespoon of freshly squeezed lemon juice. This adds a nice tang to the dip. Now, sprinkle in the seasonings: 1 teaspoon each of garlic powder, onion powder, dried dill weed, and dried parsley. Add 1/2 teaspoon of sea salt, 1/4 teaspoon of freshly ground black pepper, and 1/4 teaspoon of smoked paprika. These flavors will come together beautifully. Now it's time to whisk everything together. Vigorously mix the ingredients until the dip is fully combined. It should be smooth and creamy, with a lovely thickness. Take a taste and adjust the seasonings as needed. If you want more flavor, feel free to add a pinch of salt or a few more herbs. Your taste buds will guide you. Once you're happy with the flavor, it's time to chill the dip. Cover the bowl with plastic wrap or transfer the dip to an airtight container. Place it in the refrigerator for at least 30 minutes. This step allows the flavors to meld and deepen. When you're ready to enjoy, take the dip out of the fridge. Serve it chilled with an assortment of fresh vegetables for dipping, like carrots, celery, bell peppers, and cucumber. This adds a vibrant touch and makes for a fun snack! For the complete recipe, check out the [Full Recipe]. To make your Creamy Greek Yogurt Ranch Dip even tastier, try using fresh herbs. Fresh chives, dill, or parsley can add great flavor. You can also adjust the lemon juice for more tanginess. A little extra juice can brighten the dip. If you want a thicker dip, add more Greek yogurt. It will make the dip creamier. You can also cut back on the mayonnaise for a lighter version. This keeps the flavor while reducing calories. This dip is perfect for parties and gatherings. It pairs well with crackers or pita chips. Serve it with an array of fresh veggies, like carrots or cucumbers. They make great dippers, adding crunch to your snack. For the full recipe, check the earlier sections. {{image_4}} You can easily change the herbs in this dip. Fresh herbs like chives or basil work great. They add a nice twist to the flavor. Dried herbs can also give you different tastes. Think about using oregano or thyme for a unique touch. If you love some heat, add a spicy twist. Incorporate hot sauce or cayenne pepper. This will give your dip a zesty kick. You can also add chopped jalapeños for extra spice. Just be careful with the amount; you want to enjoy the heat, not overpower it! For a vegan version, swap the yogurt and mayonnaise. Use a plant-based yogurt and vegan mayo. Make sure all seasonings are plant-based too. This way, you can enjoy the same creamy dip without any animal products. It's delicious and fits many diets! For the full recipe, check out the link above. To keep your creamy Greek yogurt ranch dip fresh, store it in an airtight container. This helps prevent any odors from other foods in your fridge. You can enjoy the dip for up to one week. Just make sure to seal it tightly. Freezing this dip is not recommended. The texture may change after thawing, making it watery. Only freeze if it is necessary. If you must, use a freezer-safe container. If you freeze the dip, place it in the refrigerator to thaw. This method gives you the best results. Once thawed, stir it well before serving again. This helps bring back the creamy texture. Yes, non-fat can be used for a lighter version. This choice keeps the dip creamy while cutting down on fat. The flavor remains rich and satisfying. The dip lasts up to one week in the refrigerator. Store it in an airtight container to keep it fresh. I find it gets even better after a day. Fresh veggies, crackers, pita chips, or pretzels are great options. Carrots, celery, and bell peppers work well. You can get creative with your dippers! Yes, all ingredients are gluten-free; verify brands to be sure. This makes it a perfect snack for anyone with gluten sensitivities. Yes, it’s recommended to make it a few hours ahead to enhance flavors. The longer it sits, the more the flavors blend. I often prepare it the night before. This blog post shared a tasty Greek yogurt dip recipe. We covered the key ingredients, easy steps, and tips to make it even better. You learned how to customize the dip, try vegan options, and store it correctly. Think of this dip for your next party or snack. It’s healthy, easy to make, and perfect with fresh veggies or chips. Enjoy your tasty dip and feel good about sharing it with friends!](https://dishtreats.com/wp-content/uploads/2025/07/4dca82da-d028-43ac-94fd-c211b04a114a-768x768.webp)

. You now have all the tools to make savory herb roasted chicken thighs. We discussed the key ingredients, how to prepare and roast the chicken, and tips for crispy skin and flavor. You also learned about variations and storage methods to keep your meal fresh. Enjoy experimenting with flavors and techniques. Cooking should bring joy. Trust your skills, and share this tasty dish with others!](https://dishtreats.com/wp-content/uploads/2025/06/7c34b550-313c-42ec-9338-3ef305d43656-768x768.webp)