Creamy Spinach Artichoke Chicken Pasta One Pot Delight

Looking for a tasty one-pot recipe that’s easy and satisfying? You’re in the right place! My Creamy Spinach Artichoke Chicken Pasta is packed with flavor and takes just one pot to make. With tender chicken, creamy cheese, and vibrant veggies, this dish is sure to impress your family. Let’s dive into the fresh ingredients and simple steps to create a meal that will keep everyone coming back for more!
Ingredients
Main Ingredients
- 12 oz penne pasta
- 1 lb boneless, skinless chicken breasts, diced into bite-sized pieces
- 2 cups fresh spinach, roughly chopped
- 1 can (14 oz) artichoke hearts, drained and quartered
Dairy Ingredients
- 1 cup cream cheese, softened at room temperature
- 1 cup freshly grated parmesan cheese
Seasonings and Oil
- 1 teaspoon garlic powder
- 1 teaspoon onion powder
- 1 teaspoon Italian seasoning blend
- 2 tablespoons extra virgin olive oil
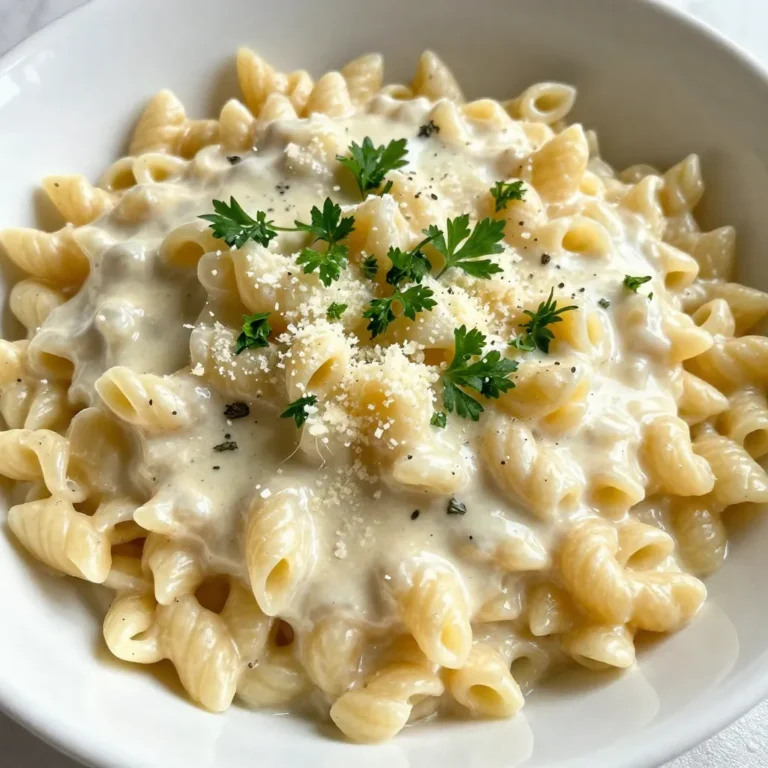
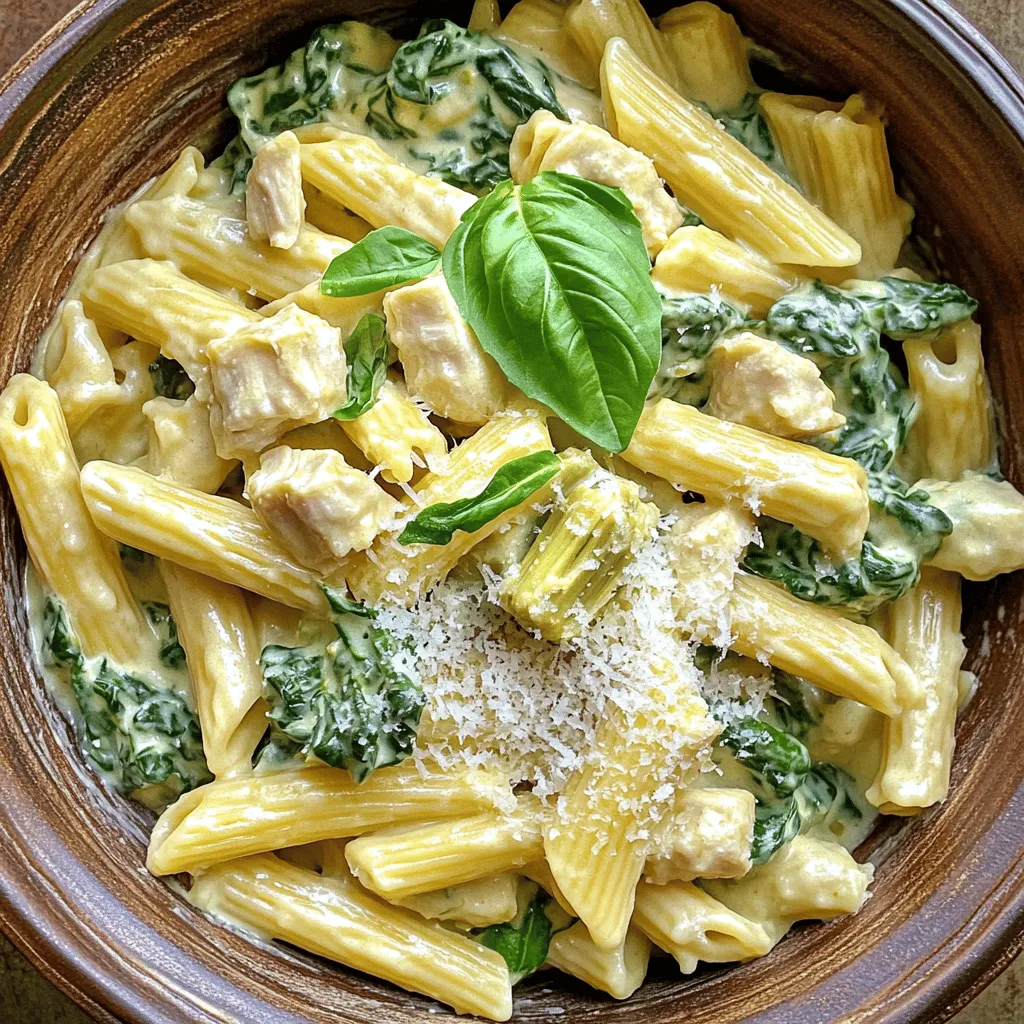
This creamy spinach artichoke chicken pasta dish is packed with flavor. The penne pasta serves as the perfect base, soaking up the rich sauce. I love using boneless, skinless chicken breasts for their tenderness. The fresh spinach adds a pop of color and nutrition. Artichoke hearts bring a tangy twist that pairs well with the other ingredients.
For the creamy texture, cream cheese is essential. It melts beautifully into the dish, creating a rich sauce. The freshly grated parmesan adds a savory touch that I can’t resist.
Seasonings like garlic powder, onion powder, and Italian blend transform this meal into something special. Olive oil gives a nice base to cook the chicken and adds depth to the flavors.
When making this dish, gather all your ingredients first. It makes the cooking process smoother and more enjoyable. Trust me, having everything ready will help you create a delightful meal every time!
Step-by-Step Instructions
Preparing the Chicken
First, heat two tablespoons of olive oil in a large pot over medium heat. Once the oil is hot, add one pound of diced chicken. Season it well with salt, pepper, garlic powder, and onion powder. Cook the chicken for about 5-7 minutes. Stir it often. You want the chicken to be golden brown and cooked through. Use a meat thermometer to check the temperature. It should reach 165°F to be safe to eat.
Cooking the Pasta
Next, pour in one cup of low-sodium chicken broth. Use a wooden spoon to scrape any tasty bits from the pot’s bottom. Raise the heat slightly and bring the broth to a gentle simmer. Carefully add 12 ounces of penne pasta, making sure it is fully submerged. Cover the pot with a lid and cook for about 10 minutes. Stir every few minutes to prevent sticking.
Combining Ingredients
Once the pasta is tender, reduce the heat to low. Add one cup of softened cream cheese, one cup of freshly grated parmesan cheese, two cups of roughly chopped spinach, and one can of drained and quartered artichoke hearts. Gently stir all the ingredients together. Allow the cream cheese to melt and mix in well. This should take about 2-3 minutes. If the sauce is too thick, add a splash of chicken broth to reach your desired creaminess. Taste and adjust with more salt, pepper, or Italian seasoning if needed. Let the dish sit for a few minutes to let the flavors meld before serving.
Tips & Tricks
Cooking Tips
- To prevent pasta from sticking, stir it well during cooking. This helps keep it loose.
- If your sauce is too thick, add a bit more chicken broth. Mix well until smooth.
Flavor Enhancements
- You can add extra spices like red pepper flakes for heat. This gives a nice kick.
- For garnishing, freshly torn basil adds color and flavor. Grate more parmesan on top, too.
Equipment Recommendations
- An ideal pot is a large Dutch oven. It distributes heat well for even cooking.
- A wooden spoon is useful for mixing. It helps avoid scratching your pot.
Variations
Ingredient Substitutions
Alternative protein choices
If you want a change from chicken, try using shrimp or tofu. Both add great flavor. You can also use cooked sausage or turkey for a different taste.
Vegetable swaps
Feel free to get creative with veggies! Kale or arugula can replace spinach. You could also add mushrooms, bell peppers, or zucchini for more texture and color.
Dietary Adjustments
Gluten-free options
To make this dish gluten-free, swap the penne pasta for a gluten-free pasta. There are many good options available in stores. Just be sure to check the cooking time, as it may differ.
Vegan alternatives
For a vegan twist, use plant-based cream cheese and skip the chicken. You can add chickpeas or lentils for protein. Nutritional yeast can replace parmesan for a cheesy taste.
Different Cooking Methods
Instant pot version
If you are short on time, use an Instant Pot. Start by sautéing the chicken in the pot, then add the broth and pasta. Cook on high pressure for about 4 minutes. After that, stir in the cream cheese and veggies.
Oven-baked variations
For a baked version, cook as usual but transfer to a baking dish before adding cheese. Top with extra cheese and bake at 350°F until bubbly and golden, about 20 minutes. This gives a nice crispy top.
Storage Info
Refrigeration
To store leftovers, let the pasta cool down first. Then, place it in an airtight container. This helps keep the creamy texture and flavors intact. You can store it in the fridge for up to three days. Make sure to reheat it properly to enjoy the taste again.
Freezing Guidelines
If you want to freeze the dish, use a freezer-safe container. It should seal tightly. This pasta can last for about two months in the freezer. When you’re ready to eat it, thaw it overnight in the fridge. Reheat it gently on the stove, adding a splash of chicken broth to keep it creamy.
Shelf Life
The creamy spinach artichoke chicken pasta stays fresh for about three days in the fridge. When frozen, it can last for up to two months. Always check for any off smells or changes in texture before eating. Enjoy your delicious meal even after cooking day!
FAQs
What can I use instead of cream cheese?
You can use Greek yogurt for a tangy twist. Sour cream also works well for creaminess. If you prefer a dairy-free option, try cashew cream or coconut cream. These alternatives keep your dish rich and smooth. Always check the flavor to ensure it matches your taste.
Can I use frozen spinach?
Yes, you can use frozen spinach in this dish. Just thaw it first and drain any excess water. This helps keep the pasta from getting too watery. Frozen spinach is a great time-saver and still adds nice flavor and nutrition.
How do I know when the chicken is fully cooked?
The chicken is fully cooked when it reaches 165°F. You can check this with a meat thermometer. Besides temperature, look for a golden color and firm texture. Cut a piece open; the meat should be white, not pink. This ensures your meal is safe and tasty.
This article covered a delicious recipe with penne pasta, chicken, and spinach. You learned about the key ingredients, easy steps, and how to enhance the flavors. The tips helped you avoid common cooking mistakes and offered ideas for ingredient swaps. Remember, feel free to adjust the recipe to meet your needs. With proper storage, you can enjoy leftovers later. Cooking can be fun and tasty! Trust these methods to create a meal you’ll love.

![Creating a Grilled Peach Caprese Salad is simple and fun. Here’s what you need: - Ripe peaches - Fresh mozzarella - Mixed greens - Cherry tomatoes - Fresh basil leaves - Balsamic glaze - Extra virgin olive oil - Salt and black pepper Each ingredient plays a key role in this dish. Ripe peaches bring sweetness. Fresh mozzarella adds creaminess. Mixed greens provide a nice crunch. Cherry tomatoes add color and flavor. Fresh basil contributes a fragrant touch. The balsamic glaze adds a tangy finish. Extra virgin olive oil enhances the taste. Lastly, salt and pepper bring everything together. For the full recipe, check out the steps to make this tasty salad. Trust me, your taste buds will thank you! - Preheat the grill to medium-high heat. This helps create great grill marks. - Ensure your grill grates are clean and lightly oiled. This prevents sticking. - Start by cutting the peaches in half and removing the pit. - Brush the cut sides of the peach halves with olive oil. This adds flavor and helps them grill well. - Place the peach halves cut side down on the grill. Grill for about 3-4 minutes. You want those nice grill marks. - Once they soften slightly, remove them. Let them cool for a couple of minutes. - Grab a large serving platter. Create a bed of mixed greens in the center. - Place the grilled peach halves on top of the greens. Spread them out for a nice look. - Next, add slices of fresh mozzarella around the peaches. Then scatter halved cherry tomatoes. - Tear fresh basil leaves and sprinkle them over the salad. This adds a lovely aroma. - Finally, drizzle balsamic glaze over the salad. Add salt and black pepper to taste. - For the best flavor, serve the salad right away. You can chill it a bit if you prefer. For the complete recipe, check out the [Full Recipe]. To get perfect grill marks on your peaches, heat your grill to medium-high. Brush the cut sides of each peach half with olive oil. This helps prevent sticking and adds flavor. Look for ripe peaches that yield slightly when pressed. They should be fragrant and have a bright color. Presentation matters! Try arranging your salad in a spiral pattern. You can also layer the ingredients in single servings. This makes each plate look special. Pair your salad with a crisp white wine or a light red. Both will enhance the flavors of the dish. Want to mix things up? Try using different dressings like a lemon vinaigrette or honey mustard. Fresh herbs like mint or dill can add a twist. You could also sprinkle some chili flakes for a little heat. These simple changes will keep your salad exciting. For the full recipe, check here: [Full Recipe]. {{image_4}} You can change up your Grilled Peach Caprese Salad by swapping fruits. Try using ripe nectarines or plums instead of peaches. These fruits provide a sweet touch and work well on the grill. You can also use strawberries or even grilled pineapple for a fun twist. For cheese, fresh mozzarella is the classic choice. However, you can try burrata for a creamier texture. Feta cheese adds a salty punch, while goat cheese gives a tangy flavor. Each cheese brings its own flair to the dish. To make this salad vegan, skip the cheese and use a plant-based alternative. Cashew cheese or tofu can work well. Drizzle a vegan balsamic glaze for that sweet touch. If you need a gluten-free option, this salad is naturally gluten-free. Just make sure your balsamic glaze is gluten-free as well. Enjoy fresh ingredients without any worries. For the best flavor, pick peaches in late summer. They are sweet and juicy in this season. In spring, try using asparagus or snap peas for a fresh crunch. In winter, roasted root vegetables like beets can replace fresh greens. Add some nuts for extra texture and flavor. Adapt your salad to fit the season and enjoy a fresh taste year-round. For the complete recipe of Grilled Peach Caprese Salad, check the Full Recipe. To keep your Grilled Peach Caprese Salad fresh, store it properly. First, separate the components. This way, the flavors stay bright and fresh. - Peaches: Place grilled peaches in a sealed container. Store them in the fridge for up to three days. - Salad Greens: Keep mixed greens in a dry, airtight container. This keeps them crisp and fresh. - Cheese and Tomatoes: Store mozzarella and cherry tomatoes in separate containers. This helps prevent sogginess. - Balsamic Glaze: Keep the glaze in a small jar. It can last for weeks in the fridge. You might wonder if you should reheat grilled peaches. I recommend enjoying them cold. Their flavor shines best this way. But if you prefer warm peaches, here’s how to heat them: - Microwave: Place peaches on a microwave-safe plate. Heat for about 10-20 seconds. Check them often to avoid overheating. - Stovetop: Heat a non-stick pan over low heat. Add a dash of olive oil and warm the peaches for a minute. For other salad ingredients, like mozzarella and tomatoes, it’s best to enjoy them cold too. Mixing warm and cold can lead to a fun flavor contrast in your dish. To make this dish, follow these simple steps: 1. Preheat your grill to medium-high heat. 2. Brush cut sides of halved peaches with olive oil. 3. Grill peach halves cut side down for 3-4 minutes. 4. On a platter, spread mixed greens for a base. 5. Place grilled peaches on top of the greens. 6. Add mozzarella slices and halved cherry tomatoes around the peaches. 7. Scatter torn basil leaves over the salad. 8. Drizzle balsamic glaze on top, then season with salt and pepper. 9. Serve right away or chill slightly before serving. Fresh mozzarella is the classic choice for Caprese salad. Its creamy texture balances the sweetness of grilled peaches. You can also try burrata for extra creaminess. Feta adds a tangy twist, while goat cheese can give a bold flavor. Choose based on your taste preferences to enhance your salad. You can prep parts of the salad ahead of time. Grill the peaches and store them in the fridge. Wash and dry the greens and tomatoes, keeping them fresh. Assemble everything just before serving to maintain flavor and texture. This way, your salad stays fresh and tasty. Check the [Full Recipe] for more details. This blog shared how to make a Grilled Peach Caprese Salad. You learned about choosing ripe peaches, grilling them, and assembling the salad. Tips on serving and variations helped you create your own version. Remember to store leftovers properly to keep them fresh. With these insights, you can enjoy a delicious, refreshing salad anytime. Trust that your skills will shine. Enjoy experimenting with flavors and ingredients to make it uniquely yours. Your summer gatherings will never be the same!](https://dishtreats.com/wp-content/uploads/2025/06/c765deb6-47e2-46b1-bbfc-9b058c8c2a51-768x768.webp)
![To make Parmesan roasted cauliflower, gather these simple ingredients: - 1 large head of cauliflower, cut into bite-sized florets - 3 tablespoons extra virgin olive oil - 1 cup freshly grated Parmesan cheese - 2 teaspoons garlic powder - 1 teaspoon onion powder - 1 teaspoon smoked paprika - Salt and freshly ground black pepper, to taste - Fresh parsley, finely chopped (for garnish) Using fresh ingredients makes a big difference in taste. Look for a cauliflower head that is firm and free of blemishes. The olive oil should be extra virgin for the best flavor. Freshly grated Parmesan cheese melts better than pre-grated. It has a richer taste and adds a creamy texture. Spices should be fresh too. This helps ensure you get the best flavor in every bite. If you want to change things up, try these add-ins: - Red pepper flakes for heat - Lemon zest for a fresh twist - Balsamic glaze drizzled on top for sweetness - Other cheeses like mozzarella or cheddar for different flavors These options let you customize the dish to fit your taste. Feel free to mix and match! For the full recipe, check out the details above. Start with a large head of cauliflower. Cut it into small, bite-sized florets. This size helps them cook evenly. Rinse the florets under cold water. Then, dry them well with a towel. Removing excess moisture helps them roast better. In a large mixing bowl, add the dried cauliflower florets. Pour in three tablespoons of extra virgin olive oil. Toss the florets until they are well-coated. In another bowl, mix one cup of freshly grated Parmesan cheese, two teaspoons of garlic powder, one teaspoon of onion powder, and one teaspoon of smoked paprika. Add salt and freshly ground black pepper to taste. Combine these dry ingredients well. Spread the coated cauliflower onto a lined baking sheet. Make sure they are in a single layer. This step helps them roast evenly. Preheat your oven to 425°F (220°C). Place the baking sheet in the oven and roast for 25 to 30 minutes. Flip the florets halfway through for even cooking. Look for a golden brown color and a tender texture. Once done, take the cauliflower out of the oven. Let it cool for a few minutes. Garnish with fresh parsley for a pop of color. Serve it on a bright platter for a beautiful display. You can also drizzle a little olive oil on top for extra flavor. This dish pairs well with grilled meats or as part of a veggie spread. Enjoy your delicious Parmesan roasted cauliflower! For more detailed guidance, check out the Full Recipe. To get that perfect roast, you need the right oven temperature. Preheat your oven to 425°F (220°C). This high heat crisps the edges and makes the cauliflower tender. Spread the florets in a single layer on the baking sheet. If they are too crowded, they will steam instead of roast. Flip them halfway through cooking for even browning. Aim for a golden color; that's when they taste the best. One common mistake is not drying the cauliflower. After washing, make sure it's dry. Excess water can lead to soggy florets. Another mistake is using old Parmesan cheese. Fresh cheese melts better and has more flavor. Lastly, don't skip the seasoning. A light touch of salt and pepper really makes a difference. You can easily make this dish even tastier. Try adding a squeeze of lemon juice before serving for a zesty kick. Fresh herbs like thyme or rosemary also add depth. For spice lovers, sprinkle some red pepper flakes for heat. You can find all these flavor ideas in the [Full Recipe]. {{image_4}} You can switch up the cheese for more flavor. Try pecorino Romano for a saltier bite. Goat cheese adds creaminess and tang. For a milder taste, use mozzarella or cheddar. Each cheese brings a unique twist to the dish. So, feel free to experiment with what you have on hand. If you like heat, add some cayenne pepper or crushed red pepper flakes. Start with a pinch and taste as you go. For a milder flavor, skip the smoked paprika. You can also use Italian seasoning for a different herb mix. Adjusting spices lets you make the dish your own. You can mix in other veggies for fun. Try bell peppers, carrots, or zucchini. Cut them into similar sizes as the cauliflower. This way, everything cooks evenly. Roasting a mix adds color and taste. You get a delightful medley on your plate. Check out the Full Recipe for more ideas on making this dish stand out! To keep your Parmesan roasted cauliflower fresh, place it in an airtight container. Make sure it cools to room temperature first. This helps prevent moisture buildup. Store it in the fridge for up to four days. If you want to enjoy it later, make sure to check the smell and texture before eating. When it's time to enjoy your leftovers, reheating is key. I recommend using the oven for the best results. Preheat your oven to 350°F (175°C). Spread the cauliflower on a baking sheet. Heat for about 10 to 15 minutes. This will crisp it up again and keep the cheese flavor strong. You can also use a microwave for quick reheating. Just heat for one to two minutes. But keep in mind, it won’t be as crispy. If you want to store the cauliflower for longer, freezing is a great option. Start by letting it cool completely. Then, place it in a freezer-safe bag. Squeeze out as much air as possible before sealing it. You can freeze it for up to three months. When ready to eat, thaw it overnight in the fridge. Then, reheat in the oven for the best taste. For more details, check out the full recipe. Roasting cauliflower takes about 25 to 30 minutes. Preheat your oven to 425°F (220°C). Place the cauliflower on a baking sheet in a single layer. Halfway through, flip the florets for even cooking. You want them to be golden brown and fork-tender. Yes, you can make this dish ahead of time. Roast the cauliflower and let it cool. Store it in an airtight container in the fridge for up to three days. When you’re ready to serve, just reheat it in the oven. This keeps it crisp and tasty. Parmesan roasted cauliflower pairs well with many dishes. Serve it alongside grilled chicken or fish for a balanced meal. It also complements pasta or a fresh salad. You can even use it as a topping for grain bowls. This dish adds a flavorful crunch to your plate. For the full recipe, check out the details above! In this blog post, we explored how to make delicious Parmesan Roasted Cauliflower. We outlined the key ingredients and shared tips for picking top-quality ones. I provided step-by-step instructions, covering preparation, mixing, roasting, and serving. You learned tips to ensure perfect roasting and avoid common mistakes. We discussed variations like different cheeses and spices, along with storage and reheating advice. With these insights, you can enjoy this tasty dish in many ways. Take your time and have fun creating your own version!](https://dishtreats.com/wp-content/uploads/2025/06/1026dd12-7014-4148-8186-1edda0f6a7e3-768x768.webp)
![To make Cherry Almond Protein Muffins, you need simple and healthy ingredients. Here’s a list for you: - 1 cup almond flour - 1/2 cup rolled oats - 1/2 cup protein powder (vanilla or unflavored) - 1/4 cup honey or maple syrup - 1/2 cup plain Greek yogurt - 2 large eggs - 1/2 cup unsweetened almond milk - 1 teaspoon baking powder - 1/2 teaspoon baking soda - 1/2 teaspoon salt - 1 cup fresh or frozen cherries, pitted and halved - 1/4 cup sliced almonds (for topping) - 1 teaspoon almond extract Each ingredient plays a key role in making these muffins tasty and nutritious. Almond flour gives a nutty flavor and a great texture. Rolled oats add heartiness and health benefits. Protein powder boosts the protein content, making these muffins perfect for a snack or breakfast. Using honey or maple syrup adds sweetness, while Greek yogurt keeps the muffins moist. The eggs help bind everything together, giving structure. Almond milk keeps the muffins light and adds a hint of almond flavor. Baking powder and baking soda make the muffins rise, resulting in fluffy bites. Cherries bring a burst of color and flavor, while sliced almonds on top add a delightful crunch. The almond extract enhances the nutty taste, tying all the flavors together. You can find the full recipe in the article to guide you step by step. Happy baking! Set your oven temperature to 350°F (175°C). Line a muffin tin with paper liners or grease each cup lightly. This helps the muffins come out easily after baking. In a large bowl, combine the almond flour, rolled oats, protein powder, baking powder, baking soda, and salt. Use a whisk to stir these ingredients well. Mixing them well ensures that your muffins rise evenly. In another bowl, whisk together the honey (or maple syrup), Greek yogurt, eggs, almond milk, and almond extract. Mix until it is smooth and creamy. This step adds moisture and flavor to your muffins. Gradually add the wet mixture to the dry mixture. Stir gently with a spatula until just combined. Be careful not to overmix the batter, as this can make the muffins tough. Gently fold the halved cherries into the batter. This adds bursts of flavor throughout each muffin. Then, fill each muffin cup about two-thirds full with the batter. This allows space for the muffins to rise. Place the muffin tin in the oven and bake for 18-20 minutes. The muffins should be golden on top. You can check for doneness by inserting a toothpick in the center; it should come out clean. Let the muffins cool in the pan for 5 minutes before transferring them to a wire rack. To make the best cherry almond protein muffins, watch your baking time. I suggest checking them at the 18-minute mark. If they look golden and a toothpick comes out clean, they are ready. Overbaking can dry out the muffins, so keep a close eye on them. After baking, let the muffins cool in the pan for five minutes. This step helps them firm up and gives you the right texture. Then, move them to a wire rack to cool completely. If you don’t have almond flour, you can use oat flour or whole wheat flour. They work well and will still taste great. For protein powder, you can try using a plant-based option or even a different flavor. If you need a non-dairy version, swap Greek yogurt for coconut yogurt or silken tofu. For almond milk, you can use soy milk or oat milk. These changes will still keep your muffins tasty and nutritious. Want to kick up the flavor? You can add a pinch of cinnamon or nutmeg to the batter. Both spices pair well with the cherries and almonds. You might also try adding a splash of vanilla extract for extra sweetness. If you enjoy a hint of citrus, a bit of lemon zest can brighten the taste. These simple additions can make your muffins even more delightful. Check out the full recipe to get started on your delicious cherry almond protein muffins! {{image_4}} You can play with flavors in these muffins. Dark chocolate chips add a rich touch. You can mix in some unsweetened coconut for a tropical twist. If you want to switch up the fruit, try using blueberries or raspberries. Both fruits pair well with almonds and give a fresh taste. You can also use dried cherries for a chewiness that works great in muffins. To make these muffins vegan, swap the eggs for flax eggs. Just mix one tablespoon of ground flaxseed with three tablespoons of water and let it sit for five minutes. Use plant-based yogurt instead of Greek yogurt. Maple syrup is a good choice to keep it sweet. You can still enjoy the same tasty muffins without animal products. If you want to cut back on sugar, reduce the honey or maple syrup. You can try using mashed bananas or unsweetened applesauce. Both will keep your muffins moist and sweet. Just remember to balance the flavors so you still enjoy every bite. Use spices like cinnamon to enhance the taste without adding more sugar. For the full recipe, check out the [Full Recipe] section above! To keep your Cherry Almond Protein Muffins fresh at room temperature, place them in an airtight container. This helps to keep moisture in and air out. Store them for up to three days. If you live in a warm area, keep them in a cool, dry place. Avoid direct sunlight, as it can dry them out. These muffins taste best when fresh, so enjoy them soon after baking. For long-term storage, freezing is the best option. Allow the muffins to cool completely before freezing. Wrap each muffin tightly in plastic wrap or aluminum foil. Then, place them in a freezer-safe bag or container. This method prevents freezer burn and helps preserve flavor. You can freeze them for up to three months. When ready to eat, simply thaw them in the fridge overnight or leave them at room temperature for a few hours. To enjoy your muffins warm, you can easily reheat them. Preheat your oven to 350°F (175°C). Place the muffins on a baking sheet and warm them for about 10 minutes. This method helps restore their soft texture. You can also use the microwave for a quick fix. Heat each muffin for 15-20 seconds. Just be careful not to overheat, as that can make them dry. For the full recipe, check out the delicious Cherry Almond Protein Muffins! Yes, you can use frozen cherries. They work just as well as fresh cherries. Just make sure to thaw them first and drain any extra liquid. This keeps the batter from becoming too wet. Frozen cherries can add a nice burst of flavor, and they are often just as nutritious as fresh ones. To check if your muffins are done, look for a golden top. Insert a toothpick into the center of a muffin. If it comes out clean or with a few crumbs, the muffins are ready. They should feel firm to the touch. If they are still wet, bake them for a few more minutes. Each muffin has about 150 calories. They are rich in protein and fiber. The almond flour and Greek yogurt add healthy fats and nutrients. Plus, cherries provide antioxidants. This makes them a tasty and nutritious snack. Enjoy these muffins guilt-free, knowing they are good for you! For the complete recipe, check the Full Recipe section. This blog post covers a simple and tasty cherry almond protein muffin recipe. You learned about the key ingredients and steps to make them. I shared tips for baking success, ingredient swaps, and ways to customize the recipe. Muffins can be fun and flexible. Whether you want to make them vegan or low-sugar, it's easy! Always store them well to keep their flavor fresh. Enjoy cooking, and have fun trying different variations. Your kitchen adventures can lead to yummy treats!](https://dishtreats.com/wp-content/uploads/2025/07/36a729b1-00f1-4288-a77b-47884a3c4d33-768x768.webp)