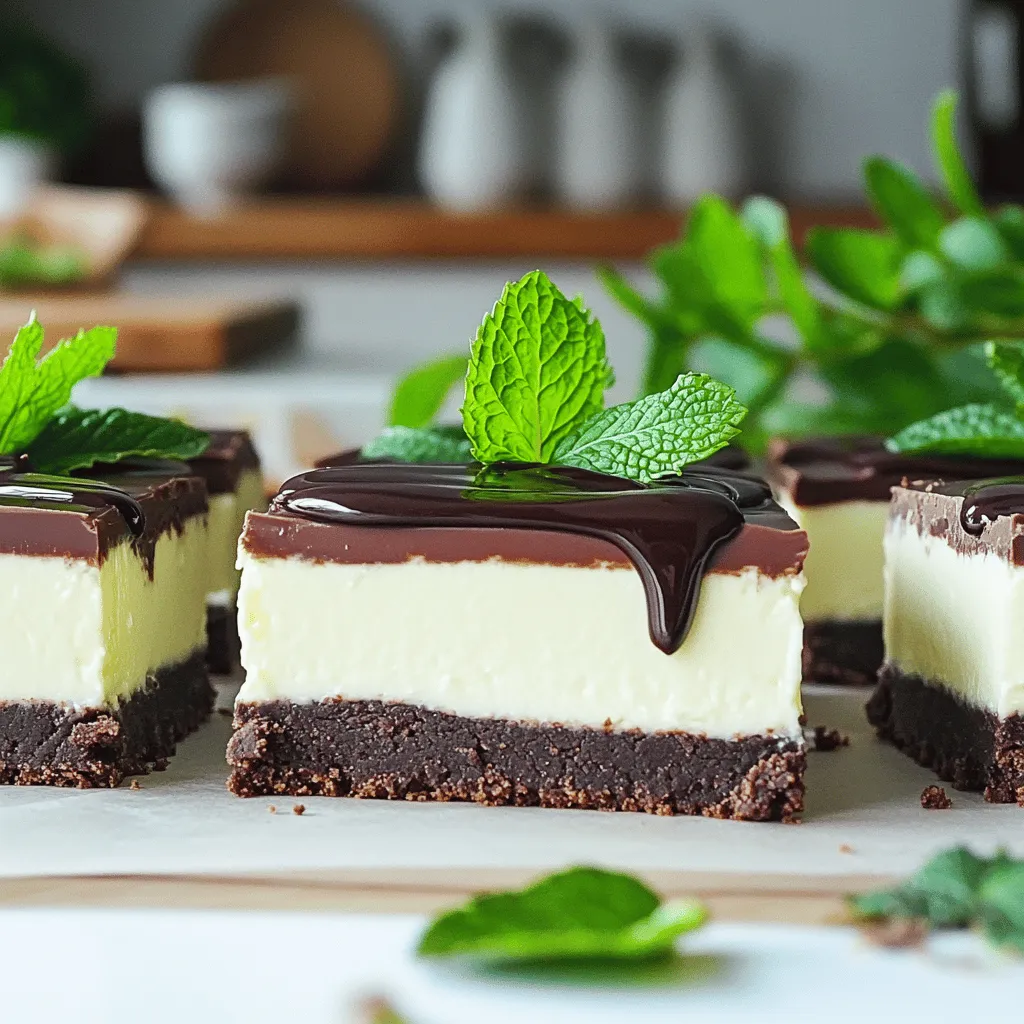
No-Bake Chocolate Mint Cheesecake Bars Delightful Treat

Are you ready to whip up a treat that’s both easy and delicious? Let me introduce you to my No-Bake Chocolate Mint Cheesecake Bars. This simple dessert combines rich chocolate and refreshing mint flavors, perfect for any occasion. You won’t need to turn on the oven! Join me for a step-by-step guide that makes creating this delightful dessert a breeze. Let’s get started!
Ingredients
Complete Ingredient List
- 1 ½ cups chocolate cookie crumbs
- ½ cup unsalted butter, melted
- 16 oz cream cheese, softened to room temperature
- 1 cup powdered sugar
- 1 teaspoon pure vanilla extract
- 1 teaspoon peppermint extract
- 1 cup heavy whipping cream
- 1 cup dark chocolate chips
- 1 tablespoon vegetable oil
- Fresh mint leaves for garnish
To make No-Bake Chocolate Mint Cheesecake Bars, you need simple yet tasty ingredients. The chocolate cookie crumbs form the base, giving a nice crunch. Melted unsalted butter helps bind the crumbs. Cream cheese makes the filling rich and creamy. You will also need powdered sugar for sweetness, along with pure vanilla and peppermint extracts for flavor.
For the finishing touch, whip heavy cream until it’s light and airy. This adds volume to the cheesecake filling. You will also need dark chocolate chips for a glossy top layer and some vegetable oil to help the chocolate melt smoothly. Finally, fresh mint leaves make a pretty garnish and add a pop of color.
Gather these ingredients before you start. Each one plays a key role in making your cheesecake bars delicious. You can find most of these items at your local grocery store. If you want to customize, think about different flavors or types of chocolate.
Step-by-Step Instructions
Preparing the Crust
- In a medium bowl, combine 1 ½ cups of chocolate cookie crumbs and ½ cup of melted unsalted butter. Mix until it looks like wet sand.
- Firmly press the mixture into the bottom of a 9×9-inch baking dish. Make sure it is even. Chill the crust in the fridge while you make the filling.
Making the Cheesecake Filling
- In a large bowl, beat 16 oz of softened cream cheese using an electric mixer until smooth.
- Gradually add 1 cup of powdered sugar and mix well until there are no lumps.
- Add 1 teaspoon of pure vanilla extract and 1 teaspoon of peppermint extract to the cream cheese mixture. Mix until blended.
- In another bowl, whip 1 cup of heavy cream until stiff peaks form. Carefully fold this into the cream cheese mix until no white streaks are left.
Assembling the Bars
- Spread the cheesecake filling evenly over the chilled cookie crust using a spatula.
- In a microwave-safe bowl, melt 1 cup of dark chocolate chips and 1 tablespoon of vegetable oil in 30-second intervals. Stir until smooth.
- Drizzle the melted chocolate over the cheesecake layer. Use a spatula to spread it evenly.
- Cover the dish with plastic wrap and refrigerate for at least 4 hours, or overnight. This helps the bars set.
- Once set, cut the cheesecake into neat bars and garnish with fresh mint leaves before serving.
Tips & Tricks
Achieving the Perfect Cheesecake Texture
To make the best cheesecake, use room temperature ingredients. This helps the cream cheese mix well. Cold cream cheese can leave lumps. Let it sit out for about 30 minutes before you start.
Whipping cream is key for a light texture. Use a clean bowl and beaters when whipping cream. Whip the cream until stiff peaks form. Then, gently fold it into the cream cheese mixture. Start at the bottom and lift it up. This keeps the mixture airy. Avoid stirring too hard, or it will deflate.
Serving Suggestions
You can garnish these bars to make them pop. Fresh mint leaves add a bright touch. You can also sprinkle chocolate shavings on top. This makes the bars look fancy and delicious.
Pair your cheesecake bars with a scoop of vanilla ice cream. The cold ice cream balances the rich taste of the bars. You can also serve them with a cup of hot coffee. The warm drink enhances the mint flavor. Enjoy your treats!
Variations
Flavor Modifications
You can tweak the flavor of these bars to suit your taste. For a different twist, try adding other extracts. You might enjoy using vanilla or almond instead of peppermint. This change can make each bite unique and exciting.
You can also swap out chocolate types. If you prefer a sweeter taste, use milk chocolate instead of dark chocolate. Dark chocolate gives a rich flavor, while milk chocolate adds sweetness. Each option creates a new dessert experience.
Dietary Adjustments
If you need to make it gluten-free, switch the chocolate cookie crumbs for gluten-free cookies. Many brands offer gluten-free options that taste great. This way, everyone can enjoy the bars together.
For dairy-free options, use a dairy-free cream cheese. Brands like Tofutti and Kite Hill make good substitutes. You can also replace heavy cream with coconut cream for a rich texture. These simple swaps still keep the bars creamy and delicious.
Storage Info
Best Ways to Store Leftovers
To store your No-Bake Chocolate Mint Cheesecake Bars, keep them in the fridge. Place the bars in an airtight container. They will stay fresh for up to five days. If you want to keep them longer, you can freeze them. Wrap each bar in plastic wrap and then put them in a freezer bag. This method helps to prevent freezer burn.
Reheating Instructions
When you are ready to enjoy the frozen bars, thaw them in the fridge overnight. This slow thaw keeps the texture nice. After thawing, take them out and serve. You can add fresh mint leaves for a pop of color. Enjoy your delicious treat!
FAQs
How long do No-Bake Chocolate Mint Cheesecake Bars last?
No-Bake Chocolate Mint Cheesecake Bars last about one week in the fridge. Store them in an airtight container to keep them fresh. After a week, the taste and texture may change, so enjoy them sooner for the best flavor.
Can I make these bars ahead of time?
Yes, you can make these bars ahead of time. They taste even better after chilling overnight. This allows the flavors to blend well. Just cover them tightly and keep them in the fridge until you are ready to serve.
What can I use instead of cream cheese?
If you want to skip cream cheese, try using Greek yogurt or silken tofu. Both options give a creamy texture. Greek yogurt adds some tanginess, while silken tofu makes it dairy-free. Blend them well to ensure smoothness.
How can I make these bars without peppermint flavor?
To make these bars without peppermint, simply skip the peppermint extract. You can replace it with vanilla extract or almond extract for a different taste. This change gives the bars a new flavor while keeping them just as delicious.
These no-bake chocolate mint cheesecake bars are simple to make and delicious. We covered the ingredients and steps to create a tasty treat. You can customize the flavors to suit your taste, swap ingredients for dietary needs, and store leftovers easily.
Now you can enjoy a sweet, refreshing dessert anytime. Try these bars at your next gathering. They are sure to impress!


![To make Classic Sloppy Joes, you need some simple, fresh ingredients. Here’s what you will need: - 1 lb ground beef (or turkey) - 1 small onion, finely chopped - 1/2 green bell pepper, finely chopped - 2 cloves garlic, minced - 1 cup tomato sauce - 2 tablespoons ketchup - 1 tablespoon brown sugar - 1 tablespoon Worcestershire sauce - 1 teaspoon mustard - Salt and pepper to taste - 4 hamburger buns - 1 cup shredded cheddar cheese (optional) - Fresh parsley for garnish These ingredients come together to create a rich and tasty filling. The ground beef or turkey serves as a hearty base. The onion and bell pepper add a nice crunch and sweetness. Garlic gives it a punch of flavor. You can also adjust the recipe. If you want a lighter dish, use turkey. For a cheesy twist, add cheddar on top. Fresh parsley adds color and a hint of freshness. This Classic Sloppy Joes recipe is quick and easy. You can find the full recipe [Full Recipe]. Enjoy cooking! First, heat a large skillet over medium heat. This step is key to getting a nice sear. Once the skillet is hot, add 1 lb ground beef or turkey. Use a wooden spoon to break the meat apart as it cooks. This helps it brown evenly. Cook until the meat is browned throughout. Be sure to drain any excess fat from the pan. This keeps your Sloppy Joes from being greasy. Next, add 1 small finely chopped onion, 1/2 green bell pepper, and 2 cloves minced garlic to the skillet. Stir the mixture well. Cook for about 5 minutes or until the veggies soften and smell great. They add a nice flavor to your dish. Now it’s time to make the sauce. Stir in 1 cup tomato sauce, 2 tablespoons ketchup, 1 tablespoon brown sugar, 1 tablespoon Worcestershire sauce, and 1 teaspoon mustard. Mix everything well until the sauce blends with the meat and veggies. Bring the mixture to a gentle simmer. This step helps all the flavors meld together. Lower the heat to maintain a gentle simmer. Let the mixture cook for about 10 minutes, stirring occasionally. If it gets too thick, add a splash of water. This keeps it from becoming dry. Stirring helps prevent sticking and keeps the mixture smooth. Taste the mixture and season it with salt and pepper to your liking. This is your chance to adjust the flavors. While the sloppy joe filling simmers, toast 4 hamburger buns. You can use a hot skillet or toaster. Toast them until they are golden brown and slightly crisp. This adds a nice crunch to your meal. To serve, take a toasted bun and spoon the savory filling onto it. For a cheesy twist, add 1 cup shredded cheddar cheese on top. Finish with a sprinkle of chopped parsley for a pop of color and flavor. This makes your Sloppy Joes look and taste amazing. Enjoy this delightful dish with your family! For the full recipe, check the recipe section above. To enhance flavor, try adjusting the ketchup or brown sugar. If you like it sweeter, add more brown sugar. For a tangy kick, a splash of vinegar works wonders. The sauce should be rich but not too thick. If it gets too thick, add a little water or extra tomato sauce. This keeps it juicy and fun to eat. You can cook Sloppy Joes on the stovetop or in a slow cooker. The stovetop is quick and easy. Sauté the meat and veggies, then let it simmer. In a slow cooker, mix everything and let it cook for hours. This method deepens the flavor. You can also swap the meat. Ground turkey or chicken are great lighter options. For a twist, try lentils for a vegetarian dish. Sloppy Joes pair well with crispy fries or a fresh coleslaw. The crunch of the coleslaw balances the softness of the sandwich. For drinks, a cold soda or iced tea is perfect. You can also enjoy them with a light beer if you prefer. These pairings make your meal fun and complete. {{image_4}} You can spice up your Sloppy Joes with fun twists. For a veggie option, try lentils or black beans instead of meat. They give a hearty texture and soak up the sauce well. Another twist is BBQ Sloppy Joes. Just add your favorite BBQ sauce to the meat mixture for a sweet and tangy flavor. Toppings can make your Sloppy Joes even more amazing. You might want to add different types of cheese. Try provolone or pepper jack for a kick. You can also mix in various sauces. A drizzle of ranch or hot sauce adds a nice touch. Different places have their own takes on Sloppy Joes. In Mexico, they use spices and jalapeños for a spicy version. In the Philippines, they might add sweet sauce and serve it with rice. Exploring these options shows how versatile this dish can be. To keep your Sloppy Joes fresh, store them in an airtight container. Place the cooled mixture in the fridge. Make sure to separate any extra buns to avoid sogginess. You can keep the leftovers for up to three days. If you want to keep them longer, freezing is a great option. When you reheat Sloppy Joes, the stovetop is best. Place the mixture in a skillet over low heat. Stir often to keep it juicy. If using the microwave, cover it with a damp paper towel to keep moisture in. For buns, you can toast them lightly on a skillet or wrap them in foil and warm them in the oven. This way, they stay soft and tasty. To freeze the Sloppy Joe mixture, let it cool first. Then, transfer it to a freezer-safe bag. Remove as much air as possible before sealing. This helps prevent freezer burn. You can freeze it for up to three months. When ready to eat, thaw it in the fridge overnight. Reheat on the stove until hot. Enjoy your Sloppy Joes just like the first time! Making Classic Sloppy Joes is quick and easy. You need about 10 minutes for prep. Cooking takes another 15 minutes. In total, you can have dinner ready in just 25 minutes. Yes, you can use ground turkey as a lighter choice. Turkey has fewer calories and less fat than beef. The flavor will be milder, so you might want to adjust your spices. It’s a great way to make a healthier Sloppy Joe. Sloppy Joes pair well with many sides. Here are some tasty options: - French fries - Coleslaw - Potato chips - Corn on the cob - Salad These sides add nice crunch and freshness to your meal. You can definitely make Sloppy Joes ahead of time. Just cook the meat and sauce, then store it in the fridge. It will last for three days. When you’re ready to eat, heat it up and serve on toasted buns. This makes meal prep easy and saves time. For longer storage, you can freeze the mixture. Just thaw and reheat when ready. You’ll still enjoy great flavor! In this blog post, we covered how to make Classic Sloppy Joes. We explored the ingredients, cooking steps, and tips for flavoring. I also shared variations and storage methods. Sloppy Joes are simple to make, versatile, and fun to eat. Don't hesitate to explore your options by trying new ingredients or toppings. Enjoy your meal and share it with friends for a delicious time!](https://dishtreats.com/wp-content/uploads/2025/06/3a095a95-3efb-4397-8f70-4189d4d50cab-768x768.webp)