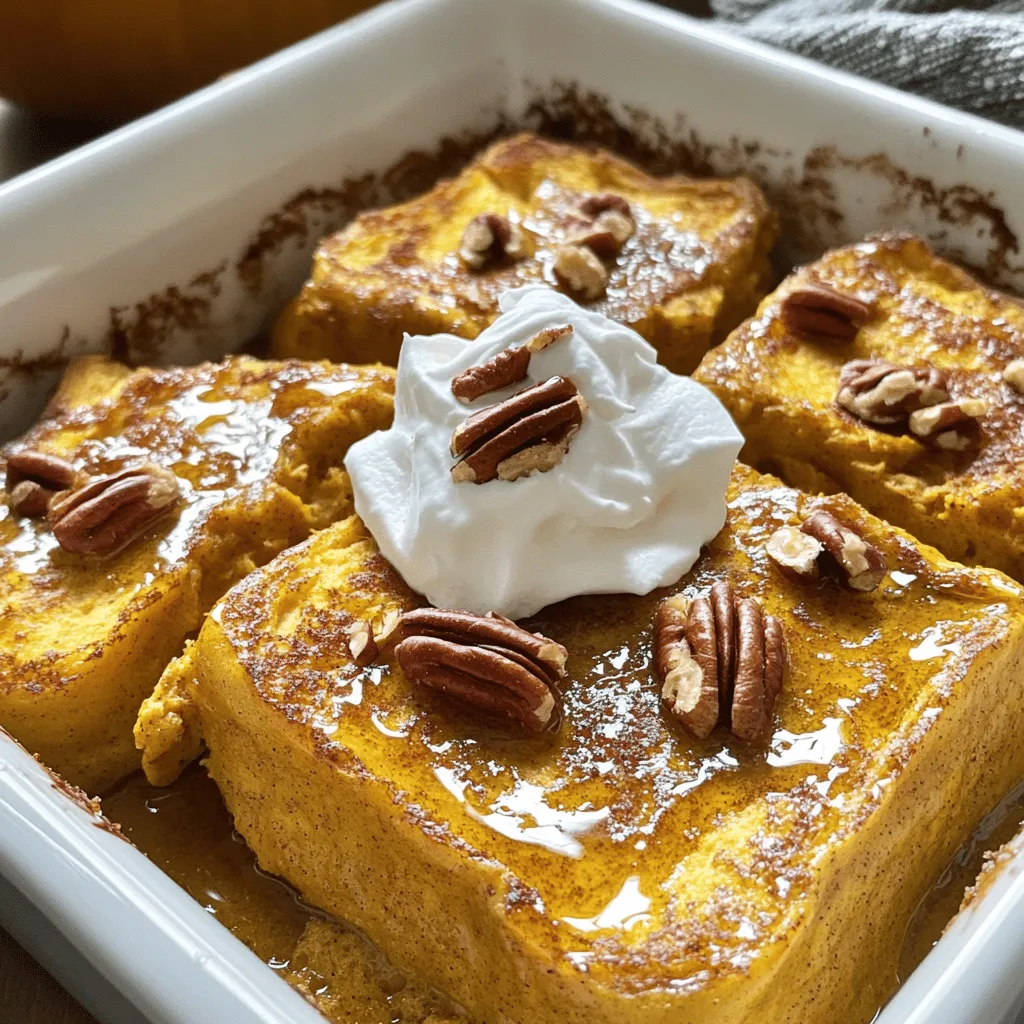
Pumpkin Spice French Toast Casserole Savory Delight

Fall flavors come alive with my Pumpkin Spice French Toast Casserole. This dish is simple, tasty, and perfect for breakfast or brunch with friends. You’ll blend rich pumpkin and warm spices, creating a sweet, comforting treat that hits the spot. Whether you’re hosting a gathering or just want a cozy morning, this casserole is a must-try. Let’s dive into the ingredients and get cooking!
Ingredients
List of Necessary Ingredients
To make the Pumpkin Spice French Toast Casserole, gather these key ingredients:
- 1 loaf of brioche bread, cubed into bite-sized pieces
- 1 can (15 oz) pure pumpkin puree
- 4 large eggs
- 2 cups milk (whole or almond)
- 3/4 cup packed brown sugar
- 2 teaspoons pure vanilla extract
- 2 teaspoons pumpkin pie spice
- 1/2 teaspoon ground cinnamon
- A pinch of salt
Optional Ingredients for Added Flavor
You can enhance your casserole with these optional ingredients:
- 1 cup chopped pecans for a nice crunch
- Maple syrup for serving
- Whipped cream for garnish
Ingredient Substitutions
If you need to swap some ingredients, here are some easy ideas:
- Use challah or whole wheat bread instead of brioche for a different taste.
- Replace whole milk with oat milk for a dairy-free option.
- Use coconut sugar instead of brown sugar for a lower glycemic index.
Step-by-Step Instructions
Preparing the Oven and Baking Dish
First, preheat your oven to 350°F (175°C). This step is key. While the oven heats, take a 9×13 inch baking dish. Grease it well with butter or cooking spray. This keeps the casserole from sticking.
Mixing the Pumpkin Batter
In a large bowl, combine the pure pumpkin puree, eggs, milk, brown sugar, vanilla extract, pumpkin pie spice, and ground cinnamon. Add a pinch of salt. Whisk everything until smooth. This mixture will be the base for your casserole.
Incorporating the Bread Cubes
Next, take your cubed brioche bread. Carefully add it to the pumpkin mixture. Use a spatula to gently fold the bread in. Make sure each piece is coated well. If you like nuts, fold in the chopped pecans now.
Transferring to Baking Dish
Now, pour the mixture into the greased baking dish. Spread it out with the spatula for an even layer. This helps it cook evenly.
Allowing the Mixture to Soak
Cover the dish tightly with aluminum foil. Let it sit for about 15 minutes. This soaking time is important. It allows the bread to soak up all the yummy flavors.
Baking the Casserole
After soaking, take off the foil. Place the dish in the preheated oven. Bake for 30-35 minutes. You want the top to be golden brown and the center to be set.
Cooling and Serving
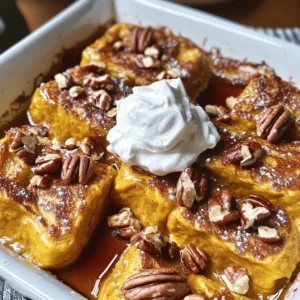
When it’s done baking, remove the casserole from the oven. Let it cool for a few minutes. This makes it easier to cut. Slice it into squares and serve warm. Drizzle with maple syrup and add whipped cream for a treat.
Tips & Tricks
Best Techniques for Mixing
For the best mix, start with a large bowl. Add the pumpkin puree, eggs, milk, and brown sugar. Use a whisk to blend the mixture until it is smooth. This step is key. It helps all the flavors combine well. When you add the bread, be gentle. Use a spatula to fold in the bread cubes. This helps each piece get coated without breaking.
How to Avoid Soggy Bread
To keep your bread from getting soggy, use fresh brioche. Stale bread works, but fresh gives a better texture. Make sure to soak the bread only for 15 minutes. This gives it time to absorb flavor without getting too wet. If you want, you can also toast the bread cubes lightly before adding them to the mixture. This adds a nice crunch.
Garnishing Ideas for Presentation
For a lovely presentation, serve the casserole warm. Drizzle maple syrup over each piece. Add a dollop of whipped cream on top. You can also sprinkle some extra cinnamon for color. If you like nuts, sprinkle chopped pecans on each plate. This makes it look fancy and adds a nice crunch.
Variations
Nut-Free Alternatives
If you want a nut-free version, just skip the pecans. You can replace them with seeds, like pumpkin or sunflower seeds. These seeds add crunch without the nuts. They will not change the taste much, and they keep your dish safe for those with nut allergies.
Spicing It Up: Adding Additional Flavors
To boost flavor, consider adding a splash of maple extract or a bit of nutmeg. You can also try adding orange zest for a fresh twist. Each of these will add depth to your pumpkin spice mix. Just a little goes a long way, so start small and taste as you go.
Making it a Breakfast Bake with Fruits
Adding fruits makes this casserole even more tasty. You can fold in diced apples or pears right before baking. Berries, like blueberries or raspberries, can also add great flavor. They bring a nice sweetness that pairs well with pumpkin. Just remember to adjust your baking time if you add a lot of fruit.
Storage Info
How to Properly Store Leftovers
To keep your pumpkin spice French toast casserole fresh, store it in an airtight container. Let it cool to room temperature first. Then, place the casserole in the fridge. It will stay good for about 3 to 4 days. If you have extra, slice the casserole before storing. This makes it easy to grab a piece later.
Reheating Instructions
When you’re ready to enjoy your leftovers, preheat your oven to 350°F (175°C). Place the casserole in an oven-safe dish. Cover it with foil to keep it moist. Heat for about 15 to 20 minutes. You can also microwave individual portions. Use a microwave-safe plate and heat for about 1 to 2 minutes. Check that it’s hot all the way through.
Freezing for Future Enjoyment
You can freeze this casserole for later. First, let it cool completely. Wrap it tightly in plastic wrap and then in aluminum foil. This helps prevent freezer burn. It can last in the freezer for up to 3 months. To thaw, move it to the fridge overnight. Reheat as mentioned earlier when you’re ready to enjoy it again.
FAQs
How do I make pumpkin spice French toast casserole ahead of time?
To make it ahead, mix the batter and cubed bread the night before. Pour it into the baking dish, cover it, and keep it in the fridge. This way, the bread can soak up the pumpkin goodness overnight. In the morning, just bake it as directed. This saves you time and gives great flavor.
Can I use different types of bread?
Yes, you can use other types of bread. Challah, sourdough, or even whole wheat bread work well. Each type will bring its own taste and texture. Just make sure the bread is sturdy enough to hold the mixture without getting too mushy.
What are the best toppings for this casserole?
For toppings, maple syrup is a must. It adds sweetness and flavor. Whipped cream makes it extra special. You can also sprinkle some extra cinnamon or nuts on top for crunch. Fresh fruits like berries or sliced bananas also add nice color and taste.
How long can I store leftovers in the fridge?
You can store leftovers for up to three days in the fridge. Just place them in an airtight container. When you want to eat it, reheat in the microwave or oven. This keeps the flavors fresh and tasty.
This article covered essential ingredients, step-by-step instructions, and helpful tips for making pumpkin spice French toast casserole. I shared options for substitutions and variations to match your taste. You learned how to store leftovers and reheating methods for future enjoyment.
In conclusion, this dish is fun to make and perfect for cozy gatherings. Enjoy your cooking and share it with others!


![- 8 oz linguine or spaghetti - 1 lb large shrimp, peeled and deveined - 4 cloves garlic, finely minced - 1/4 cup extra-virgin olive oil - 1 teaspoon red pepper flakes - 1/2 cup fresh parsley, finely chopped - 1 lemon, juiced and zested - Salt and freshly ground black pepper to taste - Grated Parmesan cheese (optional) To make Quick Garlic Shrimp Pasta, you need fresh and quality ingredients. The base of this dish is linguine or spaghetti, which holds the sauce nicely. I love using large shrimp because they cook quickly and have a great flavor. Garlic is a must here. It adds a rich, aromatic taste that makes the dish special. Next, the olive oil brings everything together. I always choose extra-virgin for its fresh and fruity flavor. Red pepper flakes add that perfect kick. Adjust the amount to fit your spice level. Fresh parsley brightens the dish, making it look vibrant. The lemon juice and zest add a zesty touch that balances the richness. Don’t forget salt and pepper to enhance all the flavors. If you want to make it extra savory, sprinkle some grated Parmesan cheese on top. These ingredients work together to create a dish that is simple yet full of flavor. For the full recipe, refer to the section above. - Bring a large pot of water to a boil. - Add salt to the water for flavor. - Cook the pasta according to the package instructions. - Reserve about 1 cup of the pasta water before draining. - Heat olive oil in a large skillet over medium heat. - Add minced garlic and red pepper flakes. - Sauté the garlic for about 30 seconds until fragrant. - Introduce the shrimp into the skillet. - Season the shrimp with salt and black pepper. - Cook for about 2-3 minutes until the shrimp turn pink and opaque. - Toss the cooked pasta into the skillet with the shrimp. - Add the reserved pasta water for creaminess. - Pour in lemon juice and zest for brightness. - Fold in the chopped fresh parsley for a fresh taste. - Taste and adjust seasoning if needed. - Plate the pasta into individual bowls. - Garnish with extra parsley and a lemon wedge. - Serve warm and enjoy this dish. For detailed cooking steps, check the Full Recipe. To get the best garlic taste, avoid burning it. When you heat garlic, it should become fragrant but not brown. Burnt garlic can taste bitter and ruin your dish. Start with medium heat and watch it closely. If you like spice, adjust the red pepper flakes. Add more for heat or less for mildness. Taste as you go, and find what suits you best. Cooking pasta to al dente is key. This means the pasta should be firm but not hard. Overcooked pasta can turn mushy and lose its bite. Before draining your pasta, save some pasta water. This starchy water helps the sauce stick and adds flavor. It’s a simple trick that makes a big difference! For side dishes, consider a fresh salad or garlic bread. These pair well with the pasta and add balance to your meal. When it comes to wine, a crisp white wine works best. Look for a Sauvignon Blanc or a Pinot Grigio. These wines enhance the garlic flavors and make the meal feel special. {{image_4}} You can switch up the pasta to fit your needs. Try whole wheat or gluten-free pasta. Both options work well with this dish and add a different taste. Fresh herbs can change the flavor too. Use basil or chives for a fresh twist. They brighten up the shrimp pasta and add a new layer of taste. You can explore other seafood options if you want. Scallops and calamari both taste great in this dish. They offer a nice change from shrimp while keeping the dish light. For a vegetarian version, use mushrooms instead of shrimp. Mushrooms have a meaty texture and soak up flavors well. This swap keeps the dish satisfying without meat. Want a richer sauce? Adding cream can make your dish more decadent. It gives the pasta a smooth texture that many love. You can also add cherry tomatoes for freshness. They pop with flavor and add color to your plate. This small change can elevate your garlic shrimp pasta experience. For a full recipe, check out the details above. To store leftover pasta, place it in an airtight container. Make sure to let it cool first. This helps prevent sogginess. You can keep it in the fridge for up to three days. After that, the shrimp may lose its quality. Always check for any off smells or changes in color before eating. When reheating pasta, use a skillet. This keeps the dish from getting too dry. Add a splash of water or olive oil to help. Heat it on low, stirring gently. Avoid using the microwave if you can. It can make the shrimp rubbery. Always taste a little before serving to ensure it's warm and flavorful. Yes, you can freeze garlic shrimp pasta! First, let the dish cool completely. Then, place it in a freezer-safe container. Leave some space for expansion. You can freeze it for up to two months. To thaw, move it to the fridge overnight. Reheat it on the stove, adding a bit of water or oil to restore moisture. You can make Quick Garlic Shrimp Pasta in about 30 minutes. - Prep time: 10 minutes - Cooking time: 20 minutes Yes, you can use frozen shrimp. Just thaw them first. - To thaw shrimp, place them in cold water for about 15-20 minutes. - Ensure shrimp are peeled and deveined before cooking. You can pair this dish with several sides: - A fresh garden salad - Garlic bread for dipping - Steamed vegetables like broccoli or asparagus To reduce the spice, you can: - Use fewer red pepper flakes or omit them. - Add more olive oil or butter to mellow the heat. I recommend using linguine or spaghetti. - These pasta types hold the sauce well. - You can also try fettuccine for a different texture. For the full recipe, refer to the [Full Recipe]. Quick Garlic Shrimp Pasta is simple and tasty. You learned about key ingredients, cooking steps, and useful tips. I focused on making garlic and shrimp shine while keeping it easy. You can swap out ingredients, store leftovers, and reheat without losing flavor. Try different flavors to make it your own. Follow these steps, and enjoy a delicious meal any day of the week. Cooking should be fun and satisfying, so gather your ingredients and start creating!](https://dishtreats.com/wp-content/uploads/2025/06/6901a993-fcd3-4db1-9297-5790b6f94dfa-768x768.webp)