Sheet Pan Garlic Parmesan Gnocchi & Veggies Delight

Looking for a delicious and easy meal? This Sheet Pan Garlic Parmesan Gnocchi & Veggies Delight is just what you need! Packed with flavors, it combines tender gnocchi with fresh vegetables and a tasty garlic Parmesan topping. You’ll love how quickly this dish comes together, making it perfect for busy nights. Join me as I guide you through a simple recipe that brings joy to your dinner table!
Ingredients
Main Ingredients
- 1 pound store-bought gnocchi
- 2 cups cherry tomatoes, halved
- 1 bell pepper, chopped
- 1 medium zucchini, sliced into half-moons
- 1 cup broccoli florets
- 4 cloves garlic, finely minced
Seasoning and Oil
- 4 tablespoons extra virgin olive oil
- 1 teaspoon Italian seasoning blend
- ½ teaspoon crushed red pepper flakes
- Salt and black pepper, to taste
- ½ cup freshly grated Parmesan cheese
Optional Garnish
- Fresh basil leaves for garnish
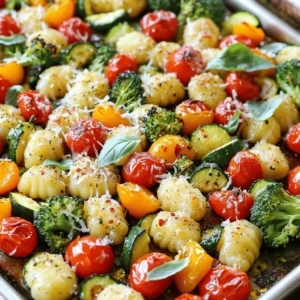
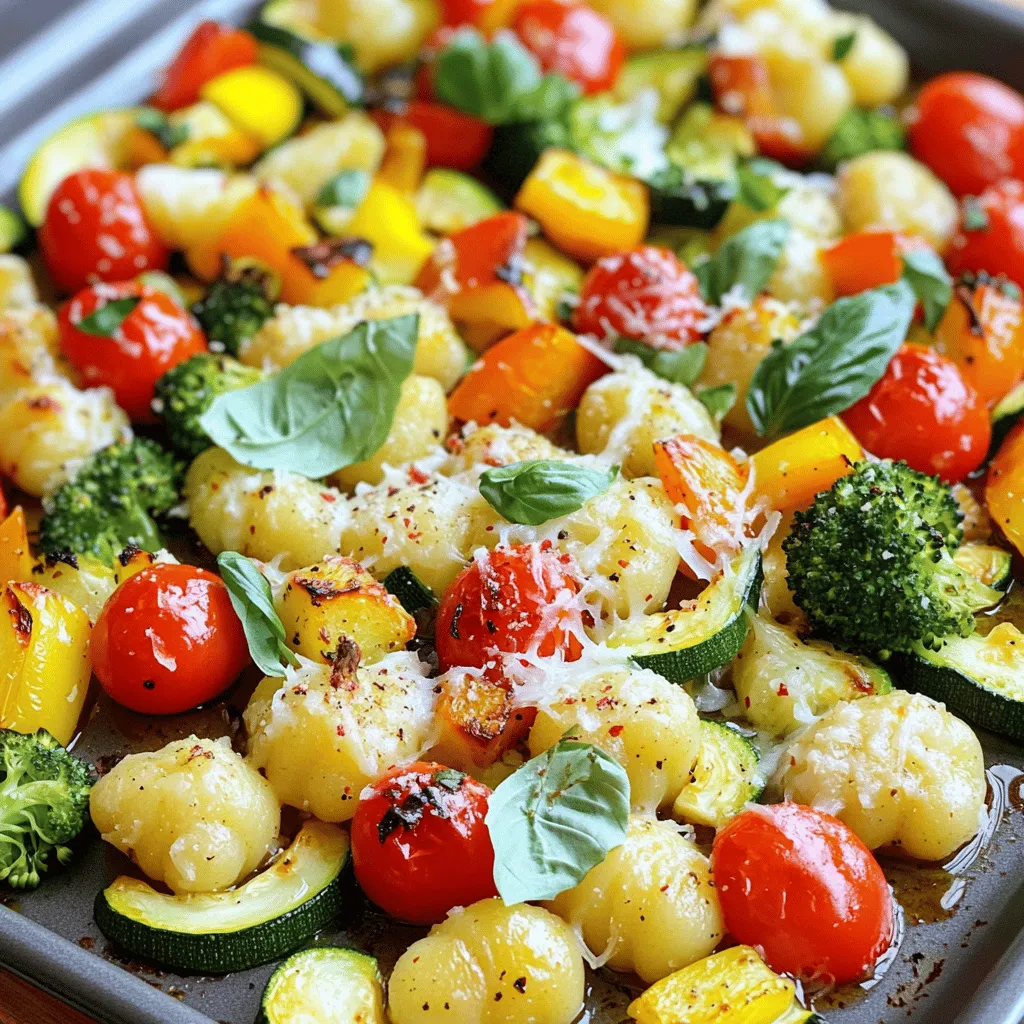
This dish shines with its bright colors and fresh flavors. The gnocchi offers a soft and chewy texture. The cherry tomatoes burst with sweetness. The bell pepper adds crunch, while the zucchini and broccoli contribute a nice earthiness. Garlic brings a warm, savory note that ties everything together.
For the seasoning, we use a mix that makes this dish sing. The extra virgin olive oil coats the ingredients well. The Italian seasoning adds that classic herb aroma. If you like a kick, the crushed red pepper flakes give just the right amount of heat.
Don’t forget the salt and black pepper. They balance all the flavors. Finally, the freshly grated Parmesan cheese melts beautifully, adding creaminess and depth. If you want to brighten the dish, fresh basil leaves make a lovely garnish.
This recipe is simple and fun. You can easily adjust ingredients based on what you have. Want to use different veggies? Go for it! Enjoy mixing flavors in this easy sheet pan delight.
Step-by-Step Instructions
Preheat the Oven
Begin by preheating your oven to 425°F (220°C). This step is key for a nice crisp on the gnocchi. Line a large sheet pan with parchment paper. This helps with easy cleanup and keeps the food from sticking.
Mix the Vegetables and Gnocchi
In a large mixing bowl, combine the gnocchi with the cherry tomatoes, bell pepper, zucchini, and broccoli. Make sure to mix them well. You want every piece to be included. This mix of flavors makes your dish pop.
Prepare Garlic Mixture
In a small bowl, whisk together the minced garlic, olive oil, Italian seasoning, red pepper flakes, salt, and black pepper. This garlic mixture adds great taste to the dish. It infuses the gnocchi and veggies with rich flavors.
Coat and Arrange
Drizzle the garlic mixture over the gnocchi and veggies. Use a spatula or your hands to toss everything together. Make sure all the pieces are coated evenly. Then, spread the mixture across the sheet pan in a single layer. This helps everything cook evenly and become golden brown.
Baking Process
Place the sheet pan in your preheated oven. Bake for 20-25 minutes. You want the gnocchi to turn golden and crispy. The veggies should become tender but not mushy. Keep an eye on them to avoid overcooking.
Cheese Melting Steps
Carefully remove the pan from the oven. Immediately sprinkle the freshly grated Parmesan cheese over the hot gnocchi and veggies. Then, return the sheet pan to the oven for another 2-3 minutes. This allows the cheese to melt and create a delicious layer on top.
Tips & Tricks
Ensuring Crispiness
To get that perfect crunch, spread the mixture in a single layer on your sheet pan. This allows hot air to circulate around the gnocchi and veggies. If they are too close together, they will steam instead of crisping up. Trust me, a little space goes a long way!
Adjusting Spice Levels
You can easily adjust the spice in this dish. If you prefer less heat, use fewer crushed red pepper flakes. If you want more kick, add a bit more! Play with the amount until it fits your taste. This simple tweak can transform the dish to your liking.
Storing Leftovers
If you have any leftovers, store them in an airtight container. Keep them in the fridge for up to three days. When you’re ready to eat, reheat in the oven for the best texture. Avoid the microwave, as it can make the gnocchi mushy. Enjoy your tasty meal again!

Variations
Vegetable Substitutions
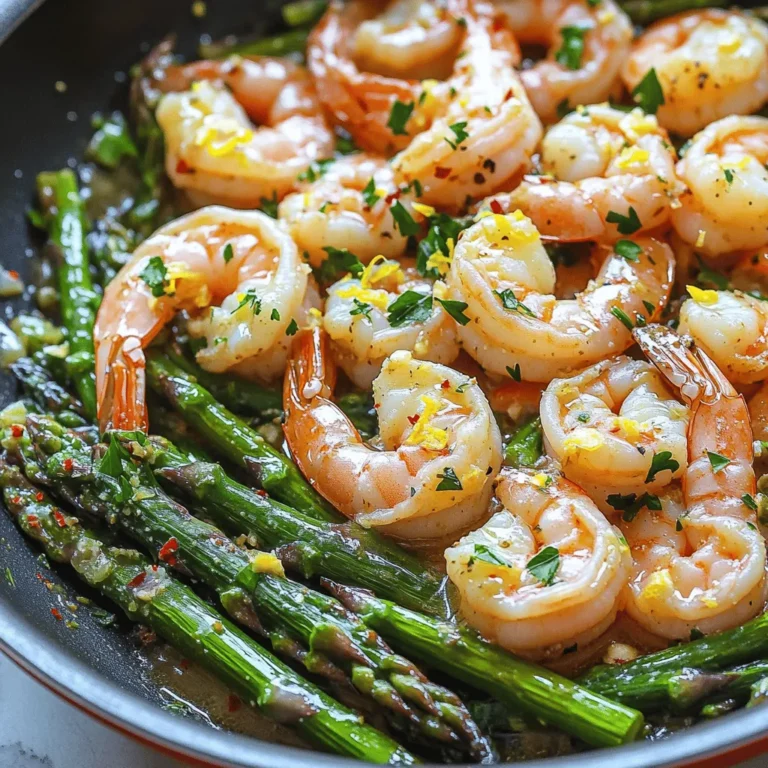
You can switch up the veggies in this dish to keep it fresh. Try using seasonal vegetables like asparagus, carrots, or even Brussels sprouts. Each vegetable brings its own flavor and texture. For example, asparagus adds a nice crunch, while carrots add a hint of sweetness. Mixing different colors makes your dish look vibrant and fun.
Protein Additions
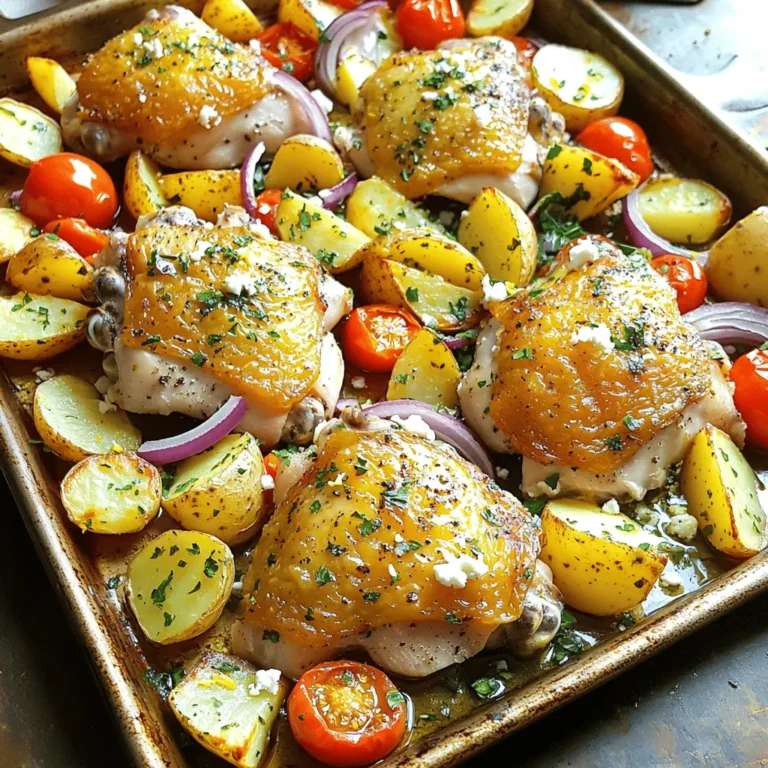
Want to make your meal heartier? You can add protein easily. Chicken breast works well; just cut it into bite-sized pieces. Tofu is another great option, especially if you want a plant-based protein. Simply cube it and toss it with the gnocchi and veggies. You can also use cooked sausage for a savory kick. Just slice it and mix it in before baking.
Dairy-Free Options
If you prefer a dairy-free dish, you can make this recipe vegan-friendly. Just skip the Parmesan cheese or use a dairy-free alternative. Nutritional yeast is a tasty substitute that gives a cheesy flavor without the dairy. You can even try vegan cheese if you want that melty texture. Adjust the other ingredients to match your taste.
Storage Info
Refrigeration Guidelines
To store leftovers in the fridge, let the dish cool first. Place the cooled gnocchi and veggies in an airtight container. This keeps moisture in and prevents the food from drying out. You can store it for about three to four days. When you’re ready to eat, simply reheat it in the oven or microwave.
Freezing Instructions
If you want to freeze this dish, make sure it cools completely. Then, transfer the gnocchi and veggies to a freezer-safe container or bag. Remove as much air as possible to prevent freezer burn. This dish can freeze well for up to three months. When you want to enjoy it again, thaw it overnight in the fridge. Reheat it in the oven for the best texture.
Shelf Life
For the best taste and quality, enjoy your sheet pan garlic parmesan gnocchi and veggies within a week. Keep an eye on the smell and texture. If it seems off, it’s best to discard it. Proper storage is key to enjoying this dish fresh and flavorful.
FAQs
Can I use homemade gnocchi instead of store-bought?
Yes, you can use homemade gnocchi. Fresh gnocchi may give a softer texture. Store-bought gnocchi tends to hold its shape better. If you prefer the homemade option, ensure it’s cooked properly before mixing with veggies.
What can I substitute for Parmesan cheese?
If you need a substitute for Parmesan cheese, try Pecorino Romano or nutritional yeast. Both options add a nice flavor. You can also use a dairy-free cheese for a vegan dish. Just ensure it melts well when heated.
Can I prepare this dish ahead of time?
Yes, you can prepare this dish ahead of time. Mix the gnocchi and veggies, then cover and store in the fridge. Keep the garlic mixture separate until you are ready to bake. This will keep the dish fresh.
How do I know when the vegetables are done?
Check the vegetables after 20-25 minutes in the oven. They should be tender but not mushy. The colors will become brighter, and some edges may brown. This means they are ready to enjoy.
Is this recipe suitable for meal prepping?
Yes, this recipe works great for meal prepping. You can make a larger batch and divide it into containers. Store them in the fridge for quick meals. Reheat in the oven or microwave for best results.
This dish is easy and fun to make. We covered the key ingredients and seasonings to create a tasty meal. You learned how to mix and bake the gnocchi with vegetables, and we discussed helpful tips. Remember, you can customize this recipe with different veggies or proteins. Storing leftovers is simple, so don’t worry if you have extra. Enjoy this sheet pan gnocchi soon, and share it with others. You’ll love how easy it is to make delicious food at home.


![- 8 oz. elbow macaroni - 1 lb. ground beef or ground turkey - 1 packet taco seasoning mix - 1 cup diced tomatoes (fresh or canned) - 1 cup canned black beans, drained and rinsed - 1 cup corn (can be frozen or canned) - 2 cups shredded cheddar cheese (divided) - 1 cup salsa (your choice of spiciness) - 1/2 cup sour cream - 1 tablespoon olive oil - Salt and pepper to taste - Chopped green onions and fresh cilantro for garnish Gather these ingredients before you start cooking. This will make the process smooth and fun! The elbow macaroni is the base of this dish. It holds the cheesy sauce very well. Ground beef or turkey adds a hearty touch. You can use either, depending on your taste. The taco seasoning mix gives the pasta that classic taco flavor. Diced tomatoes bring freshness and moisture, while black beans boost protein and fiber. Corn adds a nice sweetness. Cheddar cheese is key for that melty, gooey goodness. Salsa adds a kick; choose your preferred heat level. Sour cream makes the dish creamy and rich. Olive oil helps cook the meat and adds flavor. Finally, salt, pepper, and garnishes like green onions and cilantro make it all pop. When you have everything ready, the fun part starts! You’ll see how these simple ingredients blend into a delicious dish. For the complete recipe, check out the Full Recipe section. To start, cook the elbow macaroni. Follow the package instructions carefully. Aim for al dente texture, which means the pasta should be firm when bitten. This keeps it from getting mushy later. Once done, drain the pasta in a colander and set it aside in a large bowl. While the pasta cooks, heat the olive oil in a large skillet over medium heat. Add the ground beef or turkey. Cook for about 5-7 minutes, stirring often to break up the meat. Look for a nice brown color. After browning, drain any extra fat from the skillet. Next, add the taco seasoning mix, diced tomatoes, black beans, corn, and salsa. Stir well and let the mixture simmer for about 5 minutes. This helps the flavors come together. After simmering, gently fold the cooked macaroni into the skillet. Make sure the pasta gets well-coated with the tasty mixture. Lower the heat to low, then add 1 1/2 cups of shredded cheddar cheese. Stir until the cheese melts into a creamy coating. Remove the skillet from the heat and add the sour cream. Mix it well until fully blended. Taste your dish and add salt and pepper to your liking. For the full recipe, refer to the instructions above. Enjoy your cheesy taco pasta! To get the best taco flavor, use a high-quality taco seasoning mix. It gives a bold taste. I often mix in extra spices, like garlic powder or cumin, for depth. For a creamy texture, add the cheese slowly. Let it melt fully before adding sour cream. This step ensures a smooth, rich sauce. Garnish your cheesy taco pasta with fresh green onions and cilantro. They add color and freshness. You can also use sliced avocado or jalapeños for extra flair. For a complete meal, pair the pasta with a simple side salad or tortilla chips. The crunch complements the creamy pasta well. You can find the full recipe [here]. {{image_4}} You can change up the protein in this dish. Ground turkey is a lighter choice. Ground chicken also works well. If you prefer plant-based options, try meat substitutes made from soy or lentils. Each option gives a unique flavor, but they all blend well with taco spices. If you need gluten-free pasta, many brands offer great options. Just look for gluten-free elbow macaroni. For those avoiding dairy, you can find dairy-free cheese and sour cream at most stores. These alternatives melt nicely and keep the dish creamy. Don’t be afraid to play with flavors! Different salsas add unique twists. You can also add jalapeños for heat. Hot sauce can give it an extra kick, too. These simple changes can make your cheesy taco pasta even more exciting. For the full recipe, check out the Cheesy Taco Pasta Extravaganza. To store your Cheesy Taco Pasta, let it cool first. Place leftovers in an airtight container. This keeps the dish fresh and tasty. It will last in the fridge for about 3 to 4 days. Always check for smells or mold before eating. When you’re ready to eat, reheat the pasta on the stove. Pour the pasta into a skillet over low heat. Stir it often to ensure even heating. You can also add a splash of water or broth to keep it creamy. Microwave is another option. Use a microwave-safe dish and cover it. Heat in short bursts, stirring every minute until it’s hot. Freezing Cheesy Taco Pasta is a great way to enjoy it later. First, let it cool completely. Then, transfer it to a freezer-safe container. Make sure to leave some space for expansion. You can freeze it for up to 2 months. When you are ready to eat, defrost it overnight in the fridge. Reheat it on the stove, just like before, to keep the flavor and texture. Cheesy Taco Pasta can last for about 3 to 5 days in the fridge. To keep it fresh, store it in an airtight container. Look for signs of spoilage like a sour smell or mold. If you see either, it’s best to toss it out. Yes, you can make Cheesy Taco Pasta ahead of time. Cook it and let it cool. Then, store it in the fridge for up to 2 days before serving. When ready to eat, just reheat it in a pan or microwave. Add a splash of water or broth to keep it moist. If you don’t have elbow macaroni, you can use other pasta shapes. Options include rotini, penne, or even gluten-free pasta. Quinoa or rice can also work if you want a grain instead. Just adjust cooking times as needed. We explored a tasty Cheesy Taco Pasta recipe, packed with flavor and fun. You learned about the key ingredients, easy steps for cooking, and tips to nail that taco taste. We also talked about variations to fit your needs, storage tips, and answers to common questions. This dish is not just simple; it’s a crowd-pleaser. Enjoy cooking and sharing your delicious creation!](https://dishtreats.com/wp-content/uploads/2025/07/060fa6b2-3df9-47e4-b794-a1b6a0be3885-768x768.webp)


![Here’s what you need for a creamy, dreamy mac and cheese: - 1 lb elbow macaroni - 4 cups water - 2 tablespoons unsalted butter, divided - 1 teaspoon garlic powder - 1 teaspoon onion powder - ½ teaspoon smoked paprika - Salt and pepper, to taste - 2 cups sharp cheddar cheese, shredded - 1 cup mozzarella cheese, shredded - ½ cup cream cheese, softened - ½ cup whole milk Gather these ingredients to make your Instant Pot creamy mac and cheese. The elbow macaroni cooks perfectly in the Instant Pot, soaking up all the flavors. The two types of cheese give a rich taste. Cream cheese adds smoothness, while whole milk makes it extra creamy. Each spice, like garlic and paprika, adds a nice touch. Want to make your mac and cheese even better? Try these add-ins: - Cooked bacon for a salty crunch - Steamed broccoli for a healthy twist - Diced tomatoes for freshness - Jalapeños for heat Feel free to mix and match! You can make it just how you like. For the full recipe, check out the detailed cooking steps. Gather all your ingredients. You will need: - 1 lb elbow macaroni - 4 cups water - 2 tablespoons unsalted butter, divided - 1 teaspoon garlic powder - 1 teaspoon onion powder - ½ teaspoon smoked paprika - Salt and pepper, to taste - 2 cups sharp cheddar cheese, shredded - 1 cup mozzarella cheese, shredded - ½ cup cream cheese, softened - ½ cup whole milk Measure everything out before you start. This makes cooking easier and faster. Pour 4 cups of water into your Instant Pot. Add the elbow macaroni, 1 tablespoon of unsalted butter, garlic powder, onion powder, smoked paprika, and a pinch of salt. Stir this mix well to coat the pasta. Now, close the lid and set the valve to sealing. Choose the manual cooking option and set the timer to cook on high pressure for 4 minutes. Once the time is up, do a quick release by moving the valve to venting. Open the lid once the steam has escaped. Add the remaining tablespoon of unsalted butter, shredded cheddar cheese, shredded mozzarella cheese, softened cream cheese, and whole milk. Stir everything together with a spatula until it’s creamy. If it’s too thick, add a little more milk for a smoother texture. Season with salt and pepper to your liking. Stir again to mix in the flavors. For the complete recipe, check out the Full Recipe. Enjoy your creamy mac and cheese! To make your mac and cheese super creamy, use a mix of cheeses. I love combining sharp cheddar and mozzarella. The cheddar gives a bold flavor, while mozzarella adds stretchiness. Cream cheese also helps create a rich texture. If it's too thick, add a splash of whole milk. This will help achieve the creamy consistency you want. Here are some great cheese combos: - Sharp cheddar - Mozzarella - Cream cheese - Gruyere - Fontina Mixing these cheeses gives depth and flavor. Try different amounts to find your favorite mix. You can also add a bit of parmesan for a salty kick. Common mistakes can ruin your dish. First, don't overcook the pasta. Set your timer for 4 minutes. Overcooked pasta becomes mushy. Second, be careful when releasing steam. Always use a kitchen towel for safety. Lastly, remember to season well. Taste your mac and cheese before serving. Add more salt and pepper if needed. For more details, check out the Full Recipe. {{image_4}} You can make your mac and cheese heartier by adding protein. Cooked chicken or crispy bacon works great. Simply chop the cooked chicken or crumble the bacon into pieces. Stir it in after mixing the cheese. This adds flavor and makes it a full meal. For a vegan twist, swap the dairy for plant-based ingredients. Use cashew cream or coconut milk in place of whole milk. Replace the cheese with vegan cheese or nutritional yeast for a cheesy taste. This keeps the dish creamy while making it dairy-free. Add extra flavor by mixing in spices and herbs. A dash of cayenne pepper gives it a kick. Fresh herbs like basil or thyme add brightness. Try Italian seasoning for a different twist. You can also add mustard powder for depth. Experiment to find your favorite mix. For the full recipe, check out [Full Recipe]. To store your creamy mac and cheese, let it cool first. Place it in an airtight container. You can keep it in the fridge for up to three days. Make sure it is sealed tightly to keep it fresh. If you want to enjoy it later, consider freezing it. When you want to reheat mac and cheese, use the microwave or stovetop. If using the microwave, place your serving in a bowl. Add a splash of milk to keep it creamy. Heat it in short bursts, stirring in between. For the stovetop, warm it in a pot over low heat. Stir well and add milk if needed. This helps it regain its creamy texture. To freeze mac and cheese, use an airtight container or freezer bag. Make sure it is cool before you put it in. It can last in the freezer for up to three months. When you are ready to eat it, thaw it overnight in the fridge. Then, reheat using one of the methods above. This way, you can enjoy that yummy flavor again! For the full recipe, check the details above. Yes, you can use gluten-free pasta in this recipe. Just choose your favorite brand. Cook times may vary slightly, so check the package instructions. Gluten-free pasta can be just as creamy and tasty as regular pasta. To spice up your mac and cheese, add cayenne pepper or red pepper flakes. Start with a small amount, like 1/4 teaspoon, and taste as you go. You can also mix in some diced jalapeños for a fresh kick. Adjust it based on your spice level preference. Any Instant Pot model works well for this creamy mac and cheese. I recommend using a model with at least a 6-quart capacity. This size gives enough room for the pasta and water. The Instant Pot Duo or Ultra are popular choices, offering great features for beginners and pros alike. For the full recipe, check the link. This blog has shared everything you need for perfect mac and cheese in your Instant Pot. We covered the needed ingredients, cooking steps, and tips to avoid mistakes. You learned how to make it creamy and flavorful, even with variations. Remember to store leftovers properly for later. Keep experimenting with flavors and ingredients to find what you enjoy. Each recipe can be a new adventure. Enjoy your cooking journey!](https://dishtreats.com/wp-content/uploads/2025/07/aef5e05b-bf60-4c96-8d62-11668510c0c6-768x768.webp)
