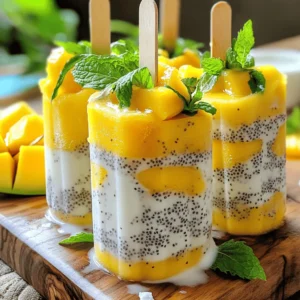
Mango Coconut Chia Popsicles Refreshing and Healthy Treat

If you’re looking for a cool treat that’s both healthy and delicious, you’ve found it! Mango Coconut Chia Popsicles blend tropical flavors with nutrition. With ripe mangoes, creamy coconut milk, and nutritious chia seeds, each bite bursts with freshness. Perfect for hot days, these popsicles are easy to make and fun for the whole family. Let’s dive into the refreshing world of homemade popsicles that pamper your taste buds!
Ingredients
Detailed Ingredients List
- Ripe mangoes: Use two ripe mangoes for a sweet and juicy base. Peel and dice them before blending. This fruit gives the popsicles their vibrant color and natural sweetness.
- Coconut milk options: You can choose between canned coconut milk for a creamy treat or fresh coconut milk for a lighter taste. Canned coconut milk adds richness, while fresh coconut milk keeps it refreshing.
- Sweetener choices: Honey or maple syrup can sweeten your popsicles. Use two tablespoons and adjust according to your taste. Honey gives a floral note, while maple syrup adds a unique flavor.
- Chia seeds: A quarter cup of chia seeds adds texture and nutrition. These tiny seeds absorb liquid and create a fun, gel-like consistency. They also bring fiber and omega-3s to your popsicles.
- Vanilla extract: Half a teaspoon of vanilla extract enhances the flavor. It adds depth and warmth to the mango and coconut mix, making each bite more flavorful.
- Pinch of salt: A small pinch of salt balances the sweetness. It helps bring out the natural flavors of the mango and coconut, making the popsicles even more delicious.
These ingredients combine to create a refreshing, healthy treat perfect for hot days. Each element plays a vital role in taste and texture, ensuring your Mango Coconut Chia Popsicles are a hit!
Step-by-Step Instructions
Preparing the Mango Mixture
Start by blending the diced mango and coconut milk. Use a high-speed blender for a smooth mix. Add honey or maple syrup to sweeten. Include a pinch of salt and vanilla extract for flavor. Blend until creamy and there are no chunks of mango left.
Chia Seed Integration
Next, you need to separate the mixture. Pour half of the mango blend into a bowl. Stir in the chia seeds. Let this sit for about 10-15 minutes. The chia seeds will absorb liquid and expand. This step is key for a thick texture.
Filling the Molds
While the chia seeds bloom, fill your popsicle molds halfway with the mango mixture. Then, gently spoon the chia mixture into each mold. Fill them until about 3/4 full. For a vibrant touch, add more mango blend on top. This will create a lovely layered effect.
Freezing Process
Now, insert popsicle sticks into the molds. Make sure they stand straight. Place the molds in the freezer. Let them freeze for at least 4-6 hours. Check if they are completely solid before serving.
Unmolding the Popsicles
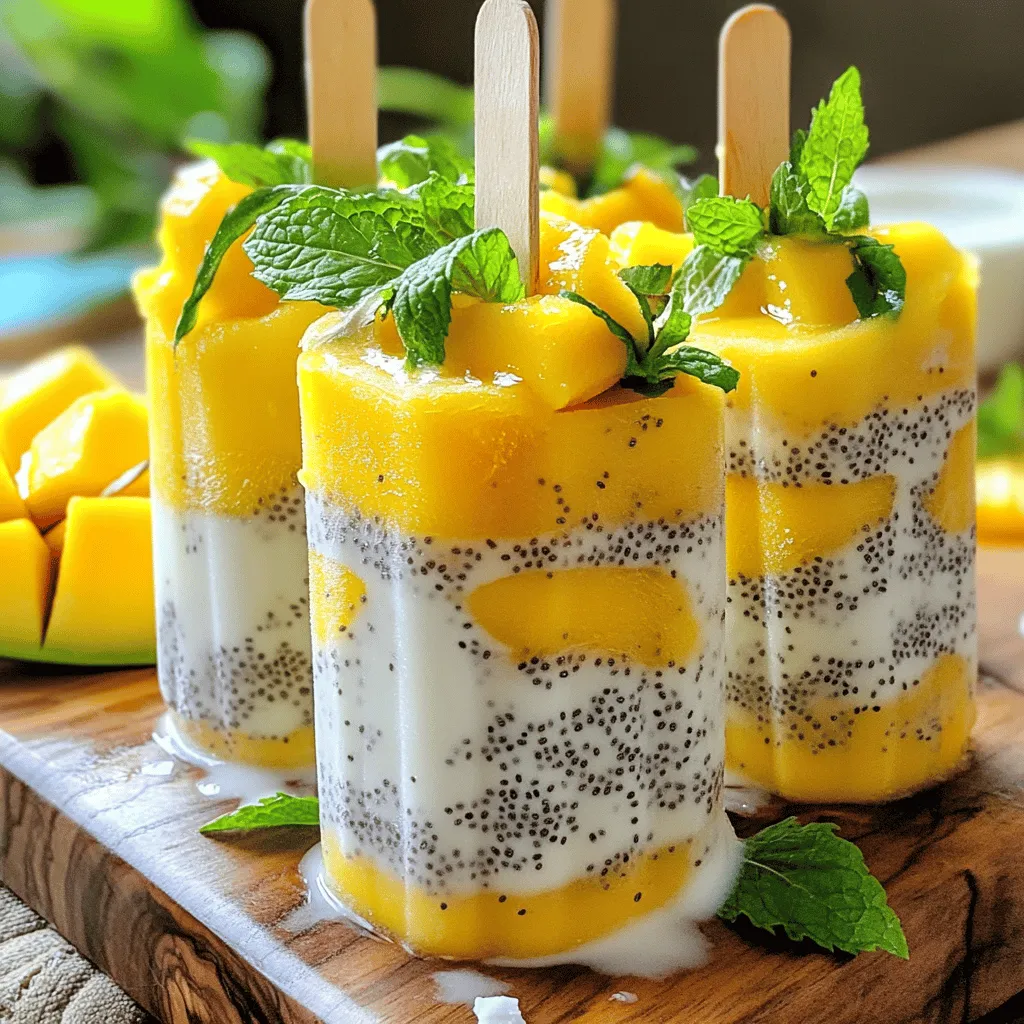
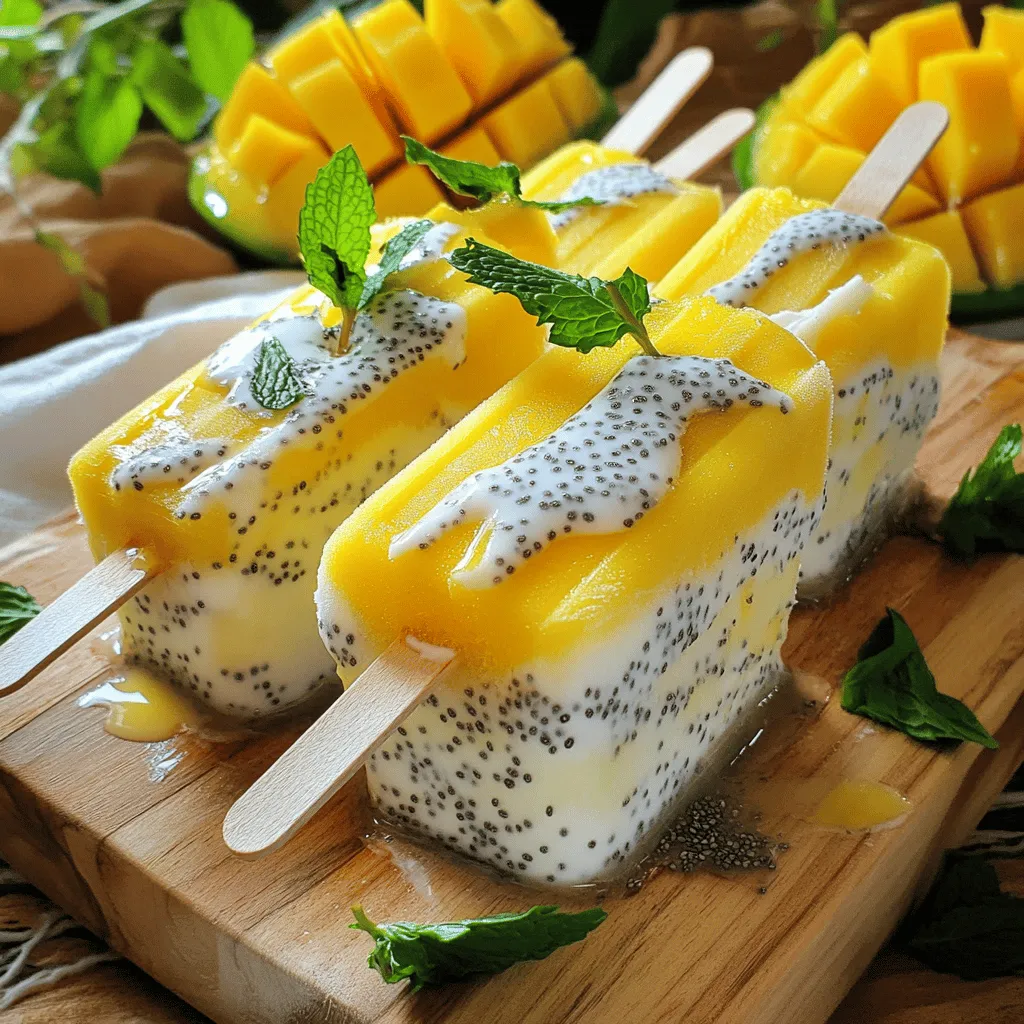
When you’re ready to enjoy, run warm water over the molds. This helps release the popsicles. Gently pull them out to avoid breaking. Serve the popsicles on a rustic wooden board, garnished with fresh mango slices and mint leaves for a pop of color.
Tips & Tricks
Adjusting Sweetness
You can change the sweetness in your popsicles. To do this, simply add more or less honey or maple syrup. Taste the mix as you go. You can also use fresh fruit to sweeten it naturally. Try adding a bit of banana or a few dates for a healthy twist.
Perfecting Texture
The creaminess of your popsicles depends on the coconut milk. For a rich texture, use canned coconut milk. If you want a lighter taste, go for fresh coconut milk. When blending, make sure to mix until smooth. This ensures no chunks remain in your popsicles, giving you a silky finish.
Creative Presentation Ideas
How you serve your popsicles can make a big difference. I love to garnish them with fresh mango slices and mint leaves. This adds color and freshness. For a fun touch, try drizzling some coconut milk over them right before serving. You can also use rustic platters or wooden boards to make your popsicles pop.

Variations
Fruit Additions
You can mix other fruits with mango for fun flavors. Pineapple adds a tropical kick. Strawberries give a sweet twist. Blueberries add a pop of color and taste. Each fruit brings its own style. Try different combinations to find your favorite. You can create a fruity paradise in each bite.
Dairy-Free and Vegan Options
If you want a dairy-free treat, choose almond or oat milk. These milks blend well and keep it light. For a sweet touch, use agave or date syrup. Both add flavor without dairy. They match well with mango and coconut. You can enjoy these pops without any animal products.
Texture Variation Ideas
Want a crunch? Try adding nuts or seeds. Almonds or cashews can give a nice bite. You can also change the chia seeds. Blend them less for a chunkier texture. Blend more for a smooth finish. Adjusting blending times can help you find the perfect feel. Each choice makes your pops unique!
Storage Info
Storing Frozen Popsicles
To store your mango coconut chia popsicles, keep them in an airtight container. This helps prevent freezer burn. You can also wrap each popsicle in plastic wrap. This extra step helps keep them fresh and tasty.
These popsicles can stay in the freezer for up to two months. After that, they may lose flavor and texture. To enjoy them at their best, try to eat them sooner.
Thawing and Serving Tips
To quickly thaw your popsicles, run warm water over the outside of the molds. This makes it easier to pull them out. You can also let them sit at room temperature for a few minutes.
The ideal serving temperature is slightly cold. This way, you can enjoy the flavors fully. If they are too frozen, let them sit for a minute before serving.
FAQs
What can I substitute for coconut milk?
If you need a non-dairy option, try almond milk or oat milk. These choices work well and keep the popsicles creamy. For a richer taste, use full-fat cow’s milk or cream. Both options will change the flavor slightly but still taste great.
How long do these popsicles take to freeze?
These popsicles need at least 4 to 6 hours to freeze. For best results, freeze them overnight. This ensures they are solid and easy to remove from the molds.
Can I use frozen mango instead of fresh?
Yes, frozen mango works just as well as fresh mango. It can save time and still taste great. Frozen mango is often picked at peak ripeness, so it can be just as sweet. Just make sure to let it thaw slightly before blending.
Are these popsicles healthy?
These popsicles are a healthy treat! They are full of good fats from coconut milk and fiber from chia seeds. Mango adds vitamins A and C, boosting your immune system. Using honey or maple syrup in small amounts keeps the sweetness natural. Enjoy guilt-free!
You can make delicious mango popsicles using simple, fresh ingredients. Start with ripe mangoes and coconut milk. Blend them and adjust sweetness with honey or maple syrup. Add chia seeds for texture and let them bloom. Layer the mixtures in molds and freeze.
Consider trying different fruits or sweeteners to fit your taste. Store your popsicles correctly to keep them fresh. Enjoy experimenting with flavors and presentation. These treats are not only fun to make but also healthy. Get creative, and dive into this tasty adventure. You’ll love the results!


. - Preheat to 350°F (175°C). - Prepare muffin tin by lining with muffin liners or greasing it lightly. - In a medium bowl, combine: - 1 cup rolled oats - 1 cup whole wheat flour - 1 teaspoon baking powder - 1/2 teaspoon baking soda - 1/2 teaspoon salt - Whisk these until they mix well. Set the bowl aside for now. - In a large bowl, add: - 2 ripe bananas, mashed until smooth - 1/2 cup honey or maple syrup - 1/4 cup unsweetened applesauce - 2 large eggs - 1 teaspoon pure vanilla extract - Use a whisk to blend these ingredients. Make sure it is smooth and creamy. - Gradually add the dry mix to the wet mix. - Stir gently until just combined. It’s okay if a few lumps remain. - Carefully fold in: - 1 cup fresh or frozen cherries, pitted and chopped - Optional: 1/2 cup chopped walnuts or pecans - Ensure they are spread out in the batter without overmixing. - Spoon the batter into the muffin cups. Fill each about two-thirds full. - Place the muffin tin in the oven and bake for 18-20 minutes. - Check for doneness with a toothpick. It should come out clean. - Once done, let them cool for about 5 minutes in the tin. - After that, move them to a cooling rack. For the full recipe, refer to the main section. Enjoy your tasty Cherry Banana Oat Muffins! To get the best texture in your muffins, avoid overmixing. When you combine wet and dry ingredients, stir gently. You want some lumps in the batter. Overmixing can lead to tough muffins. Using ripe bananas is important too. The sweeter and softer they are, the better your muffins will taste. Look for bananas with brown spots; those are perfect for baking. To test for doneness, use a toothpick. Insert it into the center of a muffin. If it comes out clean, the muffins are ready. If it has batter on it, bake for a few more minutes. If you live at a high altitude, you may need to adjust the bake time. Muffins may bake faster, so keep an eye on them. Serve your muffins warm for the best flavor. A light dusting of powdered sugar makes them look nice. You can also add fresh mint leaves for a pop of color. These muffins pair well with your favorite tea or coffee. Enjoy them as a snack or breakfast treat! For the full recipe, check out the details above. {{image_4}} You can easily change the flavor of these muffins. Adding spices like cinnamon or nutmeg gives them a warm touch. Just sprinkle in about a teaspoon of cinnamon for a cozy flavor. Nutmeg is great too, but use less, about 1/4 teaspoon. You can also try different fruits. Swap cherries for blueberries or apples. Each fruit gives a new taste and keeps things fun. If you want a vegan option, you can replace the eggs. Use flax eggs instead. Mix 1 tablespoon of ground flaxseed with 2.5 tablespoons of water. Let it sit for 5 minutes. For a low-sugar option, cut the honey or maple syrup in half. You can also use a sugar substitute like stevia. This way, you still enjoy the muffins without too much sugar. You can change the size of your muffins. Make mini muffins by using a mini muffin tin. Fill each cup halfway and bake for about 10-12 minutes. If you prefer standard-sized muffins, stick to the original recipe. Just remember, baking time changes with size. Keep an eye on them to avoid overbaking. For the full recipe, check out the details above. To keep your Cherry Banana Oat Muffins fresh, store them in an airtight container. This way, they stay moist and tasty. You can keep them at room temperature for up to three days. If you live in a warm area, use the fridge. Muffins can last about a week in the refrigerator. Just be aware that cold storage may change their texture slightly. If you want to save muffins for later, freezing is the best option. To freeze, allow the muffins to cool completely. Then, wrap each one in plastic wrap. Place them in a freezer-safe bag or container. They can stay frozen for up to three months. When you want to eat them, take a muffin out and thaw it in the fridge overnight. For the best texture, you can also microwave the muffin for about 20 seconds after thawing. To enjoy your muffins warm, use the oven or microwave. For the oven, preheat to 350°F (175°C). Place the muffin on a baking sheet and heat for about 5 to 10 minutes. This warms them through and helps regain moisture. If you use the microwave, heat for about 10 to 15 seconds. Just be careful not to overheat, as this can make them dry. Warm muffins taste best and are a perfect treat! Yes, you can use frozen cherries. They will soften during baking. This may change the texture a bit. The flavor will still be great. Just make sure to chop them before adding to the mix. If you use frozen cherries, you do not need to thaw them first. To ripen bananas fast, place them in a paper bag. This traps the ethylene gas they emit. You can also add an apple to the bag for even faster results. If you are in a hurry, you can bake bananas at 300°F (150°C) for about 15-20 minutes. This will soften them quickly. If you want to swap honey, maple syrup is a great choice. Agave nectar or brown sugar also works well. Each option will give a different taste, but they will all be sweet. Use the same amount as honey in the recipe. Each muffin has about 140 calories. This can change based on your ingredients. If you use nuts or different sweeteners, check those values. These muffins are a tasty, healthy treat you can enjoy without guilt. When stored well, these muffins last about 3 days at room temperature. Keep them in an airtight container to maintain freshness. You can store them in the fridge for up to a week. For longer storage, freeze them for up to 3 months. Just thaw them before enjoying! You now have a simple yet tasty recipe for cherry banana oat muffins. You learned about ingredients, from oats to cherries, and how to mix them. We covered important tips for getting the right texture and bake time. You also have ideas for variations and storage. These muffins are a great snack or breakfast option. Enjoy making them your way!](https://dishtreats.com/wp-content/uploads/2025/07/f958d702-06c5-46b3-af8d-5861eadc8c12-768x768.webp)

![To make pumpkin spice oatmeal, gather these simple ingredients: - 1 cup rolled oats - 2 cups milk (dairy or almond) - 1/2 cup pumpkin puree - 1 teaspoon pumpkin spice blend - 1 tablespoon maple syrup or honey - 1/4 teaspoon vanilla extract - Pinch of salt - Optional add-ins: - 1/4 cup chopped walnuts - 1/4 cup dried cranberries or raisins - Fresh apple slices or banana for garnish Each ingredient plays a key role in creating a warm and comforting breakfast. The rolled oats form the base, while the pumpkin puree adds rich flavor and nutrition. Pumpkin spice blend gives that cozy fall taste, and maple syrup or honey sweetens it just right. You can customize this dish by adding walnuts for a crunchy texture or dried fruit for a hint of sweetness. Fresh fruit on top is also a great way to brighten the dish. If you follow the Full Recipe, you will have a delightful breakfast to enjoy on chilly mornings. To start, grab a medium-sized saucepan. Combine the rolled oats, milk, and a pinch of salt. Stir gently to ensure the oats mix well with the milk. Place the saucepan over medium heat. You want to bring this to a gentle simmer. Stir occasionally. This should take about five minutes until the oats soften. Once the oats are soft, it’s time to add some flavor! Carefully add the pumpkin puree, pumpkin spice blend, maple syrup, and vanilla extract to the saucepan. Stir well to combine everything. Keep cooking for another two to three minutes. This step makes the oatmeal creamy and rich. If you like some crunch, fold in chopped walnuts. For added sweetness, toss in dried cranberries or raisins if you wish. Let the oatmeal sit for one to two minutes. This resting time helps it thicken nicely before serving. Now you’re ready to enjoy your cozy pumpkin spice oatmeal! If you want the full recipe, just check the details above. To get your oatmeal just right, you can adjust its texture. If it seems too thick, add more milk. If it feels too runny, cook it a bit longer. Using fresh pumpkin spice makes a big difference in taste. The aroma and flavor become richer and more vibrant. For a lovely presentation, top your oatmeal with apple slices or banana. These fruits add sweetness and texture. You can also create decorative swirls with pumpkin puree. This not only looks nice but also adds a bit more flavor. If mornings are busy, make a large batch of oatmeal. You can easily reheat leftovers for a quick breakfast. Store it in the fridge, and it will be ready when you are. This way, you can enjoy Pumpkin Spice Oatmeal any time without the fuss. {{image_4}} You can change up the flavor of your pumpkin spice oatmeal easily. If you want a different sweetness, try using agave or brown sugar instead of maple syrup. Each sweetener brings a unique taste. For extra crunch, mix in different nuts like almonds or pecans. Seeds like chia or flax can also add a fun texture. If you follow a vegan diet, you can make this oatmeal vegan. Simply swap dairy milk for almond milk and use maple syrup for sweetness. This way, you keep all the yummy flavors while sticking to your diet. If you need a gluten-free option, just choose certified gluten-free oats. This ensures that everyone can enjoy this tasty dish. As the holidays approach, you can add cranberries or raisins for a festive twist. These fruits not only give a nice burst of sweetness but also add a pop of color. This makes your pumpkin spice oatmeal even more inviting. You can feel the warmth of the season with each bite. To explore the full potential of this recipe, check out the [Full Recipe]. Store leftovers in an airtight container for up to 3 days. This keeps your oatmeal fresh. It’s a great way to enjoy a quick breakfast later in the week. Reheat on the stovetop or in the microwave with a splash of milk. This helps restore the creamy texture. If using the stovetop, heat gently over low heat. Stir often to avoid sticking. Freeze individual servings for easy breakfasts. To enjoy, thaw overnight in the fridge. Then, reheat as usual. This method makes mornings smoother when you’re in a rush. Leftovers can be stored for up to 3 days in the fridge. Make sure to use an airtight container. This keeps the oatmeal fresh and tasty for your next breakfast. Yes, you can adjust the amount of maple syrup. You can also use an alternative sweetener if you prefer. Honey, agave, or stevia work well. Make it as sweet as you like! Simply multiply the ingredients as needed. Keep the same cooking process for best results. This way, you can feed more people or have extra for later. It is packed with fiber from oats. The pumpkin adds vitamins, making it a nourishing breakfast option. This meal supports digestion and gives you energy to start your day. Yes, it’s easy to prepare in advance. You can reheat the oatmeal quickly for busy mornings. Just store it in the fridge and warm it up when you are ready to eat. For the full recipe, check out the complete guide! This blog post explored the simple and tasty ways to make Pumpkin Spice Oatmeal. We covered the key ingredients, step-by-step cooking instructions, and helpful tips for perfecting your recipe. You can also customize it with various add-ins and flavors. This dish is not only delicious but also nutritious and great for meal prep. Enjoy a warm bowl of pumpkin spice oatmeal and kick-start your day!](https://dishtreats.com/wp-content/uploads/2025/06/a752c53c-93b7-4877-b1fd-c59ff5d6dc49-768x768.webp)


