Air Fryer Coconut Shrimp Crispy and Flavorful Delight
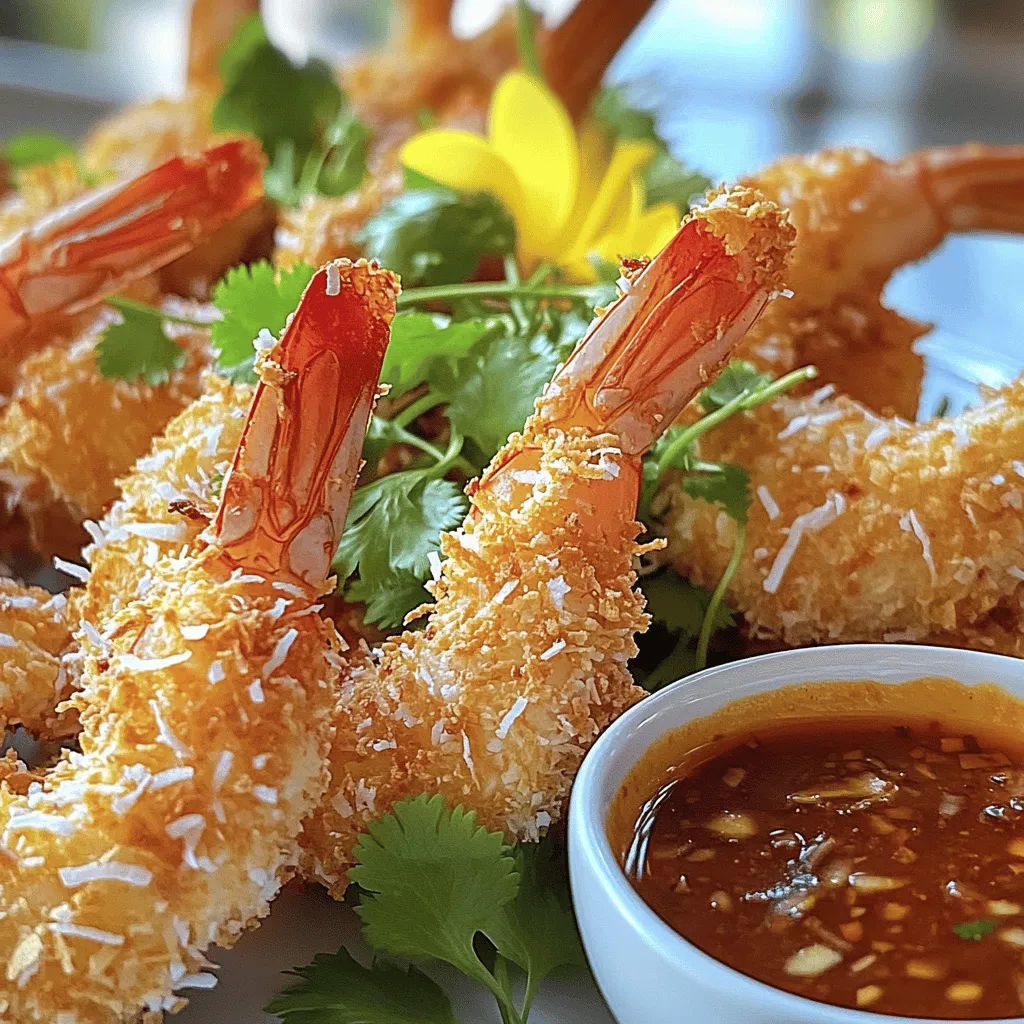
Do you crave a crispy, flavorful snack that’s both easy to make and delicious? Let me introduce you to Air Fryer Coconut Shrimp! This dish is my go-to for quick meals or as a fun appetizer. With simple ingredients and an easy step-by-step guide, you’ll impress your friends and family. Dive into this tasty recipe and discover tips for the perfect crunch every time!
Ingredients
List of Ingredients
- 1 pound large shrimp, peeled and deveined
- 1/2 cup all-purpose flour
- 2 large eggs, beaten
- 1 cup shredded unsweetened coconut
- 1/2 cup panko breadcrumbs
- 1 teaspoon paprika
- 1/2 teaspoon garlic powder
- Salt and pepper to taste
- Cooking spray or oil for greasing
Ingredient Substitutions
What can I use instead of shrimp?
You can use chicken breast or tofu as a substitute for shrimp. Both options work well with the same seasoning and coating method.
What if I need gluten-free options?
For a gluten-free version, use rice flour instead of all-purpose flour. Substitute panko breadcrumbs with gluten-free breadcrumbs. These swaps will keep the recipe tasty and safe for those with gluten sensitivities.
Step-by-Step Instructions
Preheat the Air Fryer
Start by setting your air fryer to 400°F (200°C). Preheating takes about 5 minutes. This step is key for even cooking. A hot air fryer ensures the shrimp cook perfectly.
Season the Shrimp
Take 1 pound of peeled and deveined shrimp. Place them in a bowl. Add salt, pepper, paprika, and garlic powder. Mix gently until each shrimp has a nice coating. This seasoning adds great flavor. It makes the shrimp taste amazing!
Breading Process
Now, let’s set up your breading station. You will need three shallow dishes. Fill the first dish with 1/2 cup of flour. In the second dish, pour in 2 large beaten eggs. In your third dish, mix 1 cup of shredded unsweetened coconut with 1/2 cup of panko breadcrumbs. This mix adds crunch!
To bread the shrimp, take one shrimp. Dip it in the flour, shaking off the excess. Next, dip it in the egg, letting any extra egg drip off. Finally, press it into the coconut and panko mix. Make sure it sticks well. Repeat this for all the shrimp.
Air Frying Instructions
Before cooking, spray the air fryer basket lightly with cooking spray. Place the breaded shrimp in a single layer. Do not overcrowd them; they need space to cook. You might have to cook in batches.
Cook the shrimp for 8-10 minutes. Flip them halfway through cooking. They should turn a lovely golden brown. Crispy and delicious, they will be ready to serve. Enjoy your air-fried coconut shrimp with your favorite dipping sauce!
Tips & Tricks
Achieving Perfect Crispiness
To get that perfect crunch, start with your air fryer basket. Always spray it with cooking spray. This step helps prevent the shrimp from sticking. It also promotes even cooking. I recommend a light coat on the shrimp as well. This will make them golden and crispy.
Avoiding Common Mistakes
One big mistake is overcrowding the basket. If you pack in too many shrimp, they won’t cook well. They need space for hot air to flow. Another issue is not preheating your air fryer. If it’s not hot enough, your shrimp may turn out soggy. Always preheat to 400°F (200°C) for the best results.
Flavor Enhancements
You can boost the flavor with a few extra spices. I like to add a pinch of cayenne pepper for heat. You could also try adding lime zest for a fresh twist. For a tropical kick, mix in some crushed pineapple with the coconut. These small changes can elevate your dish and impress your guests.

Variations
Spicy Coconut Shrimp
You can make your coconut shrimp spicy with just a few tweaks. Add red pepper flakes or cayenne pepper to the seasoning mix. This will give your shrimp a nice kick. You can also try a spicy sauce for dipping. A sriracha mayo or hot chili sauce can enhance the flavor. These changes will make your dish stand out and excite your taste buds.
Tropical Variations
Want to add a tropical twist? Think about using fresh fruits in your dish. Pineapples or mangoes can add sweetness. You can serve the shrimp with a tropical salsa. Mix diced mango, red onion, and cilantro for a fresh topping. You can also drizzle a coconut curry sauce over the shrimp for added flavor. These fruity options bring a bright and fresh taste to your meal.
Healthier Options
If you want a lighter dish, you can bake the shrimp instead of frying them. Preheat your oven to 400°F (200°C) and place the breaded shrimp on a baking sheet. Spray them lightly with oil to keep them crispy. Bake for about 12-15 minutes, flipping halfway through. This method cuts down on oil while still giving you a crunchy bite. Enjoy the same great taste with fewer calories!
Storage Info
How to Store Leftovers
After enjoying your air fryer coconut shrimp, store any leftovers properly. First, let the shrimp cool down to room temperature. This cooling step helps prevent sogginess. Place the shrimp in an airtight container. Make sure to layer them with parchment paper to keep them crispy. Store them in the fridge for up to three days.
Reheating Instructions
To reheat your coconut shrimp, use the air fryer again. Preheat it to 350°F (175°C). Place the shrimp in the basket in a single layer. Heat for about 4-5 minutes, flipping them halfway through. This method keeps the shrimp crispy and delicious. Avoid using the microwave, as it can make the shrimp soft and chewy.
Freezing Tips
You can also freeze both uncooked and cooked shrimp. For uncooked shrimp, bread them as you normally would, then place them on a baking sheet in a single layer. Freeze until solid, then transfer them to a freezer bag. They can last for up to three months. For cooked shrimp, let them cool, then store them in an airtight container. They can also last up to three months in the freezer.
FAQs
How long does it take to cook coconut shrimp in an air fryer?
It takes about 8 to 10 minutes to cook coconut shrimp in an air fryer. I recommend flipping the shrimp halfway through to ensure even cooking. When they turn golden brown, they are ready to eat. This quick cooking time makes air frying easy and fun.
Can I use frozen shrimp for this recipe?
Yes, you can use frozen shrimp! Just make sure to thaw them first. Place the shrimp in cold water for about 15-20 minutes. After thawing, dry them well with paper towels. This helps the coating stick better. Using frozen shrimp is a great option if fresh shrimp is hard to find.
What dipping sauces pair well with coconut shrimp?
Several sauces go great with coconut shrimp. Here are a few favorites you can try:
- Sweet chili sauce
- Pineapple salsa
- Mango chutney
- Spicy aioli
These sauces add a nice twist to the crunchy shrimp. Choose one or mix and match for extra fun!
This blog post covered how to make delicious coconut shrimp in an air fryer. We discussed the ingredients, cooking steps, and tips for great results. I shared ways to customize your dish with flavors or healthy options. Remember to store leftovers properly and reheat them to keep them crispy. Whether you want a spicy twist or a tropical touch, this recipe is versatile. Enjoy creating your own tasty version of coconut shrimp!


![To make roasted garlic hummus, gather these essential ingredients: - 1 cup canned chickpeas, rinsed and drained - 1/4 cup tahini - 1/4 cup extra virgin olive oil - 1 whole head of garlic - 2 tablespoons freshly squeezed lemon juice - 1/2 teaspoon ground cumin - Sea salt, to taste - Water, as needed These ingredients work together to create a creamy and delicious hummus. The chickpeas provide a smooth base, while tahini adds richness. Roasted garlic brings a sweet, mellow flavor that transforms the dish. To elevate your hummus, consider these optional garnishes: - Chopped fresh parsley - Smoked paprika Adding these garnishes gives your hummus a pop of color. Fresh parsley adds a touch of brightness, while smoked paprika contributes a subtle warmth. You will need a few key tools to prepare your hummus: - Food processor - Aluminum foil - Baking sheet A food processor is essential for achieving a smooth texture. Aluminum foil helps roast the garlic evenly, while a baking sheet supports the garlic in the oven. For the full recipe, check out the complete guide to making roasted garlic hummus. Enjoy the process and get ready for a tasty treat! To start, I preheat my oven to 400°F (200°C). This heat helps the garlic roast well. Next, I take a whole head of garlic and cut off the top. I make sure to expose the tops of the cloves. Then, I drizzle a little olive oil over the cloves. This step helps the garlic stay moist. I wrap the garlic in aluminum foil tightly and place it in the oven. I roast it for about 30-35 minutes. The cloves should turn soft and golden brown. After roasting, I let it cool for a few minutes. In my food processor, I add 1 cup of rinsed chickpeas and 1/4 cup of tahini. Then, I squeeze in 2 tablespoons of lemon juice and add 1/2 teaspoon of ground cumin. I also sprinkle in some sea salt. Next, I squeeze the roasted garlic cloves from their skins into the bowl. I usually use three to four cloves for a great flavor. I blend everything until it becomes smooth and creamy. While blending, I slowly drizzle in 1/4 cup of extra virgin olive oil. If the hummus feels too thick, I add water by the tablespoon until I like the texture. Once my hummus is smooth, I taste it to check if it needs more salt or lemon juice. This step is key for flavor balance. I then transfer the hummus to a serving bowl. I drizzle a bit of olive oil on top to add richness. For a pop of color, I garnish it with chopped parsley and a sprinkle of smoked paprika. To serve, I love pairing the hummus with fresh pita bread or sliced veggies. This makes for a great snack or appetizer. You can find the Full Recipe [here]. To get the right texture, start with good chickpeas. Use canned chickpeas for ease. Rinse and drain them well to remove excess salt. When blending, add olive oil slowly. If your hummus is too thick, add water a bit at a time. This makes it smooth and creamy. Roasted garlic is the star here, but you can add more flavor. Try adding herbs like fresh parsley or basil. A pinch of smoked paprika gives a nice kick. For a zestier taste, add more lemon juice. Taste as you go—this is key! One big mistake is not roasting the garlic enough. Soft, golden cloves bring the best flavor. Another common error is adding too much water at once. This can make your hummus runny. Lastly, don’t forget to taste your blend. Adjusting salt and lemon juice helps create a balanced dip. For the full recipe, refer to the main article. {{image_4}} You can change the flavor of your hummus easily. Adding herbs like basil or cilantro gives a fresh taste. For a warm twist, try adding spices like smoked paprika or chili powder. Just a pinch can turn your dip into a flavor explosion. Mix in fresh herbs or spices after blending for the best taste. While chickpeas are classic, other beans work well too. White beans, like cannellini, add creaminess. Black beans offer a rich, earthy flavor. You can even use lentils for a different texture. Each bean brings its own taste. Feel free to swap them out and explore new flavors. If you love heat, this spicy hummus is for you. Start with the full recipe and add heat! After blending, mix in chopped jalapeños or a splash of hot sauce. You can also use crushed red pepper for a milder kick. This spicy version pairs well with crunchy veggies or pita chips, making your snack time exciting. To keep your roasted garlic hummus fresh, store it in an airtight container. This helps prevent exposure to air, which can lead to spoilage. Always let the hummus cool completely if you just made it. Once cooled, cover it tightly and place it in the fridge. You can freeze hummus for later use. Portion it into smaller containers. This makes it easy to thaw only what you need. Leave a little space at the top of the container. Hummus expands when frozen. When you’re ready to eat it, thaw it in the fridge overnight. Stir well before serving. Homemade roasted garlic hummus lasts about five to seven days in the fridge. Check for any off smells or changes in color. If you see any mold, it’s best to throw it away. Fresh hummus should have a smooth texture and rich aroma. Keeping these tips in mind helps you enjoy your hummus at its best. Don't forget to check the [Full Recipe] for the perfect hummus experience! Roasted garlic can last about one week in the fridge. Store it in a sealed container. If you want to keep it longer, you can freeze it. Roasted garlic freezes well and can last up to three months. Yes, you can use fresh garlic, but the flavor will be different. Fresh garlic is sharp and strong, while roasted garlic is sweet and mild. If you want a more intense garlic taste, add a small amount of fresh garlic to your hummus. Start with one clove and adjust to your taste. Roasted garlic offers many health benefits. It can help boost your immune system. It also may lower blood pressure and improve heart health. Roasted garlic is rich in antioxidants, which fight free radicals. Plus, it can aid digestion and add flavor to meals without extra fat or salt. Enjoying roasted garlic in hummus gives you these benefits in a tasty way. This blog covered all you need for tasty roasted garlic hummus. We explored key ingredients, helpful tools, and the easy steps for making hummus. You learned tips to get the right texture and boost flavor. We shared fun variations to try, plus essential storage advice. Roasted garlic hummus is simple and fun to make. Enjoy the process and don't hesitate to get creative with your flavors! Remember, practice makes perfect.](https://dishtreats.com/wp-content/uploads/2025/06/4ccbc263-5457-4179-8ada-bd86b908b6b9-768x768.webp)
![- 1 large zucchini, sliced into thick rounds - 1 red bell pepper, cut into 1-inch squares - 1 yellow bell pepper, cut into 1-inch squares - 1 red onion, cut into large chunks - 8 cherry tomatoes, whole - 1 cup mushrooms, halved - 3 tablespoons extra virgin olive oil - 2 teaspoons dried oregano - 1 teaspoon garlic powder - Salt and black pepper to taste - Fresh parsley, finely chopped (for garnish) - 8 skewers (if using wooden skewers, soak in water for 30 minutes prior to use) Choosing the right ingredients is key to making these grilled Mediterranean veggie skewers shine. Fresh, colorful vegetables not only taste better but also look great on the plate. I love using seasonal veggies for the best flavor. You can mix and match as you like. The extra virgin olive oil adds richness and helps the spices stick. Dried oregano gives that classic Mediterranean taste. Garlic powder adds depth without the hassle of fresh garlic. Don't forget to season with salt and black pepper. This simple step makes a big difference in flavor. Fresh parsley as a garnish not only adds color but also a fresh taste that brightens up the dish. When preparing the skewers, remember to soak wooden skewers in water first. This prevents them from burning on the grill. If you use metal skewers, you can skip this step. For the full recipe, check out the details above. Enjoy preparing these delicious veggie skewers! - Preheat grill to medium-high heat. - In a bowl, combine the vegetables: zucchini, bell peppers, onion, tomatoes, and mushrooms. - In a small bowl, mix olive oil, oregano, garlic powder, salt, and pepper. - Drizzle the marinade over the veggies. Toss until all pieces are coated. - Thread the marinated vegetables onto skewers. Alternate colors for a bright look. - Place the skewers on the hot grill. Grill for 10-12 minutes. - Turn the skewers occasionally. This helps them cook evenly. - Remove skewers from the grill and let them cool slightly. - Just before serving, sprinkle fresh parsley on top for a nice finish. For the complete details, check the [Full Recipe]. For the best grilled Mediterranean veggie skewers, pick seasonal vegetables. Fresh veggies taste better and add more flavor. Look for zucchini, bell peppers, and red onions. They offer great colors and textures. When you shop, choose firm, bright vegetables. Avoid any that feel soft or look dull. You can spice up your marinade. Try adding fresh herbs like basil or thyme. They add a nice touch. You can also use lemon juice for a zesty flavor. For oils, consider using avocado or sesame oil. Each type brings a unique taste to the skewers. To get those perfect grill marks, heat your grill well. A hot grill helps sear the veggies. Place the skewers at an angle for better marks. Turn them every few minutes. This promotes even cooking and prevents burning. To stop veggies from sticking, oil the grill grates lightly. You can also brush oil on the skewers before grilling. For the full recipe, check the details above! {{image_4}} You can mix up your veggie skewers with many different vegetables. Try adding eggplant, asparagus, or zucchini for a tasty twist. Each vegetable brings its unique flavor and texture. Think about color too! Using red, yellow, green, and purple veggies makes your skewers look bright and fun. This also helps to attract kids and picky eaters. More colors usually mean more vitamins and minerals, too! Want to add protein? Try tofu or tempeh for a plant-based option. Marinate them just like the veggies for great flavor. If you prefer meat, chicken or shrimp works well. Marinate your choice of meat in olive oil, herbs, and spices. This adds depth to your skewers. It’s an easy way to make a filling meal. Don’t be afraid to play with flavors! Try different marinades. A simple lemon juice and herb mix can brighten the dish. You can also use spicy sauces for a kick. Before serving, drizzle some fresh dressing on top. This adds a burst of flavor and makes the dish even more appealing. For the full recipe, check out the complete guide. To store leftover skewers, let them cool down first. Place them in an airtight container. You can use glass or plastic containers. Make sure the lid seals well to keep the flavors fresh. For freezing skewers safely, wrap each skewer in plastic wrap. Then, place them in a freezer bag. This keeps them from getting freezer burn. When you reheat, take them out and thaw in the fridge overnight. To warm them up, place them on a grill or in the oven. Heat them until they are hot, about 5 to 10 minutes. These skewers can last up to 4 days in the refrigerator. After that, they may start to lose flavor and texture. Watch for signs that the skewers have gone bad. If they smell off or look slimy, it’s best to toss them. Always trust your senses when it comes to food safety. For the full recipe, check the section above. Yes, you can prep these skewers in advance. Start by cutting the vegetables. Place them in a bowl. Drizzle with olive oil and spices. Toss until coated. Cover the bowl and refrigerate. This keeps them fresh and ready to grill. I recommend marinating for at least 30 minutes. This allows the flavors to soak in well. Grill these skewers on medium-high heat. This ensures even cooking. Aim for a temperature of about 400°F (200°C). Grill for 10-12 minutes. Turn the skewers every few minutes. This will give you nice grill marks. Check the veggies for tenderness. They should be soft but still slightly firm. You can use wooden, metal, or bamboo skewers. Each has its benefits. Wooden skewers need soaking in water for 30 minutes. This prevents burning on the grill. Metal skewers are reusable and sturdy. They can handle heavy vegetables well. Bamboo skewers are lightweight and easy to find. Choose what works best for you! For the full recipe, refer to the earlier section. In this blog post, I shared a simple way to make tasty vegetable skewers. We covered the ingredients, preparation steps, and grilling techniques. You learned tips to choose fresh veggies, add flavors, and create fun variations. Remember, you can customize skewers to suit your taste. Enjoy the grilling process and share your creations with friends and family. Happy grilling!](https://dishtreats.com/wp-content/uploads/2025/07/4b70700e-9f85-4317-b9e4-a855a04e592b-768x768.webp)

