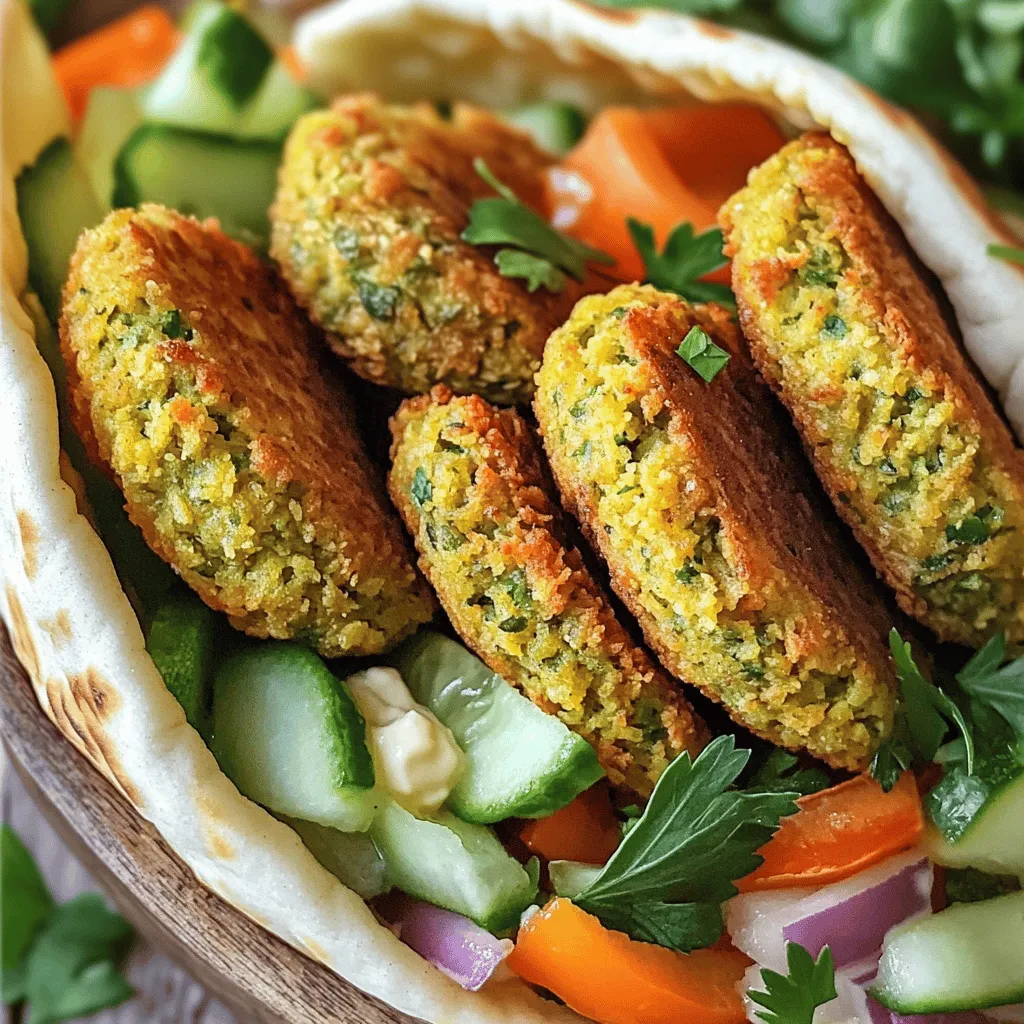
Crispy Air Fryer Falafel Simple and Delicious Recipe

Looking for a tasty and healthy snack? You’ve hit the jackpot with this crispy air fryer falafel recipe! Made from simple ingredients like chickpeas, onion, and garlic, these flavorful bites are easy to prepare and cook. Whether you enjoy them in wraps, salads, or on their own, you’ll love how quick they are to make. Get ready to satisfy your cravings for something delicious and crunchy!
Ingredients
Main Ingredients
- 1 can (15 oz) chickpeas, thoroughly drained and rinsed
- 1 small onion, roughly chopped
- 2 cloves of garlic, finely minced
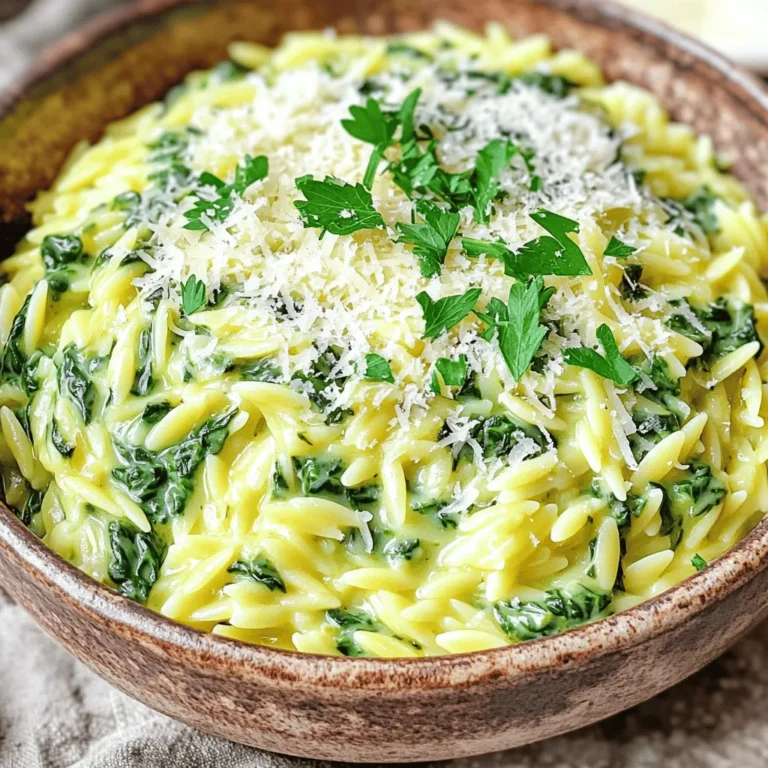
- 1 cup fresh parsley leaves, tightly packed
- 1 teaspoon ground cumin
- 1 teaspoon ground coriander
- 1/2 teaspoon baking powder
- 1 tablespoon fresh lemon juice
- Salt and pepper, to taste
- 2 tablespoons olive oil (plus extra for drizzling)
- 1/2 cup breadcrumbs (optional, for extra crunch)
To make crispy air fryer falafel, you need simple and fresh ingredients. Chickpeas form the base of the falafel. They add protein and fiber. Onions and garlic give it a nice flavor. Fresh parsley adds a bright taste.
Spices like cumin and coriander bring warmth. Baking powder helps the falafel to puff up a bit. Lemon juice adds a zesty kick and balances the flavors.
You can add olive oil for richness. If you want extra crunch, breadcrumbs work great too. They give a nice texture to each bite.
Gathering these ingredients will lead you to a delicious meal. They combine to create a dish that is both simple and satisfying.
Step-by-Step Instructions
Prepare the Mixture
1. Start by adding the chickpeas, onion, garlic, and parsley to a food processor.
2. Pulse until the mix is coarse. Don’t overprocess; you want some texture.
3. Next, add the spices: cumin, coriander, baking powder, salt, and pepper.
4. Pour in the lemon juice and olive oil. Pulse again until mixed but still chunky.
5. If you want extra crunch, fold in the breadcrumbs gently.
Shape and Chilling
1. Move the mixture to a bowl and cover it with plastic wrap.
2. Refrigerate for at least 30 minutes. This helps the flavors blend and firms up the mix.
3. After chilling, scoop about 2 tablespoons of the mix and shape it into small patties or balls.
Air Frying
1. Preheat your air fryer to 375°F (190°C). This step helps get that crispy outside.
2. Lightly spray the air fryer basket with cooking spray or drizzle some olive oil.
3. Place the shaped falafel in the basket without overlapping. This ensures even cooking.
4. Drizzle a bit more olive oil on top of the falafel for extra crispiness.
5. Cook for 12-15 minutes, flipping them halfway through. They should be golden brown and crispy.
6. Once done, remove them from the air fryer and let them cool slightly before serving.
Tips & Tricks
Achieving Crispiness
To get your falafel crispy, start by preheating your air fryer to 375°F (190°C). This step is key for a golden brown outside. If you skip this, your falafel may turn out soggy.
Next, use cooking spray or a little olive oil. Lightly spray the air fryer basket to stop sticking. This helps the falafel crisp up nicely. A drizzle of olive oil on top also enhances that crunch.
Flavor Enhancements
To boost flavor, add spices like cumin and coriander. These spices give depth and warmth to your falafel. Fresh herbs like parsley are also a must for brightness.
For a tasty drizzle, tahini sauce works wonders. It adds creaminess and a nutty flavor that pairs well with falafel. You can make a simple tahini drizzle by mixing tahini, lemon juice, and water until smooth. This elevates your dish and makes it even more delicious.
Variations
Different Ingredients
You can change up the falafel by adding fun ingredients. Try adding beets or sweet potatoes to the mix. This adds color and a hint of sweetness. Beets make a pretty pink falafel that is sure to impress. Sweet potatoes give a nice creamy texture and earthy flavor.
You can also incorporate different vegetables like carrots or zucchini. Just chop them finely before mixing. This will add more nutrients and flavor. Each veggie brings its unique taste, making your falafel even more special.
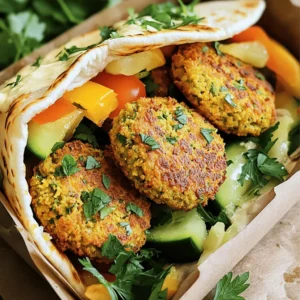
Serving Ideas
Falafel is super versatile when it comes to serving. You can wrap them in warm pitas or use them in salad bowls. Fill your wrap with fresh veggies like cucumbers, tomatoes, and lettuce. Add a drizzle of tahini sauce for a creamy finish.
Don’t forget about dipping sauces! Serve falafel with hummus or tzatziki for added flavor. Garnishes like fresh herbs can brighten up the dish. You can sprinkle some parsley or cilantro on top for a lovely touch. These simple ideas can take your crispy air fryer falafel from good to great.
Storage Info
How to Store
To keep your crispy air fryer falafel fresh, you can use two main methods: refrigeration and freezing.
- Refrigeration: Place leftover falafel in an airtight container. They will stay good for about 3-4 days in the fridge.
- Freezing tips: For longer storage, you can freeze falafel. Arrange them on a baking sheet and freeze until firm. Once frozen, transfer them to a freezer bag. They will last up to 3 months. Remember to label the bag with the date!
Reheating Instructions
When you want to enjoy leftover falafel, reheating them properly is key to keeping them crispy.
- In the air fryer: Preheat your air fryer to 350°F (175°C). Place the falafel in the basket. Heat for about 5-7 minutes, flipping halfway through. This gives them a nice crunch.
- In the oven: Preheat your oven to 375°F (190°C). Spread falafel on a baking sheet and bake for about 10 minutes, turning them halfway. This also helps restore their crispy texture.
Enjoy your falafel warm, and savor every bite!
FAQs
How can I make falafel without a food processor?
You can make falafel without a food processor by using a fork or a potato masher. First, mash the drained chickpeas in a bowl. Then, add the chopped onion, minced garlic, and parsley. Mix everything well. Use a fork to combine the spices, baking powder, lemon juice, and olive oil. Ensure the mixture is thick enough to hold its shape. You may need to mash it more to get a better texture.
Can I bake falafel in the oven instead of air frying?
Yes, you can bake falafel in the oven! Preheat your oven to 400°F (200°C). Shape the falafel into patties or balls and place them on a baking sheet lined with parchment paper. Drizzle a little olive oil on top for crispiness. Bake for about 20 to 25 minutes, flipping halfway through. This method gives you a healthier option, but the air fryer does yield a crunchier texture.
What are some side dishes to serve with falafel?
Falafel pairs well with many side dishes. Here are a few great options:
- Hummus: Creamy and tangy, it complements falafel well.
- Tzatziki: A refreshing yogurt dip with cucumber and dill.
- Tabouli: A salad made with parsley, tomatoes, and bulgur wheat.
- Pita Bread: Perfect for wrapping falafel with veggies.
- Cucumber Salad: A light, crunchy side to balance the flavors.
These sides make your meal colorful and tasty!
This blog post covered how to make delicious falafel from scratch. We explored main ingredients like chickpeas and spices. I walked you through step-by-step instructions for preparing and cooking falafel in an air fryer. Tips about achieving crispiness and flavor enhancements were also shared.
Experiment with different veggie options and serve your falafel in wraps or salads. Store extras properly and enjoy them later. Cooking can be fun and rewarding. I hope you try making falafel soon! It’s healthier and tastier than many take-out options.

![- 1 lb boneless, skinless chicken breast, thinly sliced - 1 large bell pepper (red or yellow), sliced into strips - 1 cup broccoli florets, cut into bite-sized pieces - 1 cup snap peas, trimmed - 1 medium carrot, julienned - 1/4 cup low-sodium soy sauce - 1 tablespoon honey - 1 tablespoon rice vinegar - 2 tablespoons sesame oil, divided - 3 cloves garlic, finely minced - 1 tablespoon fresh ginger, finely minced - Sesame seeds for garnish - 3 green onions, chopped (white and green parts kept separate) Using these ingredients, you can create a dish that bursts with flavor. Each element adds its own unique taste. The chicken breast serves as a great protein base. Bell peppers and broccoli contribute crunch and color. Snap peas and carrots add sweetness and texture. When you use sesame oil, garlic, and ginger, you create a rich aroma. These cooking essentials infuse the dish with depth. Finally, the sesame seeds and green onions provide a delightful finish. They enhance the dish's look and add a touch of brightness. For the full recipe, check the detailed instructions. Heat a large skillet or wok over medium-high heat. Add 1 tablespoon of sesame oil. When the oil shimmers, add the thinly sliced chicken. Season it with salt and pepper. Cook the chicken for 5-7 minutes. Stir it often until golden brown and fully cooked. Once done, remove the chicken from the skillet and set it aside. In the same skillet, add the second tablespoon of sesame oil. Let it heat up. Then, add the minced ginger and garlic. Sauté these for about 30 seconds. This step helps unlock their amazing flavors. Now, add the sliced bell pepper, broccoli florets, snap peas, and julienned carrot to the skillet. Stir-fry the vegetables for 4-5 minutes. You want them tender but still crisp. This keeps the dish colorful and crunchy. Return the cooked chicken to the skillet with the vegetables. In a separate small bowl, mix the soy sauce, honey, and rice vinegar. Whisk these until they blend well. Pour this sauce evenly over the chicken and veggies in the skillet. Stir everything together gently. Bring the mixture to a simmer over medium heat. This helps combine all the flavors and makes the dish more delicious. Next, slowly add the cornstarch slurry to the stir-fry. Stir constantly as you add it. Cook for 1-2 more minutes until the sauce thickens to your liking. This gives the dish a nice glossy finish. Remove the skillet from the heat. Add the chopped green tops of the green onions. Toss everything gently to combine. Serve the stir-fry on plates. Sprinkle sesame seeds on top for extra crunch. Enjoy this delightful meal! For the full recipe, you can refer to the earlier sections. For the best chicken stir-fry, use boneless, skinless chicken breast. Thinly slice it for quick cooking. This cut stays tender and soaks up flavors well. Heat your skillet over medium-high heat. This helps sear the chicken quickly, locking in moisture. Want to spice things up? Try adding a dash of red pepper flakes for heat. You can also mix in a splash of hoisin sauce for extra sweetness. Serve this stir-fry with jasmine rice or noodles. Both options soak up the sauce nicely. To plate your dish, start with a mound of rice in the center. Arrange the chicken and veggies around it. This creates a beautiful, colorful display. For garnish, sprinkle sesame seeds and chopped green onions on top. This adds a nice crunch and fresh flavor. For the full recipe, click here: [Full Recipe]. {{image_4}} You can easily change the protein in this dish. If you don’t like chicken, try these options: - Pork: Thinly sliced pork loin works well. - Beef: Flank steak adds great flavor. - Tofu: Firm tofu is perfect for a vegetarian option. - Shrimp: Quick-cooking shrimp gives a seafood twist. For vegetarian or vegan options, stick with tofu or tempeh. These protein sources soak up flavors well and add a nice texture. If you use tofu, press it to remove excess water for better frying. You can swap vegetables based on what’s in season or what you like best. Here are some great choices: - Zucchini: Adds a nice crunch and color. - Mushrooms: They bring an earthy flavor. - Asparagus: Great for spring dishes. - Cauliflower: A fun way to add some fiber. Mixing different veggies can also create a more colorful dish. Try to use at least three different kinds for variety. Adjust the sauce to match your taste. If you like it sweeter, add more honey. For a spicier kick, toss in some red pepper flakes. You can also switch vinegars. Here are some options: - Apple cider vinegar: It gives a fruity flavor. - Balsamic vinegar: Adds depth and sweetness. - White vinegar: For a sharper taste. Experimenting with these changes makes the dish your own. Don’t be afraid to try new flavors! For the full recipe, check the original instructions. To store leftovers, let the stir-fry cool down first. Place it in an airtight container. This keeps it fresh for up to three days in the fridge. When you're ready to eat, just take out the portion you want. If you want to freeze the stir-fry, use a freezer-safe bag or container. Remove as much air as possible to prevent freezer burn. You can freeze it for up to three months. Remember, some veggies may lose crunch when thawed, so choose your mix carefully. To reheat, the best method is on the stovetop. Add a splash of water or broth to keep it moist. Heat it over medium until hot. If you prefer the microwave, use a microwave-safe dish. Cover it with a damp paper towel to keep steam in. This helps maintain the texture and flavor. You can make this dish your own by adding personal touches. Try using different vegetables like zucchini or bok choy. You can also swap chicken for shrimp or tofu. Add your favorite nuts for a crunchy texture. Experiment with spicy sauces to kick up the heat. Each change can give you a new dish! Yes, frozen vegetables work well in this stir-fry. They save time and are easy to use. However, keep in mind that they may cook faster than fresh ones. You might need to adjust your cooking time. Aim for 3-4 minutes instead of 4-5 minutes for the veggies to stay crisp. Stir-fry goes great with several side dishes. Serve it with steamed jasmine rice for a classic touch. You can also pair it with brown rice for a healthier option. Noodles, like soba or rice noodles, also work well. Add a simple side salad for freshness and extra crunch. Absolutely! This sesame ginger chicken stir-fry is perfect for meal prep. Cook a big batch and divide it into containers. It stores well in the fridge for up to three days. To reheat, use a microwave or skillet. Just be sure to add a splash of water to keep it moist. To make this dish healthier, try a few simple swaps. Use less oil, or replace it with cooking spray. Choose low-sodium soy sauce to cut down on salt. Add more vegetables to increase fiber and nutrients. You can also cut back on honey for fewer calories. This blog post covered how to make a tasty Sesame Ginger Chicken Stir-Fry. We discussed key ingredients like chicken, fresh veggies, and flavorful sauces. I shared step-by-step cooking instructions, along with tips to enhance flavor and presentation. We also explored variations for dietary needs and the best ways to store leftovers. In summary, stir-fry is easy, fun, and flexible. You can customize it to suit your tastes. Enjoy making this dish your own, and share it with friends and family!](https://dishtreats.com/wp-content/uploads/2025/06/887f9040-7330-4bb7-a0e7-766c5efe9124-768x768.webp)