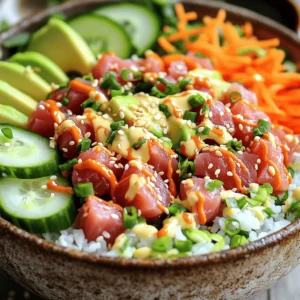
Spicy Tuna Sushi Bowls Simple and Flavorful Delight

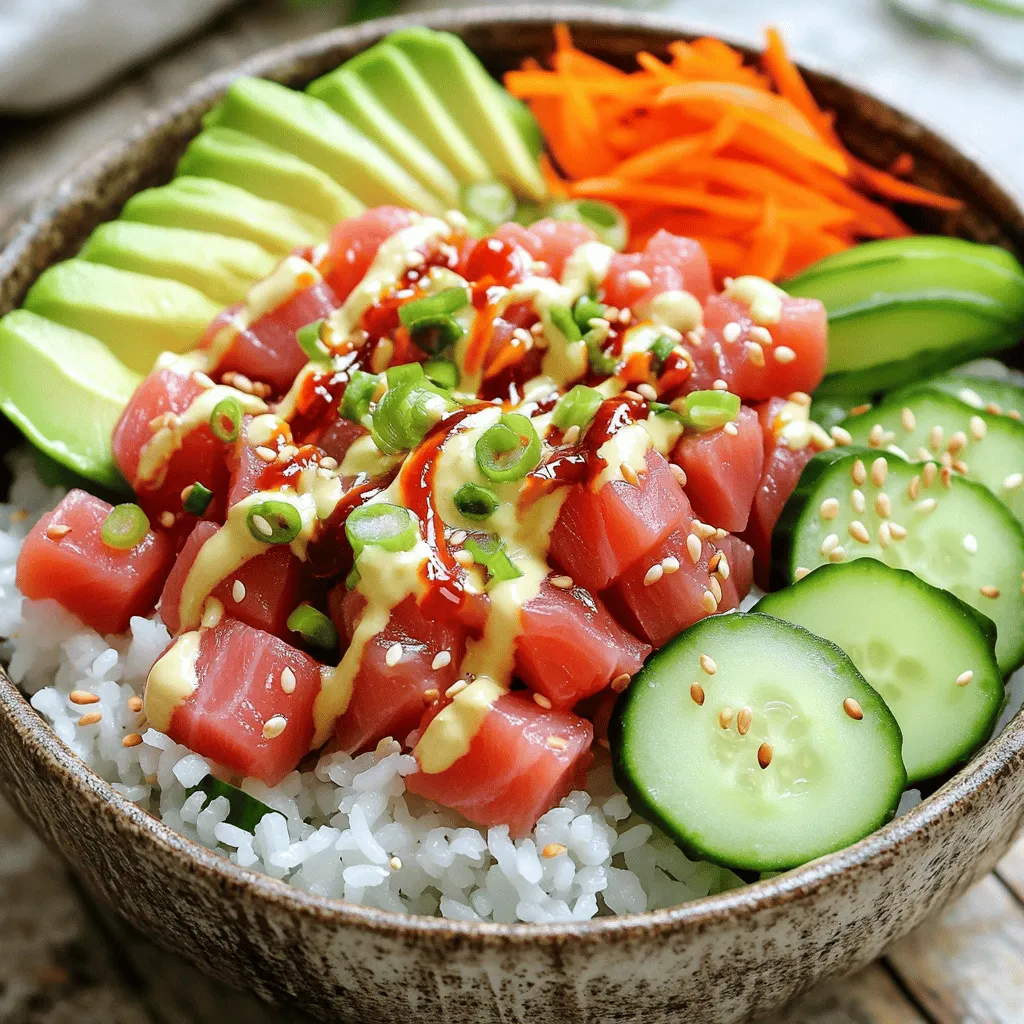
Are you craving a tasty and quick meal? Look no further! My Spicy Tuna Sushi Bowls bring bold flavors right to your kitchen. Packed with sushi-grade tuna, creamy avocado, and zesty seasonings, this dish is simple to make. I’ll guide you through each step, share tips for perfect rice, and suggest fun toppings. Let’s dive into this flavorful delight that will impress your taste buds in no time!
Ingredients
Main Ingredients
- 1 cup sushi rice
- 8 ounces sushi-grade tuna
- 1 ripe avocado
- Soy sauce for drizzling
Seasoning and Garnish
- Rice vinegar, sugar, and salt
- Mayonnaise (preferably Kewpie)
- Sriracha
- Toasted sesame seeds and nori
Optional Add-ins
- Cucumber
- Carrot
- Green onions
When I create spicy tuna sushi bowls, I keep the ingredients simple yet full of flavor. I always choose sushi-grade tuna for the best taste and safety. This tuna should be bright and fresh, as it is the star of the dish. For the rice, sushi rice is a must. It has the right texture and stickiness that holds everything together.
The avocado adds a creamy texture that balances the spice. I also love to drizzle soy sauce on top. It enhances the umami flavor of the dish.
To season the rice, I mix rice vinegar, sugar, and salt. This blend gives the rice a tangy taste. I prefer using Kewpie mayonnaise for its rich flavor. Sriracha brings the heat. You can adjust the amount based on how spicy you like it.
I often add toasted sesame seeds and nori as toppings. They provide a nice crunch and visual appeal. For extra freshness, I like to include optional add-ins like cucumber, carrot, and green onions. They add color and a crisp bite to the bowls. This combination makes each bowl a delightful experience.
Step-by-Step Instructions
Cooking the Sushi Rice
Start by rinsing the sushi rice under cold water. This helps remove excess starch. Rinse until the water runs clear. Next, place the rinsed rice in a medium saucepan with 1 ¼ cups of water. Turn the heat to medium and bring it to a boil. Once it boils, cover the pot and lower the heat. Let it simmer for about 18-20 minutes. When done, remove it from the heat and let it sit for 10 more minutes. This steaming time is key for fluffy rice.
Seasoning the Rice
While the rice steams, prepare the seasoning. In a small bowl, mix rice vinegar, sugar, and salt. Stir until the sugar and salt dissolve completely. After the rice has steamed, transfer it to a large mixing bowl. Gently fold in the vinegar mixture with a spatula. Be careful not to mash the rice. Let it cool to room temperature for the best flavor.
Preparing the Spicy Tuna
In a separate bowl, combine the diced sushi-grade tuna with mayonnaise and sriracha. Mix gently until every piece of tuna is coated well. If you like your dish spicier, feel free to add more sriracha. Taste it and adjust the spice to your liking.
Assembling the Bowls
To make the bowls, start with the seasoned sushi rice. Divide it evenly among your serving bowls. Next, top each bowl with the spicy tuna mixture. Then, arrange sliced avocado, cucumber rounds, and julienned carrot on top. This layering makes the dish colorful and fun.
Finishing Touches
For the final touches, sprinkle sliced green onions and toasted sesame seeds over each bowl. Add a few nori squares for extra flair. Finally, drizzle soy sauce over the top. Serve with a small dish of soy sauce on the side for extra dipping. Enjoy your spicy tuna sushi bowls!
Tips & Tricks
Achieving Perfect Sushi Rice
To make the best sushi rice, start with rinsing it well. Rinse the rice under cold water until the water runs clear. This step removes excess starch and helps the rice cook evenly. After rinsing, combine 1 cup of rice with 1 ¼ cups of water in a pot. Bring it to a rolling boil over medium heat. When it boils, cover the pot with a lid and lower the heat. Let it simmer for about 18-20 minutes. After cooking, let it sit, still covered, for 10 more minutes. This extra time makes the rice fluffy.
Enhancing Flavor Profiles
Using quality ingredients is key for great flavor. Always choose sushi-grade tuna for the best taste and safety. When mixing the tuna, use Kewpie mayonnaise for a creamy texture. Adjust the amount of sriracha based on your spice preference. If you like it spicy, add more sriracha. If you prefer mild, use less. Taste as you mix to find your perfect balance.
Presentation Tips
For a stunning presentation, arrange your toppings with care. Start with the sushi rice as a base. Then, add the spicy tuna on top. Use colorful vegetables like avocado, cucumber, and carrot for a bright look. Sprinkle green onions and sesame seeds on top for extra flair. Serve in beautiful bowls, and add a small dish of soy sauce on the side. This makes it feel like a restaurant experience at home.
Variations
Customizing the Protein
You can change the main protein in your spicy tuna bowls. If you can’t find sushi-grade tuna, use salmon or cooked shrimp. Both options give great flavor. For a vegetarian twist, try tofu or tempeh. Press and marinate them to add taste. You can even sauté them for a crispy finish.
Seasonal Vegetable Additions
Adding seasonal vegetables can enhance your bowl. In spring, try fresh peas or radishes. In summer, add juicy tomatoes or bell peppers. For fall, consider roasted squash or sweet potatoes. Pair these veggies with toppings like cilantro or lime zest. They add a bright kick to your dish.
Spicy Tuna Bowls with Different Bases
You don’t have to stick to sushi rice. Brown rice is a healthy choice and adds nuttiness. Quinoa is another great option; it’s full of protein. Both give a different texture. When seasoning, consider using apple cider vinegar or rice wine vinegar. They change the flavor and make it unique.
Storage Info
Storing Leftovers
To store your spicy tuna sushi bowls properly, follow these steps:
- Cool Down: Let the sushi rice cool to room temperature first.
- Containers: Use airtight containers to keep the rice and toppings fresh.
- Separate Storage: Store the rice and toppings separately to maintain texture.
- Refrigeration: Place them in the fridge right after cooling.
Reheating Instructions
When it comes to reheating sushi rice, do it gently:
- Microwave Method: Place the rice in a microwave-safe bowl. Add a splash of water to keep it moist.
- Cover: Cover with a damp paper towel to prevent it from drying out.
- Heat: Microwave in short bursts, checking often until warm.
For toppings, avoid reheating them if possible. Enjoy them fresh for the best taste. If needed, eat cold from the fridge.
Duration of Freshness
Homemade spicy tuna bowls stay fresh for about 1-2 days in the fridge.
- Check for Spoilage: Look for any off smells or changes in texture.
- Tuna Quality: If the tuna looks dull or slimy, it’s time to toss it.
- Rice Texture: If the rice has dried out or feels hard, it may not be safe to eat.
FAQs
What is the best type of tuna to use for spicy tuna sushi bowls?
I recommend using sushi-grade tuna. This type of tuna is safe to eat raw. It comes from a reliable source, ensuring freshness and quality. Regular tuna does not have the same standards. It may not be safe for raw dishes.
Can I make spicy tuna bowls in advance?
Yes, you can prep components ahead of time. Cook the sushi rice and let it cool. Store it in an airtight container. You can mix the spicy tuna just before serving. Keep sliced veggies in the fridge. This way, they stay fresh and crisp.
What can I substitute if I don’t have sushi rice?
If you can’t find sushi rice, use short-grain rice. It has a similar sticky texture. You could also try jasmine rice. Another option is quinoa for a healthier twist. Just remember to adjust the water and cooking times.
Is it safe to eat raw fish?
Yes, but you should choose sushi-grade fish. It undergoes freezing to kill parasites. Buy from trusted sources to ensure safety. Always check for freshness and smell. If it seems off, do not eat it.
How spicy can I make my spicy tuna?
You can adjust the spice level easily. Start with a small amount of sriracha. Mix it with the tuna and taste. If you want more heat, add more sriracha. Remember, it’s easier to add spice than to remove it!
In this blog post, we explored how to create delicious spicy tuna sushi bowls. We covered the key ingredients, including sushi rice, fresh tuna, and optional add-ins like cucumber and avocado. I provided detailed step-by-step instructions for cooking and assembling your dish. Tips for perfect rice and enhancing flavor rounded out the guide.
Making these bowls lets you personalize your meal to match your taste. Enjoy the process, and remember, practice makes perfect. Your homemade sushi bowl will impress anyone!
![To make a tasty cranberry pecan chicken salad, gather these key ingredients: - 2 cups cooked chicken breast, shredded - 1/2 cup dried cranberries - 1/2 cup pecans, roughly chopped - 1/4 cup celery, finely sliced - 1/4 cup red onion, finely chopped - 1/2 cup Greek yogurt - 2 tablespoons Dijon mustard - 1 tablespoon honey - Salt and pepper to taste - 4 cups mixed greens (for serving) Each ingredient plays a role in flavor and texture. The chicken gives protein, while the cranberries add sweetness. The pecans bring crunch, and the celery and onion provide freshness. The Greek yogurt binds it all together, making it creamy and delicious. Each serving of this salad offers a good balance of nutrients. You get: - Calories: 320 - Protein: 30 grams - Carbohydrates: 22 grams - Fats: 15 grams This makes it a healthy meal option. It is rich in protein and low in carbs, perfect for lunch or dinner. Feel free to mix things up if you need to. Here are some substitutions: - Use rotisserie chicken instead of cooked chicken breast for ease. - Swap dried cranberries for raisins or cherries for a different flavor. - Try walnuts or almonds in place of pecans for a new texture. - Use plain yogurt if you prefer a lighter dressing. These swaps let you customize the salad to fit your taste or dietary needs. For the full recipe, you can check the section above. To make this salad, start with the chicken. I use two cups of cooked chicken breast. You can shred it with your hands or use two forks. In a large bowl, mix the chicken with half a cup of dried cranberries and half a cup of roughly chopped pecans. Next, you’ll need a quarter cup of finely sliced celery and a quarter cup of finely chopped red onion. Add these to your bowl and stir everything together. This mix is key for flavor and texture. The main technique here is mixing. Make sure to combine the chicken and veggies well. This helps every bite taste great. For the dressing, whisk together half a cup of Greek yogurt, two tablespoons of Dijon mustard, one tablespoon of honey, and a pinch of salt and pepper. Whisk until smooth and creamy. This dressing adds a nice tang and sweetness to the salad. For serving, you can use mixed greens. Place a handful on each plate. Then, add the chicken salad on top. You can also serve it in a sandwich or wrap. If you want to impress, garnish with extra pecans and cranberries. A lemon wedge on the side adds a nice touch and flavor. This recipe is simple yet full of taste. To see the full recipe, visit the recipe section above. To make the best cranberry pecan chicken salad, focus on fresh ingredients. Use cooked chicken that is juicy and tender. Diced celery adds a nice crunch. The dried cranberries bring sweetness, while the pecans add a lovely nutty flavor. Mix the Greek yogurt, Dijon mustard, and honey well for a creamy dressing. Taste before serving. Adjust salt and pepper as needed. A pinch of lemon juice can brighten the flavors. Store any leftovers in an airtight container. This keeps the salad fresh for up to three days. To avoid sogginess, keep the dressing separate until ready to eat. If you plan to eat it later, store the salad and greens apart. You can also refrigerate the chicken salad for a quick lunch option. One common mistake is over-mixing the salad. This can make the chicken mushy. Another mistake is using too much dressing, which can overwhelm the flavors. Make sure to chop the veggies evenly for balanced bites. Finally, don’t skip tasting the salad before serving. Adjustments can make a big difference in flavor. For the full recipe, check out the complete instructions. {{image_4}} You can change this salad with the seasons. In fall, try adding diced apples or pears. They add a nice crunch and sweetness. In summer, fresh berries work great. Blueberries or strawberries can brighten up the dish. You can also mix in some shredded carrots for extra color and nutrients. This recipe is easy to tweak for different diets. To make it gluten-free, ensure all your ingredients are gluten-free. Greek yogurt is often gluten-free, but check the label. For a low-carb option, skip the dried cranberries or use unsweetened ones. You can also swap the honey for a sugar-free sweetener. You can serve this salad in many fun ways. Scoop it into lettuce cups for a fresh wrap. This adds crunch and keeps it low-carb. You can also make a sandwich with whole-grain bread. For a lighter touch, put it on a bed of mixed greens. Another idea is to serve it as a dip with whole-grain crackers. Each option gives a new taste and look. For the full recipe, check the earlier section. After enjoying your Cranberry Pecan Chicken Salad, store any leftovers in an airtight container. This keeps the salad fresh and tasty. Place it in the fridge right away. It will stay good for about three days. When you want to eat it again, give it a stir to mix the flavors. You can freeze this chicken salad, but I recommend it for only a short time. Freeze it in a container that seals well. It can stay in the freezer for up to one month. To eat, thaw it in the fridge overnight. After thawing, the texture may change, so I suggest eating it fresh if possible. Knowing how long the ingredients last helps avoid waste. Cooked chicken can last about three to four days in the fridge. Dried cranberries can stay fresh for six months in the pantry. Pecans last about six months too, but keep them in the fridge for longer freshness. Greek yogurt generally lasts one to three weeks after opening, so check the date on the container. You can make this salad ahead of time. Simply prepare the salad base without the dressing. Store the chicken, cranberries, pecans, celery, and onion in an airtight container in the fridge. Mix the dressing separately. When ready to serve, combine them. This keeps the salad fresh and crunchy. Yes, you can use other nuts. Walnuts, almonds, or cashews work well too. Each nut adds a unique flavor and texture. Choose one that you like best. Toasting the nuts lightly can enhance their flavor. Just be careful not to burn them! You can add many fruits to this salad. Apples, grapes, or mandarin oranges are great options. They add sweetness and a nice crunch. Dried fruits like raisins or apricots also work well. Don’t be afraid to mix and match to find your favorite flavor combo! For the full recipe, check out the [Full Recipe]. Cranberry Pecan Chicken Salad is both tasty and simple to make. We covered the key ingredients, nutrition facts, and substitutions to suit your needs. Next, we detailed step-by-step cooking instructions and serving suggestions. I shared tips to ensure freshness and avoid common mistakes. For variety, we explored seasonal options and dietary adjustments. Lastly, we discussed storage methods and answered typical questions. Try this salad for a quick meal or a gathering. Enjoy your journey to deliciousness!](https://dishtreats.com/wp-content/uploads/2025/06/5a61d52b-6c1c-48a0-aee6-0bda05025b36-768x768.webp)

 for Garlic Butter Lemon Salmon Foil Packs. In this article, you learned how to make Garlic Butter Lemon Salmon Foil Packs. We covered the main ingredients, step-by-step cooking instructions, and helpful tips to ensure success. You can also explore flavor variations and storage options for leftovers. This dish is simple yet delicious, making it perfect for dinner. With these techniques, you can impress friends and family with your cooking. Enjoy your meal and feel proud of your kitchen skills!](https://dishtreats.com/wp-content/uploads/2025/07/636e4153-d701-4cda-a9a1-5094e2b11f0e-768x768.webp)