Sticky Honey Garlic Meatballs Tasty and Easy Recipe

Craving a quick and tasty dinner? Let me introduce you to my Sticky Honey Garlic Meatballs! This dish brings amazing flavors together—sweet, savory, and oh-so-sticky. Best of all, it’s super easy to make, perfect for any home cook. Follow along, and you’ll whip up a plate of these mouthwatering meatballs in no time. Ready to impress your family or friends? Let’s get cooking!
Ingredients
List of Essential Ingredients
To make sticky honey garlic meatballs, gather these key items:
- 1 pound ground chicken (or turkey)
- 1/2 cup breadcrumbs
- 1/4 cup freshly grated Parmesan cheese
- 1/4 cup finely chopped green onions (plus more for garnish)
- 1 garlic clove, minced
- 1 large egg, lightly beaten
- 1 teaspoon salt
- 1/2 teaspoon freshly ground black pepper
- 1/4 teaspoon red pepper flakes (optional for a bit of heat)
- 1/3 cup honey
- 1/4 cup low-sodium soy sauce
- 2 tablespoons rice vinegar
- 1 teaspoon sesame oil
- Toasted sesame seeds for garnish
Optional Ingredients for Customization
You can play with flavors by adding these optional ingredients:
- Fresh herbs like cilantro or basil for extra taste
- Chopped nuts for added crunch
- Different spices like ginger or garlic powder for more depth
Tips for Selecting Quality Ingredients
Choosing the right ingredients makes a big difference:
- Ground Meat: Look for fresh ground chicken or turkey. Check the color; it should be pink with no brown spots.
- Cheese: Freshly grated Parmesan melts better than pre-grated.
- Honey: Use raw or local honey for the best flavor.
- Soy Sauce: Opt for low-sodium to control salt levels.
- Fresh Produce: Always choose bright green onions and firm garlic. They add the best flavor.
Quality ingredients set the stage for your sticky honey garlic meatballs. Each bite will burst with flavor and delight!
Step-by-Step Instructions
Preparation and Preheating
Start by preheating your oven to 400°F (200°C). This helps cook the meatballs well. Next, line a baking sheet with parchment paper. This makes cleanup easy later.
Mixing the Meatball Ingredients
In a large bowl, combine the following ingredients:
- 1 pound ground chicken or turkey
- 1/2 cup breadcrumbs
- 1/4 cup grated Parmesan cheese
- 1/4 cup finely chopped green onions
- 1 minced garlic clove
- 1 lightly beaten large egg
- 1 teaspoon salt
- 1/2 teaspoon ground black pepper
- 1/4 teaspoon red pepper flakes (optional)
Gently mix everything together. You can use your hands or a spatula. Be careful not to overmix. This keeps the meatballs soft and tasty.
Shaping and Baking the Meatballs
Now, scoop out some of the mixture. Roll it into balls about 1 inch wide. Place each meatball on the lined baking sheet. Make sure to leave space between them. This helps them cook evenly. Bake the meatballs in the preheated oven for 20 minutes. They should turn golden brown and be fully cooked.
Preparing the Honey Garlic Sauce
While the meatballs bake, let’s make the honey garlic sauce. In a small saucepan over medium heat, whisk together:
- 1/3 cup honey
- 1/4 cup low-sodium soy sauce
- 2 tablespoons rice vinegar
- 1 teaspoon sesame oil
Let the mixture come to a gentle simmer. Cook for about 5 minutes, stirring often. This thickens the sauce a bit.
Glazing and Serving the Meatballs
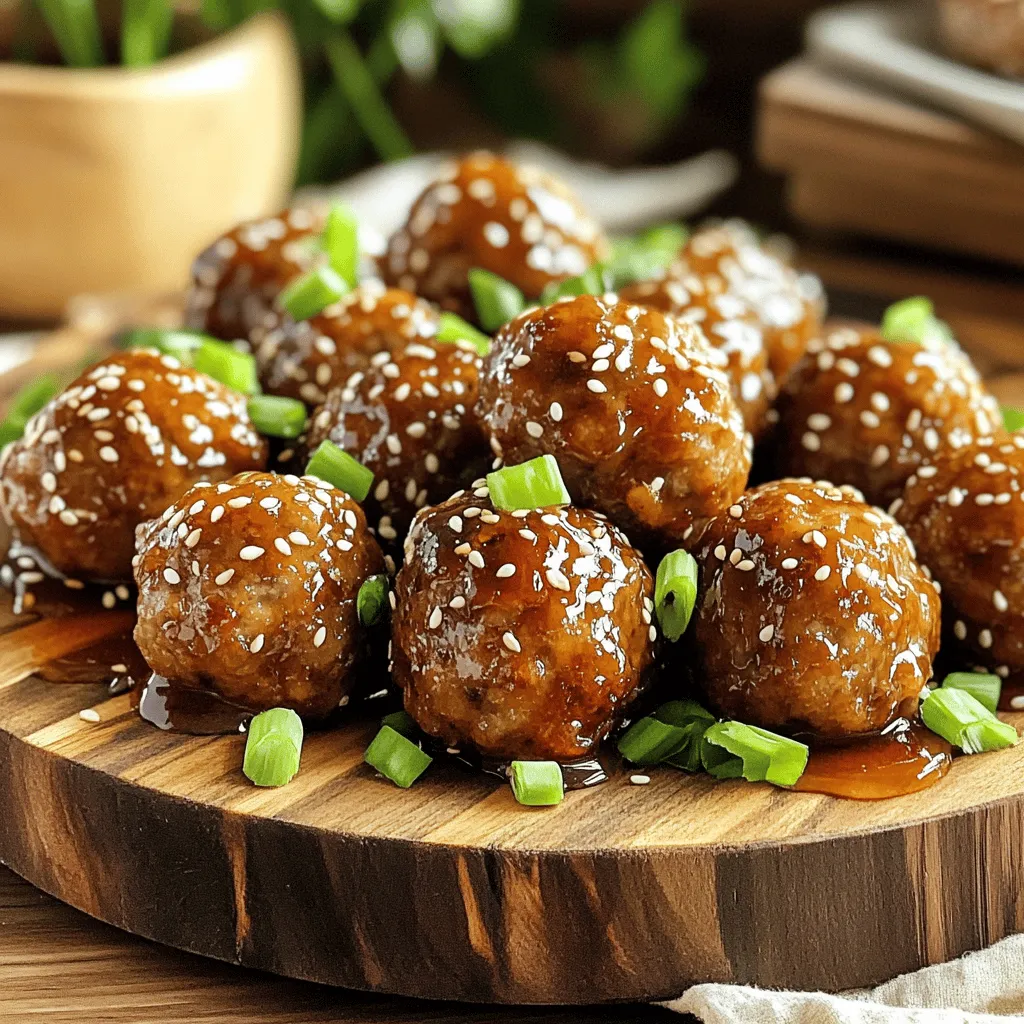
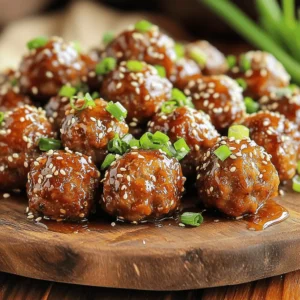
When the meatballs are done baking, take them out of the oven. Transfer them to a large bowl. Pour the warm honey garlic sauce over the meatballs. Gently toss them so they are well coated. Serve the meatballs on a platter. For a nice touch, sprinkle toasted sesame seeds and extra chopped green onions on top. Enjoy these tasty bites!
Tips & Tricks
Ensuring Tender Meatballs
To make sure your meatballs stay tender, avoid overmixing. When you add the ground chicken, breadcrumbs, and other ingredients, mix gently. Use your hands or a spatula for this step. Overmixing can make your meatballs tough. Keep them about one inch in size for even cooking. The egg acts as a binder, so don’t skip it.
Best Practices for Sauce Thickness
For a perfect sauce, heat it slowly. Whisk the honey, soy sauce, rice vinegar, and sesame oil over medium heat. When it simmers, let it cook for about five minutes. This helps the sauce thicken nicely. If it gets too thick, add a tiny bit of water. You want it to coat the meatballs without being too runny.
Serving Suggestions for Completeness
When serving your sticky honey garlic meatballs, think about pairing them with rice or a fresh salad. Rice soaks up the extra sauce well, making each bite even better. You can also sprinkle more green onions or sesame seeds on top for a nice touch. For an extra sweet kick, drizzle some honey sauce over your dish before serving. Enjoy your meal!
Variations
Substituting Proteins (Chicken, Turkey, Veggie Options)
You can easily change the meat in this recipe. Ground turkey works well and keeps the dish light. If you want a plant-based option, try using ground veggie meat or lentils. Just make sure you mash the lentils well to form a nice meatball shape. Each protein will offer a unique taste and texture.
Different Sauces to Try
While honey garlic sauce is a star, you can explore other sauces too. Try a sweet chili sauce for a different kick. Teriyaki sauce gives a nice Asian twist. You can even mix honey with mustard for a tangy flavor. Each sauce change can make your meatballs exciting and new.
Spicy vs. Mild Candy Garlic Meatballs
If you like heat, add more red pepper flakes. This gives the meatballs a spicy kick. For a milder version, skip the flakes altogether. You can also balance it with a touch of extra honey for sweetness. Adjusting the spice level helps you cater to everyone’s taste buds at the table.
Storage Info
Storing Leftover Meatballs
After you enjoy your sticky honey garlic meatballs, store any leftovers in an airtight container. Make sure to let them cool down first. They will stay fresh in the fridge for about three to four days. If you want to keep them longer, freezing is a good option.
Reheating Tips to Preserve Flavor
To reheat meatballs, use your oven or microwave. For the oven, preheat it to 350°F (175°C). Place the meatballs on a baking sheet and cover them with foil. Bake for about 10-15 minutes until warm. If using the microwave, place them on a microwave-safe plate. Heat in short bursts of 30 seconds, checking often to avoid drying them out.
Freezing for Future Meals
If you want to freeze meatballs, do so before adding the sauce. Arrange the cooled meatballs on a baking sheet and freeze them for about an hour. Once frozen, transfer them to a freezer bag or container. They can last for up to three months in the freezer. When you’re ready to eat, thaw them in the fridge overnight before reheating. Enjoy your tasty meal whenever you like!
FAQs
Can I make Sticky Honey Garlic Meatballs in advance?
Yes, you can make these meatballs ahead of time. Mix the meatball ingredients and form the balls. Place them on a tray and cover with plastic wrap. Store them in the fridge for up to a day. You can also freeze them for later. Just make sure to thaw them before cooking.
What can I use instead of breadcrumbs?
If you need a substitute for breadcrumbs, try using oats or crushed crackers. You can even use ground nuts for a gluten-free option. Just adjust the amount to get the right texture. Each option gives a different flavor and crunch.
How can I make the sauce less sweet?
If you want a less sweet sauce, reduce the honey amount. You can also add more soy sauce for a salty balance. Another option is to mix in a little vinegar for extra tang. Adjust it until it fits your taste.
Can I grill these meatballs instead of baking?
Yes, you can grill the meatballs! Just make sure to keep them on skewers or a grilling pan. This will help prevent them from falling through the grill. Cook them over medium heat until they’re fully cooked. Grilling adds a nice smoky flavor.
You can create tasty sticky honey garlic meatballs with basic ingredients and easy steps. Remember, quality matters; select fresh ingredients for the best flavor. Customize your meatballs and sauce to fit your taste. Storing and reheating them ensures you enjoy leftovers later. With these tips and variations, you can make each batch unique. Explore this dish and share your favorite tweaks. Enjoy cooking and making delicious memories!
![To make this dish, you will need: - 1 lb Brussels sprouts, trimmed and halved - 3 tablespoons extra virgin olive oil - 1/4 cup pure maple syrup - 1 tablespoon balsamic vinegar - 1 teaspoon garlic powder - Salt and freshly ground black pepper to taste These ingredients come together to create a sweet and savory glaze. The maple syrup adds sweetness, while the balsamic vinegar gives tanginess. The olive oil helps with roasting, making the sprouts tender and tasty. You can add these optional ingredients for extra flavor and texture: - 1/4 cup chopped walnuts - Fresh thyme leaves for garnish Walnuts add a nice crunch, while thyme gives a fresh aroma. Both options enhance the dish without overpowering it. This dish is not just tasty; it’s also good for you. Here’s a quick look at the nutrition per serving: - Calories: About 180 - Protein: 3g - Carbohydrates: 25g - Fat: 8g - Fiber: 4g Brussels sprouts are rich in vitamins C and K. The maple syrup provides natural sugars, making this dish a healthy choice. You get great flavors and health benefits in one meal. For the complete recipe, check the Full Recipe section above! First, we need to preheat the oven to 400°F (200°C). This heat is perfect for roasting. A hot oven ensures crispy edges and tender centers for your Brussels sprouts. Next, gather your ingredients. You will need: - 1 lb Brussels sprouts, trimmed and halved - 3 tablespoons extra virgin olive oil - 1/4 cup pure maple syrup - 1 tablespoon balsamic vinegar - 1 teaspoon garlic powder - Salt and freshly ground black pepper to taste - 1/4 cup chopped walnuts (optional for crunch) - Fresh thyme leaves for garnish (optional for aroma and color) In a large bowl, mix the halved Brussels sprouts with olive oil, maple syrup, balsamic vinegar, garlic powder, salt, and pepper. Toss everything well. Make sure every sprout gets coated in the sweet and savory sauce. This step is key for flavor. Prepare your baking sheet by lining it with parchment paper. This makes cleaning easy and helps prevent sticking. Spread the Brussels sprouts in a single layer on the sheet. Give them space to roast well. Now, place the baking sheet in the hot oven. Roast the sprouts for 25 minutes. Halfway through, stir them to promote even cooking. You want them to get tender and brown. If you add walnuts, toss them on the sheet during the last 5 minutes. This will give them a nice toast and extra crunch. Once done, take the Brussels sprouts out and let them cool for a minute. Transfer them to a serving dish. For a finishing touch, sprinkle fresh thyme leaves on top. This adds a nice pop of color and aroma to your dish. Enjoy this full recipe for a delicious treat! To get that perfect glaze, start with good maple syrup. Use pure maple syrup for the best flavor. Mix it well with olive oil and balsamic vinegar; this combo really shines. Make sure to coat the Brussels sprouts evenly. This helps each piece get that sweet, sticky glaze. Toss them well in the bowl before roasting. Roasting Brussels sprouts needs some care. First, preheat your oven to 400°F (200°C). This hot oven helps them caramelize. Spread the sprouts on a baking sheet in a single layer. If they are crowded, they won't brown well. Stir them halfway through cooking to ensure even roasting. You want them golden brown and tender, about 25 minutes in the oven. When ready to serve, think about how to make them look nice. Place the roasted sprouts on a large platter. You can arrange them in a circle for a pretty look. If you added walnuts, sprinkle them on top for crunch. Fresh thyme leaves also add color and smell great. This makes the dish not just tasty but beautiful too. For the full recipe, check out the details above. {{image_4}} You can switch up the sweetener for a twist. Try honey or agave syrup. These will add their own unique flavors. You can also use coconut sugar for a richer taste. If you like a kick, add some chili flakes for heat. A dash of orange juice can also brighten up the sweetness. This recipe is already vegetarian. To make it vegan, ensure the maple syrup is pure. You can also use almond oil instead of olive oil for a different flavor. For creaminess, add a dollop of vegan sour cream on top before serving. This adds a lovely tang that pairs well with the sweetness. Seasonal swaps can make this dish even better. In spring, add fresh peas for color and sweetness. During fall, toss in some diced apples for a sweet crunch. In winter, try adding roasted chestnuts for a nutty flavor. These changes keep the dish fresh and exciting every time you make it. For the full recipe, you can refer back to the detailed instructions provided. After enjoying your maple glazed Brussels sprouts, store any leftovers in an airtight container. This keeps them fresh and prevents odors. Let them cool first before sealing. Place the container in the fridge. They stay good for about 3 to 5 days. If you want to keep them longer, consider freezing. Reheating your Brussels sprouts can be quick and easy. You can use the oven or stovetop. If you use the oven, preheat it to 350°F (175°C). Spread the sprouts on a baking sheet and heat for about 10-15 minutes. Stir halfway through to ensure even warming. If you prefer the stovetop, heat a pan over medium heat. Add a bit of olive oil and toss the sprouts until warmed through. Freezing Brussels sprouts is a smart way to save them for later. First, blanch them in boiling water for 3 minutes. Then, cool them in ice water. This keeps their bright color and flavor. Drain and dry the sprouts, then place them in a freezer bag. Remove as much air as you can before sealing. They can last up to 6 months in the freezer. When you're ready to use them, just thaw and reheat! Enjoy your deliciously roasted maple glazed Brussels sprouts from [Full Recipe] and savor every bite! Yes, you can prep Brussels sprouts in advance. Trim and halve them a day before. Store them in an airtight container in the fridge. When you're ready, mix them with the other ingredients from the Full Recipe. This helps save time and makes cooking easier. Maple glazed Brussels sprouts pair well with many dishes. Here are some great options: - Roast chicken for a savory touch. - Grilled salmon for a healthy protein. - Quinoa salad for a hearty side. - Mashed potatoes for comfort food lovers. These options balance the sweet and savory flavors of the sprouts. To make this dish vegan, swap out the maple syrup for agave nectar. This keeps the sweetness intact. You can also use vegetable oil instead of olive oil if you prefer. Follow the Full Recipe as is, making those simple swaps. Enjoy the same great taste with a vegan twist! In this blog post, we covered how to make maple glazed Brussels sprouts. We discussed the key ingredients and provided step-by-step instructions. Tips helped you achieve the perfect glaze and roasting method. You also learned about variations, storage, and common questions. Now, you have all the tools to enjoy this dish. Experiment with flavors and enjoy your cooking!](https://dishtreats.com/wp-content/uploads/2025/06/8ccc11bb-56ad-4722-8e0d-cbebb28a9ca5-768x768.webp)
. - Preheat the oven to 425°F (220°C). - Slice the red bell peppers in half. Remove the seeds and membranes. Place them skin-side up on a lined baking sheet. - Roast the peppers for about 25 minutes until the skin is blistered. - Let the peppers cool. Once cool, peel off the skin and chop them into bite-sized pieces. - Rinse 1 cup of quinoa thoroughly under cold water. - In a saucepan, combine the rinsed quinoa with 2 cups of water. Bring it to a boil. - Reduce the heat to low, cover, and simmer for about 15 minutes until the water is absorbed. - Fluff the quinoa with a fork and let it cool. - In a large mixing bowl, combine the cooled quinoa with the roasted peppers, halved cherry tomatoes, finely diced red onion, and diced cucumber. - Mix gently to ensure even distribution of all ingredients. - In a small bowl, whisk together 3 tablespoons of olive oil, 2 tablespoons of balsamic vinegar, and 1 teaspoon of garlic powder. - Add a pinch of salt and freshly ground black pepper, to taste. - Drizzle the dressing over the salad mixture and toss gently to coat. - If you want, sprinkle 1/4 cup of crumbled feta cheese on top and mix lightly. - Finally, garnish with freshly chopped parsley for a colorful finish. For more details, refer to the Full Recipe. To get that perfect blistered skin on your red peppers, follow these steps: - Choose fresh peppers: Look for firm, shiny skin. - Cut them right: Slice each pepper in half lengthwise. This helps them roast evenly. - High heat is key: Roast at 425°F (220°C) for about 25 minutes. - Watch for bubbles: The skin should bubble and char slightly. This adds great flavor. For seasoning your peppers, try these ideas: - Simple salt and pepper: This lets the natural sweetness shine. - Add garlic powder: This gives a rich taste. - Sprinkle paprika: This adds a nice smoky flavor. To ensure your quinoa is fluffy and not mushy, use this method: - Rinse well: Rinse quinoa under cold water to remove bitterness. - Water ratio matters: Use 2 cups of water for every 1 cup of quinoa. - Don’t skip the simmer: Bring to a boil, then lower the heat and cover. Let it simmer for 15 minutes. You can also hydrate quinoa with broth instead of water. This adds extra flavor to your dish. To make your Roasted Red Pepper Quinoa Salad even tastier, consider these tips: - Add fresh herbs: Basil or cilantro can brighten the dish. - Spice it up: A pinch of red pepper flakes adds heat. - Mix textures: Add nuts for crunch or avocado for creaminess. These simple changes can elevate your salad and keep it exciting. For the full recipe, refer to the earlier section. {{image_4}} For a vegan twist, you can skip the feta cheese. Instead, use avocado or vegan cheese. These options add creaminess without dairy. You can also mix in other vegetables. Try adding spinach, roasted zucchini, or artichokes. They boost flavor and nutrition. Want to make your salad heartier? Add chickpeas or grilled chicken. Chickpeas add fiber and protein. They make the salad more filling. If you prefer meat, grilled chicken works great. You can also try other legumes like black beans or lentils. They offer different flavors and textures. You can change the salad with the seasons. In summer, use fresh corn, tomatoes, or cucumber. These veggies are sweet and crunchy. You might also swap roasted red peppers for grilled asparagus or eggplant. These changes keep the salad exciting and fresh all year. For the full recipe, check out the details above. To keep your roasted red pepper quinoa salad fresh, store it in the fridge. Use an airtight container to avoid moisture loss. Place a piece of parchment paper between the salad and the lid. This helps keep it crisp. This salad lasts about 3 to 5 days in the refrigerator. Look for signs of spoilage like an off smell or slimy texture. If the salad looks or smells bad, it’s best to toss it. You can freeze quinoa, but it's best not to freeze the whole salad. Freezing can change the texture of the veggies. To freeze quinoa, cook it and let it cool. Then, place it in a freezer-safe bag. Remove as much air as possible. This way, you can use it later for quick meals. Yes, you can make this salad ahead. Prepare it in advance for busy days. I suggest making it up to two days before serving. Store it in an airtight container in the fridge. The flavors will meld nicely. Just keep the dressing separate until you’re ready to eat. This keeps the salad fresh and crisp. If you want a change, try using brown rice, farro, or couscous. Each option gives a different taste and texture. You can even use lentils for a protein boost. Just make sure to cook them according to package directions. This keeps your salad hearty and filling. This salad has a mild flavor. The roasted peppers add sweetness, not heat. If you like spice, you can add jalapeños or red pepper flakes. For a milder taste, skip the spicy additions. You can also add more cucumber or feta to balance the heat. This salad works great as a side or main dish. Pair it with grilled chicken or fish for protein. It also complements roasted veggies or a light soup. For a vegetarian option, add chickpeas or serve with hummus. You can enjoy it as part of a larger meal or on its own. Check out the Full Recipe for more ideas! This Roasted Red Pepper Quinoa Salad is easy and tasty. We covered key ingredients, cooking steps, and helpful tips. You can customize it to fit your diet and likes. Always store leftovers properly to enjoy later. Remember, fresh flavors and textures make this salad shine. With these ideas, you can impress your friends or family at any meal. Enjoy making and sharing this healthy dish!](https://dishtreats.com/wp-content/uploads/2025/06/1f28db07-8093-4cb7-8796-796da85cb13a-768x768.webp)