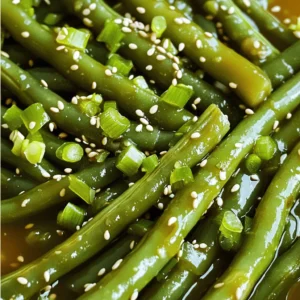
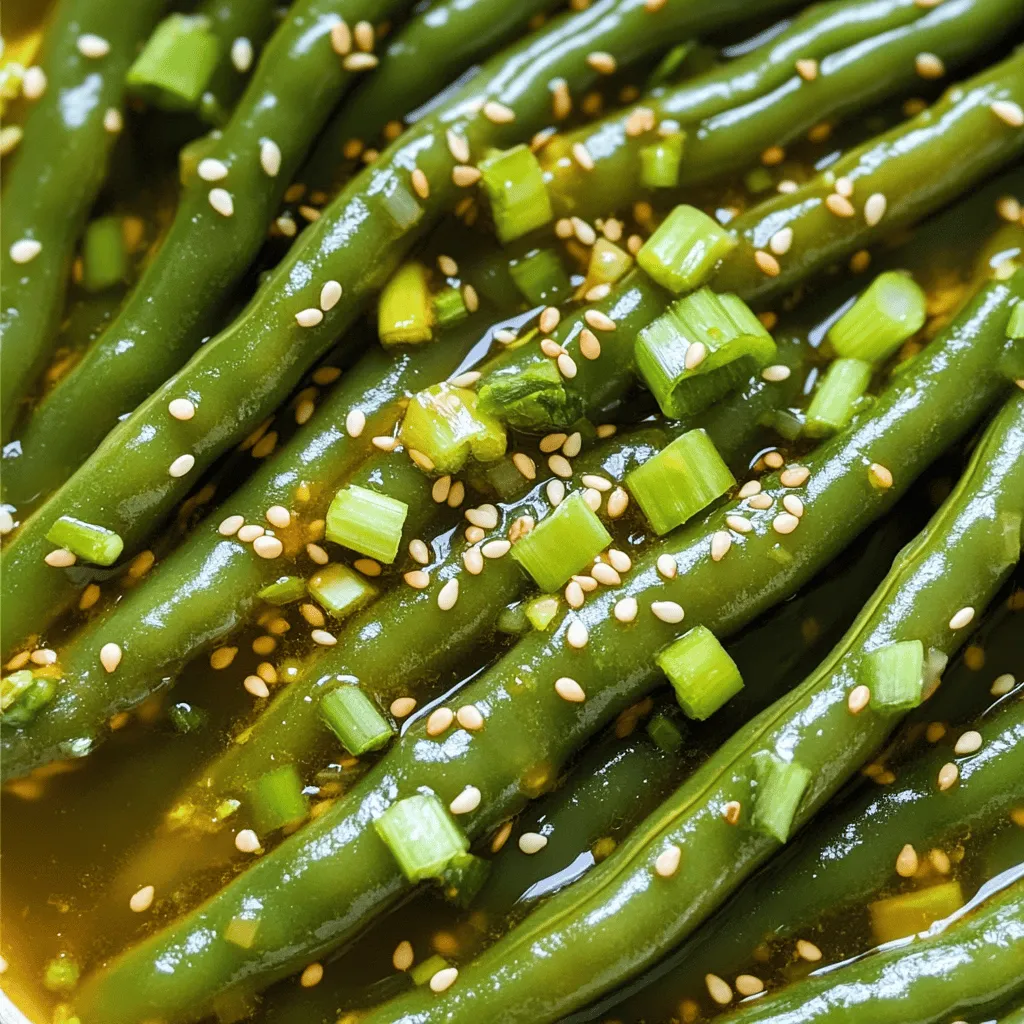
Sweet Soy Garlic Green Beans Flavorful and Easy Dish
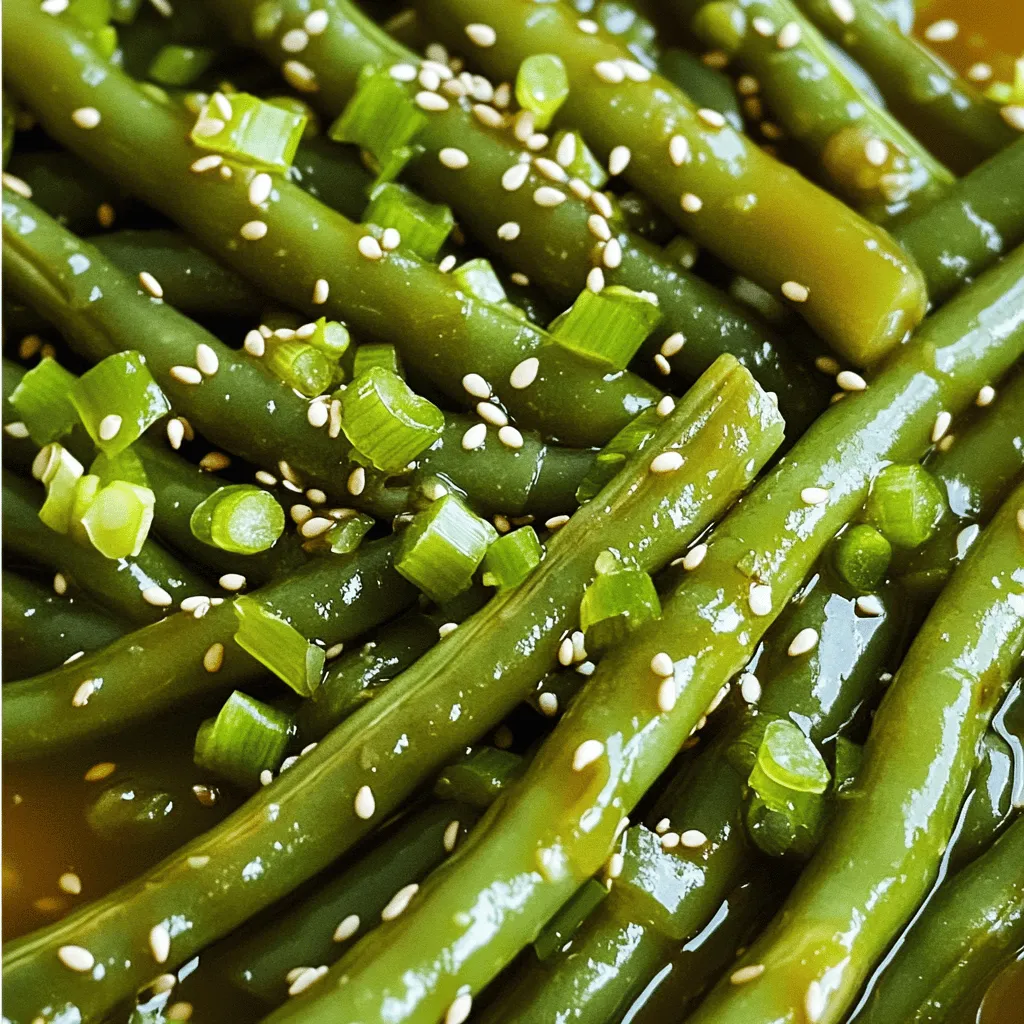
Looking for a quick side dish that bursts with flavor? Try my Sweet Soy Garlic Green Beans! This easy recipe combines fresh green beans with a savory sauce made from soy sauce, honey, and garlic. Perfect for any meal, you’ll be amazed at how simple it is to elevate your dinner. Join me as we explore the steps to create this delicious dish that your family will love!
Ingredients
List of Ingredients
- 1 pound fresh green beans, trimmed
- 3 tablespoons soy sauce
- 2 tablespoons honey or maple syrup
- 3 cloves garlic, minced
- 1 tablespoon sesame oil
- 1 teaspoon ground ginger
- 1 tablespoon sesame seeds (optional)
- Salt and pepper to taste
- Chopped scallions for garnish
Gathering these ingredients makes cooking easy and fun. Fresh green beans are the star here. They should be bright and firm. Soy sauce adds a rich umami flavor. Honey or maple syrup gives a touch of sweetness, balancing the saltiness. Garlic brings warmth, while sesame oil adds a nutty taste. Ground ginger introduces a subtle spice that enhances the dish.
You can sprinkle sesame seeds on top for a nice crunch. Don’t skip the scallions! They add a fresh bite and look great as a garnish.
Recommended Tools
- Large pot for boiling
- Skillet or wok for sautéing
- Ice water bowl for shocking
Using the right tools makes cooking smooth. A large pot helps boil the beans quickly. A skillet or wok is perfect for sautéing the garlic and mixing flavors. The ice water bowl is key to keeping the green beans bright and crisp. Enjoy the process of making this flavorful dish!
Step-by-Step Instructions
Preparation of Green Beans
1. Blanching process: Fill a large pot with water. Bring it to a rolling boil. Add the trimmed green beans to the boiling water. Blanch them for 2-3 minutes. The beans should look bright green and feel tender-crisp.
2. Shocking in ice water: Drain the green beans promptly. Transfer them to a bowl filled with ice water. This step stops the cooking and keeps their color. Allow them to cool for a few minutes, then drain again and set aside.
Making the Sauce
1. Sautéing garlic: Heat a large skillet or wok over medium heat. Add the sesame oil. Once hot, sauté the minced garlic for about 30 seconds. Stir constantly to avoid browning. It should smell amazing!
2. Adding soy sauce, honey, and ginger: Pour in the soy sauce, honey (or maple syrup), and ground ginger. Stir well and let it simmer gently. Cook for 2-3 minutes until the sauce thickens slightly.
Combining Ingredients
1. Tossing the green beans in the sauce: Add the blanched green beans to the skillet. Gently toss them in the sweet soy garlic sauce. Make sure all beans are coated.
2. Cooking until heated through: Cook for another 2-3 minutes. This warms the beans and blends the flavors. Taste and season with salt and pepper as needed. Optionally, sprinkle sesame seeds on top for extra flavor and texture.
Tips & Tricks
Perfecting the Recipe
To get crisp green beans, blanch them correctly. Boil them for only 2-3 minutes. This keeps them bright and crunchy. After boiling, shock them in ice water. This stops cooking and locks in that lovely green color. Drain and set them aside.
Be careful with the garlic. Sauté it for just 30 seconds. Stir it constantly to keep it from browning. Brown garlic can taste bitter. You want it to be fragrant, not burnt.
Enhancing Flavor
For garnishes, chopped scallions add freshness. They brighten the dish with color and taste. If you want a little crunch, try sesame seeds. They add texture and a nice nutty flavor.
If honey isn’t your thing, maple syrup works too. Both sweeteners add a wonderful taste. You can also try agave nectar for a different twist.
Cooking Techniques
You can cook these beans on the stovetop or in a wok. I prefer using a wok. It heats evenly and gives great results. The high sides help toss the beans in the sauce easily.
If you don’t have a wok, a large skillet works well too. Just make sure it has enough room for all the ingredients. This way, you can stir everything without making a mess.
Variations
Ingredient Substitutions
You can change the green beans for other veggies. Try using snap peas, broccoli, or carrots. Each brings a unique crunch and flavor.
For sweeteners, honey is great, but you can use maple syrup or agave nectar. They all add a nice touch to the sauce.
Flavor Additions
Want a bit of heat? Sprinkle in some chili flakes or red pepper. You can also add fresh ginger for a stronger taste.
You can swap sesame oil for olive oil or avocado oil. Each oil brings its own flavor and health benefits.
Dietary Adjustments
This dish can easily fit vegan diets. Just replace honey with maple syrup. It retains the sweet flavor without using animal products.
For gluten-free options, select gluten-free soy sauce. This small change keeps the taste while ensuring everyone can enjoy it.
Storage Info
How to Store Leftovers
To keep your sweet soy garlic green beans fresh, follow these steps:
- Refrigeration tips: Place any leftovers in an airtight container. They can last in the fridge for up to three days. Make sure the beans cool down before sealing the container.
- Freezing recommendations: If you want to save them longer, you can freeze the green beans. Use a freezer-safe bag and remove as much air as possible. They can last for about two months in the freezer.
Reheating Instructions
When it’s time to enjoy your leftovers, reheating is key.
- Best practices for reheating: The best way to reheat is in a skillet over medium heat. Add a splash of water or soy sauce to keep them moist.
- Avoiding loss of texture: Avoid using the microwave if you can. It can make the beans soggy. Stir them gently as they heat to maintain their crispness.
Shelf Life
Knowing how long your dish lasts helps you enjoy it at its best.
- How long the dish lasts in the fridge: Sweet soy garlic green beans will stay fresh for three days when stored properly in the fridge.
- Signs of spoilage: Look for any off smells, discoloration, or slimy texture. If you see any of these signs, it’s best to toss the beans.
FAQs
Can I use frozen green beans?
Yes, you can use frozen green beans. They are easy to find and save time. However, they may not have the same crisp texture as fresh ones. Frozen beans often lose their bite when cooked. You can still make them taste great by adjusting cooking time. Cook them just until heated through to keep some crunch. For flavor, add a bit more garlic or soy sauce.
How do I make this recipe spicier?
To add heat, try these ideas:
- Add red pepper flakes when cooking the sauce.
- Mix in a fresh minced chili pepper.
- Use spicy soy sauce instead of regular soy sauce.
- Drizzle some sriracha on top before serving.
These small changes can give your green beans a nice kick!
What to serve with Sweet Soy Garlic Green Beans?
These green beans go well with many dishes. Here are some great pairings:
- Serve with grilled chicken or shrimp for a tasty meal.
- Pair them with rice or quinoa to soak up the sauce.
- They complement steak or pork nicely, adding a fresh touch.
- Try them with tofu for a vegetarian option.
No matter what you choose, these green beans will shine on your plate!
This post covers a simple and tasty recipe for Sweet Soy Garlic Green Beans. We looked at the key ingredients, tools needed, and a step-by-step guide to make the dish. I also shared tips for perfecting your green beans, ideas for variations, and how to store leftovers.
Enjoy experimenting with flavors and ingredients. This dish can fit into many diets and occasions. You can serve it with many main meals. Now, go ahead and make it your own!