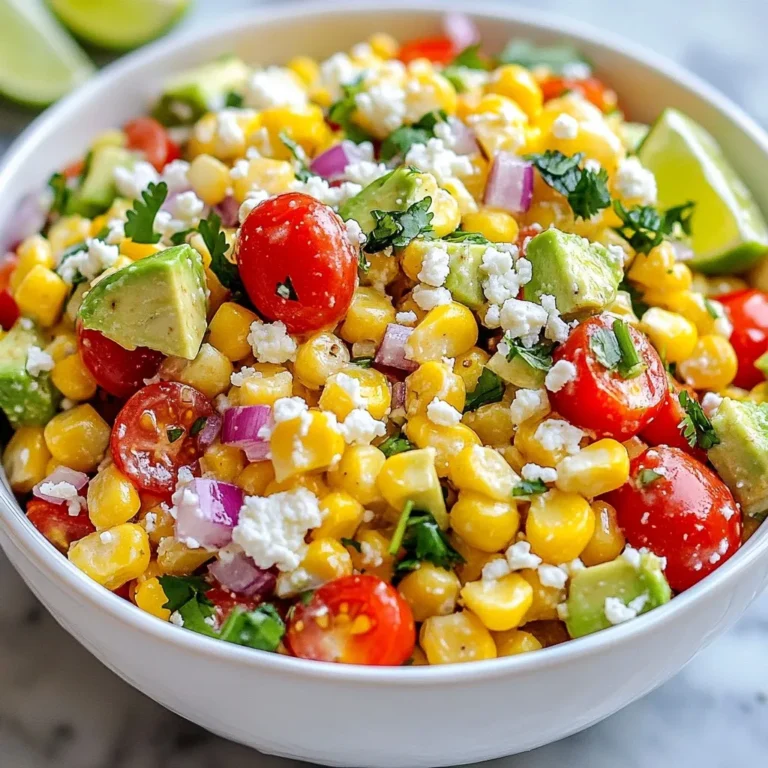
Mediterranean Chickpea Salad Fresh and Flavorful Dish
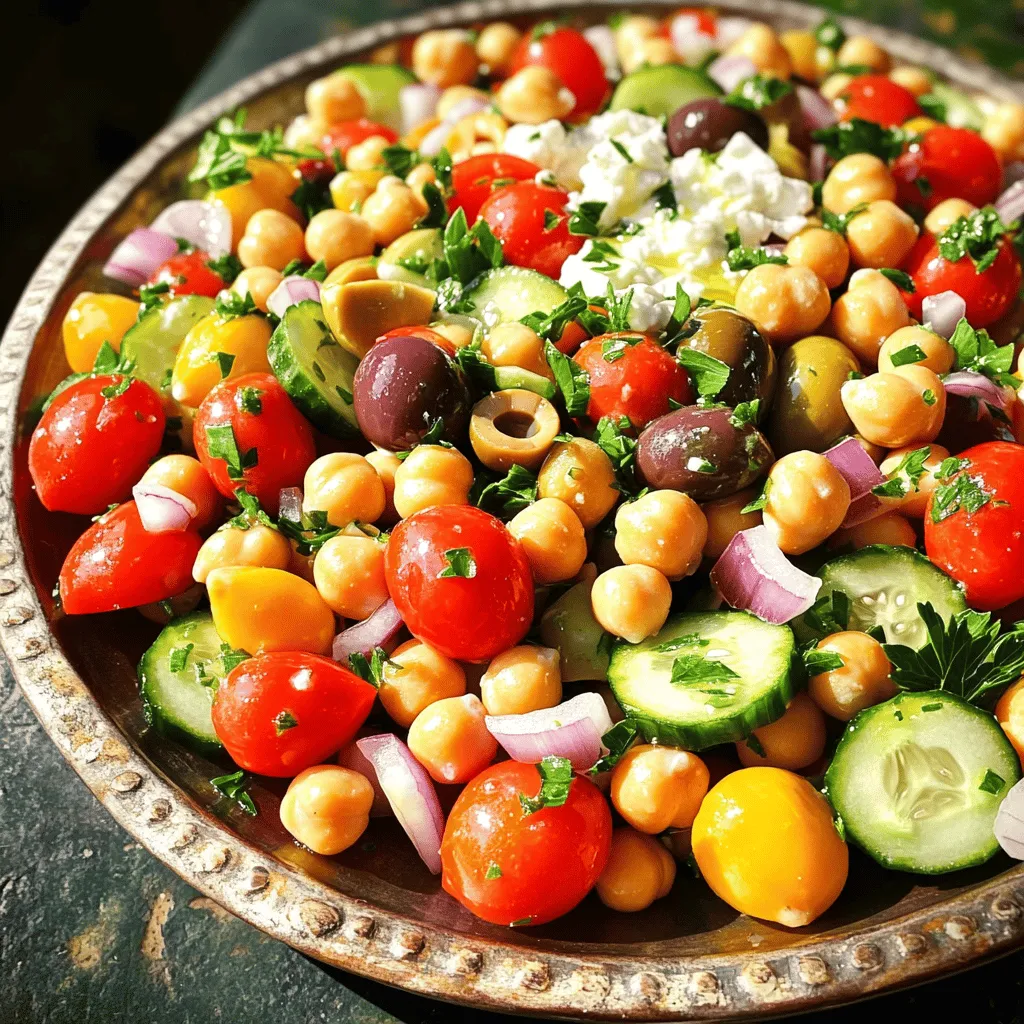
Looking for a fresh and tasty dish? A Mediterranean Chickpea Salad is just what you need. This vibrant salad is packed with flavors and is easy to make. You only need simple ingredients, whether fresh or canned. I’ll guide you step-by-step to create this salad, complete with tips to twist the recipe your way. Let’s dive in and make your next meal a colorful feast!
Ingredients
Detailed Ingredients List
To create a vibrant Mediterranean Chickpea Salad, gather the following ingredients:
- 1 can (15 oz) chickpeas, thoroughly rinsed and drained
- 1 cup cherry tomatoes, halved
- 1 cucumber, diced into bite-sized pieces
- 1/4 red onion, finely chopped
- 1/2 cup Kalamata olives, pitted and sliced
- 1/2 cup feta cheese, crumbled (omit for a vegan version)
- 2 tablespoons fresh parsley, finely chopped
- 2 tablespoons extra virgin olive oil
- 1 tablespoon freshly squeezed lemon juice
- 1 teaspoon dried oregano
- Sea salt and freshly cracked black pepper to taste
Fresh vs. Canned Chickpeas
I often use canned chickpeas for ease and speed. They save time and still taste great. Rinsing them well removes extra salt and improves the flavor. Fresh chickpeas offer a different texture. If you choose fresh, soak them overnight. Cook them until tender. This adds a lovely bite to your salad.
Recommended Brands for Quality Ingredients
For the best flavor in your salad, I recommend these brands:
- Chickpeas: Goya or Eden Foods for canned options. They offer great taste and quality.
- Olive Oil: Colavita or California Olive Ranch. They provide a rich, fruity flavor.
- Feta Cheese: Athenos or Dodoni. Both brands have creamy textures and a nice tang.
Using high-quality ingredients elevates your dish. It makes it not only tasty but also visually appealing.
Step-by-Step Instructions
Preparation of Ingredients
Start by gathering your ingredients. You will need:
- 1 can (15 oz) chickpeas, thoroughly rinsed and drained
- 1 cup cherry tomatoes, halved
- 1 cucumber, diced into bite-sized pieces
- 1/4 red onion, finely chopped
- 1/2 cup Kalamata olives, pitted and sliced
- 1/2 cup feta cheese, crumbled (omit for a vegan version)
- 2 tablespoons fresh parsley, finely chopped
- 2 tablespoons extra virgin olive oil
- 1 tablespoon freshly squeezed lemon juice
- 1 teaspoon dried oregano
- Sea salt and freshly cracked black pepper to taste
First, rinse the chickpeas well. Drain them completely. Next, chop the cherry tomatoes and cucumber. Finely chop the red onion. Slice the Kalamata olives. If you use feta cheese, crumble it now. Lastly, chop the fresh parsley.
Mixing and Combining the Salad
In a large mixing bowl, add the rinsed chickpeas. Next, incorporate the halved cherry tomatoes, diced cucumber, chopped red onion, and sliced Kalamata olives into the bowl. If you are using feta cheese, sprinkle it over the mixture. This adds a creamy texture and boosts the flavor.
Now, prepare the dressing. In a small bowl, whisk together the olive oil, lemon juice, oregano, sea salt, and black pepper. Drizzle this dressing over the salad mixture. Gently toss everything together. You want all the ingredients to be evenly coated.
Finally, add the chopped parsley to the salad. Toss it lightly again. This adds a beautiful green touch to the dish. For the best flavor, let the salad rest for about 10 minutes. This resting time helps the flavors blend well.
Tips for Making Perfect Dressing
To make the dressing shine, use high-quality extra virgin olive oil. Fresh lemon juice makes a big difference. If you don’t have fresh lemons, bottled juice works but lacks the same bright taste. Add your dried oregano and salt with care. You can always taste and adjust. If you want a bit more zing, add more lemon juice or a dash of vinegar. This will brighten the salad even more.
Tips & Tricks
Enhancing Flavor Profiles
To make your Mediterranean Chickpea Salad shine, focus on fresh ingredients. Use ripe cherry tomatoes for sweetness. Choose a crisp cucumber for crunch. The red onion adds a nice bite, while Kalamata olives bring depth. If you want a creamier taste, add feta cheese. The tangy dressing is key: mix olive oil and lemon juice. This combination brightens the dish. A sprinkle of oregano offers a warm, aromatic touch that ties everything together.
How to Make Ahead
You can prepare this salad ahead of time. Chop your veggies and store them in the fridge. Mix the dressing separately and keep it in a jar. When you are ready to serve, combine everything. This method keeps your salad fresh and crunchy. Letting the salad sit for about 10 minutes before serving helps the flavors blend. This resting time makes each bite tasty.
Best Practices for Serving
Serve the salad on a colorful platter to attract attention. You can use individual bowls for a nice touch. Garnish with extra parsley and feta for a pop of color. This not only looks great but also adds freshness. Pair the salad with pita bread or grilled chicken for a complete meal. Enjoy it as a light lunch or a side dish at dinner.

Variations
Vegan Adaptations
Making this salad vegan is easy. Just leave out the feta cheese. You can add extra olives or use avocado for creaminess instead. This keeps the dish rich and tasty. You still get a great blend of flavors.
Swapping Ingredients for a Unique Twist
You can switch up the veggies in this salad. Try bell peppers or zucchini for a new taste. You can also use different herbs like basil or mint. If you want a spicy kick, add diced jalapeños. These swaps make the salad fun and exciting.
Adding Proteins or Grains
For a heartier meal, add some protein or grains. Grilled chicken or shrimp works well. If you prefer plant-based options, try quinoa or farro. These additions keep you full and satisfied. You can easily turn this salad into a main dish.
Storage Info
Refrigeration Guidelines
Store your Mediterranean Chickpea Salad in an airtight container. This keeps it fresh. Make sure to refrigerate it right after serving. The cool temperature helps the flavors stay bright.
Freezing Tips
I do not recommend freezing this salad. Freezing can change the texture. The veggies may become mushy, which is not tasty. If you want to save some, try to store only the dressing separately. This way, you can mix it fresh later.
How Long Does it Last?
When stored properly, the salad lasts about 3 to 5 days in the fridge. Check for freshness each time you eat. If it smells off or looks soggy, it’s best to toss it. Enjoy the salad while it’s still crisp and vibrant!
FAQs
What is the nutritional value of Mediterranean Chickpea Salad?
Mediterranean Chickpea Salad is packed with nutrients. One serving has about:
- 200 calories
- 10 grams of protein
- 8 grams of healthy fats
- 30 grams of carbs
- High fiber content
Chickpeas offer protein and fiber. Tomatoes, cucumbers, and parsley add vitamins. Feta cheese provides calcium. This salad supports heart health and digestion.
Can I meal prep with this recipe?
Yes, you can meal prep this salad. It holds well in the fridge. Store it in an airtight container. It stays fresh for 3 to 5 days. The flavors even improve over time. Prepare it on the weekend for easy lunches. Just toss it again before serving.
How to adjust the spice level in the salad?
To adjust the spice level, you have a few options. If you like it mild, skip the olives. For more heat, add a pinch of red pepper flakes. You can also use a dash of hot sauce in the dressing. Taste as you go to find your perfect balance.
In this blog post, we explored how to make a delicious Mediterranean Chickpea Salad. We covered key ingredients, preparation steps, and tips for enhancing flavors. You learned about fresh versus canned chickpeas and the best brands to use. We also discussed how to store the salad and answered common questions.
Making this salad is easy and fun, with many ways to adapt it to your taste. I hope you feel inspired to try different variations and enjoy this healthy dish!

![- 4 cups fresh spinach - 1 cup mixed berries - 1/2 cup feta cheese - 1/4 cup sliced almonds or walnuts - 1/4 red onion - 1 tablespoon honey - 2 tablespoons balsamic vinegar - 2 tablespoons extra virgin olive oil - Salt and pepper to taste The heart of a great Summer Berry Spinach Salad lies in its fresh ingredients. Start with 4 cups of fresh spinach. Choose vibrant, crisp leaves for the best flavor. Next, add 1 cup of mixed berries. I love using strawberries, blueberries, and raspberries together. They add sweetness and color. For creaminess, include 1/2 cup of feta cheese. Crumble it into small pieces for easy mixing. You can also try goat cheese if you prefer. Then, toss in 1/4 cup of sliced almonds or walnuts for crunch. Toasting them adds extra flavor. Finally, slice 1/4 of a red onion. Its sharpness balances the sweetness of the berries. Now, let’s move to the dressing. Combine 1 tablespoon of honey with 2 tablespoons of balsamic vinegar. This mix gives a sweet and tangy kick. Add 2 tablespoons of extra virgin olive oil for richness. Season with salt and pepper to taste. This dressing brings all the flavors together. For the full recipe, check the details above. Each ingredient plays a role in making this salad a fresh and tasty delight! - First, wash and dry the spinach. Make sure it's clean and free of dirt. - Next, add the spinach to a large mixing bowl. This is your fresh salad base. - Rinse the mixed berries under cool water. This helps keep them fresh and tasty. - Slice the strawberries if needed. Halve or quarter them to match other berries. - Gently add the berries to the bowl with the spinach. - Finely slice the red onion. Sprinkle it over the salad for a nice crunch. - In a small bowl, combine honey, balsamic vinegar, olive oil, salt, and pepper. - Whisk until the mixture is smooth. This dressing will bring the salad to life. - Carefully drizzle the dressing over the salad. Make sure every part gets a light coat. - Top with crumbled feta cheese and toasted sliced almonds or walnuts. This adds creaminess and crunch. - Gently toss the salad. Be careful not to mush the berries; you want them whole. For the full recipe, check out the vibrant Summer Berry Spinach Salad. Enjoy every bite! For this salad, I love using strawberries, blueberries, and raspberries. They add sweet flavors and vibrant colors. Choose berries that are firm and bright. Avoid any that feel squishy or have dark spots. In summer, you’ll find these berries at their best. They are fresh and full of flavor. If you can, buy them locally for the best taste. To make your salad stand out, serve it in a wide, shallow bowl. This lets the colors shine. Arrange the spinach first, then place the berries artistically on top. A sprinkle of feta cheese adds a touch of white. You can even drizzle a bit of extra dressing on top for a glossy finish. This makes the dish look fancy and appetizing. When mixing the salad, be gentle. You don’t want to squish the berries. Use your hands or two large spoons. Lift the spinach from the bottom and turn it over. This way, all the ingredients blend well. Toss just enough to coat everything with the dressing. It should look fresh and colorful, not mushy. Enjoy the beautiful mix of flavors! {{image_4}} You can change the nuts or cheese in this salad to suit your taste. If you want a creamier texture, try goat cheese instead of feta. For nuts, walnuts add a rich flavor, while pecans give a sweet crunch. You can also skip the nuts if you have a nut allergy. If you prefer different greens, kale or arugula work well. Kale adds a hearty bite, while arugula brings a peppery flavor. Both options will keep your salad fresh and exciting. While the balsamic dressing is tasty, many other dressings pair well. A lemon vinaigrette adds brightness. A poppy seed dressing can bring a sweet touch. You can also try a yogurt-based dressing for creaminess without the extra calories. You can make your dressing at home or buy it from the store. Homemade dressings let you control the flavor. Store-bought options save time and still taste great. Always check the labels for added sugars or preservatives. You can adapt this salad for fall or winter by changing the ingredients. In the fall, swap out berries for roasted apples or pears. Add some crumbled blue cheese for a bold taste. For winter, add sliced citrus fruits like oranges or grapefruits. They add a lovely color and refreshing taste during cold months. For a heartier salad, consider adding roasted butternut squash or cooked quinoa. This gives you a filling meal while keeping it seasonal and delicious. For the full recipe, click [Full Recipe]. To store leftovers, place the salad in an airtight container. This keeps it fresh and crisp. Avoid mixing the dressing in if you plan to eat it later. The dressing can make the salad soggy. Instead, store the dressing in a separate small jar. Use glass or BPA-free plastic containers. They help keep flavors intact and prevent leaks. If you have extra berries or nuts, store them in separate bags. This way, they stay fresh for longer. Serve the salad within two hours after making it. This keeps the greens bright and the berries juicy. If you need to hold it longer, store it in the fridge. Just remember to add the dressing right before serving. To keep ingredients fresh, cover the salad tightly. Use plastic wrap or a lid. You can also place a damp paper towel on top. This helps maintain moisture without making everything soggy. You cannot freeze the entire salad. Freezing will ruin the texture of the spinach and berries. However, you can freeze some components. For example, freeze extra berries for smoothies later. To freeze components separately, wash and dry the berries first. Spread them out on a baking sheet and freeze until solid. After that, transfer them to a freezer bag. This way, you can enjoy them later without losing flavor. You can easily add protein to your salad. Here are some great ideas: - Grilled chicken, sliced thin - Shrimp, cooked and peeled - Quinoa, cooked and cooled - Chickpeas, drained and rinsed - Hard-boiled eggs, sliced or quartered These additions make the salad heartier. They also give you extra nutrients. Adding protein turns a light dish into a full meal. Yes, you can prepare this salad ahead of time. Here are some tips for meal planning: - Wash and dry the spinach one day before serving. - Store it in a sealed bag with a paper towel to absorb moisture. - Prepare the berries and onion. Keep them separate in the fridge. - Make the dressing a day ahead and store it in a jar. Just mix everything together when you're ready to eat. This keeps the salad fresh and crunchy. This salad is packed with nutrition. Here are some key benefits: - Spinach is rich in vitamins A, C, and K. - Berries are full of antioxidants, which help fight free radicals. - Feta cheese adds calcium and protein. - Nuts provide healthy fats and fiber. Eating this salad supports good health. It boosts your energy and keeps you feeling full. Get creative with your toppings! Here are some fun ideas: - Croutons for added crunch - Avocado slices for creaminess - Sunflower seeds for a nutty flavor - Fresh herbs like basil or mint for a fresh twist - Dried fruits like cranberries or apricots for sweetness Feel free to mix and match. You can make each salad unique! This salad is best when fresh. Here’s how to store it: - Keep it in the fridge for up to two days. - Store the dressing separately to prevent sogginess. - Use an airtight container for the salad. If you want to keep it longer, avoid adding wet ingredients. This helps maintain freshness. This blog post covers how to make a delicious Summer Berry Spinach Salad. We explored the fresh ingredients, simple steps, and helpful tips for making it special. You learned how to pick the best berries, create an easy dressing, and suggest variations. Remember, this salad is not just tasty; it's also packed with nutrients. Whether you serve it fresh or store leftovers, it's a dish you can enjoy many ways. Try it out and make it your own!](https://dishtreats.com/wp-content/uploads/2025/07/5f6f3c08-a552-4e10-ab55-3c96ca32b52c-768x768.webp)


![- 1 lb Brussels sprouts, trimmed and halved - 3 tablespoons extra virgin olive oil - 2 tablespoons pure maple syrup - 1 tablespoon Dijon mustard - 1 teaspoon garlic powder - 1/4 cup chopped walnuts (optional for added crunch) - Fresh parsley, roughly chopped, for garnish (optional) - Salt - Freshly ground black pepper When making Maple Mustard Brussels Sprouts, the main ingredients are key to flavor. Brussels sprouts bring a nice crunch. Extra virgin olive oil adds richness, while pure maple syrup gives a sweet touch. Dijon mustard adds a tangy kick that ties it all together. You might want to add garlic powder for more flavor. If you like crunch, chopped walnuts work well. A sprinkle of fresh parsley adds color and freshness to the dish. For seasoning, salt and freshly ground black pepper enhance the taste. Be sure to adjust these to your liking. The balance of flavors makes this dish a standout! Check the [Full Recipe] for detailed steps to prepare these delightful sprouts. - Preheat your oven to 400°F (200°C). - Line a baking sheet with parchment paper. This makes cleanup easy. - In a bowl, combine olive oil, maple syrup, Dijon mustard, and garlic powder. - Season with salt and pepper. Whisk until smooth. - Add halved Brussels sprouts to the dressing. - Toss until evenly coated. Make sure every sprout gets some flavor. - Spread sprouts on the baking sheet in a single layer. - If you like, sprinkle with walnuts for crunch. - Roast for 25-30 minutes. Remember to stir halfway through for even cooking. - Check if the sprouts are fork-tender and caramelized. - Garnish with fresh parsley before serving. This adds color and freshness to your dish. For the complete recipe, check out the [Full Recipe]. To get that golden-brown color, you need to space the Brussels sprouts well on the baking sheet. If they are too close, they will steam instead of roast. Stir them halfway through cooking. This helps them cook evenly and get that nice caramelized look. You can add more flavor by mixing in balsamic vinegar for a tangy twist. This will balance the sweetness of the maple syrup. Also, try using herbs like thyme or rosemary. These herbs add a fresh taste that brightens the dish. Use a large mixing bowl when tossing your ingredients. This gives you enough space to coat the Brussels sprouts well. A high-quality baking sheet is key for even roasting. It helps them brown nicely without sticking. For the full recipe, check out the details above. {{image_4}} To make this dish vegan, swap out the Dijon mustard for a vegan option. There are many great choices available, like a chickpea or tahini-based mustard. These alternatives keep the flavor bold and rich, just like the traditional recipe. You won’t lose any taste while making it plant-based. If you need a nut-free dish, simply leave out the walnuts. The Brussels sprouts will still have a lovely texture and taste. The maple and mustard glaze adds all the flavor you want. You can enjoy this dish without any worries about allergies. For a heartier meal, consider adding protein. Roasted chickpeas or crispy tofu work great here. They pair perfectly with the sweet and tangy flavors of the Brussels sprouts. You can serve them together on the same plate for a filling and nutritious dish. This option makes it easy to create a balanced meal. For the full recipe, check out the details above! Store any leftover Maple Mustard Brussels Sprouts in an airtight container. They will stay fresh for up to 3 days. This keeps them safe and tasty for later meals. Just remember to let them cool down first before sealing them up. You can freeze roasted Brussels sprouts for up to 2 months. To do this, place them in a freezer-safe bag or container. Make sure to squeeze out as much air as possible. This helps prevent freezer burn and keeps their flavor intact. To enjoy your Brussels sprouts again, reheat them in the oven or on the stovetop. The oven gives them a nice crispy texture. If you choose the stovetop, keep the heat medium to avoid burning. Just warm them through until they are hot and ready to eat. For the full recipe, check out the [Full Recipe]. The ideal roasting time is 25-30 minutes. This time allows them to cook perfectly. You want them fork-tender and golden brown. Stir them halfway through to help them caramelize well. Yes, you can prep these sprouts a day ahead. Just mix the Brussels sprouts with the maple-mustard dressing and store them in the fridge. When you're ready to serve, simply roast them before your meal. This saves time and keeps flavors fresh. Pair them with proteins like chicken or fish. They also go great with grains like quinoa or rice. The sweet and tangy flavor of the sprouts complements many dishes well. Absolutely! Maple Mustard Brussels Sprouts store well in the fridge. You can enjoy them throughout the week. Just reheat them in the oven or on the stovetop for the best texture. For the full recipe, be sure to check the earlier sections. This blog post shared a simple and tasty recipe for Maple Mustard Brussels Sprouts. You learned about the main ingredients and optional add-ins. The step-by-step instructions ensure you roast them to perfection. I’ve also shared tips for flavor and storage, plus variations to suit your needs. These Brussels sprouts are easy to make and full of flavor. Try them with your favorite protein for a delicious meal! Enjoy experimenting with this recipe and make it your own.](https://dishtreats.com/wp-content/uploads/2025/06/4f608c6e-5907-49f6-a9cf-d865501fb0be-768x768.webp)
![The Sun-Dried Tomato Chickpea Salad is simple to make and full of flavor. Here’s what you need: - 1 can (15 oz) chickpeas, thoroughly drained and rinsed - 1/2 cup sun-dried tomatoes, roughly chopped - 1/4 cup red onion, finely diced - 1/2 cucumber, peeled and diced - 1/4 cup feta cheese, crumbled into small pieces - 2 tablespoons fresh parsley, finely chopped - 2 tablespoons extra virgin olive oil - 1 tablespoon freshly squeezed lemon juice - 1 teaspoon dried oregano - Salt and freshly ground black pepper, to taste This mix of ingredients creates a bright, fresh dish. Chickpeas add protein and fiber. Sun-dried tomatoes give a sweet and tangy taste. The red onion adds a sharp bite, while cucumber brings crunch. Feta cheese adds creaminess to the salad. Fresh parsley brightens the flavors. Make sure to use high-quality extra virgin olive oil for the best taste. Fresh lemon juice adds a zesty kick. Dried oregano brings an earthy flavor that ties everything together. Adjust salt and pepper to your liking for a perfect balance. For the full recipe, follow the steps to enjoy this delightful salad. It's quick to prepare and great for lunch or dinner! To make this salad, start with a large mixing bowl. Combine the following ingredients: - 1 can (15 oz) chickpeas, thoroughly drained and rinsed - 1/2 cup sun-dried tomatoes, roughly chopped - 1/4 cup red onion, finely diced - 1/2 cucumber, peeled and diced - 1/4 cup feta cheese, crumbled into small pieces Gently stir the ingredients together. This ensures an even distribution of flavors and textures. In a separate small bowl, whisk together the dressing ingredients: - 2 tablespoons extra virgin olive oil - 1 tablespoon freshly squeezed lemon juice - 1 teaspoon dried oregano - Salt and freshly ground black pepper, to taste Mix until well combined. You want the oil and lemon juice to emulsify, meaning they blend into a smooth mixture. Drizzle the dressing over the salad base. Toss gently to coat everything evenly. Be careful not to break the chickpeas or feta cheese. After mixing, sprinkle the freshly chopped parsley on top. Give it one last gentle toss. Cover the salad and let it rest for at least 15 minutes. This time allows the flavors to meld together, enhancing the taste. You can serve it chilled or at room temperature for the best experience. For the full recipe, check the ingredients and instructions above. To make your Sun-Dried Tomato Chickpea Salad stand out, choose a nice serving bowl. A colorful bowl can catch the eye and add to the meal. You can layer the salad to show off its colors. Start with chickpeas at the bottom, then add layers of sun-dried tomatoes, cucumbers, and red onions. For garnishing, sprinkle extra parsley leaves on top. This adds a fresh touch. You can also add a few crumbles of feta cheese over the top. This gives a nice contrast to the vibrant colors of the salad. If you want to impress, serve it with crusty bread or pita on the side. You can make this salad ahead of time. Store it in the fridge for a quick meal later. After you mix it, cover the salad well. It stays fresh for 2 to 3 days. The flavors will deepen as it sits. For meal prepping, divide the salad into single-serving containers. This makes it easy to grab and go. Keep the dressing separate until you are ready to eat. This keeps the salad crisp and fresh. Enjoy your meal! For the full recipe, check out the details above. {{image_4}} You can switch out chickpeas for other beans. Black beans or kidney beans work well. They add a different taste and texture. If you want to try lentils, they can also be good. For a dairy-free option, use a vegan feta cheese. There are many brands available. You can also skip the cheese and add more vegetables. This keeps the salad fresh and tasty. To boost the flavor, add spices like cumin or paprika. These spices can take your salad to a new level. You could also add bell peppers or corn for a nice crunch. If you want more protein, add grilled chicken or tofu. These options make the salad heartier. You can even mix in some nuts or seeds for added texture. For the full recipe, check out the details above and create your own delicious twist! To keep your Sun-Dried Tomato Chickpea Salad fresh, use these tips: - Store in an airtight container. - Layer ingredients to prevent sogginess. - Keep dressing separate until serving. - Use glass containers for better preservation. Glass keeps the salad fresh longer. It also helps you see the colorful layers. Your salad lasts up to three days in the fridge. After that, it may lose its crunch. Watch for these signs of spoilage: - Change in smell or color. - Soft or mushy chickpeas. - Feta cheese that appears slimy. If you notice these signs, it's best to throw it away. Enjoy the salad while it's fresh for the best taste! For the full recipe, click [Full Recipe]. To make this salad, start by gathering your ingredients. You need chickpeas, sun-dried tomatoes, red onion, cucumber, feta cheese, parsley, olive oil, lemon juice, oregano, salt, and pepper. 1. In a large bowl, mix the chickpeas, sun-dried tomatoes, cucumber, onion, and feta. 2. In a small bowl, whisk olive oil, lemon juice, oregano, salt, and pepper together. 3. Pour the dressing over the salad and toss gently. 4. Add the parsley and mix lightly. 5. Let the salad rest for 15 minutes. This helps the flavors blend well. You can find the full recipe above for detailed steps. Yes! This salad is perfect for meal prep. You can prepare it a day in advance. Just store it in an airtight container in the fridge. The flavors will deepen, making it taste even better. Make sure to keep the salad covered to keep it fresh. This salad pairs well with many dishes. Here are some ideas: - Grilled chicken or fish for added protein. - Crusty bread or pita to scoop up the salad. - A light soup like tomato basil for a cozy meal. - Roasted vegetables for a colorful plate. These options will enhance your meal and make it even more enjoyable! This blog post detailed how to create a refreshing Sun-Dried Tomato Chickpea Salad. We covered the necessary ingredients, simple steps to prepare, and tips for presentation. You can enhance this salad with various substitutes or flavors. Proper storage ensures freshness and keeps meals tasty longer. Remember, this salad is not just easy to make—it's also adaptable. Enjoy making it your own, and delight your taste buds with every bite. Your next meal can be both fun and healthy!](https://dishtreats.com/wp-content/uploads/2025/07/f0fe0f85-1842-4358-ad7f-ac591425fdaf-768x768.webp)