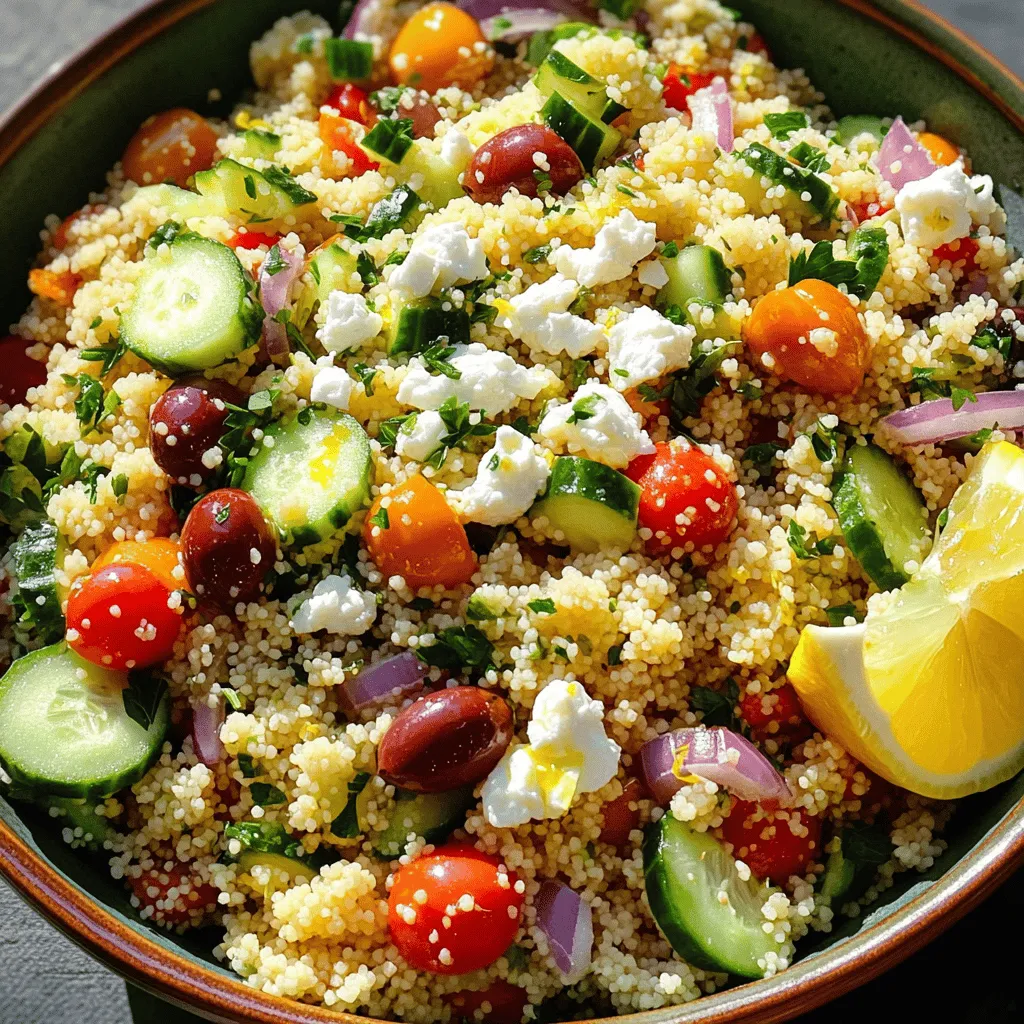
Lemon Herb Mediterranean Couscous Flavorful Delight

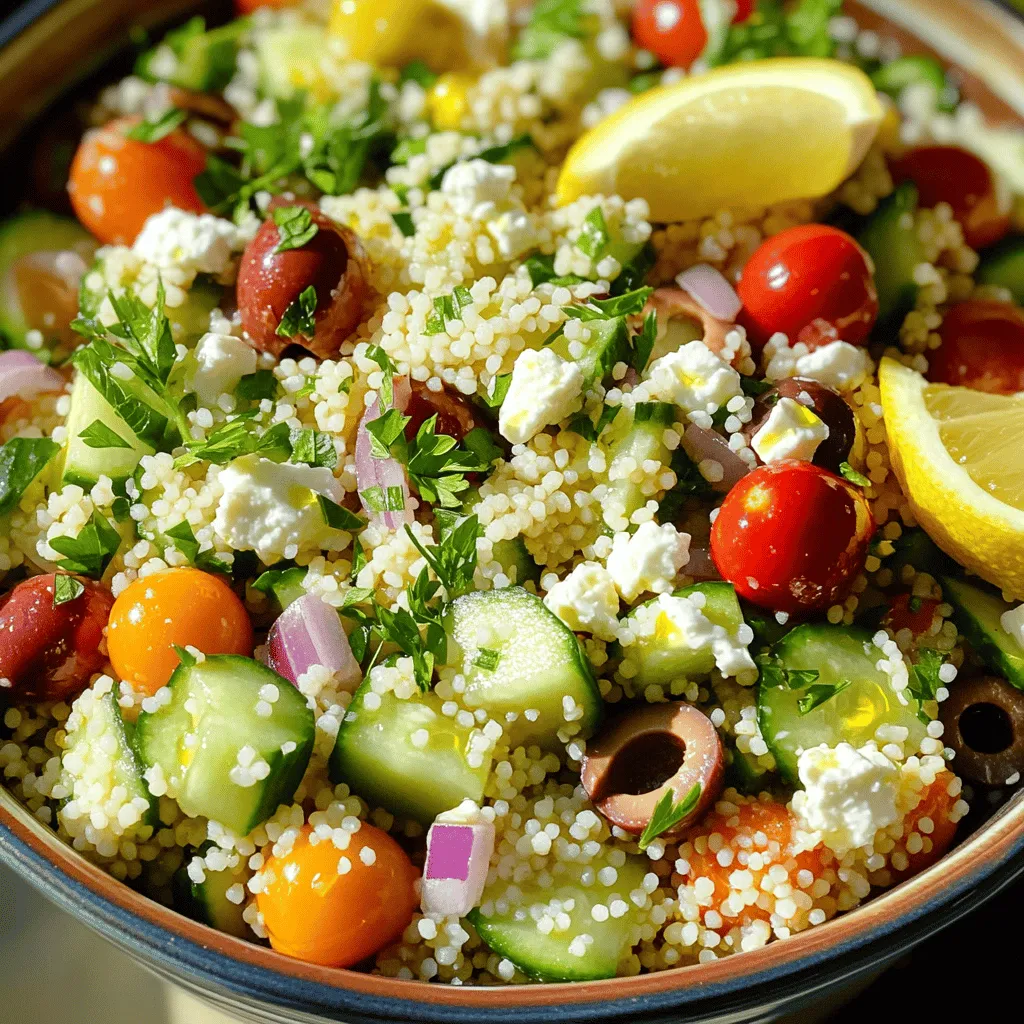
If you’re craving a bright, fresh dish that bursts with flavor, you need to try Lemon Herb Mediterranean Couscous. This delightful recipe combines fluffy couscous with vibrant veggies, aromatic herbs, and tangy lemon. It’s perfect for a quick weeknight dinner or a tasty side at gatherings. Follow my simple steps to create a meal that’s sure to impress. Let’s get cooking and brighten your table today!
Ingredients
Essential Ingredients for Lemon Herb Mediterranean Couscous
- 1 cup couscous
- 1 1/4 cups vegetable broth or water
- 1 medium cucumber, diced into small cubes
- 1 cup cherry tomatoes, halved
- 1/2 red onion, finely chopped
- 1/2 cup Kalamata olives, pitted and sliced
- 1/2 cup feta cheese, crumbled into small pieces
- 1/4 cup fresh parsley, finely chopped
- 2 tablespoons fresh mint, finely chopped
- Zest and juice of 1 lemon
The heart of this dish is couscous. It cooks fast and is light. Couscous absorbs flavors well. You can use regular or whole wheat couscous. Both options work great.
Next, we have fresh vegetables. The cucumber adds crispness. Cherry tomatoes bring sweetness. Red onion adds a mild bite and color. Kalamata olives give a briny taste that pairs perfectly with the other ingredients.
For herbs and cheese, feta cheese is a must. It adds creaminess and saltiness. Fresh parsley and mint add brightness and aroma. Together, they make the dish fresh and vibrant.
Pantry Staples
- 3 tablespoons extra virgin olive oil
- Salt and freshly ground pepper to taste
- Zest and juice of 1 lemon
Extra virgin olive oil is key for flavor. It coats the couscous and veggies. Salt and pepper enhance all the tastes. A good squeeze of lemon juice adds a zesty kick.
These pantry staples combine with your fresh ingredients. They create a dish that is bright, tasty, and healthy. Each bite will remind you of sunny days by the Mediterranean Sea. Enjoy the process of bringing these flavors together!
Step-by-Step Instructions
Preparing the Couscous
To start, bring 1 1/4 cups of vegetable broth to a boil in a medium pot. Once the broth bubbles, stir in 1 cup of couscous. Remove the pot from heat and cover it with a lid. Let it sit for 5 minutes. This allows the couscous to absorb all the liquid.
After 5 minutes, take a fork and fluff the couscous. This separates the grains and makes it light. Let it cool for a few minutes while you prepare the other ingredients.
Mixing the Ingredients
In a large mixing bowl, combine the diced cucumber, halved cherry tomatoes, finely chopped red onion, and sliced Kalamata olives. Gently mix them together to blend the flavors.
Next, grab a small bowl. Whisk together the lemon zest, lemon juice, extra virgin olive oil, salt, and freshly ground pepper. This dressing adds a zesty kick to the couscous.
Bringing It All Together
Once the couscous has cooled, add it to the bowl with the veggie mixture. Gently toss everything to mix. Ensure the ingredients are well combined.
Now, pour the dressing over the couscous. Toss gently again so every bite gets that zesty flavor.
Finally, fold in the crumbled feta cheese, chopped parsley, and mint. Distribute them evenly throughout the dish. Taste your couscous salad. Adjust the seasoning with more salt, pepper, or lemon juice as needed. Enjoy this bright, fresh dish!
Tips & Tricks
Common Mistakes to Avoid
- Overcooking couscous: Couscous cooks quickly. If you leave it too long, it can become mushy. Stick to the five-minute resting time after boiling. This helps keep the grains fluffy and separate.
- Not cooling couscous before mixing: Make sure to cool the couscous before adding it to your veggies. Hot couscous can wilt fresh ingredients. Let it sit for a few minutes after fluffing.
Flavor Enhancements
- Adding more herbs or spices: To boost the flavor, add extra herbs. Fresh basil or dill can enhance the taste. You can also sprinkle in some red pepper flakes for a kick.
- Adjusting lemon juice for zest: The lemon juice adds brightness. If you want more zing, try adding a bit more juice. You can also use lemon zest to bring out a stronger lemon flavor.

Variations
Ingredient Swaps
You can easily switch out ingredients in this dish. For cheese, consider using goat cheese instead of feta. Goat cheese adds a creamy texture and tangy flavor. This swap makes the dish unique and adds a new taste.
For vegetables, feel free to use bell peppers instead of cucumbers. Bell peppers add crunch and sweet flavor. You can mix colors too. Red, yellow, and green peppers brighten the dish and make it more fun.
Enhancing Nutritional Value
To boost this dish’s nutrition, add protein. Chickpeas work well and give a hearty texture. You can also use grilled chicken for a filling meal. Both options increase protein and keep you satisfied.
Incorporating nuts or seeds adds crunch and healthy fats. Try adding toasted pine nuts or slivered almonds. They give a nice texture and flavor. Plus, they make the dish more interesting.
Feel free to mix and match these ideas. Each swap or addition can change the dish’s taste and health benefits.
Storage Info
Proper Storage Techniques
To keep your Lemon Herb Mediterranean Couscous fresh, store it in an airtight container. This keeps moisture out and helps maintain its flavor. Place the container in the fridge if you plan to save leftovers. It’s best to let the dish cool to room temperature before sealing it up. This prevents condensation buildup inside the container.
Shelf Life
This tasty couscous dish lasts about 3 to 5 days in the fridge. After that, it may start to lose quality. Look for signs of spoilage. If you see mold or an off smell, it’s time to toss it. Always trust your senses when deciding if food is still good. Enjoy this dish while it’s fresh for the best taste!
FAQs
How can I make this dish gluten-free?
To make Lemon Herb Mediterranean Couscous gluten-free, you can swap couscous for quinoa or rice. Both options work well. Quinoa adds protein, while rice gives a nice texture. Be sure to check labels, as some brands may contain gluten.
Can I prepare this recipe ahead of time?
Yes, you can prepare this recipe ahead of time. Make the couscous and mix the veggies. Store them in separate containers. This keeps everything fresh. Mix them together just before serving. This way, the flavors stay bright.
What can I serve with Lemon Herb Mediterranean Couscous?
Lemon Herb Mediterranean Couscous pairs well with many dishes. Grilled chicken or fish complements the flavors nicely. You can also serve it with roasted vegetables or a fresh salad. These options add great texture and taste.
Is this recipe suitable for meal prepping?
This recipe is great for meal prepping. Store portions in airtight containers. Keep it in the fridge for up to three days. To reheat, use a microwave or a skillet. Add a splash of olive oil for flavor.
In this post, we explored how to make Lemon Herb Mediterranean Couscous. We covered the key ingredients, from couscous and fresh veggies to herbs and cheese. I outlined easy steps to prepare, mix, and bring it all together for great flavor.
With some tips on avoiding common mistakes and fun variations, you can make this dish your own. Remember to store leftovers properly for the best taste. Enjoy your culinary adventure with this delicious and healthy meal!


![To make stuffed bell peppers with quinoa, gather these tasty ingredients: - 4 large bell peppers (mixed colors) - 1 cup quinoa (rinsed) - 2 cups vegetable broth - 1 can black beans (drained and rinsed) - 1 cup corn kernels - 1 medium onion (finely chopped) - 2 cloves garlic (minced) - 1 teaspoon ground cumin - 1 teaspoon chili powder - ½ teaspoon smoked paprika - Salt and pepper to taste - 1 cup diced tomatoes - 1 cup shredded cheese - Fresh cilantro (optional for garnish) These ingredients work together to create a colorful and healthy meal. Quinoa is the star here, adding protein and fiber. The bell peppers not only look great but also bring sweetness and crunch. If you want to learn how to combine them into a delicious dish, check out the Full Recipe. - To cook quinoa with vegetable broth, start by rinsing 1 cup of quinoa under cold water. This step removes bitterness. Pour the rinsed quinoa into a medium saucepan. Add 2 cups of vegetable broth for added flavor. Bring the mixture to a boil over medium-high heat. Once boiling, reduce the heat to low. Cover the pan and let it simmer for about 15 minutes. You will know it's done when all the liquid is absorbed. - After cooking, fluff the quinoa with a fork. This makes it light and airy. Set the quinoa aside to cool while you prepare the other ingredients. - Heat a non-stick skillet over medium heat. Add 1 medium onion, finely chopped, and 2 cloves of minced garlic. Cook these until the onion turns soft and translucent. This takes about 3 to 5 minutes. - Next, add 1 can of drained black beans and 1 cup of corn kernels to the skillet. Stir in 1 cup of diced tomatoes, along with 1 teaspoon of ground cumin, 1 teaspoon of chili powder, ½ teaspoon of smoked paprika, and salt and pepper to taste. Mix well and let it cook for an additional 5 minutes until everything is warm. - To prepare the bell peppers, slice off the tops and remove the seeds and membranes. Choose 4 large bell peppers for a colorful dish. Place the hollowed peppers upright in a baking dish. Make sure they stand stable. - Now, fill each bell pepper with the quinoa and vegetable mix. Press it down gently to pack it in well. For a cheesy touch, top each pepper with 1 cup of shredded cheese. Let it cascade down the sides for a fun look. - Cover the baking dish with aluminum foil. This helps keep the moisture in. Place it in the preheated oven at 375°F (190°C). Bake for 25 minutes. - After 25 minutes, carefully remove the foil. Return the dish to the oven for another 10 to 15 minutes. You want the peppers to be tender, and the cheese to melt and bubble. It should have a lovely golden color when done. Now you have a delicious, colorful dish ready to serve! For full details, refer to the [Full Recipe]. How to choose the right bell peppers Pick large, firm bell peppers for stuffing. Look for vibrant colors like red, yellow, or green. The best peppers have smooth skin. Avoid any with soft spots or blemishes. This ensures a tasty bite every time. Ensuring even cooking Cut off the tops of the peppers evenly. This helps them stand upright. Remove seeds and membranes for better stuffing. Place them in a baking dish that fits snugly. This keeps them from tipping over during cooking. Adding herbs or spices for variety Fresh herbs like cilantro or parsley boost flavor. Try adding a pinch of oregano or thyme for depth. For a spicy touch, sprinkle in some red pepper flakes. These small tweaks make a big difference in taste. Recommended cheese types for best flavor Cheddar and mozzarella melt well and taste great. For a kick, use pepper jack cheese. If you like tang, feta cheese can add a nice twist. Experiment to find your favorite cheese blend. Essential kitchen tools and equipment You’ll need a sharp knife and a cutting board for prep. A medium saucepan is great for cooking quinoa. Use a non-stick skillet for sautéing vegetables. A sturdy spoon helps you mix everything well. Baking dish recommendations for even heat distribution Choose a glass or ceramic baking dish. These materials distribute heat evenly. Make sure it’s big enough to hold all your stuffed peppers. This way, they cook through without burning. For the full recipe, follow this link: [Full Recipe]. {{image_4}} You can change the protein in stuffed peppers easily. If you want a meat option, try ground turkey. It adds great flavor. For a plant-based choice, use tofu. You can mash it and mix it into the filling. Black beans are great, but these options offer variety. You can also make vegetarian or vegan options. Use black beans or lentils for protein. These keep it meat-free. Just ensure you skip the cheese for a vegan meal. There are many ways to customize the protein to fit your needs. Quinoa is a fantastic base for stuffed peppers, but you can switch grains. Rice is a classic choice that works well. Farro or couscous can also bring a different texture. They make the meal hearty and filling. If you need gluten-free options, use rice or quinoa. Both are naturally gluten-free. This way, everyone can enjoy your stuffed peppers without worry. Think about different flavors to spice things up. For a Mexican twist, add jalapeños or taco seasoning. This gives the dish a kick and adds excitement. You can also use salsa for added flavor. For a Mediterranean vibe, add olives or crumbled feta cheese. These ingredients enhance the taste and bring a fresh feel. Both options are simple yet effective ways to change your stuffed peppers. To keep your stuffed bell peppers fresh, store them in the fridge. Place them in an airtight container. They will stay good for up to 4 days. If you want to save them for later, freezing is a great option. Wrap each stuffed pepper in plastic wrap, then put them in a freezer-safe bag. This way, they can last for up to 3 months. For reheating in the oven, preheat it to 350°F (175°C). Place the peppers in a baking dish with a little broth or water. Cover with foil to keep moisture in. Bake for about 20 minutes or until heated through. If you need a quick option, use the microwave. Place one stuffed pepper on a microwave-safe plate. Heat on high for about 2-3 minutes. If it's not hot enough, heat in 30-second bursts until warm. Stuffed peppers last in the fridge for about 4 days. After that, they may spoil. Look out for any signs of spoilage. If you see mold or a bad smell, it's time to toss them. Always trust your senses! You typically bake stuffed bell peppers for 35 to 40 minutes. Start by covering them with foil for the first 25 minutes. This keeps them moist. After that, remove the foil to let the cheese melt and brown for another 10 to 15 minutes. Check the peppers to ensure they are tender but not mushy. Yes, you can prepare stuffed peppers in advance. Stuff the peppers and place them in a baking dish. Cover with foil and store them in the fridge for up to 24 hours. When ready to bake, just pop them in the oven. You may need to extend the baking time by a few minutes. If you want to swap quinoa, try rice, farro, or couscous. These grains provide a nice texture. Rice cooks quickly and absorbs flavors well. Farro adds a chewy bite, while couscous is fluffy and light. You can also use lentils for a protein boost. Stuffed peppers are quite healthy! They are full of fiber from the quinoa, beans, and veggies. Bell peppers are rich in vitamins A and C. This dish tends to be low in calories and high in nutrients. It offers a balanced meal with protein, carbs, and healthy fats. Absolutely! You can use green, red, yellow, or orange bell peppers. Each type has a unique taste. Green peppers are more bitter, while red ones are sweet and fruity. Mixing colors not only looks pretty but also gives different flavors. Feel free to choose your favorite or what’s on hand! For the complete method to make flavorful stuffed bell peppers, check out the [Full Recipe]. Here, I’ll share key details about the dish that will help you create a yummy meal your family will love. Stuffed bell peppers are colorful and fun. They make a great meal for any day. You can use any bell pepper color. Red, yellow, and green peppers add a nice look to your plate. Each color has a different taste too. Quinoa is the star here. It’s a healthy grain packed with protein. Rinsing it before cooking helps remove any bitter taste. You cook quinoa in vegetable broth for extra flavor. This makes it soft and fluffy, perfect for mixing with veggies. The filling is made from black beans, corn, diced tomatoes, and spices. Black beans add protein and fiber. Corn brings sweetness and crunch. Diced tomatoes add moisture and flavor, making the filling juicy. The spices—cumin, chili powder, and smoked paprika—give your dish a tasty kick. They create layers of flavor that make each bite exciting. Don’t forget to add salt and pepper to taste! When you stuff the peppers, pack the filling well. This keeps everything together during cooking. Topping with shredded cheese adds a melty touch. As the peppers bake, the cheese melts and gets golden. Baking them with foil keeps the peppers moist. Then, removing the foil lets the cheese get bubbly and brown. The result is a beautiful dish that is sure to impress! Stuffed peppers combine colorful ingredients into a tasty meal. We discussed how to prepare quinoa, sauté vegetables, and stuff the peppers. I shared tips for choosing the right peppers and flavoring your dish. Variations allow you to substitute proteins and grains based on your taste. Storing leftovers properly extends the life of your meal. Making stuffed peppers can be fun and creative. Enjoy trying new flavors and share this recipe with others!](https://dishtreats.com/wp-content/uploads/2025/06/552026c8-f020-4e58-b656-10611c333f52-768x768.webp)


