
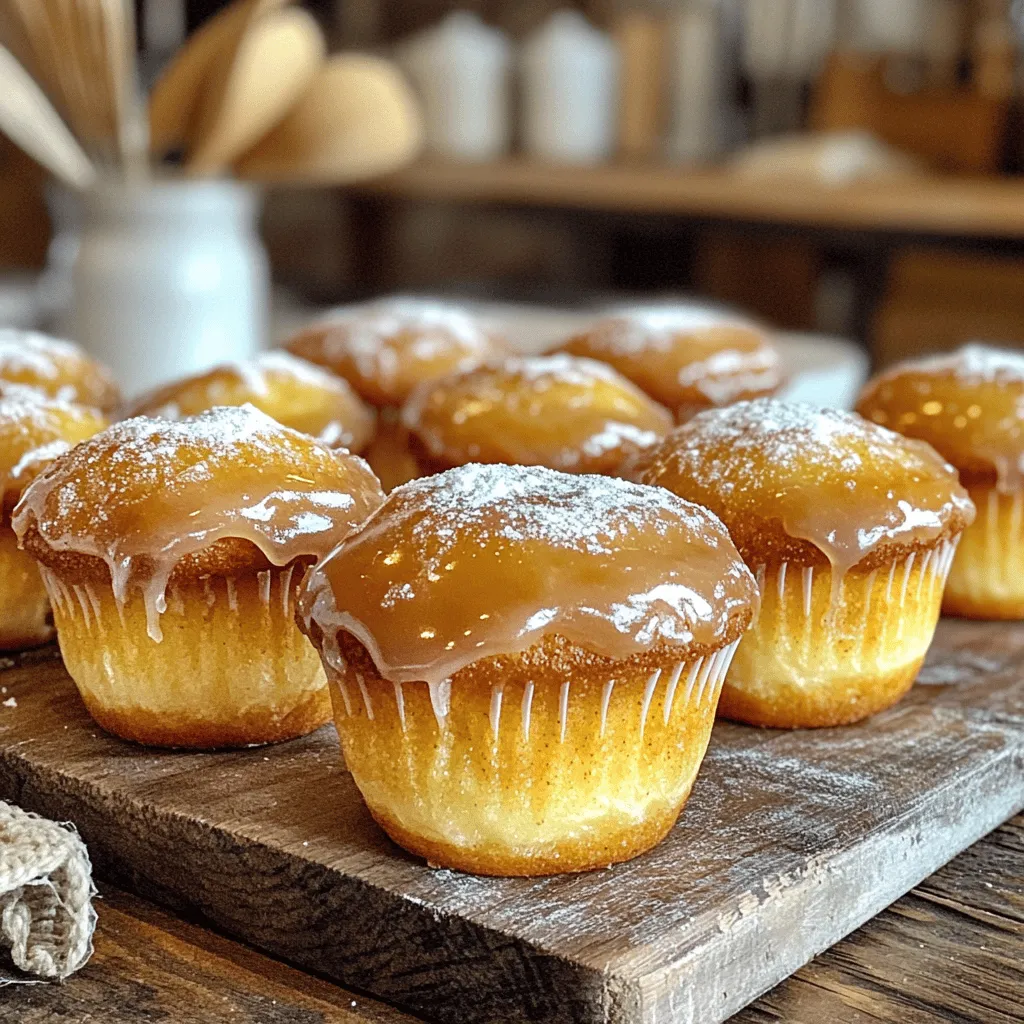
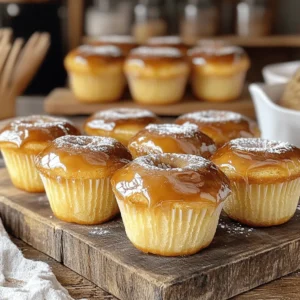
Maple Glazed Donut Muffins Irresistible and Easy Recipe

If you crave a sweet treat that’s easy to make, I’ve got just the recipe for you: Maple Glazed Donut Muffins! These muffins combine the best of both worlds—moist, fluffy muffin texture with a rich, sweet glaze. In this blog post, I’ll share all the ingredients, step-by-step instructions, and tips you need to master this delightful bake. Get ready to impress your friends and family with your new favorite snack!
Ingredients
List of Essential Ingredients
To make maple glazed donut muffins, gather these key items:
- 1 ½ cups all-purpose flour
- ¾ cup granulated sugar
- 1 tablespoon baking powder
- ½ teaspoon salt
- 1 teaspoon ground cinnamon
- ½ teaspoon ground nutmeg
- ¾ cup milk
- ¼ cup unsalted butter, melted
- 1 large egg
- 2 teaspoons pure vanilla extract
- ½ cup maple syrup (for glaze)
- 1 tablespoon unsalted butter (for glaze)
- 1 tablespoon powdered sugar (for glaze)
Measuring Tips for Accuracy
Measuring your ingredients correctly is key. Here are some tips:
- Use dry measuring cups for flour and sugar.
- Scoop flour gently and level with a knife.
- For liquids, use a clear measuring cup.
- Check the measurement at eye level.
- Always pack brown sugar firmly into the cup.
Recommended Quality Ingredients
Quality matters in baking. Here’s what to look for:
- All-purpose flour: Choose unbleached for best results.
- Granulated sugar: Use pure cane sugar for better flavor.
- Maple syrup: Look for pure maple syrup, not imitation.
- Unsalted butter: This gives you control over salt levels.
- Fresh spices: Use whole spices if possible; they have more flavor.
Step-by-Step Instructions
Prepping Your Tools
Start by preheating your oven to 350°F (180°C). This helps the muffins bake evenly. Next, prepare your muffin tin. You can grease it with cooking spray or use muffin liners. This stops the muffins from sticking.
Mixing Dry Ingredients
In a large bowl, add the dry ingredients. Combine 1 ½ cups all-purpose flour, ¾ cup granulated sugar, 1 tablespoon baking powder, ½ teaspoon salt, 1 teaspoon ground cinnamon, and ½ teaspoon ground nutmeg. Whisk these together until they mix well. This helps the muffins rise and taste great.
Combining Wet Ingredients
In a separate bowl, mix the wet ingredients. Combine ¾ cup milk, ¼ cup melted unsalted butter, 1 large egg, and 2 teaspoons pure vanilla extract. Whisk until smooth. This mixture adds moisture and flavor to your muffins.
Baking the Muffins
Gently pour the wet mixture into the dry ingredients. Stir with a spatula until just combined. Don’t overmix; some lumps are good! Now, fill each muffin cup about three-quarters full with the batter. Place the tin in the oven and bake for 15 to 18 minutes. Check if they’re ready by inserting a toothpick; it should come out clean.
Making the Maple Glaze
While the muffins bake, prepare the maple glaze. In a small saucepan, mix ½ cup maple syrup and 1 tablespoon unsalted butter. Heat over low heat until the butter melts. Then, stir in 1 tablespoon powdered sugar. Keep stirring until the glaze is smooth and shiny.
Glazing and Cooling
After baking, let the muffins cool in the tin for about 5 minutes. Then, transfer them to a wire rack. While they are still warm, dip the tops into the maple glaze. Allow any extra glaze to drip back in the pan. This makes sure they are well-coated. Let them sit on the rack until the glaze sets. Enjoy your sweet, fluffy maple glazed donut muffins!
Tips & Tricks
Baking Tips for Perfect Muffins
To bake perfect muffins, follow these simple tips:
- Preheat your oven to 350°F (180°C) for even cooking.
- Grease your muffin tin or use liners. This helps with easy removal.
- Mix dry and wet ingredients separately. This keeps your muffins light.
- Don’t overmix the batter. Lumps are okay. They add to the texture.
- Fill muffin cups three-quarters full. This allows room for rising.
- Check for doneness with a toothpick. It should come out clean.
Common Mistakes to Avoid
Avoid these common mistakes to ensure great muffins:
- Overmixing the batter can lead to dense muffins. Stop mixing when combined.
- Not using fresh baking powder can affect the rise. Check the date!
- Skipping the glaze might leave your muffins less sweet. The glaze adds flavor.
- Opening the oven too soon can cause muffins to sink. Wait until halfway through baking.
- Not letting muffins cool before glazing can make the glaze runny. Be patient!
Enhancing Flavor and Texture
To boost flavor and texture, try these tricks:
- Add a pinch of salt to the glaze. It balances the sweetness.
- Experiment with spices like nutmeg or cardamom. They add warmth and depth.
- Mix in chopped nuts or chocolate chips for texture. They add a fun crunch.
- Use brown sugar instead of granulated sugar for richer flavor.
- Drizzle extra maple syrup over the muffins for a sweet finish.
These tips will help you create maple glazed donut muffins that are truly irresistible!
Variations
Seasonal Flavor Variations
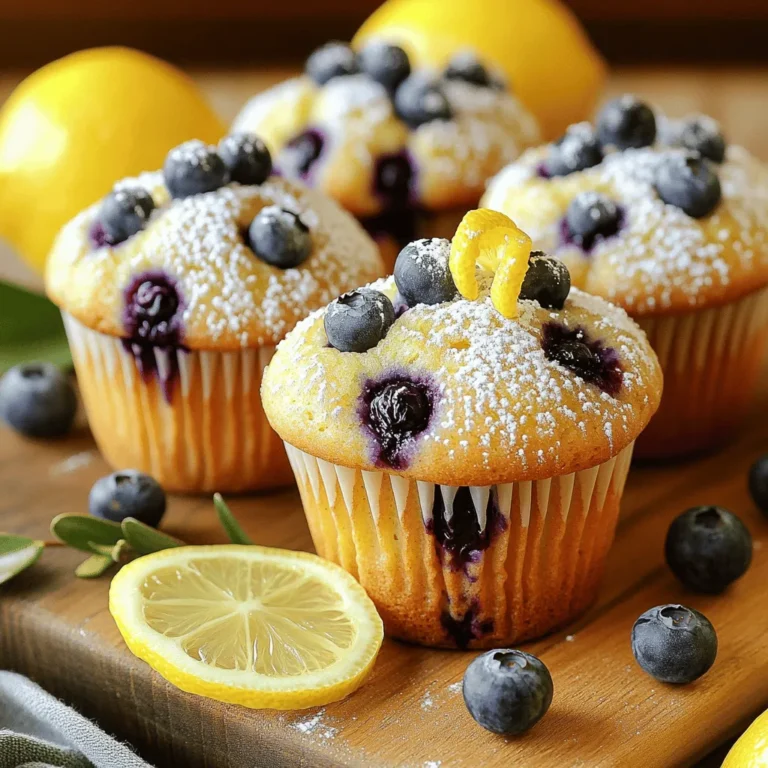
You can change the flavor of your muffins by adding seasonal spices or ingredients. For fall, try adding pumpkin puree and a sprinkle of ginger. In spring, mix in fresh blueberries for a burst of flavor. Summer is great for lemon zest or even some diced strawberries. Each season brings new tastes, making your muffins fun to enjoy all year round.
Alternative Glazing Options
If you want to switch up the glaze, consider using chocolate or vanilla. For a chocolate glaze, melt chocolate chips with a bit of cream. Mix until smooth and dip the muffins in. A vanilla glaze can be made with powdered sugar, vanilla extract, and a splash of milk. Both options add a delightful twist to your maple glazed donut muffins.
Healthier Ingredient Swaps
You can make these muffins healthier with simple swaps. Use whole wheat flour instead of all-purpose flour for more fiber. Swap out granulated sugar for coconut sugar or honey to cut down on refined sugars. You can even use Greek yogurt instead of butter for added protein. These changes keep the muffins tasty while making them a bit lighter.
Storage Info
How to Store Leftover Muffins
To store leftover muffins, let them cool completely. Place them in an airtight container. This keeps them fresh for up to three days. If you want them to last longer, consider freezing them.
Freezing Instructions
You can freeze these muffins easily. Wrap each muffin in plastic wrap. Then place them in a freezer bag. They will stay fresh for about two to three months. Just remember to label the bag with the date.
Best Way to Reheat Muffins
To reheat muffins, take them out of the fridge or freezer. If frozen, let them thaw at room temperature for about 30 minutes. Preheat your oven to 350°F (180°C). Place the muffins on a baking sheet and warm them for about 5 to 10 minutes. You can also microwave a muffin for about 15-20 seconds. Enjoy them warm with that sweet maple glaze!
FAQs
How do I make my donuts fluffier?
To make your donuts fluffier, ensure you don’t overmix the batter. Overmixing can make them dense. Mix just until combined. Also, use fresh baking powder to ensure a good rise. A little extra milk can help too, making the batter lighter.
Can I use whole wheat flour?
Yes, you can use whole wheat flour. It adds a nutty flavor and more fiber. However, it may change the texture slightly. You might want to mix it with some all-purpose flour for a softer muffin.
Where can I find the best maple syrup?
Look for pure maple syrup at local farmers’ markets or specialty stores. The best syrup comes from the Northeast U.S. or Canada. Check the label to ensure it says “100% pure maple syrup” for the best flavor.
How long do these muffins last?
These muffins stay fresh for about 3 days at room temperature. Store them in an airtight container to keep them moist. If you want them to last longer, consider freezing them.
Can I make these muffins ahead of time?
Yes, you can make these muffins ahead of time. Bake them the day before and store them in an airtight container. You can glaze them right before serving for the best taste.
What’s the difference between a donut and a muffin?
The main difference is in texture and shape. Donuts are usually fried, making them soft and airy. Muffins are baked and denser. Donuts often have a sweet glaze, while muffins can have various flavors and toppings.
In this blog post, I covered essential ingredients and tips for baking muffins. You learned how to measure accurately and use quality ingredients. I shared step-by-step instructions for mixing, baking, and glazing. Plus, I gave you tips for perfect muffins and variations to try. Finally, I explained storage methods and answered common questions.
Now, you have the tools to bake delicious muffins every time. Enjoy experimenting with flavors and sharing your creations!


![- Medium head of cauliflower - Garlic cloves - Grated Parmesan cheese - Extra virgin olive oil - Garlic powder - Smoked paprika - Salt and pepper - Fresh parsley To convert cups to grams, remember that 1 cup of cauliflower is about 100 grams. For cheese, 1 cup of grated Parmesan is around 100 grams too. If you want more garlic flavor, you can add extra garlic cloves. Adjust the garlic powder to your taste. Using fresh ingredients makes a big difference. Fresh cauliflower offers better taste and texture. Fresh garlic gives a stronger flavor. For those with dietary needs, you can swap Parmesan cheese with a vegan version made from nuts or nutritional yeast. Always choose high-quality olive oil for a rich flavor. Quality ingredients lead to a better dish! First, break down the cauliflower. Remove the leaves and stem. Cut the head into bite-sized florets. Make sure they are all similar in size. This step helps them cook evenly. Next, take six cloves of garlic and finely mince them. You want the garlic to blend well with the cauliflower. Gather the other ingredients: olive oil, garlic powder, smoked paprika, salt, and pepper. Now, preheat your oven to 425°F (220°C). This temperature is perfect for roasting. While the oven heats, grab a large bowl. Add the cauliflower florets, minced garlic, olive oil, garlic powder, smoked paprika, salt, and pepper. Toss everything together with your hands or a spoon. Ensure each floret is well-coated. Line a large baking sheet with parchment paper for easy cleanup. Spread the cauliflower in a single layer on the sheet. Place the baking sheet in the preheated oven. Roast the cauliflower for about 20 to 25 minutes. Stir halfway through to achieve a nice golden brown. After roasting, take the baking sheet out of the oven. Sprinkle the grated Parmesan cheese over the hot cauliflower. The heat will melt the cheese beautifully. Return it to the oven for another five minutes. Wait until the cheese is bubbly and delicious. When it's done, let it cool for a few minutes. For a fresh touch, garnish with finely chopped parsley before serving. If you want to explore the full recipe, check it out here: [Full Recipe]. To ensure even roasting, spread the cauliflower in a single layer. This allows the hot air to circulate around each floret. Use a large baking sheet lined with parchment paper for easy cleanup. Keep an eye on your cauliflower as it roasts. Aim for a golden color and tender texture. Stir the florets halfway through the cooking time to promote uniform browning. You can boost the flavor with extra spices and herbs. Consider adding a pinch of cayenne for heat or thyme for an earthy touch. If you want deeper flavor, try marinating the cauliflower in olive oil and spices before roasting. This helps the flavors soak in, making each bite delicious. This roasted garlic Parmesan cauliflower pairs great with many main dishes. I love it with grilled chicken or fish. For best practices in garnishing, sprinkle fresh parsley on top before serving. This adds color and freshness to your dish. Serve it in a rustic bowl or a beautiful platter. A drizzle of olive oil enhances its appeal. Enjoy your flavorful roasted garlic Parmesan cauliflower as a delightful side dish! For the full recipe, check out the details. {{image_4}} You can easily change a few ingredients in this dish. If you're looking for a vegan option, use nutritional yeast instead of Parmesan. This swap gives you a cheesy flavor without dairy. For other veggies, try broccoli or Brussels sprouts. Both will roast nicely and absorb the garlic flavor. If you want a different taste, you can grill the cauliflower. Grilling brings a smoky flavor that pairs well with garlic. Another option is using an air fryer. It cooks faster and makes the cauliflower crispy. Both methods keep the dish delicious. You can adjust ingredients based on the season. In fall, add some pumpkin spice for warmth. In spring, include fresh herbs like dill or tarragon. For holiday meals, mix in some cranberries or nuts for a festive twist. These changes keep the recipe fresh and exciting. To store leftovers, place the cauliflower in an airtight container. This keeps it fresh and tasty. Use it within three days for the best flavor. Glass or BPA-free plastic containers work well for storage. They seal tightly and prevent moisture loss. For reheating, the oven is your best friend. Preheat it to 350°F (175°C). Spread the cauliflower on a baking sheet and bake for about 10 minutes. This method keeps it crispy. Microwaving works too, but it can make the cauliflower soggy. To avoid this, place a paper towel over the dish to absorb excess moisture. You can freeze the cauliflower before cooking. Just toss it with the oil and seasonings, then spread it in a single layer on a baking sheet. Freeze until solid, then transfer to a freezer bag. To cook from frozen, no need to thaw. Just roast it at 425°F (220°C) for 30-35 minutes, adding the cheese in the last five minutes. This method keeps the flavors locked in. How can I make this dish ahead of time? You can prepare the cauliflower ahead. Simply season it and spread it on a baking sheet. Cover the sheet tightly with plastic wrap. Store it in the fridge for up to a day. When ready, roast it as per the recipe. This saves time and keeps flavors fresh. What can I serve with roasted garlic Parmesan cauliflower? This dish pairs well with many meals. It complements grilled chicken or fish nicely. You can also serve it with a hearty salad. For a vegetarian option, try it with quinoa or rice. The flavors enhance any meal you create. Is this recipe gluten-free? Yes, this recipe is gluten-free. All the ingredients are safe for those on a gluten-free diet. Just ensure that the Parmesan cheese is labeled gluten-free. This makes it easy for everyone to enjoy. Can I make this dish low-carb? Absolutely! Cauliflower is a great low-carb choice. It’s naturally low in carbs and high in fiber. You can enjoy this dish without worry. It fits perfectly into a low-carb meal plan. What to do if it's too soggy? If your cauliflower is too soggy, it may need more roasting time. Make sure to spread the florets out on the baking sheet. This helps them roast evenly and stay crisp. You can also reduce the olive oil slightly for less moisture. Why isn’t the cheese melting properly? If the cheese isn’t melting, check the oven temperature. It should be hot enough at 425°F (220°C). Make sure to add the cheese right after roasting. This lets it melt smoothly over the hot cauliflower. If needed, give it a few extra minutes in the oven. This dish combines fresh ingredients and simple steps. You learned how to prepare, roast, and serve roasted garlic Parmesan cauliflower. I shared tips for enhancing flavor and ideas for swapping ingredients. Remember to store leftovers correctly to keep them fresh. Whether you want a quick snack or a tasty side, this recipe works well. You can easily adjust it to suit your tastes. Enjoy cooking and making this dish your own!](https://dishtreats.com/wp-content/uploads/2025/06/e2797ad0-ebfe-4fec-85bd-8200cd052b8d-768x768.webp)