
Maple Glazed Brussels Sprouts Delightful and Simple Dish
![To make this tasty dish, gather these simple ingredients: - 1 pound Brussels sprouts, trimmed and halved - 3 tablespoons extra virgin olive oil - 1/4 cup pure maple syrup - 2 tablespoons balsamic vinegar - 1 teaspoon Dijon mustard - 1/2 teaspoon fine sea salt - 1/4 teaspoon freshly ground black pepper - 1/4 cup pecans, roughly chopped for added crunch - 1/4 cup dried cranberries for a touch of sweetness - Fresh thyme leaves for an aromatic garnish (optional) You can easily adjust ingredient amounts based on what you need. Here are some quick conversions: - If you want to make more, use 2 pounds of sprouts and double the glaze. - For less, cut the amounts in half. This still keeps the taste great. - In a pinch, you can swap the pecans for walnuts or almonds. This dish not only tastes good but is also good for you. Here’s a quick look at what’s inside: - Calories: About 200 per serving - Fat: 12 grams (mostly healthy fats from olive oil and nuts) - Carbohydrates: 24 grams (includes natural sugars from maple syrup) - Fiber: 5 grams (great for digestion from Brussels sprouts) - Protein: 3 grams (from nuts and sprouts) This breakdown helps you see the benefits of each ingredient. Enjoy making this dish with fresh, seasonal produce for the best flavor and health benefits. For the complete recipe, check out the Full Recipe. Start by preheating your oven to 400°F (200°C). This step is key for getting perfect crispness. While the oven warms up, clear your kitchen counter. Gather all your tools and ingredients. Having everything ready makes cooking much easier. Take 1 pound of Brussels sprouts. Trim off the ends and cut them in half. Place the halved sprouts in a large mixing bowl. Add 3 tablespoons of extra virgin olive oil and 1/2 teaspoon of fine sea salt. Sprinkle in 1/4 teaspoon of freshly ground black pepper. Toss the sprouts until they are well coated. This ensures each sprout gets flavor. Spread the seasoned Brussels sprouts on a baking sheet. Make sure the cut sides face down. This helps them brown nicely. Place the baking sheet in your preheated oven. Roast for 20-25 minutes. They should be crispy and golden. While they roast, make the maple glaze. In a small saucepan, mix 1/4 cup of pure maple syrup, 2 tablespoons of balsamic vinegar, and 1 teaspoon of Dijon mustard. Heat over medium heat but do not let it boil. Once the sprouts are ready, drizzle the glaze over them. Toss gently to coat. Return the glazed sprouts to the oven for 5 more minutes. This step caramelizes the glaze, making it rich and tasty. After that, take them out and add 1/4 cup of roughly chopped pecans and 1/4 cup of dried cranberries. These add crunch and sweetness. If you want, garnish with fresh thyme leaves for even more flavor. For the full details, check the Full Recipe. When you pick Brussels sprouts, look for bright green ones. They should feel firm and heavy in your hand. Avoid any that have yellow leaves or feel soft. The size matters too; smaller sprouts are sweeter and more tender. If you can, buy them on the stalk. They stay fresh longer that way. Caramelization makes Brussels sprouts sweet and tasty. To get it right, roast them cut-side down. This lets them get nice and brown. Make sure they have space on the baking sheet. If they are too close together, they will steam instead of roast. Use high heat, about 400°F, for best results. Check them halfway through and give them a stir for even cooking. One big mistake is overcooking the sprouts. They should be tender but still have a bit of crunch. Avoid using too much glaze; it can make them soggy. Always glaze right after roasting, then caramelize them for just a few minutes. This step adds flavor without losing the sprout's crispness. Lastly, don’t skip the nuts and cranberries; they add great texture and taste. For the full recipe, check the [Full Recipe]. {{image_4}} You can change the taste of maple glazed Brussels sprouts by adding different nuts or seeds. Try walnuts for a rich flavor or sunflower seeds for a crunch. Almonds also work well; they add a nice texture and nutty taste. Each option gives a new twist to your dish. Just sprinkle them on top after roasting for the best crunch and flavor. If you need to adjust for dietary needs, it’s easy. Use agave syrup instead of maple syrup for a vegan option. For a nut-free dish, skip the pecans and use pumpkin seeds. You can also swap balsamic vinegar with apple cider vinegar for a light zing. These swaps keep the dish tasty while meeting your needs. Brussels sprouts shine in fall and winter, but you can adapt them year-round. In spring, add fresh herbs like basil or parsley for brightness. In summer, pair with grilled corn for a sweet twist. You can also mix in seasonal veggies like carrots or sweet potatoes for color and taste. This way, your dish stays fresh and exciting no matter the season. For the full recipe, check out the Maple Glazed Brussels Sprouts Delight. After enjoying your maple glazed Brussels sprouts, store leftovers right. Place them in an airtight container. They will stay fresh for about three days in the fridge. Keep them away from strong-smelling foods. This helps maintain their flavor. When you reheat, aim to keep the sprouts crispy. Use your oven for the best results. Preheat it to 350°F (175°C). Spread the sprouts on a baking sheet. Heat them for about 10-15 minutes. This method helps keep them crunchy and flavorful. You can also microwave them for quick reheating, but they may not stay as crispy. If you want to enjoy these sprouts later, freezing works too. First, let them cool completely. Spread them on a baking sheet in a single layer. Freeze until solid, then transfer to a zip-top bag. They can last up to three months in the freezer. When ready to eat, thaw them overnight in the fridge. Reheat using the oven for the best taste. Enjoy your tasty treat again! Yes, you can prepare these Brussels sprouts ahead of time. After roasting them, let them cool. Store them in an airtight container in the fridge. They stay fresh for up to three days. When you're ready to serve, just reheat them in the oven. This keeps them crispy and tasty. These Brussels sprouts pair well with many dishes. Serve them alongside roasted chicken or grilled salmon for a complete meal. They also shine as a side dish for holiday dinners. You can even enjoy them with a grain salad or pasta for a light lunch. The sweet glaze adds a nice touch to any plate. You can easily change the sweetness of the glaze. If you want it sweeter, add more maple syrup. Start with an extra tablespoon and taste as you go. For a less sweet glaze, reduce the maple syrup. You can add more balsamic vinegar to balance the flavor. Adjust it to match your taste! We explored how to make Maple Glazed Brussels Sprouts from start to finish. You learned about ingredients, cooking steps, and storage tips. I shared helpful tricks to avoid mistakes and ensure a tasty outcome. You can now customize your dish with variations and serve it with confidence. Remember, fresh ingredients and careful roasting lead to the best flavors. Enjoy making this dish and impress your family and friends. With practice, your skills will grow. Happy cooking!](https://dishtreats.com/wp-content/uploads/2025/07/6c550e47-e99c-4554-a6d4-422f3e5f831a.webp)
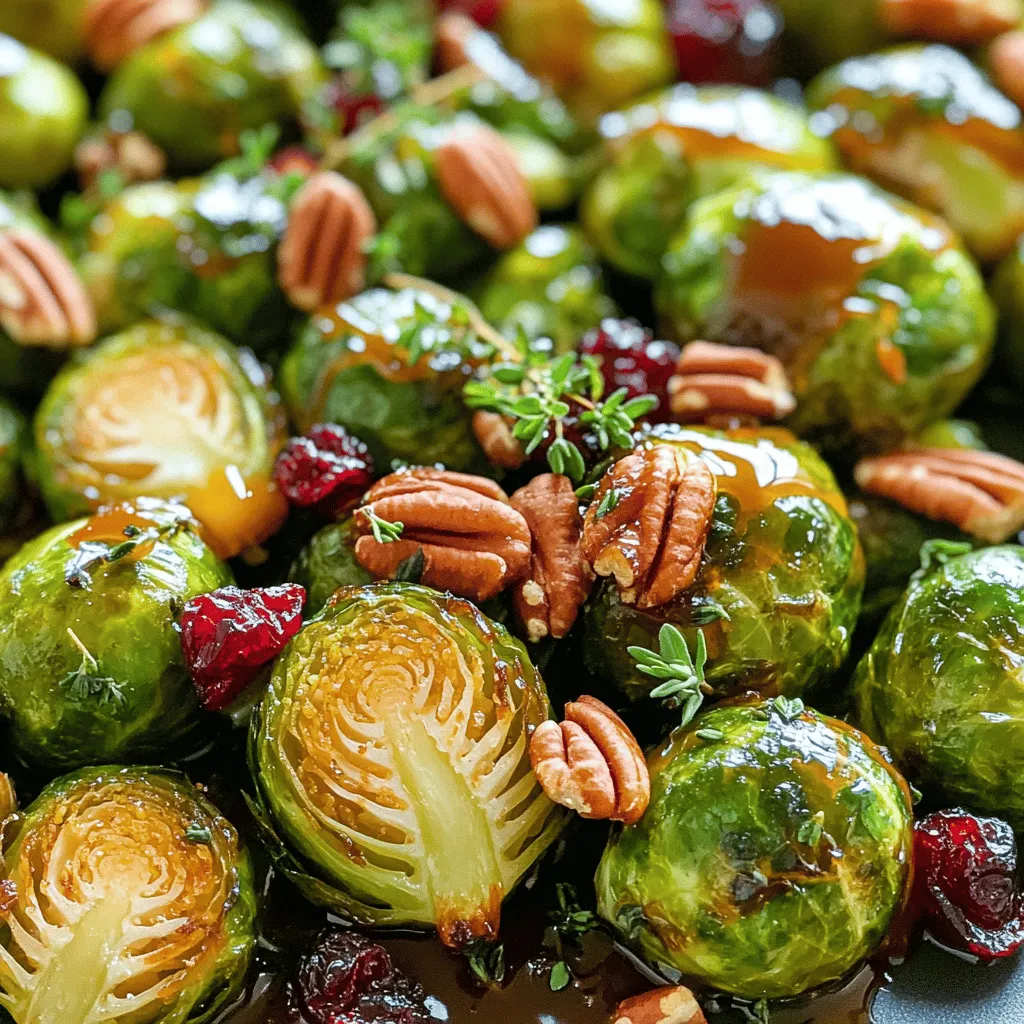
Are you ready to transform your dinner with a simple yet delicious dish? Maple glazed Brussels sprouts combine sweet and savory flavors that will excite your taste buds. This dish is easy to make, perfect for any meal, and packed with nutrients. I’ll guide you step-by-step, from choosing the freshest sprouts to achieving that perfect caramelization. Let’s get started on this delightful journey to a healthier table!
Ingredients
List of Ingredients for Maple Glazed Brussels Sprouts
To make this tasty dish, gather these simple ingredients:
- 1 pound Brussels sprouts, trimmed and halved
- 3 tablespoons extra virgin olive oil
- 1/4 cup pure maple syrup
- 2 tablespoons balsamic vinegar
- 1 teaspoon Dijon mustard
- 1/2 teaspoon fine sea salt
- 1/4 teaspoon freshly ground black pepper
- 1/4 cup pecans, roughly chopped for added crunch
- 1/4 cup dried cranberries for a touch of sweetness
- Fresh thyme leaves for an aromatic garnish (optional)
Measurement Conversions for Seasonal Adjustments
You can easily adjust ingredient amounts based on what you need. Here are some quick conversions:
- If you want to make more, use 2 pounds of sprouts and double the glaze.
- For less, cut the amounts in half. This still keeps the taste great.
- In a pinch, you can swap the pecans for walnuts or almonds.
Nutritional Information Breakdown
This dish not only tastes good but is also good for you. Here’s a quick look at what’s inside:
- Calories: About 200 per serving
- Fat: 12 grams (mostly healthy fats from olive oil and nuts)
- Carbohydrates: 24 grams (includes natural sugars from maple syrup)
- Fiber: 5 grams (great for digestion from Brussels sprouts)
- Protein: 3 grams (from nuts and sprouts)
This breakdown helps you see the benefits of each ingredient. Enjoy making this dish with fresh, seasonal produce for the best flavor and health benefits.
Step-by-Step Instructions
Preheat the Oven and Prepare Your Workspace
Start by preheating your oven to 400°F (200°C). This step is key for getting perfect crispness. While the oven warms up, clear your kitchen counter. Gather all your tools and ingredients. Having everything ready makes cooking much easier.
Detailed Process for Preparing Brussels Sprouts
Take 1 pound of Brussels sprouts. Trim off the ends and cut them in half. Place the halved sprouts in a large mixing bowl. Add 3 tablespoons of extra virgin olive oil and 1/2 teaspoon of fine sea salt. Sprinkle in 1/4 teaspoon of freshly ground black pepper. Toss the sprouts until they are well coated. This ensures each sprout gets flavor.
Roasting and Glazing Techniques
Spread the seasoned Brussels sprouts on a baking sheet. Make sure the cut sides face down. This helps them brown nicely. Place the baking sheet in your preheated oven. Roast for 20-25 minutes. They should be crispy and golden.
While they roast, make the maple glaze. In a small saucepan, mix 1/4 cup of pure maple syrup, 2 tablespoons of balsamic vinegar, and 1 teaspoon of Dijon mustard. Heat over medium heat but do not let it boil. Once the sprouts are ready, drizzle the glaze over them. Toss gently to coat.
Return the glazed sprouts to the oven for 5 more minutes. This step caramelizes the glaze, making it rich and tasty. After that, take them out and add 1/4 cup of roughly chopped pecans and 1/4 cup of dried cranberries. These add crunch and sweetness. If you want, garnish with fresh thyme leaves for even more flavor.
Tips & Tricks
Pro Tips for Choosing Fresh Brussels Sprouts
When you pick Brussels sprouts, look for bright green ones. They should feel firm and heavy in your hand. Avoid any that have yellow leaves or feel soft. The size matters too; smaller sprouts are sweeter and more tender. If you can, buy them on the stalk. They stay fresh longer that way.
How to Achieve Perfect Caramelization
Caramelization makes Brussels sprouts sweet and tasty. To get it right, roast them cut-side down. This lets them get nice and brown. Make sure they have space on the baking sheet. If they are too close together, they will steam instead of roast. Use high heat, about 400°F, for best results. Check them halfway through and give them a stir for even cooking.
Common Mistakes to Avoid
One big mistake is overcooking the sprouts. They should be tender but still have a bit of crunch. Avoid using too much glaze; it can make them soggy. Always glaze right after roasting, then caramelize them for just a few minutes. This step adds flavor without losing the sprout’s crispness. Lastly, don’t skip the nuts and cranberries; they add great texture and taste.
Variations
Adding Different Nuts or Seeds
You can change the taste of maple glazed Brussels sprouts by adding different nuts or seeds. Try walnuts for a rich flavor or sunflower seeds for a crunch. Almonds also work well; they add a nice texture and nutty taste. Each option gives a new twist to your dish. Just sprinkle them on top after roasting for the best crunch and flavor.
Substituting Ingredients for Dietary Preferences
If you need to adjust for dietary needs, it’s easy. Use agave syrup instead of maple syrup for a vegan option. For a nut-free dish, skip the pecans and use pumpkin seeds. You can also swap balsamic vinegar with apple cider vinegar for a light zing. These swaps keep the dish tasty while meeting your needs.
Seasonal Variations for Every Meal
Brussels sprouts shine in fall and winter, but you can adapt them year-round. In spring, add fresh herbs like basil or parsley for brightness. In summer, pair with grilled corn for a sweet twist. You can also mix in seasonal veggies like carrots or sweet potatoes for color and taste. This way, your dish stays fresh and exciting no matter the season.
Storage Info
Best Practices for Storing Leftovers
After enjoying your maple glazed Brussels sprouts, store leftovers right. Place them in an airtight container. They will stay fresh for about three days in the fridge. Keep them away from strong-smelling foods. This helps maintain their flavor.
Reheating Techniques to Retain Flavor
When you reheat, aim to keep the sprouts crispy. Use your oven for the best results. Preheat it to 350°F (175°C). Spread the sprouts on a baking sheet. Heat them for about 10-15 minutes. This method helps keep them crunchy and flavorful. You can also microwave them for quick reheating, but they may not stay as crispy.
Freezing Options for Future Meals
If you want to enjoy these sprouts later, freezing works too. First, let them cool completely. Spread them on a baking sheet in a single layer. Freeze until solid, then transfer to a zip-top bag. They can last up to three months in the freezer. When ready to eat, thaw them overnight in the fridge. Reheat using the oven for the best taste. Enjoy your tasty treat again!
FAQs
Can I make Maple Glazed Brussels Sprouts ahead of time?
Yes, you can prepare these Brussels sprouts ahead of time. After roasting them, let them cool. Store them in an airtight container in the fridge. They stay fresh for up to three days. When you’re ready to serve, just reheat them in the oven. This keeps them crispy and tasty.
What should I serve with Maple Glazed Brussels Sprouts?
These Brussels sprouts pair well with many dishes. Serve them alongside roasted chicken or grilled salmon for a complete meal. They also shine as a side dish for holiday dinners. You can even enjoy them with a grain salad or pasta for a light lunch. The sweet glaze adds a nice touch to any plate.
How can I adjust the sweetness of the glaze?
You can easily change the sweetness of the glaze. If you want it sweeter, add more maple syrup. Start with an extra tablespoon and taste as you go. For a less sweet glaze, reduce the maple syrup. You can add more balsamic vinegar to balance the flavor. Adjust it to match your taste!
We explored how to make Maple Glazed Brussels Sprouts from start to finish. You learned about ingredients, cooking steps, and storage tips. I shared helpful tricks to avoid mistakes and ensure a tasty outcome. You can now customize your dish with variations and serve it with confidence. Remember, fresh ingredients and careful roasting lead to the best flavors. Enjoy making this dish and impress your family and friends. With practice, your skills will grow. Happy cooking!
![To make this tasty dish, gather these simple ingredients: - 1 pound Brussels sprouts, trimmed and halved - 3 tablespoons extra virgin olive oil - 1/4 cup pure maple syrup - 2 tablespoons balsamic vinegar - 1 teaspoon Dijon mustard - 1/2 teaspoon fine sea salt - 1/4 teaspoon freshly ground black pepper - 1/4 cup pecans, roughly chopped for added crunch - 1/4 cup dried cranberries for a touch of sweetness - Fresh thyme leaves for an aromatic garnish (optional) You can easily adjust ingredient amounts based on what you need. Here are some quick conversions: - If you want to make more, use 2 pounds of sprouts and double the glaze. - For less, cut the amounts in half. This still keeps the taste great. - In a pinch, you can swap the pecans for walnuts or almonds. This dish not only tastes good but is also good for you. Here’s a quick look at what’s inside: - Calories: About 200 per serving - Fat: 12 grams (mostly healthy fats from olive oil and nuts) - Carbohydrates: 24 grams (includes natural sugars from maple syrup) - Fiber: 5 grams (great for digestion from Brussels sprouts) - Protein: 3 grams (from nuts and sprouts) This breakdown helps you see the benefits of each ingredient. Enjoy making this dish with fresh, seasonal produce for the best flavor and health benefits. For the complete recipe, check out the Full Recipe. Start by preheating your oven to 400°F (200°C). This step is key for getting perfect crispness. While the oven warms up, clear your kitchen counter. Gather all your tools and ingredients. Having everything ready makes cooking much easier. Take 1 pound of Brussels sprouts. Trim off the ends and cut them in half. Place the halved sprouts in a large mixing bowl. Add 3 tablespoons of extra virgin olive oil and 1/2 teaspoon of fine sea salt. Sprinkle in 1/4 teaspoon of freshly ground black pepper. Toss the sprouts until they are well coated. This ensures each sprout gets flavor. Spread the seasoned Brussels sprouts on a baking sheet. Make sure the cut sides face down. This helps them brown nicely. Place the baking sheet in your preheated oven. Roast for 20-25 minutes. They should be crispy and golden. While they roast, make the maple glaze. In a small saucepan, mix 1/4 cup of pure maple syrup, 2 tablespoons of balsamic vinegar, and 1 teaspoon of Dijon mustard. Heat over medium heat but do not let it boil. Once the sprouts are ready, drizzle the glaze over them. Toss gently to coat. Return the glazed sprouts to the oven for 5 more minutes. This step caramelizes the glaze, making it rich and tasty. After that, take them out and add 1/4 cup of roughly chopped pecans and 1/4 cup of dried cranberries. These add crunch and sweetness. If you want, garnish with fresh thyme leaves for even more flavor. For the full details, check the Full Recipe. When you pick Brussels sprouts, look for bright green ones. They should feel firm and heavy in your hand. Avoid any that have yellow leaves or feel soft. The size matters too; smaller sprouts are sweeter and more tender. If you can, buy them on the stalk. They stay fresh longer that way. Caramelization makes Brussels sprouts sweet and tasty. To get it right, roast them cut-side down. This lets them get nice and brown. Make sure they have space on the baking sheet. If they are too close together, they will steam instead of roast. Use high heat, about 400°F, for best results. Check them halfway through and give them a stir for even cooking. One big mistake is overcooking the sprouts. They should be tender but still have a bit of crunch. Avoid using too much glaze; it can make them soggy. Always glaze right after roasting, then caramelize them for just a few minutes. This step adds flavor without losing the sprout's crispness. Lastly, don’t skip the nuts and cranberries; they add great texture and taste. For the full recipe, check the [Full Recipe]. {{image_4}} You can change the taste of maple glazed Brussels sprouts by adding different nuts or seeds. Try walnuts for a rich flavor or sunflower seeds for a crunch. Almonds also work well; they add a nice texture and nutty taste. Each option gives a new twist to your dish. Just sprinkle them on top after roasting for the best crunch and flavor. If you need to adjust for dietary needs, it’s easy. Use agave syrup instead of maple syrup for a vegan option. For a nut-free dish, skip the pecans and use pumpkin seeds. You can also swap balsamic vinegar with apple cider vinegar for a light zing. These swaps keep the dish tasty while meeting your needs. Brussels sprouts shine in fall and winter, but you can adapt them year-round. In spring, add fresh herbs like basil or parsley for brightness. In summer, pair with grilled corn for a sweet twist. You can also mix in seasonal veggies like carrots or sweet potatoes for color and taste. This way, your dish stays fresh and exciting no matter the season. For the full recipe, check out the Maple Glazed Brussels Sprouts Delight. After enjoying your maple glazed Brussels sprouts, store leftovers right. Place them in an airtight container. They will stay fresh for about three days in the fridge. Keep them away from strong-smelling foods. This helps maintain their flavor. When you reheat, aim to keep the sprouts crispy. Use your oven for the best results. Preheat it to 350°F (175°C). Spread the sprouts on a baking sheet. Heat them for about 10-15 minutes. This method helps keep them crunchy and flavorful. You can also microwave them for quick reheating, but they may not stay as crispy. If you want to enjoy these sprouts later, freezing works too. First, let them cool completely. Spread them on a baking sheet in a single layer. Freeze until solid, then transfer to a zip-top bag. They can last up to three months in the freezer. When ready to eat, thaw them overnight in the fridge. Reheat using the oven for the best taste. Enjoy your tasty treat again! Yes, you can prepare these Brussels sprouts ahead of time. After roasting them, let them cool. Store them in an airtight container in the fridge. They stay fresh for up to three days. When you're ready to serve, just reheat them in the oven. This keeps them crispy and tasty. These Brussels sprouts pair well with many dishes. Serve them alongside roasted chicken or grilled salmon for a complete meal. They also shine as a side dish for holiday dinners. You can even enjoy them with a grain salad or pasta for a light lunch. The sweet glaze adds a nice touch to any plate. You can easily change the sweetness of the glaze. If you want it sweeter, add more maple syrup. Start with an extra tablespoon and taste as you go. For a less sweet glaze, reduce the maple syrup. You can add more balsamic vinegar to balance the flavor. Adjust it to match your taste! We explored how to make Maple Glazed Brussels Sprouts from start to finish. You learned about ingredients, cooking steps, and storage tips. I shared helpful tricks to avoid mistakes and ensure a tasty outcome. You can now customize your dish with variations and serve it with confidence. Remember, fresh ingredients and careful roasting lead to the best flavors. Enjoy making this dish and impress your family and friends. With practice, your skills will grow. Happy cooking!](https://dishtreats.com/wp-content/uploads/2025/07/6c550e47-e99c-4554-a6d4-422f3e5f831a-300x300.webp)
. - Preheat to 350°F (175°C). - Prepare muffin tin by lining with muffin liners or greasing it lightly. - In a medium bowl, combine: - 1 cup rolled oats - 1 cup whole wheat flour - 1 teaspoon baking powder - 1/2 teaspoon baking soda - 1/2 teaspoon salt - Whisk these until they mix well. Set the bowl aside for now. - In a large bowl, add: - 2 ripe bananas, mashed until smooth - 1/2 cup honey or maple syrup - 1/4 cup unsweetened applesauce - 2 large eggs - 1 teaspoon pure vanilla extract - Use a whisk to blend these ingredients. Make sure it is smooth and creamy. - Gradually add the dry mix to the wet mix. - Stir gently until just combined. It’s okay if a few lumps remain. - Carefully fold in: - 1 cup fresh or frozen cherries, pitted and chopped - Optional: 1/2 cup chopped walnuts or pecans - Ensure they are spread out in the batter without overmixing. - Spoon the batter into the muffin cups. Fill each about two-thirds full. - Place the muffin tin in the oven and bake for 18-20 minutes. - Check for doneness with a toothpick. It should come out clean. - Once done, let them cool for about 5 minutes in the tin. - After that, move them to a cooling rack. For the full recipe, refer to the main section. Enjoy your tasty Cherry Banana Oat Muffins! To get the best texture in your muffins, avoid overmixing. When you combine wet and dry ingredients, stir gently. You want some lumps in the batter. Overmixing can lead to tough muffins. Using ripe bananas is important too. The sweeter and softer they are, the better your muffins will taste. Look for bananas with brown spots; those are perfect for baking. To test for doneness, use a toothpick. Insert it into the center of a muffin. If it comes out clean, the muffins are ready. If it has batter on it, bake for a few more minutes. If you live at a high altitude, you may need to adjust the bake time. Muffins may bake faster, so keep an eye on them. Serve your muffins warm for the best flavor. A light dusting of powdered sugar makes them look nice. You can also add fresh mint leaves for a pop of color. These muffins pair well with your favorite tea or coffee. Enjoy them as a snack or breakfast treat! For the full recipe, check out the details above. {{image_4}} You can easily change the flavor of these muffins. Adding spices like cinnamon or nutmeg gives them a warm touch. Just sprinkle in about a teaspoon of cinnamon for a cozy flavor. Nutmeg is great too, but use less, about 1/4 teaspoon. You can also try different fruits. Swap cherries for blueberries or apples. Each fruit gives a new taste and keeps things fun. If you want a vegan option, you can replace the eggs. Use flax eggs instead. Mix 1 tablespoon of ground flaxseed with 2.5 tablespoons of water. Let it sit for 5 minutes. For a low-sugar option, cut the honey or maple syrup in half. You can also use a sugar substitute like stevia. This way, you still enjoy the muffins without too much sugar. You can change the size of your muffins. Make mini muffins by using a mini muffin tin. Fill each cup halfway and bake for about 10-12 minutes. If you prefer standard-sized muffins, stick to the original recipe. Just remember, baking time changes with size. Keep an eye on them to avoid overbaking. For the full recipe, check out the details above. To keep your Cherry Banana Oat Muffins fresh, store them in an airtight container. This way, they stay moist and tasty. You can keep them at room temperature for up to three days. If you live in a warm area, use the fridge. Muffins can last about a week in the refrigerator. Just be aware that cold storage may change their texture slightly. If you want to save muffins for later, freezing is the best option. To freeze, allow the muffins to cool completely. Then, wrap each one in plastic wrap. Place them in a freezer-safe bag or container. They can stay frozen for up to three months. When you want to eat them, take a muffin out and thaw it in the fridge overnight. For the best texture, you can also microwave the muffin for about 20 seconds after thawing. To enjoy your muffins warm, use the oven or microwave. For the oven, preheat to 350°F (175°C). Place the muffin on a baking sheet and heat for about 5 to 10 minutes. This warms them through and helps regain moisture. If you use the microwave, heat for about 10 to 15 seconds. Just be careful not to overheat, as this can make them dry. Warm muffins taste best and are a perfect treat! Yes, you can use frozen cherries. They will soften during baking. This may change the texture a bit. The flavor will still be great. Just make sure to chop them before adding to the mix. If you use frozen cherries, you do not need to thaw them first. To ripen bananas fast, place them in a paper bag. This traps the ethylene gas they emit. You can also add an apple to the bag for even faster results. If you are in a hurry, you can bake bananas at 300°F (150°C) for about 15-20 minutes. This will soften them quickly. If you want to swap honey, maple syrup is a great choice. Agave nectar or brown sugar also works well. Each option will give a different taste, but they will all be sweet. Use the same amount as honey in the recipe. Each muffin has about 140 calories. This can change based on your ingredients. If you use nuts or different sweeteners, check those values. These muffins are a tasty, healthy treat you can enjoy without guilt. When stored well, these muffins last about 3 days at room temperature. Keep them in an airtight container to maintain freshness. You can store them in the fridge for up to a week. For longer storage, freeze them for up to 3 months. Just thaw them before enjoying! You now have a simple yet tasty recipe for cherry banana oat muffins. You learned about ingredients, from oats to cherries, and how to mix them. We covered important tips for getting the right texture and bake time. You also have ideas for variations and storage. These muffins are a great snack or breakfast option. Enjoy making them your way!](https://dishtreats.com/wp-content/uploads/2025/07/f958d702-06c5-46b3-af8d-5861eadc8c12-768x768.webp)
![- 1 can (15 oz) black beans, rinsed and well-drained - 1 cup corn kernels (fresh, frozen, or canned) - 1 red bell pepper, diced - 1/2 cup red onion, finely chopped - 1 jalapeño pepper, deseeded and minced - 1 ripe avocado, diced - 1/4 cup fresh cilantro, chopped - Juice of 2 limes - 3 tablespoons extra-virgin olive oil - 1 teaspoon ground cumin - 1 teaspoon smoked paprika - Salt and freshly ground pepper to taste I love using black beans in this salad. They add protein and fiber. They also make the dish filling. Corn brings a sweet crunch. It pairs well with the beans. The red bell pepper adds color and a slight sweetness. Red onion gives a sharp taste that balances the flavors. For spice, I use jalapeño. It adds heat without being too strong. If you want less spice, remove the seeds or skip the jalapeño. The ripe avocado adds creaminess. It makes every bite smooth and rich. Fresh cilantro brings a bright, fresh taste. The lime juice adds acidity. It brightens the salad and keeps it fresh. Olive oil adds healthy fats. The ground cumin and smoked paprika give depth. These spices add warmth and a hint of smokiness. This salad is not just tasty; it's also nutritious. The black beans are high in protein and fiber. They support digestion and keep you full longer. The corn, bell pepper, and avocado provide key vitamins. They help keep your body healthy. You can find the Full Recipe for this salad at the end. Enjoy making this colorful dish and feel good about what you eat! Start by mixing the base ingredients in a large bowl. Add the black beans, corn, diced red bell pepper, chopped red onion, and minced jalapeño. Stir gently to combine everything without mashing the beans. This keeps the texture nice. Next, gently fold in the diced avocado and chopped cilantro. Be careful here! You want those avocado pieces to stay whole. They add a creamy texture to the salad, which is delightful. Now, let’s make the dressing. In a small bowl, whisk together the lime juice, olive oil, ground cumin, and smoked paprika. Add salt and pepper to taste. This dressing adds zing and flavor to the salad. To achieve the ideal consistency, ensure that you mix well. You want it to be smooth but not too runny. If it seems thick, add a bit more olive oil or lime juice. Drizzle the dressing over your salad mixture. Gently toss everything together until it’s evenly coated. This step is important! It ensures every bite is full of flavor. Allow the salad to rest for about 10-15 minutes at room temperature. This helps the flavors meld beautifully. Trust me, the wait is worth it! You can check the [Full Recipe] for more details. To make your Southwest Black Bean Salad pop, add more spices or herbs. You can try adding a pinch of cayenne pepper or a dash of chili powder for heat. Fresh herbs like parsley or oregano can also bring a nice twist. If you want to switch things up, use different beans, like pinto or kidney beans. Each type adds its own flavor and texture, making your salad unique. When serving this salad, think about how it looks. A large, colorful bowl makes for a great centerpiece. You can also layer the salad in clear jars for a fun and stylish option. This way, guests can see all the vibrant colors. It’s perfect for parties or picnics. Plus, it’s easy for guests to grab their own jar! One mistake to watch out for is overmixing the salad. This can mash the beans and ruin the texture. Gently fold the ingredients instead. Another common issue is using overly ripe ingredients, especially the avocado. If the avocado is too soft, it can break apart and make the salad mushy. Pick firm, ripe avocados for the best results. {{image_4}} You can change the base of your Southwest black bean salad. Adding grilled chicken or tofu makes it heartier. Both protein options give you energy. You can also include more veggies. Cucumbers add crunch, while tomatoes bring sweetness. These changes keep the salad fresh and exciting. The dressing can change the whole taste of your salad. You can try different vinaigrettes, like balsamic or honey mustard. Each adds its own twist. If you prefer a creamier texture, go for a yogurt-based dressing. This will make the salad rich and smooth. This salad pairs well with many dishes. You can serve it with tacos or burritos for a complete meal. It also works great as a side with grilled meats. The bright flavors complement spicy foods nicely. For a fun touch, scoop the salad into taco shells. It’s a delicious way to enjoy this recipe and impress your guests. For the Full Recipe, check here: [Full Recipe]. To keep your Southwest black bean salad fresh, store it in an airtight container. This helps to lock in flavors and keep ingredients crisp. The salad lasts about 3 to 5 days in the fridge. It’s best to eat it within the first few days for optimal taste. You can freeze this salad, but it’s best to freeze the ingredients separately. Black beans and corn freeze well, but the avocado and fresh herbs do not. If you want to enjoy the salad later, freeze black beans and corn in one bag. Store diced avocado and herbs in another. This way, you can mix them fresh when you’re ready to eat. To reheat the salad, gently warm the beans and corn in a pan over low heat. Avoid using high heat, as it can mush the beans. After reheating, check the flavors. You might need to add more lime juice or salt to bring back the taste. Enjoy your meal ready and full of flavor! Yes, you can make this salad ahead of time. It tastes even better after resting. To prep in advance, chop all your veggies and store them in a bowl. Keep the dressing in a separate container. When you are ready to eat, mix everything together. This keeps the salad fresh and crunchy. This salad works great for meal prepping! Portion the salad into containers. You can add the dressing just before eating. This way, the salad stays fresh throughout the week. Use airtight containers to keep everything crisp. Black beans are packed with nutrients. They are high in protein and fiber. This helps you feel full longer and aids digestion. They also contain vitamins and minerals like iron, magnesium, and folate. Adding black beans to your diet can support heart health and help maintain stable blood sugar levels. To add heat, increase the amount of jalapeño. You can also add diced serrano peppers for extra spice. A dash of hot sauce or cayenne pepper can kick it up, too. Taste as you go to find your perfect spice level. Fresh ingredients often taste brighter and have better texture. They can add more crunch to your salad. Canned ingredients are convenient and save time. They’re also usually less expensive. Be sure to rinse canned beans to remove extra salt. Choose what's best for your schedule and taste. For the complete recipe, check out the [Full Recipe]. This blog post covered how to make a delicious Southwest Black Bean Salad. We discussed the key ingredients, nutritional facts, and tasty variations. You learned the step-by-step process, from mixing to serving. We also shared tips for storage and answered common questions. Enjoy making this salad for your next meal or gathering. Remember, it’s easy to customize to suit your taste. With the right ingredients and a few tweaks, you'll have a healthy dish that everyone loves. Get cooking and enjoy!](https://dishtreats.com/wp-content/uploads/2025/07/9afc72a8-6225-467a-bc64-ad0cd532be46-768x768.webp)
![To make Classic Chicken Marsala, you will need: - 4 boneless, skinless chicken breasts - Sea salt and freshly cracked black pepper, to taste - 1/2 cup all-purpose flour, for dredging - 4 tablespoons extra virgin olive oil - 2 tablespoons unsalted butter - 8 ounces cremini mushrooms, thinly sliced - 1 cup low-sodium chicken broth - 2 tablespoons freshly squeezed lemon juice - 1/4 cup fresh parsley, finely chopped, for garnish Using fresh ingredients makes all the difference in your dish. Fresh chicken tastes better and has better texture. Fresh mushrooms add depth and flavor. Fresh herbs, like parsley, bring vibrant notes to your plate. Fresh ingredients enhance the overall taste and make your meal more enjoyable. They can transform a simple dish into something special. If you can't find certain items, don't worry! Here are some easy swaps: - Chicken breasts: You can use chicken thighs for a richer flavor. - Cremini mushrooms: Use button mushrooms if cremini are not available. - Olive oil: Use canola or vegetable oil if you're out of olive oil. - Chicken broth: Vegetable broth works well for a lighter taste. - Lemon juice: You can use vinegar as a tangy alternative if you lack lemons. These substitutes will keep your Chicken Marsala flavorful and delicious, even with changes. 1. First, season the chicken breasts with salt and pepper. 2. Dredge each breast in flour. Shake off any extra flour. 3. Heat 2 tablespoons of olive oil in a skillet over medium heat. 4. Place the chicken in the skillet. Cook for 5-6 minutes on each side. 5. Remove the chicken from the skillet and keep it warm on a plate. 6. Add the remaining olive oil and butter to the same skillet. 7. Once the butter melts, add the sliced mushrooms. Sauté for 5 minutes. 8. Pour in the chicken broth and lemon juice. Scrape the skillet's bottom. 9. Simmer the sauce for 5 minutes until it thickens. 10. Return the chicken to the skillet. Spoon sauce over the top. 11. Simmer everything together for 2-3 minutes. 12. Finish with parsley before serving. To get the best Chicken Marsala, focus on these techniques: - Dredging: Flour helps create a crust. It locks in moisture and adds flavor. - Searing: Cooking the chicken on medium heat gives a golden crust. - Deglazing: Scraping the skillet adds depth to the sauce. - Simmering: Letting the sauce thicken enhances the flavor. Here are some tips to avoid issues while cooking: - Skipping seasoning: Always season the chicken well. It makes a big difference. - Overcrowding the skillet: Cook in batches if needed. This keeps the heat high. - Not checking doneness: Use a meat thermometer. Chicken should reach 165°F. - Rushing the sauce: Let it simmer. This builds the best flavor. For the complete cooking process, check the Full Recipe. Serve Chicken Marsala on a large plate. Spoon the rich mushroom sauce over the chicken. Pair it with creamy mashed potatoes or steamed vegetables. These sides add color and balance to the dish. I love adding a bright green salad too. It makes the meal complete and fresh. To boost flavor, season the chicken well with sea salt and pepper. Dredging it in flour gives it a nice crust. Be sure to use fresh mushrooms for the best taste. Cremini mushrooms add a deep, earthy flavor. Deglazing the skillet with chicken broth is key. It helps pick up all the tasty bits left behind. A splash of lemon juice brightens the dish. It cuts through the richness and makes every bite pop. When it comes to drinks, I suggest a dry white wine. A good Sauvignon Blanc or Chardonnay works well. These wines complement the chicken and sauce without overpowering them. If you prefer something non-alcoholic, try sparkling water with lemon. It refreshes your palate between bites. Enjoy your meal with a suitable drink for a perfect dining experience. Check out the Full Recipe for more details. {{image_4}} You can add herbs and spices to give Chicken Marsala a fun twist. Try adding fresh thyme or rosemary for a fragrant touch. Paprika can add a bit of heat and color. You can also use garlic powder or onion powder to deepen the flavor. Mix these into the flour before dredging the chicken. This small change can make a big difference in taste. If you want a vegetarian or vegan version, replace the chicken with hearty mushrooms or eggplant. Both options soak up the sauce well. Use vegetable broth instead of chicken broth for a rich flavor. You may also try tofu for a protein boost. Dredge the tofu in flour like the chicken for a satisfying crunch. You can play with the sauce to change the flavor profile. For a creamier version, add heavy cream to the broth. This will give you a rich, luscious sauce that coats the chicken well. You can also use Marsala wine for a sweeter touch. If you want a tangy flavor, use balsamic vinegar instead of lemon juice. Each of these swaps can help you create a unique dish. For the full recipe, check the [Full Recipe]. To store your Classic Chicken Marsala, let it cool first. Place the chicken and sauce in an airtight container. Make sure to separate the sauce from the chicken if you can. This helps keep the chicken moist. Place the container in the fridge. It’s best to use the leftovers within three days for the best taste. When reheating Classic Chicken Marsala, use a skillet for the best results. Warm it over medium heat. Add a splash of chicken broth or water to keep it moist. Stir gently until heated through. You can also microwave it, but be careful not to overheat. This can dry out the chicken. Classic Chicken Marsala lasts about three days in the fridge. If you want to keep it longer, freeze it. In the freezer, it will last up to three months. Just remember to store it in a freezer-safe container. To enjoy it later, thaw it in the fridge overnight before reheating. For more details on making this dish, check out the Full Recipe. Chicken Marsala is made of simple, tasty ingredients. You need chicken breasts, mushrooms, and Marsala wine. The sauce gets its flavor from chicken broth and lemon juice. You also use flour to coat the chicken. Olive oil and butter add richness. Fresh parsley gives a nice touch at the end. Yes, you can prepare Chicken Marsala ahead of time. Cook the chicken and store it in the fridge. Keep the sauce separate to avoid sogginess. When you are ready to serve, just reheat both. This keeps the chicken juicy and the sauce fresh. The best wine for Chicken Marsala is a dry Marsala wine. This wine adds depth and sweetness to the dish. If you can't find Marsala, you can use dry sherry or white wine. These alternatives work well but may change the flavor slightly. Always choose a wine you enjoy drinking! In this article, we covered the crucial ingredients for Chicken Marsala and why freshness matters. I shared step-by-step instructions to help you cook it perfectly. We explored tips for serving and pairing drinks, as well as variations for every taste. Finally, I explained how to store leftovers safely. Cooking Chicken Marsala can be easy and fun. With the right tips and knowledge, you can enjoy a delicious meal every time.](https://dishtreats.com/wp-content/uploads/2025/06/e9aedbd7-71f4-4133-b36d-4fb1a0e8152d-768x768.webp)
. You now have all the tools to make savory herb roasted chicken thighs. We discussed the key ingredients, how to prepare and roast the chicken, and tips for crispy skin and flavor. You also learned about variations and storage methods to keep your meal fresh. Enjoy experimenting with flavors and techniques. Cooking should bring joy. Trust your skills, and share this tasty dish with others!](https://dishtreats.com/wp-content/uploads/2025/06/7c34b550-313c-42ec-9338-3ef305d43656-768x768.webp)