
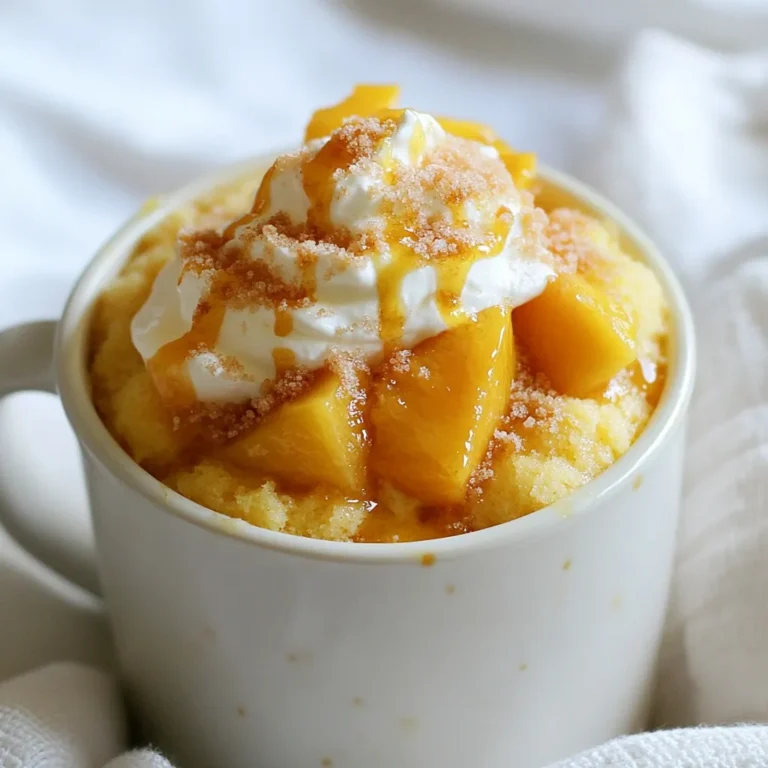
Classic Key Lime Pie Simple and Tangy Recipe
![To make a true classic key lime pie, you need these key items: - 1 ½ cups graham cracker crumbs - ½ cup unsweetened coconut flakes - ⅓ cup granulated sugar - ½ cup unsalted butter, melted - 4 large egg yolks - 1 (14 oz) can sweetened condensed milk - ½ cup freshly squeezed key lime juice (approx. 12 key limes) - Zest of 2 key limes - 1 cup heavy whipping cream - 2 tablespoons powdered sugar - Lime slices and extra zest for garnish These ingredients work together to create a sweet, tangy pie that sings of sunshine. You can add some optional ingredients to enhance your pie: - Toasted coconut flakes for extra crunch - A pinch of salt to balance sweetness - Lime zest for a stronger lime flavor These add-ons can make your pie even more delightful. If you're missing an ingredient, here are some easy swaps: - Use regular lime juice instead of key lime juice. It will taste different but still good. - Swap graham cracker crumbs with crushed vanilla wafers for a unique flavor. - Replace heavy cream with whipped topping for a lighter version. These substitutions can help you prepare the pie with what you have. For the exact steps, check out the Full Recipe. First, preheat your oven to 350°F (175°C). This step is key for a great crust. In a medium bowl, mix the graham cracker crumbs, coconut flakes, and granulated sugar. Pour in the melted butter and stir until it feels like moist sand. Next, grab a 9-inch pie pan. Press the crumb mixture into the bottom and up the sides of the pan. Make sure it’s firm and even. Bake this crust for 8-10 minutes until the edges are golden. After baking, let it cool completely. Now, let’s make the filling. In a large bowl, whisk the egg yolks until they are pale yellow. Then, add the sweetened condensed milk, key lime juice, and lime zest. Whisk until everything is smooth. You want to have no lumps here! Carefully pour this lime mixture into your cooled crust. Spread it out evenly. Bake the pie for 15 minutes. The filling should be set but still a bit jiggly in the center. After baking, take it out and let it cool at room temperature. Once it’s cool, put the pie in the fridge for at least 2 hours. This chilling time makes it even tastier! For the full recipe, check out the details above! To get the best texture and flavor in your Key Lime Pie, follow a few simple tips: - Use Fresh Key Limes: Fresh key limes give a bright taste. They also add a nice zing. - Whisk Egg Yolks Well: Whisk the yolks until they are pale. This helps create a smooth filling. - Don’t Overbake: Bake the filling until it is just set. It should still jiggle a bit in the middle. - Chill Properly: Let the pie cool at room temp before refrigerating. This step enhances the flavor. Some mistakes can ruin your pie. Here are a few to watch out for: - Skipping the Zest: The zest adds flavor and aroma. Don’t skip it! - Using Cold Ingredients: Let your ingredients reach room temperature. This helps them mix better. - Overmixing the Filling: Whisk just until combined. Overmixing can create bubbles in the filling. - Not Cooling the Crust: Always cool the crust completely before adding the filling. A warm crust can make the filling runny. Having the right tools makes cooking easier and more fun: - 9-inch Pie Pan: This is the perfect size for your Key Lime Pie. - Mixing Bowls: Use medium and large bowls for mixing your crust and filling. - Electric Mixer: This helps you whip the cream to stiff peaks easily. - Zester or Grater: A good zester is key for getting the lime zest just right. These tips and tools will help you create a perfect Key Lime Pie every time. For the full recipe, check out the [Full Recipe]. {{image_4}} You can change up the crust for your Key Lime Pie. Here are some fun ideas: - Graham Cracker Crust: This is the classic choice. It’s sweet and crunchy. - Oreo Crust: Use crushed Oreos instead of graham crackers for a chocolate twist. - Nut Crust: Ground almonds or pecans add a nice nutty flavor. Mix them with butter and a bit of sugar. - Coconut Crust: Use shredded coconut for a tropical feel. It pairs well with the lime. Want to try something different? Here are some tasty twists: - Mango Key Lime Pie: Add pureed mango to the filling for a fruity kick. - Berry Key Lime Pie: Mix in fresh berries like strawberries or blueberries for color and flavor. - Coconut Key Lime Pie: Stir in coconut milk for a creamier texture and tropical taste. - Chocolate Key Lime Pie: Add melted chocolate to the filling for a rich, sweet layer. Making your pie look great can be fun. Here are some ideas: - Whipped Cream Topping: Spread whipped cream on top. Use a spatula to make swirls. - Garnish with Lime: Add lime slices or zest for a pop of color. - Serve in Mason Jars: For a fun twist, serve individual portions in jars. - Add Fresh Berries: Place berries around the pie for extra flair. For the full recipe, check out the Zesty Classic Key Lime Pie . To keep your key lime pie fresh, cover it tightly with plastic wrap or aluminum foil. This prevents the pie from absorbing fridge odors. Store it in the fridge for up to three days. Make sure to slice the pie before storing to make it easier to serve later. You can freeze key lime pie if you want to save some for later. First, let the pie cool completely after baking. Wrap the pie tightly in plastic wrap and then in aluminum foil. This double wrapping helps prevent freezer burn. You can freeze it for up to three months. Just remember to label it with the date. To enjoy your frozen key lime pie, move it from the freezer to the fridge. Let it thaw overnight. If you're in a hurry, you can leave it at room temperature for about two hours. Do not microwave it, as this can change the texture. Once thawed, you can add fresh whipped cream or lime zest for extra flavor before serving. Yes, you can use regular limes. Key limes are smaller and more fragrant. They have a tart flavor that makes the pie special. If you use regular limes, the pie will taste a bit different but still good. You might want to adjust the sugar to balance the flavor. You can keep key lime pie in the fridge for up to three days. Cover it well to prevent it from drying out. If the pie has whipped cream on top, eat it within two days. The cream can lose its texture after that. You can use coconut cream or a dairy-free option. If you need a lighter option, try using yogurt. For a richer flavor, you can also use mascarpone cheese. Each choice will change the taste and texture a bit, but they all work well in this recipe. Check the [Full Recipe] for more details. In this post, we explored the key ingredients for classic Key Lime Pie, from crust to filling. I shared step-by-step instructions for baking. We discussed tips to avoid common mistakes and explored variations for flavor and presentation. Additionally, we covered how to store and reheat leftovers effectively. Key Lime Pie is simple to make and delightful to share. Enjoy creating your version and savor each bite. When you follow these tips, your pie will shine!](https://dishtreats.com/wp-content/uploads/2025/07/bf504450-0d09-4d53-b035-55d87c168019.webp)
Craving a dessert that’s both simple and tangy? You’ve come to the right place! In this post, I’ll guide you through making a classic Key Lime Pie that’s bursting with flavor and a breeze to whip up. We’ll cover everything from essential ingredients to tips for perfecting your pie. Get ready to impress your friends and family with a treat that’s sure to delight. Let’s get started!
Ingredients
Key Ingredients for Classic Key Lime Pie
To make a true classic key lime pie, you need these key items:
- 1 ½ cups graham cracker crumbs
- ½ cup unsweetened coconut flakes
- ⅓ cup granulated sugar
- ½ cup unsalted butter, melted
- 4 large egg yolks
- 1 (14 oz) can sweetened condensed milk
- ½ cup freshly squeezed key lime juice (approx. 12 key limes)
- Zest of 2 key limes
- 1 cup heavy whipping cream
- 2 tablespoons powdered sugar
- Lime slices and extra zest for garnish
These ingredients work together to create a sweet, tangy pie that sings of sunshine.
Optionally Available Ingredients
You can add some optional ingredients to enhance your pie:
- Toasted coconut flakes for extra crunch
- A pinch of salt to balance sweetness
- Lime zest for a stronger lime flavor
These add-ons can make your pie even more delightful.
Substitutions and Adjustments
If you’re missing an ingredient, here are some easy swaps:
- Use regular lime juice instead of key lime juice. It will taste different but still good.
- Swap graham cracker crumbs with crushed vanilla wafers for a unique flavor.
- Replace heavy cream with whipped topping for a lighter version.
These substitutions can help you prepare the pie with what you have.
Step-by-Step Instructions
Preheating and Crust Preparation
First, preheat your oven to 350°F (175°C). This step is key for a great crust. In a medium bowl, mix the graham cracker crumbs, coconut flakes, and granulated sugar. Pour in the melted butter and stir until it feels like moist sand. Next, grab a 9-inch pie pan. Press the crumb mixture into the bottom and up the sides of the pan. Make sure it’s firm and even. Bake this crust for 8-10 minutes until the edges are golden. After baking, let it cool completely.
Filling the Pie
Now, let’s make the filling. In a large bowl, whisk the egg yolks until they are pale yellow. Then, add the sweetened condensed milk, key lime juice, and lime zest. Whisk until everything is smooth. You want to have no lumps here! Carefully pour this lime mixture into your cooled crust. Spread it out evenly.
Baking and Cooling Process
Bake the pie for 15 minutes. The filling should be set but still a bit jiggly in the center. After baking, take it out and let it cool at room temperature. Once it’s cool, put the pie in the fridge for at least 2 hours. This chilling time makes it even tastier!
Tips & Tricks
Achieving the Perfect Texture and Flavor
To get the best texture and flavor in your Key Lime Pie, follow a few simple tips:
- Use Fresh Key Limes: Fresh key limes give a bright taste. They also add a nice zing.
- Whisk Egg Yolks Well: Whisk the yolks until they are pale. This helps create a smooth filling.
- Don’t Overbake: Bake the filling until it is just set. It should still jiggle a bit in the middle.
- Chill Properly: Let the pie cool at room temp before refrigerating. This step enhances the flavor.
Common Mistakes to Avoid
Some mistakes can ruin your pie. Here are a few to watch out for:
- Skipping the Zest: The zest adds flavor and aroma. Don’t skip it!
- Using Cold Ingredients: Let your ingredients reach room temperature. This helps them mix better.
- Overmixing the Filling: Whisk just until combined. Overmixing can create bubbles in the filling.
- Not Cooling the Crust: Always cool the crust completely before adding the filling. A warm crust can make the filling runny.
Essential Tools and Equipment
Having the right tools makes cooking easier and more fun:
- 9-inch Pie Pan: This is the perfect size for your Key Lime Pie.
- Mixing Bowls: Use medium and large bowls for mixing your crust and filling.
- Electric Mixer: This helps you whip the cream to stiff peaks easily.
- Zester or Grater: A good zester is key for getting the lime zest just right.
These tips and tools will help you create a perfect Key Lime Pie every time.

Variations
Alternative Crust Options
You can change up the crust for your Key Lime Pie. Here are some fun ideas:
- Graham Cracker Crust: This is the classic choice. It’s sweet and crunchy.
- Oreo Crust: Use crushed Oreos instead of graham crackers for a chocolate twist.
- Nut Crust: Ground almonds or pecans add a nice nutty flavor. Mix them with butter and a bit of sugar.
- Coconut Crust: Use shredded coconut for a tropical feel. It pairs well with the lime.
Flavor Variations of Key Lime Pie
Want to try something different? Here are some tasty twists:
- Mango Key Lime Pie: Add pureed mango to the filling for a fruity kick.
- Berry Key Lime Pie: Mix in fresh berries like strawberries or blueberries for color and flavor.
- Coconut Key Lime Pie: Stir in coconut milk for a creamier texture and tropical taste.
- Chocolate Key Lime Pie: Add melted chocolate to the filling for a rich, sweet layer.
Presentation Ideas for Serving
Making your pie look great can be fun. Here are some ideas:
- Whipped Cream Topping: Spread whipped cream on top. Use a spatula to make swirls.
- Garnish with Lime: Add lime slices or zest for a pop of color.
- Serve in Mason Jars: For a fun twist, serve individual portions in jars.
- Add Fresh Berries: Place berries around the pie for extra flair.
Storage Info
How to Store Leftover Key Lime Pie
To keep your key lime pie fresh, cover it tightly with plastic wrap or aluminum foil. This prevents the pie from absorbing fridge odors. Store it in the fridge for up to three days. Make sure to slice the pie before storing to make it easier to serve later.
Freezing Instructions for Key Lime Pie
You can freeze key lime pie if you want to save some for later. First, let the pie cool completely after baking. Wrap the pie tightly in plastic wrap and then in aluminum foil. This double wrapping helps prevent freezer burn. You can freeze it for up to three months. Just remember to label it with the date.
Best Practices for Reheating or Thawing
To enjoy your frozen key lime pie, move it from the freezer to the fridge. Let it thaw overnight. If you’re in a hurry, you can leave it at room temperature for about two hours. Do not microwave it, as this can change the texture. Once thawed, you can add fresh whipped cream or lime zest for extra flavor before serving.
FAQs
Can I use regular limes instead of key limes?
Yes, you can use regular limes. Key limes are smaller and more fragrant. They have a tart flavor that makes the pie special. If you use regular limes, the pie will taste a bit different but still good. You might want to adjust the sugar to balance the flavor.
How long can I keep key lime pie in the fridge?
You can keep key lime pie in the fridge for up to three days. Cover it well to prevent it from drying out. If the pie has whipped cream on top, eat it within two days. The cream can lose its texture after that.
What can I substitute for heavy whipping cream?
You can use coconut cream or a dairy-free option. If you need a lighter option, try using yogurt. For a richer flavor, you can also use mascarpone cheese. Each choice will change the taste and texture a bit, but they all work well in this recipe.
In this post, we explored the key ingredients for classic Key Lime Pie, from crust to filling. I shared step-by-step instructions for baking. We discussed tips to avoid common mistakes and explored variations for flavor and presentation. Additionally, we covered how to store and reheat leftovers effectively.
Key Lime Pie is simple to make and delightful to share. Enjoy creating your version and savor each bite. When you follow these tips, your pie will shine!
![To make a true classic key lime pie, you need these key items: - 1 ½ cups graham cracker crumbs - ½ cup unsweetened coconut flakes - ⅓ cup granulated sugar - ½ cup unsalted butter, melted - 4 large egg yolks - 1 (14 oz) can sweetened condensed milk - ½ cup freshly squeezed key lime juice (approx. 12 key limes) - Zest of 2 key limes - 1 cup heavy whipping cream - 2 tablespoons powdered sugar - Lime slices and extra zest for garnish These ingredients work together to create a sweet, tangy pie that sings of sunshine. You can add some optional ingredients to enhance your pie: - Toasted coconut flakes for extra crunch - A pinch of salt to balance sweetness - Lime zest for a stronger lime flavor These add-ons can make your pie even more delightful. If you're missing an ingredient, here are some easy swaps: - Use regular lime juice instead of key lime juice. It will taste different but still good. - Swap graham cracker crumbs with crushed vanilla wafers for a unique flavor. - Replace heavy cream with whipped topping for a lighter version. These substitutions can help you prepare the pie with what you have. For the exact steps, check out the Full Recipe. First, preheat your oven to 350°F (175°C). This step is key for a great crust. In a medium bowl, mix the graham cracker crumbs, coconut flakes, and granulated sugar. Pour in the melted butter and stir until it feels like moist sand. Next, grab a 9-inch pie pan. Press the crumb mixture into the bottom and up the sides of the pan. Make sure it’s firm and even. Bake this crust for 8-10 minutes until the edges are golden. After baking, let it cool completely. Now, let’s make the filling. In a large bowl, whisk the egg yolks until they are pale yellow. Then, add the sweetened condensed milk, key lime juice, and lime zest. Whisk until everything is smooth. You want to have no lumps here! Carefully pour this lime mixture into your cooled crust. Spread it out evenly. Bake the pie for 15 minutes. The filling should be set but still a bit jiggly in the center. After baking, take it out and let it cool at room temperature. Once it’s cool, put the pie in the fridge for at least 2 hours. This chilling time makes it even tastier! For the full recipe, check out the details above! To get the best texture and flavor in your Key Lime Pie, follow a few simple tips: - Use Fresh Key Limes: Fresh key limes give a bright taste. They also add a nice zing. - Whisk Egg Yolks Well: Whisk the yolks until they are pale. This helps create a smooth filling. - Don’t Overbake: Bake the filling until it is just set. It should still jiggle a bit in the middle. - Chill Properly: Let the pie cool at room temp before refrigerating. This step enhances the flavor. Some mistakes can ruin your pie. Here are a few to watch out for: - Skipping the Zest: The zest adds flavor and aroma. Don’t skip it! - Using Cold Ingredients: Let your ingredients reach room temperature. This helps them mix better. - Overmixing the Filling: Whisk just until combined. Overmixing can create bubbles in the filling. - Not Cooling the Crust: Always cool the crust completely before adding the filling. A warm crust can make the filling runny. Having the right tools makes cooking easier and more fun: - 9-inch Pie Pan: This is the perfect size for your Key Lime Pie. - Mixing Bowls: Use medium and large bowls for mixing your crust and filling. - Electric Mixer: This helps you whip the cream to stiff peaks easily. - Zester or Grater: A good zester is key for getting the lime zest just right. These tips and tools will help you create a perfect Key Lime Pie every time. For the full recipe, check out the [Full Recipe]. {{image_4}} You can change up the crust for your Key Lime Pie. Here are some fun ideas: - Graham Cracker Crust: This is the classic choice. It’s sweet and crunchy. - Oreo Crust: Use crushed Oreos instead of graham crackers for a chocolate twist. - Nut Crust: Ground almonds or pecans add a nice nutty flavor. Mix them with butter and a bit of sugar. - Coconut Crust: Use shredded coconut for a tropical feel. It pairs well with the lime. Want to try something different? Here are some tasty twists: - Mango Key Lime Pie: Add pureed mango to the filling for a fruity kick. - Berry Key Lime Pie: Mix in fresh berries like strawberries or blueberries for color and flavor. - Coconut Key Lime Pie: Stir in coconut milk for a creamier texture and tropical taste. - Chocolate Key Lime Pie: Add melted chocolate to the filling for a rich, sweet layer. Making your pie look great can be fun. Here are some ideas: - Whipped Cream Topping: Spread whipped cream on top. Use a spatula to make swirls. - Garnish with Lime: Add lime slices or zest for a pop of color. - Serve in Mason Jars: For a fun twist, serve individual portions in jars. - Add Fresh Berries: Place berries around the pie for extra flair. For the full recipe, check out the Zesty Classic Key Lime Pie . To keep your key lime pie fresh, cover it tightly with plastic wrap or aluminum foil. This prevents the pie from absorbing fridge odors. Store it in the fridge for up to three days. Make sure to slice the pie before storing to make it easier to serve later. You can freeze key lime pie if you want to save some for later. First, let the pie cool completely after baking. Wrap the pie tightly in plastic wrap and then in aluminum foil. This double wrapping helps prevent freezer burn. You can freeze it for up to three months. Just remember to label it with the date. To enjoy your frozen key lime pie, move it from the freezer to the fridge. Let it thaw overnight. If you're in a hurry, you can leave it at room temperature for about two hours. Do not microwave it, as this can change the texture. Once thawed, you can add fresh whipped cream or lime zest for extra flavor before serving. Yes, you can use regular limes. Key limes are smaller and more fragrant. They have a tart flavor that makes the pie special. If you use regular limes, the pie will taste a bit different but still good. You might want to adjust the sugar to balance the flavor. You can keep key lime pie in the fridge for up to three days. Cover it well to prevent it from drying out. If the pie has whipped cream on top, eat it within two days. The cream can lose its texture after that. You can use coconut cream or a dairy-free option. If you need a lighter option, try using yogurt. For a richer flavor, you can also use mascarpone cheese. Each choice will change the taste and texture a bit, but they all work well in this recipe. Check the [Full Recipe] for more details. In this post, we explored the key ingredients for classic Key Lime Pie, from crust to filling. I shared step-by-step instructions for baking. We discussed tips to avoid common mistakes and explored variations for flavor and presentation. Additionally, we covered how to store and reheat leftovers effectively. Key Lime Pie is simple to make and delightful to share. Enjoy creating your version and savor each bite. When you follow these tips, your pie will shine!](https://dishtreats.com/wp-content/uploads/2025/07/bf504450-0d09-4d53-b035-55d87c168019-300x300.webp)

![- 1 lb boneless, skinless chicken breast, thinly sliced - 1 large bell pepper (red or yellow), sliced into strips - 1 cup broccoli florets, cut into bite-sized pieces - 1 cup snap peas, trimmed - 1 medium carrot, julienned - 1/4 cup low-sodium soy sauce - 1 tablespoon honey - 1 tablespoon rice vinegar - 2 tablespoons sesame oil, divided - 3 cloves garlic, finely minced - 1 tablespoon fresh ginger, finely minced - Sesame seeds for garnish - 3 green onions, chopped (white and green parts kept separate) Using these ingredients, you can create a dish that bursts with flavor. Each element adds its own unique taste. The chicken breast serves as a great protein base. Bell peppers and broccoli contribute crunch and color. Snap peas and carrots add sweetness and texture. When you use sesame oil, garlic, and ginger, you create a rich aroma. These cooking essentials infuse the dish with depth. Finally, the sesame seeds and green onions provide a delightful finish. They enhance the dish's look and add a touch of brightness. For the full recipe, check the detailed instructions. Heat a large skillet or wok over medium-high heat. Add 1 tablespoon of sesame oil. When the oil shimmers, add the thinly sliced chicken. Season it with salt and pepper. Cook the chicken for 5-7 minutes. Stir it often until golden brown and fully cooked. Once done, remove the chicken from the skillet and set it aside. In the same skillet, add the second tablespoon of sesame oil. Let it heat up. Then, add the minced ginger and garlic. Sauté these for about 30 seconds. This step helps unlock their amazing flavors. Now, add the sliced bell pepper, broccoli florets, snap peas, and julienned carrot to the skillet. Stir-fry the vegetables for 4-5 minutes. You want them tender but still crisp. This keeps the dish colorful and crunchy. Return the cooked chicken to the skillet with the vegetables. In a separate small bowl, mix the soy sauce, honey, and rice vinegar. Whisk these until they blend well. Pour this sauce evenly over the chicken and veggies in the skillet. Stir everything together gently. Bring the mixture to a simmer over medium heat. This helps combine all the flavors and makes the dish more delicious. Next, slowly add the cornstarch slurry to the stir-fry. Stir constantly as you add it. Cook for 1-2 more minutes until the sauce thickens to your liking. This gives the dish a nice glossy finish. Remove the skillet from the heat. Add the chopped green tops of the green onions. Toss everything gently to combine. Serve the stir-fry on plates. Sprinkle sesame seeds on top for extra crunch. Enjoy this delightful meal! For the full recipe, you can refer to the earlier sections. For the best chicken stir-fry, use boneless, skinless chicken breast. Thinly slice it for quick cooking. This cut stays tender and soaks up flavors well. Heat your skillet over medium-high heat. This helps sear the chicken quickly, locking in moisture. Want to spice things up? Try adding a dash of red pepper flakes for heat. You can also mix in a splash of hoisin sauce for extra sweetness. Serve this stir-fry with jasmine rice or noodles. Both options soak up the sauce nicely. To plate your dish, start with a mound of rice in the center. Arrange the chicken and veggies around it. This creates a beautiful, colorful display. For garnish, sprinkle sesame seeds and chopped green onions on top. This adds a nice crunch and fresh flavor. For the full recipe, click here: [Full Recipe]. {{image_4}} You can easily change the protein in this dish. If you don’t like chicken, try these options: - Pork: Thinly sliced pork loin works well. - Beef: Flank steak adds great flavor. - Tofu: Firm tofu is perfect for a vegetarian option. - Shrimp: Quick-cooking shrimp gives a seafood twist. For vegetarian or vegan options, stick with tofu or tempeh. These protein sources soak up flavors well and add a nice texture. If you use tofu, press it to remove excess water for better frying. You can swap vegetables based on what’s in season or what you like best. Here are some great choices: - Zucchini: Adds a nice crunch and color. - Mushrooms: They bring an earthy flavor. - Asparagus: Great for spring dishes. - Cauliflower: A fun way to add some fiber. Mixing different veggies can also create a more colorful dish. Try to use at least three different kinds for variety. Adjust the sauce to match your taste. If you like it sweeter, add more honey. For a spicier kick, toss in some red pepper flakes. You can also switch vinegars. Here are some options: - Apple cider vinegar: It gives a fruity flavor. - Balsamic vinegar: Adds depth and sweetness. - White vinegar: For a sharper taste. Experimenting with these changes makes the dish your own. Don’t be afraid to try new flavors! For the full recipe, check the original instructions. To store leftovers, let the stir-fry cool down first. Place it in an airtight container. This keeps it fresh for up to three days in the fridge. When you're ready to eat, just take out the portion you want. If you want to freeze the stir-fry, use a freezer-safe bag or container. Remove as much air as possible to prevent freezer burn. You can freeze it for up to three months. Remember, some veggies may lose crunch when thawed, so choose your mix carefully. To reheat, the best method is on the stovetop. Add a splash of water or broth to keep it moist. Heat it over medium until hot. If you prefer the microwave, use a microwave-safe dish. Cover it with a damp paper towel to keep steam in. This helps maintain the texture and flavor. You can make this dish your own by adding personal touches. Try using different vegetables like zucchini or bok choy. You can also swap chicken for shrimp or tofu. Add your favorite nuts for a crunchy texture. Experiment with spicy sauces to kick up the heat. Each change can give you a new dish! Yes, frozen vegetables work well in this stir-fry. They save time and are easy to use. However, keep in mind that they may cook faster than fresh ones. You might need to adjust your cooking time. Aim for 3-4 minutes instead of 4-5 minutes for the veggies to stay crisp. Stir-fry goes great with several side dishes. Serve it with steamed jasmine rice for a classic touch. You can also pair it with brown rice for a healthier option. Noodles, like soba or rice noodles, also work well. Add a simple side salad for freshness and extra crunch. Absolutely! This sesame ginger chicken stir-fry is perfect for meal prep. Cook a big batch and divide it into containers. It stores well in the fridge for up to three days. To reheat, use a microwave or skillet. Just be sure to add a splash of water to keep it moist. To make this dish healthier, try a few simple swaps. Use less oil, or replace it with cooking spray. Choose low-sodium soy sauce to cut down on salt. Add more vegetables to increase fiber and nutrients. You can also cut back on honey for fewer calories. This blog post covered how to make a tasty Sesame Ginger Chicken Stir-Fry. We discussed key ingredients like chicken, fresh veggies, and flavorful sauces. I shared step-by-step cooking instructions, along with tips to enhance flavor and presentation. We also explored variations for dietary needs and the best ways to store leftovers. In summary, stir-fry is easy, fun, and flexible. You can customize it to suit your tastes. Enjoy making this dish your own, and share it with friends and family!](https://dishtreats.com/wp-content/uploads/2025/06/887f9040-7330-4bb7-a0e7-766c5efe9124-768x768.webp)


![- 1 can (15 oz) black beans, thoroughly rinsed and drained - 1 cup sweet corn (use fresh, frozen, or canned) - 1 large red bell pepper, diced into bite-sized pieces - 1 ripe avocado, diced - 1/2 medium red onion, finely chopped for a milder flavor - 1 cup cherry tomatoes, halved for bursts of sweetness - 1/4 cup fresh cilantro, finely chopped for an aromatic touch The foundation of my zesty black bean salad lies in the fresh ingredients. Black beans serve as the protein-packed base. They add a creamy texture and earthy flavor. Sweet corn brings a pop of sweetness, balancing the dish. A red bell pepper adds crunch and color. Diced avocado gives a rich, buttery taste. Finely chopped red onion adds a mild bite, while halved cherry tomatoes provide juicy bursts. Finally, fresh cilantro adds a bright finish, tying all the flavors together. - 2 tablespoons freshly squeezed lime juice - 1 tablespoon high-quality olive oil - 1 teaspoon ground cumin for warmth - 1 teaspoon garlic powder for depth - Salt and freshly cracked black pepper to taste The dressing is key to making the salad come alive. Fresh lime juice adds a zesty kick. Olive oil brings richness and ties the salad together. Ground cumin adds a warm, earthy note. Garlic powder deepens the flavor profile. Finally, salt and black pepper enhance all the tastes, making each bite delightful. - Portion size and garnishes - Optional accompaniments For serving, I like to present the salad in a large, colorful bowl. This makes it inviting and fun. You can also portion it into individual cups for a neat look. Garnish with extra cilantro leaves and lime wedges for a fresh touch. This salad pairs well with grilled chicken or fish. It also makes a great filling for wraps or tacos. Enjoy the zesty flavors and vibrant colors! For the full recipe, check out the details above. To start, grab a big mixing bowl. Add the rinsed black beans, sweet corn, diced red bell pepper, diced avocado, finely chopped red onion, halved cherry tomatoes, and chopped cilantro. Mix them all together well. Make sure each ingredient spreads out. This ensures every bite is full of flavor. Next, take a small bowl. In it, whisk together the freshly squeezed lime juice, olive oil, ground cumin, garlic powder, and a good pinch of salt and black pepper. Keep whisking until the dressing is smooth and well mixed. This mixture will bring out the best in the salad. Now, drizzle the dressing over your salad mixture. Using a large spoon or spatula, gently toss everything together. You want each piece coated with that zesty dressing. After tossing, taste the salad. You can add more lime juice or salt if needed. Let the salad sit for 10-15 minutes at room temperature. This resting time helps all the flavors blend nicely before you serve it. Check out the Full Recipe to see all the details! To make your Zesty Black Bean Salad shine, adjust the seasoning to suit your taste. Start with a little salt and pepper, then taste. If it needs more, add gradually until it’s perfect. You can also squeeze in a splash of extra lime juice. This adds brightness and makes the flavors pop. Using canned ingredients can save you time. Canned black beans and corn are quick and easy. Just rinse and drain them well. If you prefer fresh, that’s great too! Prepping ingredients in advance can also help. Chop your veggies the day before. Store them in the fridge until you’re ready to mix. Serving style can make your salad more appealing. Use a large, colorful bowl to showcase the bright ingredients. You can also serve it in cups for individual portions. Garnish with extra cilantro leaves and lime wedges. This adds a fresh look and invites guests to enjoy your creation. For the full recipe, check the details above! {{image_4}} You can easily swap beans in this salad. Try pinto beans or kidney beans for a different taste. Each bean brings its own flavor and texture. Adding or substituting vegetables can change the salad’s vibe. Consider diced cucumber for crunch or chopped jalapeño for heat. Roasted red peppers can add a smoky note. Use what you like! This salad is vegan and gluten-free. It fits well into many diets. If you want more protein, add grilled chicken or shrimp. Both options pair great with the zesty flavors. You can also use tofu or tempeh for a plant-based protein boost. Both options add texture while keeping it healthy. Want to mix up the dressing? Try a simple vinaigrette with balsamic vinegar instead of lime juice. It adds a sweet tang. You could also use a creamy dressing, like ranch or avocado dressing. This change can make the salad richer and more filling. For a spicy kick, add some hot sauce to your dressing. Experiment to find your favorite combination! For the full recipe and more ideas, check the [Full Recipe]. Store Zesty Black Bean Salad in an airtight container. Glass containers work best, but plastic ones are fine too. Make sure everything is sealed tight. This keeps the flavors fresh. Keep the salad in the fridge for the best taste. To batch prepare, mix all ingredients except avocado. Add avocado just before serving. This keeps it from browning. You can store the salad for up to three days. After that, it may lose its crunch and flavor. You can freeze black bean salad, but I don’t recommend it. Freezing changes the texture of the ingredients. If you decide to freeze it, do so without avocado. To thaw, place the salad in the fridge overnight. This helps it retain some freshness. Yes, you can make this salad ahead of time. It tastes even better after resting. To prep, mix all the salad ingredients in a bowl. Keep the dressing separate until you're ready to serve. This keeps the salad fresh and crunchy. Store the salad in a sealed container in the fridge. It can last up to two days. Just remember to add the dressing just before serving. This salad pairs well with many dishes. Try serving it with grilled chicken or fish for a complete meal. You can also enjoy it with tacos or burritos for a fun twist. It works great as a side dish for barbecues. If you want a lighter meal, serve it with whole-grain pita bread. The flavors blend well with many cuisines. Yes, this salad is very healthy! Black beans are rich in protein and fiber, which help you feel full. They also support heart health and digestion. The fresh veggies add vitamins and minerals. Avocado provides healthy fats that are good for your skin. The lime juice boosts your vitamin C intake. Overall, this salad is a great choice for a nutritious meal. For the full recipe, check out the vibrant Zesty Black Bean Salad! This blog post covered the essentials for making a delicious black bean salad. We explored fresh ingredients, dressings, serving ideas, and tips for great flavor. You can customize it to fit your taste and dietary needs, too. Remember to store your salad properly for freshness. A well-made salad can be a healthy, tasty dish that fits into your meal plans. Enjoy your cooking and delight in each bite of your Zesty Black Bean Salad!](https://dishtreats.com/wp-content/uploads/2025/07/dc2c0f53-4615-45f1-afed-f531318cc377-768x768.webp)