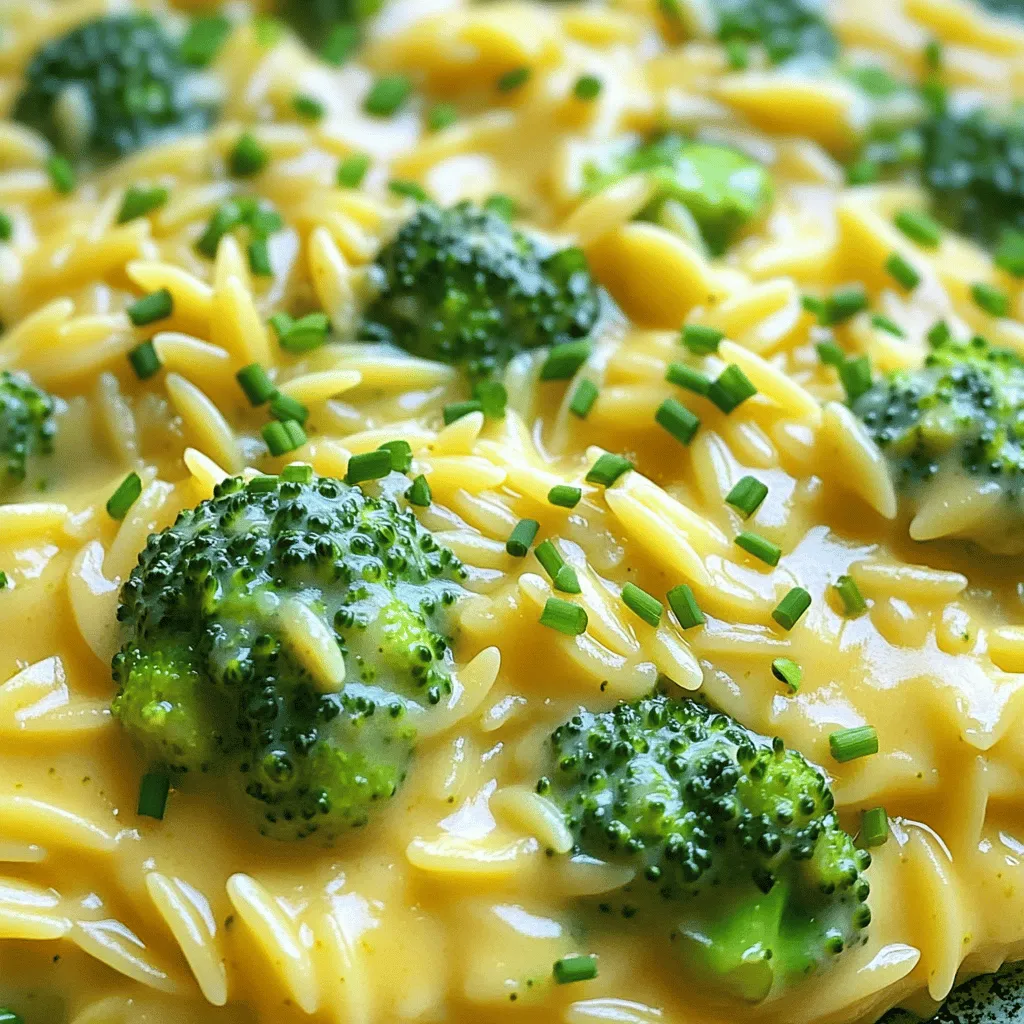
Creamy Broccoli Cheddar Orzo Simple and Tasty Dish

Are you ready to whip up a dish that’s both creamy and delicious? This Creamy Broccoli Cheddar Orzo is simple to make and full of flavor. I love how it uses easy ingredients for a quick meal that the whole family will enjoy. In this post, I’ll guide you through each step, share my best tips, and offer some fun variations. Let’s get started on this tasty adventure!
Ingredients
Complete List of Ingredients
- 1 cup orzo pasta
- 2 cups broccoli florets, fresh or frozen
- 1 tablespoon extra-virgin olive oil
- 1 small onion, finely chopped
- 2 garlic cloves, minced
- 4 cups low-sodium vegetable broth
- 1 cup heavy cream
- 1 ½ cups sharp cheddar cheese, freshly grated
- ½ teaspoon mustard powder
- ¼ teaspoon freshly ground black pepper
- Salt, to taste
- Chopped chives or green onions for garnish (optional)
Measurement Information
Using precise measurements helps make the dish great. Each ingredient plays a role in taste and texture. For instance, use 1 cup of orzo for the right amount of pasta. The 2 cups of broccoli give a nice crunch and color. Remember to add 1 tablespoon of olive oil to sauté your onions.
Tips for Freshness and Quality
Always choose fresh broccoli when possible. Look for vibrant green florets. If using frozen broccoli, ensure it is not freezer-burned. Fresh garlic gives the best flavor, so skip the jarred kind. When buying cheese, go for freshly grated sharp cheddar. It melts better and tastes richer. For the best broth, pick low-sodium to control salt levels. Using quality ingredients makes a big difference in taste!
Step-by-Step Instructions
Cooking the Broccoli and Orzo
Start by pouring the vegetable broth into a medium pot. Bring it to a gentle boil over medium heat. This broth will add flavor to your dish. Once boiling, add 1 cup of orzo pasta. Cook the orzo according to package instructions, which usually takes about 8-10 minutes. In the last 3 minutes of cooking, add 2 cups of broccoli florets. This ensures the broccoli becomes tender but still bright green.
Sautéing Onion and Garlic
While the orzo and broccoli cook, heat 1 tablespoon of extra-virgin olive oil in a large skillet over medium heat. Once hot, add 1 small chopped onion. Cook for about 4 minutes, stirring often, until the onion looks translucent. Next, add 2 minced garlic cloves and stir for about 1 minute. You want the garlic to smell great but not burn.
Combining Ingredients for Creamy Texture
Once the orzo and broccoli are done, drain them and add them to the skillet with the onion and garlic. Mix everything well. Pour in 1 cup of heavy cream and 1 ½ cups of freshly grated sharp cheddar cheese. Add ½ teaspoon of mustard powder and ¼ teaspoon of black pepper. Stir until the cheese melts and creates a creamy sauce. Cook on low heat for 2-3 minutes to let the flavors meld together. Taste and adjust seasoning as needed. For the final touch, serve your creamy broccoli cheddar orzo hot, garnished with chopped chives or green onions if you like.
Tips & Tricks
Tips for Perfectly Cooked Orzo
To cook orzo just right, follow these tips:
- Use a large pot for even cooking.
- Make sure to boil water before adding orzo.
- Stir the orzo occasionally to prevent sticking.
- Taste the orzo a minute before the time is up. It should be al dente.
How to Achieve the Creamiest Sauce
A creamy sauce makes your orzo shine. Here’s how:
- Use heavy cream for richness.
- Gradually add cheese to melt slowly.
- Stir constantly to blend the flavors well.
- Keep the heat low to avoid burning the sauce.
Suggested Garnishes & Serving Ideas
Garnishes add color and flavor. Try these options:
- Sprinkle chopped chives or green onions on top.
- Add a dash of black pepper for a kick.
- Serve with crusty bread for a complete meal.
- Pair with a light salad for freshness.
Variations
Alternative Vegetable Options
You can change up the veggies in this dish. Try using spinach, peas, or green beans. Each will add a different taste and color. If you want more crunch, use bell peppers or zucchini. They all cook well, so feel free to mix and match.
Dairy-Free or Vegan Substitutions
To make this dish dairy-free or vegan, swap the heavy cream with coconut milk or cashew cream. Use vegan cheese instead of cheddar. These swaps keep the dish creamy and tasty, while also being kind to your diet choices.
Protein Additions for Extra Heartiness
Want to make your creamy broccoli cheddar orzo more filling? Add in some cooked chicken or turkey. Shrimp or sautéed tofu can also work well. For a plant-based boost, toss in some chickpeas or lentils. These additions will give you a heartier meal and pack in more nutrients.
Storage Info
How to Store Leftovers
To keep leftover creamy broccoli cheddar orzo fresh, let it cool first. Then, place it in an airtight container. This helps prevent drying out. Store it in the fridge for up to three days. Make sure it is tightly sealed to maintain flavor.
Reheating Instructions
When you are ready to enjoy your leftovers, reheat the orzo on the stove. Add a splash of water or broth to help it regain creaminess. Heat over medium-low heat, stirring often. This prevents sticking and burning. You can also microwave it for quick heating. Use a microwave-safe dish and cover it with a lid or microwave-safe wrap.
Freezing for Future Meals
Freezing creamy broccoli cheddar orzo is easy. Portion it into freezer-safe containers. Leave a little space at the top for expansion. You can freeze it for up to three months. When you want to eat it, thaw it overnight in the fridge. Reheat as mentioned above for the best taste. This dish stays creamy and delicious, making it perfect for busy nights.
FAQs
Can I make this dish ahead of time?
Yes, you can make creamy broccoli cheddar orzo ahead of time. Just prepare it as usual. After cooking, let it cool. Store it in an airtight container in the fridge. When ready to eat, reheat it on the stove or in the microwave. You may need to add a splash of broth or cream to keep it creamy.
What can I substitute for orzo?
If you can’t find orzo, try using other small pasta shapes. Good options include ditalini, elbows, or even rice. Each will give a slightly different texture, but they will still work well in this dish. Just adjust the cooking time based on the pasta you choose.
Is it possible to use frozen broccoli?
Yes, frozen broccoli works great in this recipe. It saves time and is just as nutritious as fresh. When you add it to the orzo, it cooks quickly and blends well. Just make sure to add it at the same time as the orzo, so it heats through properly.
This blog post covered ingredients, cooking steps, and tips for a creamy orzo dish. I shared ways to enhance flavor and texture while offering storage advice. You can enjoy variations like adding different veggies or proteins. Remember, meal prep helps save time and effort. You can whip up this dish in no time. With these insights, you can create a creamy dish everyone will love. Happy cooking!

![- 2 grilled chicken breasts, shredded - 1 cup BBQ sauce (choice of homemade or your favorite store-bought) - 4 cups mixed greens (combination of spinach, arugula, and romaine) - 1 cup cherry tomatoes, halved - 1 cup corn (freshly cooked, canned, or frozen) - 1 ripe avocado, diced - ½ cup red onion, finely sliced - ½ cup shredded cheddar cheese - ¼ cup fresh cilantro, chopped (optional for garnish) - Salt and freshly ground black pepper, to taste - Tortilla chips, for serving on the side Gather these ingredients before you start cooking. Grilled chicken gives a great flavor. You can use any BBQ sauce you like. If you want homemade sauce, that works too! The salad greens add crunch and freshness. Cherry tomatoes and corn give sweetness. Avocado adds creaminess. Red onion gives a nice bite. Shredded cheese makes everything richer. The cilantro is optional, but it adds a nice touch. Finally, don’t forget the tortilla chips for a fun crunch on the side. This combination makes for a bright, colorful, and tasty BBQ chicken salad bowl. For the complete recipe, follow the steps provided in the article. First, shred your grilled chicken breasts. Place the chicken in a medium bowl. Next, pour in your BBQ sauce. You can use homemade sauce or your favorite store-bought kind. Mix it well. Make sure every piece of chicken gets coated with the sauce. This step is key to getting great flavor. After mixing, set the chicken aside. Let it sit for a few minutes. This allows the flavors to meld together. Grab a large salad bowl for this part. Start by adding your mixed greens, which can include spinach, arugula, and romaine. Next, toss in the halved cherry tomatoes, corn, and sliced red onion. Use salad tongs or your hands to mix the greens and veggies. You want everything to be evenly distributed. Now, gently add the diced avocado. Take care to fold it in without mashing it. This keeps the avocado pieces intact and adds a creamy texture. Now it’s time for the fun part! Divide your colorful salad mixture into individual serving bowls. This makes for a beautiful display. On top of each bowl, add a generous scoop of the BBQ chicken. Finish each bowl with a sprinkle of shredded cheddar cheese. This adds richness and flavor. If you like, you can also garnish with fresh cilantro. This step gives a nice touch. Serve your bowls with tortilla chips on the side. They add a satisfying crunch to the meal. For the full recipe, check out the earlier section. Grilling chicken gives it a smoky flavor. This method adds a nice char. Baking chicken is easier and keeps it juicy. Choose what fits your time and setup. For great BBQ flavor, marinate the chicken overnight. This helps the sauce soak in well. Boost your BBQ sauce with spices. Try adding garlic powder, onion powder, or smoked paprika. Fresh herbs like oregano or thyme can also work wonders. If you want cheese alternatives, try feta or goat cheese. Both add a tangy kick to your salad. Layer your salad ingredients for a beautiful look. Start with greens, then add the chicken. Place colorful toppings like tomatoes and corn on top. Use bright bowls to make the meal pop. Vibrant tortilla chips add a fun touch and great crunch. For the full recipe, check back to the beginning! {{image_4}} You can make BBQ chicken salad bowls even more fun by swapping ingredients. Instead of grilled chicken, try using pulled pork or even tofu for a vegetarian option. These proteins still soak up that yummy BBQ flavor. For salad greens, don't feel stuck with just one type. You can mix in kale, romaine, or even baby spinach. Each green adds a new taste and texture. You might also consider adding different vegetables like bell peppers or cucumbers. They can add a nice crunch and freshness to your bowls. While BBQ sauce is a star, you can explore other dressings too. Ranch dressing gives a creamy twist. A tangy vinaigrette can make the salad lighter. Try mixing BBQ sauce with ranch for a unique blend. Don't hesitate to play with BBQ sauce flavors. You could use a spicy version for a kick or a honey BBQ for sweetness. Each type creates a new experience every time you make this dish. When serving your BBQ chicken salad bowls, think about sides that go well. Cornbread or sweet potato fries are great options. They can balance the salad's freshness with some warmth. Get creative with your bowls. Use large lettuce leaves as edible bowls or even hollowed-out bell peppers. This makes your meal fun and different. Plus, it adds color and excitement to your table. For more ideas, check out the Full Recipe to get inspired on how to mix things up! To keep your BBQ chicken salad fresh, store it in the fridge. Use airtight containers. This helps keep the flavors and textures intact. You can also separate the chicken from the salad if you prefer. For reheating BBQ chicken, place it in a microwave-safe dish. Heat it for short intervals, about 30 seconds at a time. Stir it in between to ensure even heating. You want it warm, not hot, to keep the chicken juicy. You can safely eat your prepared salad for up to three days. After that, the greens may wilt and lose their crunch. If you want to keep it longer, consider freezing some components. You can freeze the BBQ chicken for up to three months. Just make sure to package it well in freezer bags. The salad greens and toppings should stay in the fridge, as freezing changes their texture. For a full recipe on how to make this delicious dish, check the [Full Recipe]. It takes about 15 minutes to prep and 15 minutes to cook. So, in total, you’ll need around 30 minutes. This quick time makes it perfect for busy days. Yes, you can prepare this salad ahead of time! Just keep the salad and chicken separate until you’re ready to eat. This way, the greens stay fresh and crisp. You can store the chicken in the fridge for up to three days. When you are ready, mix them together for a tasty meal. If you want to swap out BBQ sauce, you can try teriyaki sauce for a sweet twist. Ranch dressing also works well if you prefer something creamy. Each option gives a different flavor, making your salad fun and unique. To make this recipe gluten-free, choose a gluten-free BBQ sauce. Many brands offer tasty options. Also, ensure your tortilla chips are gluten-free. This way, you can enjoy this dish without worry! This blog post detailed how to create tasty BBQ chicken salad bowls. You learned about key ingredients, from grilled chicken to colorful salad greens. We discussed step-by-step instructions for preparing and assembling the salad, along with cool tips for flavor and presentation. You also discovered variations for ingredients, sauces, and serving suggestions. Now, you can enjoy these bowls at home. Try new flavors and enjoy your meals. With simple swaps, your salad will always be fresh and fun.](https://dishtreats.com/wp-content/uploads/2025/06/ab007e5c-1328-4456-8678-35604ca2185e-768x768.webp)